Table of Contents

Related Manuals for LG WDEP9423F


Summary of Contents for LG WDEP9423F
- Page 1 WDEP9423F Model Language English+Spanish Page Color(cover/body) 1도 Vellum paper 80g Material Size(W x H) B5 (182 x 257) 2022.12.28 Date Designer 세인텍 MFL51224548 Part No. Description Manual,Owners...
- Page 2 Scan to see the online manual. OWNER'S MANUAL WALL OVEN Read this owner's manual thoroughly before operating the appliance and keep it handy for reference at all times. ENGLISH WDEP9423F www.lg.com MFL51224548 Copyright © 2022 LG Electronics Inc. All Rights Reserved. Rev.00_122722...
-
Page 3: Table Of Contents
30 FCC Notice 30 Open Source Software Notice Information Product Features Smart Diagnosis Feature 8 Exterior / Interior 31 Using LG ThinQ to Diagnose Issues 8 Accessories 31 Using Audible Diagnosis to Diagnose 10 OPERATION Issues 32 MAINTENANCE Operating Control Panel... - Page 4 en-us_main.book.book Page 3 Tuesday, December 27, 2022 3:17 PM 45 THIS LIMITED WARRANTY DOES NOT COVER 46 PROCEDURE FOR RESOLVING DISPUTES...
-
Page 5: Important Safety Instructions
en-us_main.book.book Page 4 Tuesday, December 27, 2022 3:17 PM IMPORTANT SAFETY INSTRUCTIONS IMPORTANT SAFETY INSTRUCTIONS READ ALL INSTRUCTIONS BEFORE USE Safety Messages Your safety and the safety of others are very important. We have provided many important safety messages in this manual and on your appliance. Always read and follow all safety messages. -
Page 6: Operation
en-us_main.book.book Page 5 Tuesday, December 27, 2022 3:17 PM IMPORTANT SAFETY INSTRUCTIONS Operation • DO NOT TOUCH HEATING ELEMENTS OR INTERIOR SURFACES OF OVEN. Heating elements may be hot even though they are dark in color. Interior surfaces of an oven become hot enough to cause burns. During and after use, do not touch or let clothing or other flammable materials contact heating elements or interior surfaces of oven until they have had sufficient time to cool. -
Page 7: Risk Of Fire And Flammable Materials
en-us_main.book.book Page 6 Tuesday, December 27, 2022 3:17 PM IMPORTANT SAFETY INSTRUCTIONS • Before replacing the oven light, switch off the electrical power to the oven at the main fuse or circuit breaker panel. • Never pour cold water over a hot oven for cleaning purposes. •... -
Page 8: Maintenance
en-us_main.book.book Page 7 Tuesday, December 27, 2022 3:17 PM IMPORTANT SAFETY INSTRUCTIONS • Do not place food or cookware on the bottom of the oven cavity. Doing so will cause permanent damage to the oven bottom finish. • When using cooking or roasting bags in the oven, follow the manufacturer’s directions. •... -
Page 9: Product Overview
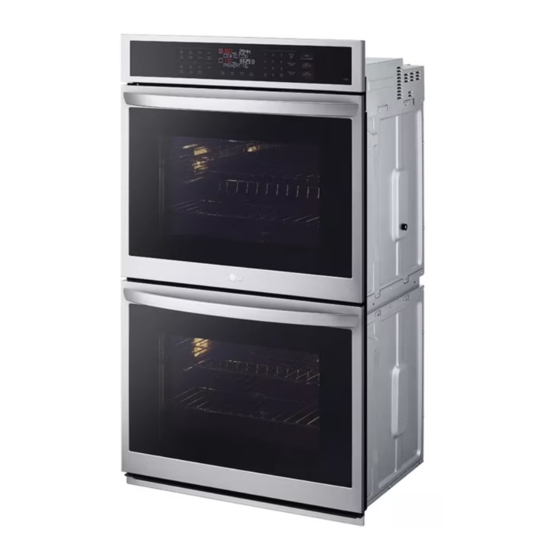
en-us_main.book.book Page 8 Tuesday, December 27, 2022 3:17 PM PRODUCT OVERVIEW PRODUCT OVERVIEW Product Features The appearance and specifications listed in this manual may vary due to constant product improvements. Exterior / Interior Oven Controller Rating Label, Model and Serial Number Plate Upper Oven Door Air Fry Rack Spacer (2 ea) - Page 10 Optional Accessories (sold separately) Grid Broiler Pan Gliding Rack NOTE • Contact LG Customer Service at 1-800-243-0000 (1-888-542-2623 in Canada) if any accessories are missing. • For your safety and for extended product life, only use authorized components. • The manufacturer is not responsible for product...
-
Page 11: Operation
en-us_main.book.book Page 10 Tuesday, December 27, 2022 3:17 PM 10 OPERATION OPERATION Operating Control Panel Control Panel Features Oven Functions Number Pad Select various functions of the oven. See Press to set any function requiring numbers Operating the Oven. such as the time of day on the clock, the timer, the oven temperature, the start time, and the Display length of operation for timed baking, etc. -
Page 12: Energy Saving Tips
en-us_main.book.book Page 11 Tuesday, December 27, 2022 3:17 PM OPERATION Energy Saving Tips For example, to set 5 minutes: • Multiple-rack cooking saves time and energy. Press Upper Timer On/Off or Lower Timer Whenever possible, cook foods requiring the On/Off once. same cooking temperature together in one 0:00 appears and Timer flashes in the display. - Page 13 en-us_main.book.book Page 12 Tuesday, December 27, 2022 3:17 PM 12 OPERATION • select display language much, raise or lower the thermostat 10 ℉ (5 ℃). If the adjustment was not enough, raise or lower • activate/deactivate the preheating alarm light the thermostat 20 ℉...
-
Page 14: Control Lock
en-us_main.book.book Page 13 Tuesday, December 27, 2022 3:17 PM OPERATION Start Time (Delayed Timed Cook) Press and hold Clock for 3 seconds to enter the settings mode. Press Clock repeatedly The automatic timer of this function turns the oven until appears in the display. -
Page 15: Cook Time (Timed Cook)
en-us_main.book.book Page 14 Tuesday, December 27, 2022 3:17 PM 14 OPERATION Press Upper CLEAR / OFF or Lower CLEAR / NOTE OFF to cancel this function at any time. • To change the cooking time, repeat step 4 and The oven will continue to cook for the set amount press START. -
Page 16: Minimum & Maximum Default Settings
en-us_main.book.book Page 15 Tuesday, December 27, 2022 3:17 PM OPERATION Press and hold Clock for 3 seconds. without chiming. The oven remains in Sabbath appears in the display when the Sabbath mode, but is turned off. mode is activated. • If no cook time is set, the oven will not automatically turn off. -
Page 17: Using Standard Oven Racks
en-us_main.book.book Page 16 Tuesday, December 27, 2022 3:17 PM 16 OPERATION Tilt the front end up and push the rack in. NOTE • The convection fan motor may run periodically Using Gliding Oven Racks during a regular bake cycle. • The heat turns off if the door is left open during The optional gliding racks slide in and out on a baking. -
Page 18: Convection Bake And Roast Mode
en-us_main.book.book Page 17 Tuesday, December 27, 2022 3:17 PM OPERATION Removing Gliding Racks A chime sounds at the end of the set cook time and a notification appears in the display. Open the oven door and remove the food. With the rack in the closed position, grasp the front of the rack and frame and lift up. -
Page 19: Bake Mode
en-us_main.book.book Page 18 Tuesday, December 27, 2022 3:17 PM 18 OPERATION meats and poultry. The heated air circulates Press START. The oven starts to preheat. around the food from all sides, sealing in juices and flavors. Foods are crispy brown on the outside If the cook time is set, the remaining time while staying moist on the inside. -
Page 20: Recommended Baking Guide
en-us_main.book.book Page 19 Tuesday, December 27, 2022 3:17 PM OPERATION Baking Rack Guide • The oven bottom has a porcelain-enamel finish. To make cleaning easier, protect the oven bottom from excessive spillovers by placing a Rack Type of Food cookie sheet on the rack below the rack you are Position cooking on. - Page 21 en-us_main.book.book Page 20 Tuesday, December 27, 2022 3:17 PM 20 OPERATION • The heating element(s) turn off immediately CAUTION when the door is opened. They turn on again approximately 1 second after the door is closed. • When using your broiler, the temperature inside the oven will be extremely high.
-
Page 22: Recommended Broiling Guide
en-us_main.book.book Page 21 Tuesday, December 27, 2022 3:17 PM OPERATION Recommended Broiling Guide Recommended Broiling Guide The size, weight, thickness, starting temperature, and your preference of doneness will affect broiling times. This guide is based on meats at refrigerator temperature. For best results when broiling, use a pan designed for broiling. - Page 23 en-us_main.book.book Page 22 Tuesday, December 27, 2022 3:17 PM 22 OPERATION First Second Quantity and/or Rack Side Side Food Comments Thickness Position Time Time (min.) (min.) Cut through back of shell. Spread open. 2–4 Do not Brush with melted Lobster Tails 12-14 10 to 12 oz each turn over.
-
Page 24: Frozen Meal(Upper Oven Only)
en-us_main.book.book Page 23 Tuesday, December 27, 2022 3:17 PM OPERATION • Pieces of meat that are thicker than two inches should be removed from the refrigerator 30 minutes prior to cooking. This will help them cook more quickly and evenly, and will produce less smoke when broiling. -
Page 25: Proof Mode
en-us_main.book.book Page 24 Tuesday, December 27, 2022 3:17 PM 24 OPERATION Adjust the settings as desired. • The Proof feature automatically provides the optimum temperature for the proofing process, and therefore does not have a temperature Press START. adjustment. • For best results, cover the dough with a cloth or Canceling the Warm Function with plastic wrap. -
Page 26: Air Fry (Upper Oven Only)
en-us_main.book.book Page 25 Tuesday, December 27, 2022 3:17 PM OPERATION To Stop Cooking Press START. Once the oven reaches the desired temperature, appears in PAEHEAυιξη Press Upper CLEAR / OFF. the display. NOTE NOTE • No preheating is required when using the Air Fry •... -
Page 27: Recommended Air Frying Guide
en-us_main.book.book Page 26 Tuesday, December 27, 2022 3:17 PM 26 OPERATION • Check food often and shake it or turn it over for through the oven and can result in carbon crisper results. monoxide poisoning. Aluminum foil can also trap heat, causing a fire hazard or poor oven •... -
Page 28: Remote Start Mode
en-us_main.book.book Page 27 Tuesday, December 27, 2022 3:17 PM OPERATION Quantity Rack Recommended Items Temp. (°F) Time Guide (oz) Position POTATOES-Fresh/Homemade Homemade French Fries 20-30 Cut the potatoes and soak (10x10 mm) for 30 minutes in hot tap water. Drain and pat Homemade Potato 30-40 dry.Brush or lightly spray... - Page 29 Page 28 Tuesday, December 27, 2022 3:17 PM 28 OPERATION be started or stopped using the LG ThinQ smartphone app. Preparing the Oven for a Remote Start Open the oven door to make sure the oven is empty and ready for preheating. Do not place food in the oven.
-
Page 30: Smart Functions
LG ThinQ Application Features Installing LG ThinQ Application and • Product Upgrades Connecting an LG Appliance - On models with the LG UP Home Appliance feature, experience new features by Models with QR Code upgrading the product through the LG ThinQ app. -
Page 31: Rf Module Specifications
Any changes or modifications in construction of press and hold the Wi-Fi button for 3 seconds. this device which are not expressly approved by Run the LG ThinQ application and follow the the party responsible for compliance could void instructions in the application to connect the the user’s authority to operate the equipment. -
Page 32: Smart Diagnosis Tm Feature
If you experience a problem with your Wi-Fi equipped appliance, it can transmit troubleshooting data to a smartphone using the LG ThinQ application. • Launch the LG ThinQ application and select the Smart Diagnosis feature in the menu. Follow the instructions provided in the LG ThinQ application. -
Page 33: Maintenance
en-us_main.book.book Page 32 Tuesday, December 27, 2022 3:17 PM 32 MAINTENANCE MAINTENANCE Cleaning Repeat as necessary. NOTE Interior • To clean the stainless steel surface, use warm Do not use oven cleaners to clean the oven cavity. sudsy water or a stainless steel cleaner or polish. Use the product's EasyClean function regularly to •... -
Page 34: Easyclean
Compared to the more intense Self Clean process, your LG oven gives you the option of cleaning with LESS HEAT, • Do not store a soiled broiler pan or grid LESS TIME, and virtually NO SMOKE OR FUMES. - Page 35 en-us_main.book.book Page 34 Tuesday, December 27, 2022 3:17 PM 34 MAINTENANCE - Common food items that can soil your oven: Steaks, broiled / Fish, broiled / Meat roasted at low temperatures EasyClean Instruction Guide NOTE • Allow the oven to cool to room temperature before using the EasyClean cycle.
-
Page 36: Self Clean
en-us_main.book.book Page 35 Tuesday, December 27, 2022 3:17 PM MAINTENANCE Clean the oven cavity immediately after the smoking or an odor. This is normal, especially if EasyClean cycle by scrubbing with a wet, non- the oven is heavily soiled. During Self Clean, the scratch scouring sponge or pad. - Page 37 en-us_main.book.book Page 36 Tuesday, December 27, 2022 3:17 PM 36 MAINTENANCE and cooling. This is normal and will not affect CAUTION performance. • Do not leave small children unattended near the • The Self Clean cycle cannot be started if the appliance.
-
Page 38: Periodic Maintenance
en-us_main.book.book Page 37 Tuesday, December 27, 2022 3:17 PM MAINTENANCE Setting Self Clean smoking or an odor. This is normal, especially if the oven is heavily soiled. The Self Clean function has cycle times of 3, 4, or 5 hours. •... - Page 39 en-us_main.book.book Page 38 Tuesday, December 27, 2022 3:17 PM 38 MAINTENANCE Slide a flat blade screwdriver between the housing and the glass light cover Support the glass light cover with two fingers to prevent the cover from falling to the bottom of the oven.
-
Page 40: Troubleshooting
en-us_main.book.book Page 39 Tuesday, December 27, 2022 3:17 PM TROUBLESHOOTING TROUBLESHOOTING FAQs Frequently Asked Questions My new oven doesn’t cook like my old one. Is there something wrong with the temperature settings? No. Your oven has been factory tested and calibrated. For the first few uses, follow your recipe times and temperatures carefully. - Page 41 en-us_main.book.book Page 40 Tuesday, December 27, 2022 3:17 PM 40 TROUBLESHOOTING My appliance is still dirty after running the EasyClean cycle. What else should I do? The EasyClean cycle only helps to loosen light soils in your appliance to assist in hand-cleaning of your oven.
-
Page 42: Before Calling For Service
en-us_main.book.book Page 41 Tuesday, December 27, 2022 3:17 PM TROUBLESHOOTING Before Calling for Service Review this section before calling for service; doing so will save you both time and money. Cooking Problem Possible Cause & Solution Oven will not work Plug on appliance is not completely inserted in the electrical outlet. -
Page 43: Parts & Features
en-us_main.book.book Page 42 Tuesday, December 27, 2022 3:17 PM 42 TROUBLESHOOTING Problem Possible Cause & Solution Food does not broil Oven controls improperly set. properly • Make sure you select the Broil mode properly. Improper rack position being used. • See the Broiling Guide. Cookware not suited for broiling. -
Page 44: Noises
en-us_main.book.book Page 43 Tuesday, December 27, 2022 3:17 PM TROUBLESHOOTING Problem Possible Cause & Solution Cooling fan The fan turns off automatically when the electronic components have cooled continues to run sufficiently. after oven is turned • This is normal. off. - Page 45 During Wi-Fi setup, the app is requesting a password to connect to the product (on certain phones). • Locate the network name which starts with "LG" under Settings > Networks. Note the last part of the network name. - If the network name looks like LGE_Appliance_XX-XX-XX, enter lge12345.
-
Page 46: Limited Warranty
Should your LG Electric Oven ("Product") fail due to a defect in materials or workmanship under normal and proper use, during the warranty period set forth below, LG will, at its option, repair or replace the Product. This limited warranty is valid only to the original retail purchaser of the Product (“You”) and applies only when purchased lawfully and used within the United States including U.S. - Page 47 Notice of Dispute. In the event you intend to commence an arbitration proceeding, you must first notify LG in writing at least 30 days in advance of initiating the arbitration by sending a letter to LG at LG Electronics, USA, Inc. Attn: Legal Department- Arbitration 111 Sylvan Avenue, Englewood Cliffs, NJ 07632 USA.
- Page 48 LIMITED WARRANTY subject of the claim; and describe the nature of the claim and the relief being sought. If you and LG are unable to resolve the dispute within 30 days, either party may proceed to file a claim for arbitration.
- Page 49 en-us_main.book.book Page 48 Tuesday, December 27, 2022 3:17 PM 48 LIMITED WARRANTY You may only opt out of the dispute resolution procedure in the manner described above (that is, by e-mail or telephone); no other form of notice will be effective to opt out of this dispute resolution procedure. Opting out of this dispute resolution procedure will not affect the coverage of the Limited Warranty in any way, and you will continue to enjoy the full benefits of the Limited Warranty.
- Page 50 en-us_main.book.book Page 49 Tuesday, December 27, 2022 3:17 PM Memo...
- Page 51 en-us_main.book.book Page 50 Tuesday, December 27, 2022 3:17 PM 50 Memo...
- Page 52 Escanee el código QR para ver el manual. MANUAL DEL PROPIETARIO HORNO DE PARED Lea el manual del propietario detenidamente previo a operar el electrodoméstico y mantengalo al alcance para futuras referencias. ESPAÑOL WDEP9423F www.lg.com Copyright © 2022 LG Electronics Inc. Todos los derechos reservados...
- Page 53 Características del Producto Aplicación LG ThinQ 9 Interior/exterior 33 Funciones de la aplicación LG ThinQ 9 Accesorios 33 Instalación de la aplicación LG ThinQ y conexión de un electrodoméstico LG 11 FUNCIONAMIENTO 34 Especificaciones del módulo RF 34 Aviso de la FCC Funcionamiento del panel de control 35 Software de código abierto...
- Page 54 es-us_main.book.book Page 3 Tuesday, December 27, 2022 3:30 PM Antes de llamar al servicio técnico 46 Cocción 48 Partes y Características 49 Ruidos 49 Wi-Fi 50 GARANTÍA LIMITADA EE. UU. 50 TÉRMINOS Y CONDICIONES 50 ESTA GARANTÍA LIMITADA NO CUBRE LO SIGUIENTE 51 PROCEDIMIENTO PARA RESOLVER CONFLICTOS...
- Page 55 es-us_main.book.book Page 4 Tuesday, December 27, 2022 3:30 PM INSTRUCCIONES IMPORTANTES DE SEGURIDAD INSTRUCCIONES IMPORTANTES DE SEGURIDAD LEA TODAS LAS INSTRUCCIONES ANTES DE UTILIZAR Mensajes de Seguridad Su seguridad y la de los demás son muy importantes. Tanto en este manual como en el equipo, hemos proporcionado muchos mensajes de seguridad importantes.
- Page 56 es-us_main.book.book Page 5 Tuesday, December 27, 2022 3:30 PM INSTRUCCIONES IMPORTANTES DE SEGURIDAD • La conexión incorrecta del cableado doméstico de aluminio a los cables de cobre puede provocar descargas eléctricas o un incendio. Utilice únicamente conectores diseñados para unir cobre con aluminio y siga al pie de la letra el procedimiento recomendado por el fabricante.
- Page 57 es-us_main.book.book Page 6 Tuesday, December 27, 2022 3:30 PM INSTRUCCIONES IMPORTANTES DE SEGURIDAD • No coloque la mano debajo del controlador o entre la puerta y el reborde inferior de ventilación cuando el horno esté en funcionamiento. La parte exterior del horno puede volverse muy caliente al tacto. Mantenimiento •...
- Page 58 es-us_main.book.book Page 7 Tuesday, December 27, 2022 3:30 PM INSTRUCCIONES IMPORTANTES DE SEGURIDAD PRECAUCIÓN PRECAUCIÓN • Para reducir el riesgo de lesiones leves a personas, mal funcionamiento o daño al producto o a la propiedad al usar este producto, siga las precauciones básicas, incluidas las siguientes: Funcionamiento •...
- Page 59 es-us_main.book.book Page 8 Tuesday, December 27, 2022 3:30 PM INSTRUCCIONES IMPORTANTES DE SEGURIDAD • El horno debe limpiarse con regularidad y debe retirarse cualquier resto de comida. Si no se mantiene en condiciones de limpieza, la superficie puede deteriorarse y esto podría acortar la vida útil del electrodoméstico y ocasionar situaciones de peligro.
- Page 60 es-us_main.book.book Page 9 Tuesday, December 27, 2022 3:30 PM DESCRIPCIÓN GENERAL DEL PRODUCTO DESCRIPCIÓN GENERAL DEL PRODUCTO Características del Producto La apariencia y las especificaciones detalladas en este manual podrían variar debido a mejoras constantes en el producto. Interior/exterior Etiqueta de clasificación, placa con el número Controlador del horno de serie y el modelo Puerta del horno superior...
- Page 61 Rejilla Asadera Estante deslizante NOTA • Comuníquese con el Servicio de atención al cliente de LG al 1-800-243-0000 (1-888-542-2623 en Canadá) si le falta algún accesorio. • Para su seguridad y una mayor duración del producto, utilice únicamente componentes autorizados.
- Page 62 es-us_main.book.book Page 11 Tuesday, December 27, 2022 3:30 PM FUNCIONAMIENTO FUNCIONAMIENTO Funcionamiento del panel de control Funciones del panel de control • Mantenga presionado el botón durante Funciones del horno 3 segundos para seleccionar y ajustar las Seleccione varias funciones del horno. Consulte configuraciones del horno.
- Page 63 es-us_main.book.book Page 12 Tuesday, December 27, 2022 3:30 PM 12 FUNCIONAMIENTO • Presione Lower CLEAR / OFF (Borrar/detener NOTA horno inferior) para detener la cocción o cancelar la configuración del horno inferior. • La hora del día no puede modificarse durante los ciclos de horneado con temporizador o de NOTA autolimpieza.
- Page 64 es-us_main.book.book Page 13 Tuesday, December 27, 2022 3:30 PM FUNCIONAMIENTO Presione 1 para seleccionar el reloj de 12 NOTA horas o 2 para seleccionar el reloj de 24 horas. • Si en la pantalla no aparece el tiempo restante, recupérelo presionando Upper Timer On/Off o Presione START para aceptar el cambio.
- Page 65 es-us_main.book.book Page 14 Tuesday, December 27, 2022 3:30 PM 14 FUNCIONAMIENTO Use los botones numéricos para ingresar la Presione START para aceptar el cambio. cantidad de grados a los que desea ajustar la temperatura del horno. Ajuste del volumen del indicador sonoro Ajuste la temperatura presionando Clock Mantenga presionado Clock (Reloj) durante 3...
- Page 66 es-us_main.book.book Page 15 Tuesday, December 27, 2022 3:30 PM FUNCIONAMIENTO Hora de inicio (Cocción programada Configure la hora de inicio: presione 1, 6, 3 y 0 para 4:30. Si el reloj está configurado en el retrasada) modo de 12 horas, presione 4, 3 y 0. El temporizador automático de esta función enciende y apaga el horno a la hora que usted Presione START.
- Page 67 es-us_main.book.book Page 16 Tuesday, December 27, 2022 3:30 PM 16 FUNCIONAMIENTO Configuración de la Cocción programada NOTA Por ejemplo, para hornear a 300 °F durante 30 minutos, primero debe configurar el reloj para la • Durante el modo de precalentamiento, el hora correcta del día.
- Page 68 es-us_main.book.book Page 17 Tuesday, December 27, 2022 3:30 PM FUNCIONAMIENTO • Siempre cierre la puerta del horno antes de activar el modo Sabbath. Configuraciones mínimas y máximas predeterminadas Todas las funciones detalladas tienen un ajuste mínimo y máximo de tiempo o temperatura que puede ingresarse en el control.
- Page 69 es-us_main.book.book Page 18 Tuesday, December 27, 2022 3:30 PM 18 FUNCIONAMIENTO ventilación, ya que el calor podría deformar o PRECAUCIÓN derretir el plástico. • Para evitar quemaduras, coloque los estantes Es normal que se vea vapor cuando se cocinan del horno en la ubicación deseada antes de alimentos con un alto contenido de humedad.
- Page 70 es-us_main.book.book Page 19 Tuesday, December 27, 2022 3:30 PM FUNCIONAMIENTO Una vez que se libere del tope, levante la se configuró un tiempo de inicio retrasado, parte trasera del estante y tire de él y del aparece el tiempo de inicio en la pantalla. marco para sacarlos entre las guías.
- Page 71 es-us_main.book.book Page 20 Tuesday, December 27, 2022 3:30 PM 20 FUNCIONAMIENTO • Hornee galletas y bizcochos en bandejas sin • Coloque los alimentos (con la grasa hacia arriba) lados o con lados muy bajos para permitir que el en la rejilla. aire caliente circule alrededor de la comida.
- Page 72 es-us_main.book.book Page 21 Tuesday, December 27, 2022 3:30 PM FUNCIONAMIENTO Guía de recomendaciones para asar Cómo cambiar la Configuración de cocción Colocación de estantes y bandejas Presione UPPER Bake o LOWER Bake. Los resultados del horneado serán mejores si las bandejas para hornear están centradas en el horno todo lo posible.
- Page 73 es-us_main.book.book Page 22 Tuesday, December 27, 2022 3:30 PM 22 FUNCIONAMIENTO hacer que un incendio causado por grasa se Posición propague y cause lesiones personales. Tipo de alimento • Cuando use su asador, la temperatura dentro estante del horno será extremadamente elevada. Tenga Panecitos, muffins, brownies, cuidado de evitar posibles quemaduras por los galletas, pastelitos, pasteles en capas,...
- Page 74 es-us_main.book.book Page 23 Tuesday, December 27, 2022 3:30 PM FUNCIONAMIENTO Presione Upper CLEAR / OFF (Borrar/detener natural del proceso de dorado y no debe horno superior) o Lower CLEAR / OFF (Borrar/ preocuparlo. Si hay más humo del esperado, siga detener horno inferior) para cancelar el estos consejos para reducir la cantidad de humo procedimiento en cualquier momento o...
- Page 75 es-us_main.book.book Page 24 Tuesday, December 27, 2022 3:30 PM 24 FUNCIONAMIENTO Tiempo Tiempo Posición en el en el Comida Cantidad y/o espesor primer segundo Comentarios estante lado lado (min) (min) Espaciar de manera Carne vacuna 1 lb (9 hamburguesas) uniforme. Se pueden molida de 1/2 a 3/4"...
- Page 76 es-us_main.book.book Page 25 Tuesday, December 27, 2022 3:30 PM FUNCIONAMIENTO Tiempo Tiempo Posición en el en el Comida Cantidad y/o espesor primer segundo Comentarios estante lado lado (min) (min) Aumente el tiempo de 5 a 10 minutos por Fetas de lado para un espesor jamón "...
- Page 77 es-us_main.book.book Page 26 Tuesday, December 27, 2022 3:30 PM 26 FUNCIONAMIENTO menos humo al asar. Los tiempos de cocción probablemente serán más cortos que los tiempos indicados en la Tabla para asar. • En el caso de los bistecs con hueso o las chuletas deshuesadas (que se les quitó toda la carne alrededor del hueso), envuelva las secciones expuestas del hueso en papel de aluminio para reducir el quemado.
- Page 78 es-us_main.book.book Page 27 Tuesday, December 27, 2022 3:30 PM FUNCIONAMIENTO Presione 1 para temperatura alta, 2 para NOTA temperatura media o 3 para temperatura baja. • Si no se configura un tiempo de leudado, el horno se apagará automáticamente después de •...
- Page 79 es-us_main.book.book Page 28 Tuesday, December 27, 2022 3:30 PM 28 FUNCIONAMIENTO Air fry (Freír con aire) (Solo horno Presione UPPER More Modes o LOWER More Modes. superior) Esta función aumenta automáticamente la Presiona 4 para horno superior, presiona 3 temperatura ingresada a 45 °F para un para horno inferior rendimiento óptimo cuando se usa Freír con aire.
- Page 80 es-us_main.book.book Page 29 Tuesday, December 27, 2022 3:30 PM FUNCIONAMIENTO • Los batidos y recubrimientos húmedos no se • Con el modo Freír con aire, los alimentos doran ni se endurecen cuando se usa el modo congelados preparados pueden cocinarse más Freír con aire.
- Page 81 es-us_main.book.book Page 30 Tuesday, December 27, 2022 3:30 PM 30 FUNCIONAMIENTO • Evite abrir la puerta del horno más de lo • Freír con aire piezas de pollo frescas, como alitas necesario para ayudar a mantener la o muslos, sin piel, puede producir humo ya que temperatura del horno, evitar la pérdida de calor la grasa se derrite a altas temperaturas.
- Page 82 Cuando en la pantalla aparece Remote Start del horno puede iniciarse o detenerse a través de Ready (ENCENDIDO), la función Inicio remoto la aplicación para teléfonos inteligentes LG ThinQ. está lista para su utilización. Cómo preparar el horno para un inicio...
- Page 83 es-us_main.book.book Page 32 Tuesday, December 27, 2022 3:30 PM 32 FUNCIONAMIENTO NOTA - El estado del Inicio remoto indica "ready" (listo). - Inicio remoto experimenta un problema durante el funcionamiento. • El ícono de Wi-Fi en la pantalla muestra el estado de la conexión de red del electrodoméstico.
- Page 84 Cancele el temporizador antes de usar esta función. • Actualizaciones del producto - En los modelos con la función LG UP Home Appliance, descubra nuevas funciones con solo actualizar el producto a través de la Instalación de la aplicación LG aplicación LG ThinQ.
- Page 85 Cualquier cambio o modificación en la botón Wi-Fi durante 3 segundos. Ejecute la construcción de este dispositivo, que no cuente aplicación LG ThinQ y siga las instrucciones en con la aprobación expresa de la parte responsable ella para conectar el electrodoméstico.
- Page 86 • Inicie la aplicación LG ThinQ y seleccione la términos de la licencia, avisos de derechos de función Smart Diagnosis en el menú. Siga las autor y otros documentos relevantes, visite https:/ instrucciones para el diagnóstico audible...
- Page 87 es-us_main.book.book Page 36 Tuesday, December 27, 2022 3:30 PM 36 MANTENIMIENTO MANTENIMIENTO Limpieza Limpie un área pequeña y friegue siguiendo el grano del acero inoxidable si corresponde. Interior Seque y saque brillo con un paño suave o una No utilice limpiadores de horno para limpiar la toalla de papel secos y limpios.
- Page 88 En comparación con el autolimpieza. (Disponible en algunos modelos) proceso más intenso de Self Clean, el horno LG le brinda la opción de limpiar con MENOS CALOR, en • Retire la rejilla de la asadera. Vierta la grasa de la MENOS TIEMPO y, prácticamente, SIN HUMO NI...
- Page 89 es-us_main.book.book Page 38 Tuesday, December 27, 2022 3:30 PM 38 MANTENIMIENTO Cuándo usar EasyClean • Ejemplo de suciedad en el horno • Raspadores plásticos sugeridos: - Espátula de plástico dura - Raspador plástico para bandejas - Raspador plástico para pintura - Tarjeta de crédito vieja Caso 1 - Forma de la suciedad: gotitas o manchitas...
- Page 90 es-us_main.book.book Page 39 Tuesday, December 27, 2022 3:30 PM MANTENIMIENTO Pulse START (Iniciar). El tiempo restante Una vez que haya limpiado la cavidad del aparece en la pantalla. horno, quite el exceso de agua con una toalla limpia y seca. Vuelva a colocar los estantes y demás accesorios.
- Page 91 es-us_main.book.book Page 40 Tuesday, December 27, 2022 3:30 PM 40 MANTENIMIENTO • La cocina debe estar bien ventilada para papel de aluminio ni ningún otro material. Esto minimizar los olores de la limpieza. Abra una destruye la distribución de calor, produce ventana o encienda un ventilador o extractor resultados de horneado deficientes y causa antes de la autolimpieza.
- Page 92 es-us_main.book.book Page 41 Tuesday, December 27, 2022 3:30 PM MANTENIMIENTO Ajuste de Self Clean horno hasta que el horno se haya enfriado. El bloqueo se libera de manera automática. La función Self Clean tiene ciclos de 3, 4 o 5 horas. •...
- Page 93 es-us_main.book.book Page 42 Tuesday, December 27, 2022 3:30 PM 42 MANTENIMIENTO disyuntor. Si no lo hace, podría causar lesiones PRECAUCIÓN graves, descargas eléctricas o la muerte. • Es posible que deba cancelar o interrumpir el • Use guantes para cambiar la luz del horno. Los ciclo Self Clean debido a exceso de humo o la fragmentos de vidrio de las bombillas rotas presencia de fuego en el horno.
- Page 94 es-us_main.book.book Page 43 Tuesday, December 27, 2022 3:30 PM SOLUCIÓN DE PROBLEMAS SOLUCIÓN DE PROBLEMAS Preguntas Frecuentes Preguntas frecuentes Mi nuevo horno no cocina como el que tenía antes. ¿Hay algún problema con los ajustes de temperatura? No, su horno se probó y calibró en la fábrica. Durante los primeros usos, siga cuidadosamente los tiempos y las temperaturas de su receta.
- Page 95 es-us_main.book.book Page 44 Tuesday, December 27, 2022 3:30 PM 44 SOLUCIÓN DE PROBLEMAS ¿Por qué no se pueden operar los botones de función? Asegúrese de que el electrodoméstico no esté en modo Control Lock (Bloqueo de control). El ícono del candado aparecerá...
- Page 96 es-us_main.book.book Page 45 Tuesday, December 27, 2022 3:30 PM SOLUCIÓN DE PROBLEMAS ¿Con qué frecuencia debo usar EasyClean? EasyClean se puede usar las veces que desee. EasyClean funciona mejor cuando el horno está LEVEMENTE sucio, por ejemplo, con salpicaduras de grasa LEVES y gotitas de queso. Consulte la sección EasyClean del manual del propietario para obtener más información.
- Page 97 es-us_main.book.book Page 46 Tuesday, December 27, 2022 3:30 PM 46 SOLUCIÓN DE PROBLEMAS Antes de llamar al servicio técnico Revise esta sección antes de llamar para servicio; hacerlo le ahorrará tiempo y dinero. Cocción Problemas Causas posibles y solución El horno no funciona El enchufe del electrodoméstico no está...
- Page 98 es-us_main.book.book Page 47 Tuesday, December 27, 2022 3:30 PM SOLUCIÓN DE PROBLEMAS Problemas Causas posibles y solución Los alimentos no se Se está utilizando un utensilio de cocina incorrecto o de un tamaño inapropiado. hornean o rostizan • Consulte la sección "Funcionamiento del horno" en el capítulo Funcionamiento. correctamente Se debe ajustar el sensor del horno.
- Page 99 es-us_main.book.book Page 48 Tuesday, December 27, 2022 3:30 PM 48 SOLUCIÓN DE PROBLEMAS Partes y Características Problemas Causas posibles y solución El control del horno El control electrónico detectó una condición de falla. suena y aparece un • Apague la función del horno que está usando para borrar la pantalla y detener el pitido. código de error F.
- Page 100 Durante la configuración de Wi-Fi, la aplicación requiere una contraseña para conectar el producto (en determinados teléfonos). • Ubique el nombre de la red que comienza con "LG" en Configuración > Redes. Tenga en cuenta la última parte del nombre de la red.
- Page 101 VEA A CONTINUACIÓN LA SECCIÓN “PROCEDIMIENTO PARA RESOLVER CONFLICTOS”. En caso de que su Horno eléctrico LG ("Producto") presente alguna falla por defectos de materiales o de fabricación bajo uso apropiado y normal durante el período de garantía establecido más abajo, el mismo será...
- Page 102 MANERA CON ESTA GARANTÍA LIMITADA O CON EL PRODUCTO, SE RESOLVERÁN EXCLUSIVAMENTE A TRAVÉS DE UN ARBITRAJE VINCULANTE Y NO EN UNA CORTE DE JURISDICCIÓN GENERAL. ARBITRAJE VINCULANTE SIGNIFICA QUE USTED Y LG RENUNCIAN AL DERECHO DE UN JUICIO CON JURADO Y A REALIZAR O PARTICIPAR EN UNA DEMANDA COLECTIVA.
- Page 103 Aviso de disputa. En caso de que usted desee iniciar un procedimiento de arbitraje, primero debe notificar a LG por escrito al menos 30 días antes de iniciar el arbitraje enviando una carta a LG a LG Electronics, USA, Inc. Atención: Legal Department- Arbitration 111 Sylvan Avenue, Englewood Cliffs, NJ 07632 USA.
- Page 104 LG pueden solicitar al otro que participe en un procedimiento de arbitraje. Para excluirse usted debe enviar una notificación a LG, en un lapso de hasta 30 días continuos, contados a partir de la fecha de la primera compra del consumidor del producto, ya sea por: (i) el envío de un correo electrónico a optout@lge.com con el siguiente Asunto: “Exclusión del arbitraje”...
- Page 105 es-us_main.book.book Page 54 Tuesday, December 27, 2022 3:30 PM 54 Memorándum...
- Page 106 es-us_main.book.book Page 55 Tuesday, December 27, 2022 3:30 PM Memorándum...
- Page 107 es-us_main.book.book Page 56 Tuesday, December 27, 2022 3:30 PM 56 Memorándum...
- Page 108 es-us_main.book.book Page 57 Tuesday, December 27, 2022 3:30 PM Memorándum...
- Page 109 Page 54 Tuesday, December 27, 2022 3:30 PM LG Customer Information Center For inquiries or comments, visit www.lg.com or call: U.S.A. 1-800-243-0000 1-888-542-2623 CANADA Register your product Online! www.lg.com...