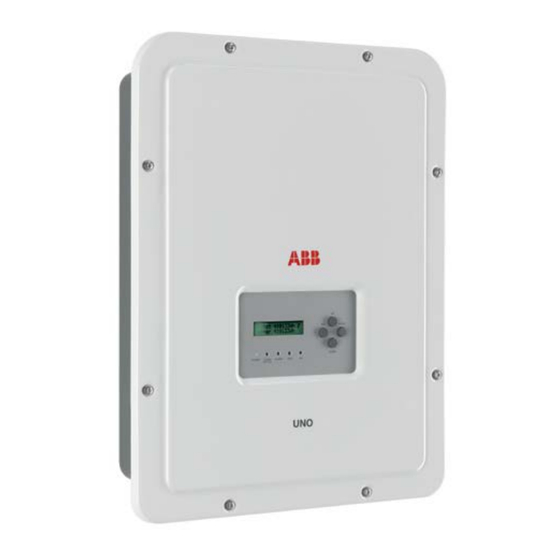
ABB UNO-DM-1.2-TL-PLUS Quick Start Manual
Solar inverter
Hide thumbs
Also See for UNO-DM-1.2-TL-PLUS:
- Product manual (61 pages) ,
- Quick installation manual (2 pages) ,
- Manual (198 pages)
Advertisement
Quick Links
ABB solar inverter
Quick Installation Guide
UNO-DM-1.2/2.0/3.3/4.0/4.6/5.0-TL-PLUS
(from 1.2 to 5.0 kW)
EN
APPLY HERE
THE WIRELESS
IDENTIFICATION LABEL
In addition to the information given below, it is mandatory to read and observe the safety information
and installation instructions shown in the installation manual. The technical documentation and the
interface and management software for the product are available on the website.
The equipment must be used in accordance to what is described in this Quick Installation Guide.
Otherwise, the protections guaranteed by the inverter may be affected.
3.
Transportation and relocation
The transportation of the device, in particular via land transportation, must be made with adequate means and
ways to protect the parts from violent impacts, humidity, vibrations, etc.
Lifting
The means used for lifting must be suitable to bear the weight of the equipment.
Weight of the equipment components
Model
Weight
All models
15 kg
Unpacking and inspection
The packaging components must be removed and disposed of according to the applicable regulations of the
country where the device is installed.
Upon opening the packaging, check the integrity of the equipment and verify that all the components are
present.
If you notice defects or deterioration, stop the operations and call the carrier, as well as inform ABB Service
immediately.
Please keep the packaging in the event it has to be returned; the use of inadequate packaging will void the
warranty.
Always store the Quick Installation Guide, all the supplied accessories and the AC connector cover in a safe place.
4.
Place and position of installation
- Refer to the technical data for the verification of the environmental conditions to be
met.
- Do not install the inverter where it is exposed to direct sunlight. If necessary, use
protection that minimizes the exposure, especially for ambient temperatures above
40°C/104°F.
- Do not install in small unventilated spaces where the air cannot circulate freely.
- Always ensure that the airflow around the inverter is not blocked to prevent
overheating.
- Do not install near flammable substances (minimum distance 3 m/10 ft).
- Do not install on wooden walls or other flammable substances.
- Do not install inside residential premises or where a prolonged presence of people
or animals is planned, due to the acoustic noise that the inverter produces during
operation. The noise emission value is strongly influenced by the installation
location (e.g. type of surfaces around the inverter, general properties of the room,
etc.) and the quality of electricity supply.
5° MAX
5° MAX
- Install on a solid wall or structure that is suitable to support the weight of the
equipment.
- Install in an upright position with a maximum inclination as shown in the figure.
- Respect the minimum distances indicated. Choose a location that allows enough
space around the unit to allow easy installation and removal of the equipment from
the mounting surface.
- Where possible, install at eye level for easy viewing of the display and the LEDs.
- Install at a height that takes into account the weight of the equipment.
10 cm
- When installing multiple inverters, position the inverters side by side while
NO
NO
maintaining the minimum distances (measured from the outer edge of the inverter);
if the space available does not allow this provision, position the inverters in a
staggered layout, as indicated in the figure, in order to make sure that the heat
dissipation is not affected by the other inverters.
- All installations at altitudes above 2,000 m/6,500' must be assessed on a case by case basis with ABB Service to determine the proper derating of the input
parameters.
The final installation of the inverter must not compromise the access to any disconnection devices located outside.
Refer to the warranty conditions to evaluate the possible exclusions related to an improper installation.
5.
Components supplied with the inverter
Bracket for wall fixing
Watertight connector for the AC cable
connection
Wireless antenna
Cable with faston isolated for the
configuration of the input channels
in parallel
(Spare part) T20 screw for front cover 1
5° MAX
5° MAX
NO
NO
15
OK
cm
OK
OK
OK
10 cm
20
cm
Quantity
Components supplied with the inverter
M5x10 screw for the external ground
connection
1
M5 contact washers for the external
ground connection
1
M5x10 Wall bracket locking screws
(optionally mounting, to be used if
required)
1
M5 Wall bracket locking washers
(Optionally mounting, to be used if
required)
1 + 1
XXXXXX
ABB
solar
inverters
XXXXXX
XXXXXX
XXXXXX
XXXXXX
XXXXXX
X
X
Technical documentation
The
In addition
technical
to what
documentation
is explained
and
in this
guide,
interface
the
and
the
safety
and
management
installation
for the
software
information
provided
product
in the
are
available
installation
at the
manual
website.
mus
t be
read
and
followed.
1.
The labels on the inverter show the markings, main technical data and the identification of the equipment and of the manufacturer
Regulatory Label
The labels placed on the equipment absolutely MUST NOT be removed, damaged, dirtied, hidden, etc.
In the manual, and/or in some cases on the equipment, the danger or attention zones are indicated by signs, labels, symbols or icons.
Obligation to consult the
manual
Degree of protection of the
IP65
device
Positive and negative pole
of the input voltage (DC)
2.
The inverter models referred to in this installation guide are available in six power capacity systems: 1.2kW, 2.0kW, 3.3 kW, 4.0 kW, 4.6 kW and 5.0 kW.
For each model, the following variants are available (suffix could be combined):
- Models with "B" suffix (e.g. UNO-DM-3.3-TL-PLUS-B). Models equipped with Wireless communication.
- Models with "S" suffix (e.g. UNO-DM-3.3-TL-PLUS-S). Models equipped with DC disconnecting switch.
- Models with "E" suffix (e.g. UNO-DM-3.3-TL-PLUS-E). Models equipped with Wireless communication and Accessory Board equipped with Ethernet board
(UNO-DM-PLUS-COM Etherner KIT).
- Models with "X" suffix (e.g. UNO-DM-3.3-TL-PLUS-X). Models equipped with Accessory Board (UNO-DM-COM KIT).
Main components
01
Bracket
02
Lock spring
03
Heatsink
04
Anti-condensation valve
05
Front Cover
06
LED panel
07
Display
08
Keypad
09
DC Input Connectors
10
AC Output Connector
11
Wireless antenna connector
12
DC Input terminal block
DC disconnect switch
16
(only -S models)
UNO-DM-COM KIT card
18
(optional)
19
External ground connection
20
Service cable gland
6.
Do not open the inverter in case of rain, snow or high
humidity (>95%). During the installation, do not place the
inverter with the front cover
Install the inverter by following this procedure:
• Place the bracket
• The selection of the appropriate number and distribution of the anchors
is the responsibility of the installer. The choice must be made according
to the type of wall, frame or other type of support, and should be sized
considering a total load of more than 4 times the weight of the inverter
(total 4x15=60 kg total). Depending on the type of anchor chosen, drill the
holes required for the fixing of the bracket (Figure
• Fix the bracket to the wall or structure.
• Carefully lift the inverter and hook it onto the bracket by inserting the two
supports in the slots on the inverter (Figure
• Proceed to anchor the inverter to the bracket by pressing the lower part
toward the wall or structure until the two springs on the bracket set the
inverter in position (Figure
• Install wireless antenna by screwing it into the dedicated connector
located on the bottom part of inverter
7.
WARNING! ELECTRIC SHOCK HAZARD! Hazardous voltages may be present inside the
inverter. The access to the internal zones of the inverter must be carried out after a minimum
waiting time of 5 minutes since the inverter was disconnected from the grid and from the
photovoltaic generator.
15
• The main connections are made on the lower part (outside) of the inverter. To install the accessories and make the necessary
cm
connections, unscrew the 8 screws using a TORX T20 key and open the front cover
special attention since additional screws are not supplied.
OK
OK
OK
Caution! It is necessary to hold the front cover during the removal of screws to avoid the cover falling
10 cm
10 cm
(the front cover is not secured to the inverter's chassis).
• After making the connections, close the cover by tightening the 8 screws on the front, while respecting the sequence and
tightening torque (2.5 Nm).
20
8.
cm
Check the correct polarity of the input strings and the absence of earth leakages of the PV generator. When the PV panels are exposed
to sunlight, they provide a continuous voltage (DC) to the inverter. Access to the internal inverter zones must be carried out with the
equipment disconnected from the grid and from the PV generator.
NO
NO
OK
Caution! The inverters referred to in this document are WITHOUT AN ISOLATION TRANSFORMER (transformer-less). This type involves the
use of PV panels of an isolated type (IEC61730 Class A Rating) and the need to maintain the PV generator floating with respect to earth; no
generator pole must be connected to the ground.
If multiple strings are connected to the same input, they must have the same type and number
OK
OK
OK
OK
of panels in series. ABB also recommend they have the same orientation and inclination.
• Observe the maximum input current with respect to quick-coupling connectors. Refer to "String inverters -
Product manual appendix" document available on the site www.abb.com/solarinverters, to find out the make and
model of the quick-coupling connector used on the inverter. Depending on the model of the connectors installed
on your inverter, it will be necessary to use the same model for the corresponding counterparts (by checking the
manufacturer's website or via ABB for the compliant counterpart).
The use of non-compliant counterparts with respect to the quick-coupling connectors models
present on the inverter, may cause serious damage to the unit and result in the immediate
loss of warranty
• Connect the DC input, always checking the tightness of the connectors.
Quantity
• Versions of the inverter which are equipped with two independent input channels (i.e. dual maximum power point tracker, MPPT), can be configured as parallel
(i.e. single MPPT).
1
Configuring Input Mode to Independent (default configuration)
This configuration is set at the factory and involves the use of the two input channels (MPPT) in
2
an independent mode. This means that the jumpers (supplied) between the positive and negative
poles of the two DC input channels
mode should be set during the commissioning phase, in the dedicated section of the internal
webserver "SETTINGS > SETUP DC SIDE > INPUT MODE" or through the inverter display menu
2
"SETTINGS> INPUT MODE".
Configuring Input Mode to Parallel
2
This configuration involves the use of the two input channels (MPPT) connected in parallel. This
means that the jumpers (supplied) between the positive and negative poles of the two DC input
channels
must be installed, and that the parallel channel mode should be set during the
12
commissioning phase, in the dedicated section of the internal webserver "SETTINGS > SETUP
1
DC SIDE > INPUT MODE" or through the inverter display menu "SETTINGS> INPUT MODE".
UNO-DM-X.X-TL-PLUS
P/N:PPPPPPPPPPP
SN:YYWWSSSSSS WK:WWYY
WO:XXXXXXX
SO:SXXXXXXXX Q1
Product Label (In case of a service password
request, it is necessary to have the serial number
available (SN: YYWWSSSSSS))
General warning - Important
safety
information
Temperature interval
Obligation to use protective
clothing and/or personal
protective equipment
05
07
06
08
12
09
A
05
facing the ground.
01
level on the wall and use it as a drilling template.
).
A
).
B
).
B
C
(Figure
).
11
C
NO
NO
OK
OK
OK
OK
OK
OK
12
must not be installed, and that the independent channel
Wireless Identification Label (The label is divided in
two separate parts by a dashed line; take the bottom part
and apply it on the cover of this quick installation guide)
Dangerous voltage
Hot parts
Without isolating
Direct and alternating
transformer
current respectively
Point of connection of the
Discharge time of the
protective ground
stored energy
10
03
01
18
04
16
10
11
19
20
8
6
1
4
; while removing the screws, pay
05
3
2
5
7
12
-IN1 -IN1 +IN1 +IN1
-IN2 -IN2
+IN2 +IN2
DC INPUTS
02
01
03
B
Advertisement

Related Manuals for ABB UNO-DM-1.2-TL-PLUS


Summary of Contents for ABB UNO-DM-1.2-TL-PLUS
- Page 1 (by checking the - All installations at altitudes above 2,000 m/6,500’ must be assessed on a case by case basis with ABB Service to determine the proper derating of the input manufacturer’s website or via ABB for the compliant counterpart).
- Page 2 2. Insert the cable into the connector and cut the cable to length inverter: a network with the name ABB-XX-XX-XX-XX-XX-XX will appear in the list of networks, where “X” is a hex digit of the MAC address (MAC address then loosen the cable gland.