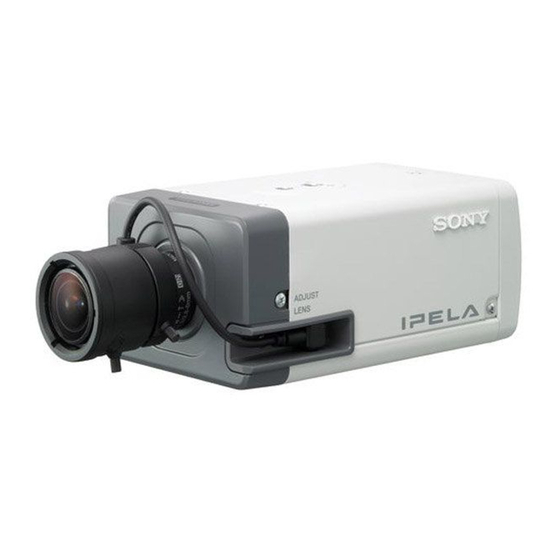
Sony Ipela ExwavePRO SNC-CS20 Service Manual
Hide thumbs
Also See for Ipela ExwavePRO SNC-CS20:
- Installation manual (2 pages) ,
- User manual (100 pages)
Table of Contents
Advertisement
Quick Links
Advertisement
Table of Contents

Related Manuals for Sony Ipela ExwavePRO SNC-CS20


Summary of Contents for Sony Ipela ExwavePRO SNC-CS20
- Page 1 NETWORK CAMERA SNC-CS20 SNC-CM120 SERVICE MANUAL 1st Edition...
- Page 2 ! WARNING This manual is intended for qualified service personnel only. To reduce the risk of electric shock, fire or injury, do not perform any servicing other than that contained in the operating instructions unless you are qualified to do so. Refer all servicing to qualified service personnel.
-
Page 3: Table Of Contents
Table of Contents Manual Structure 2-3. Check after Adjustment ..........2-11 2-3-1. Preparation of Check ........... 2-11 Purpose of this manual ..............3 2-3-2. Burst Level Check ..........2-11 2-3-3. Video Level Check ..........2-11 Related manuals ................3 2-3-4. Color Reproduction Adjustment Check .... -
Page 5: Manual Structure
..Installation Manual (Supplied with SNC-CS20/CM120) This manual describes the information on installing the SNC-DS10/DM110..“Easy Setup Guide for the Sony Network Camera ” CD-ROM (Supplied with SNC-CS20/CM120) This manual describes the information on setting the SNC-CS20/CM120. -
Page 7: Service Overview
Section 1 Service Overview 1-1. Board Location CN-3107 board Board name Model SY-365/365A board BI-227 SNC-CM120 BI-228 SNC-CS20 CN-3107 Common use PS-757 SNC-CS20 PS-757A SNC-CM120 SY-365 SNC-CS20 SY-365A SNC-CM120 PS-757/757A board BI-227/228 board 1-2. Removing/Reattaching the Lens Removal Lens connector cover 1. -
Page 8: Removing/Reattaching The Cabinet
1-3. Removing/Reattaching the Cabinet 1-3-1. Upper Case 1. Remove the lens. (Refer to Section 1-2.) Upper case BSW M2 x 5 2. Remove the six screws, then remove the upper case. BSW M2 x 5 3. To install, reverse the removal procedure. BSW M2 x 5 BSW M2 x 5 SNC-CS20/CM120... -
Page 9: Rear Assembly
1-3-2. Rear Assembly Replace the removed tape (A) with the new tape (A). . Parts name: Tape (A) . Parts number: 3-941-343-01 1. Remove the lens. (Refer to Section 1-2.) 2. Remove the upper case. (Refer to Section 1-3-1.) Tape (A) 3. -
Page 10: Front Assembly
1-3-3. Front Assembly 1. Remove the lens. (Refer to Section 1-2.) 2. Remove the upper case. (Refer to Section 1-3-1.) PSW2 x 5 3. Remove the screw (B2 x 6), then remove the lens connector cover. 4. Remove the two screws (B2 x 6) and the two screw Front assembly (PSW2 x 5). -
Page 11: Ps-757/757A Board
1-4-2. PS-757/757A Board 1. Remove the lens. (Refer to Section 1-2.) 2. Remove the upper case. (Refer to Section 1-3-1.) Harnesses Harnesses 3. Remove the rear assembly. (Refer to Section 1-3-2.) 4. Remove the front assembly. (Refer to Section 1-3-3.) PSW2 x 5 5. -
Page 12: Replacing The Optical Filter Block
1-5. Replacing the Optical Filter Block 1. Remove the lens. (Refer to Section 1-2.) Slider plate PSW2 x 5 2. Remove the upper case. (Refer to Section 1-3-1.) Harness Holes 3. Remove the front assembly. (Refer to Section 1-3-3.) Front assembly Hole 4. -
Page 13: Replacing The Electrolytic Capacitor
1-6. Replacing the Electrolytic Capacitor The electrolytic capacitor used in this unit needs to be replaced periodically. When a service for repair or maintenance is provided, and if the unit has been used for a long period of time, it is recommended that the following electrolytic capacitor (or assembled part that include it) to be replaced at once after having consent from the customer. -
Page 15: Adjustments
Section 2 Adjustments 2-1. Preparation 2-1-1. Adjustment Tools and Required Equipment J-7120-450-A: Gray scale chart I type (For PTB-700) J-6431-850-A: Pattern box PTB-700 . Light source for test chart SNC-CM120 J-7120-530-A: Vectorscope scale SNC-CS20 J-7120-520-A: Vectorscope scale J-6080-058-A: Color temperature correction filter C14 . -
Page 16: Installation Of Adjustment Program
2-1-2. Installation of Adjustment Program 2-1-3. Connection Diagram Voltmeter 1. Start the PC. (Only SNC-CM120) 2. Copy “CameraAdjustmentTool” directory from the CD-ROM of adjustment program to an arbitrary place. SY-365/365A Pattern box PTB-700 3. Execute “vcredist_x86.exe” in the copied folder. board CN301 Camera 4. -
Page 17: Adjustment
2-2. Adjustment 5. The dialog box is displayed. Then, select NTSC or PAL radio button according to the measurement device to be used. . In the adjustment using CameraAdjustmentTool.exe 6. Check that all check boxes are checked, and then click the [OK] button. -
Page 18: Vsub Voltage Adjustment (Only Snc-Cm120)
2-2-2. VSUB Voltage Adjustment 2. Operate the spin box so that the voltage value of the (Only SNC-CM120) voltmeter matches the value displayed in the lower area of the adjustment software window. You can check the imprint of CCD used in this adjustment SNC_CM120 from the side B of the BI-227 board. -
Page 19: Setup Level Adjustment
2-2-3. Setup Level Adjustment 2-2-4. Burst Level Adjustment . Subject: None . Subject: None . Measuring equipment: Waveform monitor . Measuring equipment: Waveform monitor NTSC: A = 7.5 ± 2 (IRE) NTSC: B = 40 ± 2 (IRE) . Specification: . -
Page 20: White Defect Correction
2-2-5. White Defect Correction 2-2-6. White Defect Correction (Light funnel) (Only SNC-CM120) . Subject: None . Measuring equipment: None . Subject: None . Specification: . Measuring equipment: None None . Specification: None 1. Cover the lens with the lens cap, etc. 2. -
Page 21: Mechanical Iris Adjustment
2-2-7. Mechanical Iris Adjustment 2-2-8. Video Level Adjustment . Subject: Gray scale chart type I . Subject: Clear chart . Measuring equipment: None . Measuring equipment: Waveform monitor NTSC: C = 65 ± 5 (IRE) . Specification: . Specification: None C = 455 ±... -
Page 22: White Balance Data Retrieving
2-2-9. White Balance Data Retrieving 4. Check that “OK” is displayed in the upper right area of the window, and then remove the color temperature . Subject: Clear chart correction filter C14. 5. Click the [Next] button. . Measuring equipment: Vectorscope . -
Page 23: (Light Funnel) (Only Snc-Cm120)
2-2-10. White Balance Data Retrieving 4. Check that “OK” is displayed in the upper right area of (Light funnel) (Only SNC-CM120) the window, and then remove the color temperature correction filter C14. 5. Click the [Next] button. . Subject: Clear chart . -
Page 24: Color Reproduction Adjustment
2-2-11. Color Reproduction Adjustment 5. Check that “OK” is displayed in the upper right area of the window, and then click the [Next] button. . Subject: Color-bar chart . Measuring equipment: Waveform monitor, vectorscope NTSC: D = 90 ± 5 (IRE) SNC_CM120 . -
Page 25: Saving Of Adjustment Results
2-3. Check after Adjustment 2-2-12. Saving of Adjustment Results 1. Press the [Save] button. 2-3-1. Preparation of Check 1. After adjustment is completed, turn off the power of SNC_DS20 this unit once, and then restart it. 2. After this unit is restarted, press the [VIDEO|OUT] button several times and check that the image is output on the video monitor. -
Page 26: Vsub Voltage Check (Only Snc-Cm120)
2-3-5. VSUB Voltage Check 2-4-2. MAC Address and Serial Number (Only SNC-CM120) Writing 1. Connect to this unit via browser and set “Light funnel Required equipment/Tools mode” to Always ON from the [Camera]-[Sense up] . Personal computer (PC) tab in the setting window. . - Page 27 Preparation Writing initial data 1. Connect each equipment according to the connection 5. Select “Manual setting” with the software for writing diagram in Section 2-1-3. MAC address and serial number. 2. Turn on the power of each equipment. 6. Perform the following steps (1) to (4), and write the 3.
-
Page 29: Spare Parts
Therefore, specified parts should be used in the case of replacement. 2. Standardization of Parts Some repair parts supplied by Sony differ from those used for the unit. These are because of parts common- ality and improvement. 3. Stock of Parts Parts marked with “o”... -
Page 30: A-2. Exploded Views
Overall Block A-2. Exploded Views SNC-CM120 BVTT K2 x 4 3 x 6 B2 x 6 B2 x 6 B2 x 6 B2 x 6 BVTT 3 x 6 SNC-CS20 2.6 x 6 B2.6 x 12 B2 x 6 B2 x 6 K2 x 4 B2 x 6 SNC-CS20/CM120... - Page 31 Overall Block Part No. SP Description A-1559-407-A s MOUNTED CIRCUIT BOARD, CN-3107 A-1559-412-A s MOUNTED CIRCUIT BOARD, PS-757 (for SNC-CS20) A-1542-329-A s MOUNTED CIRCUIT BOARD, PS-757A (for SNC-CM120) A-1559-678-A s MOUNTED CIRCUIT BOARD, BI-228 (for SNC-CS20) A-1559-409-A s MOUNTED CIRCUIT BOARD, BI-227 (for SNC-CM120) A-1564-279-A s MOUNTED CIRCUIT BOARD, SY-365(RP) (for SNC-CS20)
-
Page 32: A-3. Electrical Parts List
A-3. Electrical Parts List --------------------------- BI-227 BOARD ;for SNC-CM120 (BI-227 BOARD ;for SNC-CM120) --------------------------- Ref. No. Ref. No. or Q'ty Part No. SP Description or Q'ty Part No. SP Description A-1559-409-A s MOUNTED CIRCUIT BOARD, BI-227 C170 1-100-567-81 s CAP,CHIP CERAMIC 0.01MF B 1005 2pcs 2-640-315-02 o SCREW (M2X5), SMALL, +P, SW C171... - Page 33 -------------------------- (BI-227 BOARD ;for SNC-CM120) BI-228 BOARD ;for SNC-CS20 -------------------------- Ref. No. Ref. No. or Q'ty Part No. SP Description or Q'ty Part No. SP Description R126 1-208-945-81 s RES, CHIP 270K (1005) A-1559-678-A s MOUNTED CIRCUIT BOARD, BI-228 R127 1-218-977-81 s RES, CHIP 100K 2pcs 2-640-315-02 o SCREW (M2X5), SMALL, +P, SW...
- Page 34 ------------- (BI-228 BOARD ;for SNC-CS20) CN-3107 BOARD ------------- Ref. No. Ref. No. or Q'ty Part No. SP Description or Q'ty Part No. SP Description FB107 1-400-382-21 s EMI FERRITE (SMD) (1608) A-1559-407-A s MOUNTED CIRCUIT BOARD, CN-3107 FB108 1-400-382-21 s EMI FERRITE (SMD) (1608) C900 1-112-298-91 o CAP, CERAMIC 1MF B (1608) IC103...
- Page 35 ----------------- PS-757/757A BOARD (PS-757/757A BOARD) ----------------- Ref. No. *a:[SNC-CS20] or Q'ty Part No. SP Description *b:[SNC-CM120] 1-208-907-81 s RES, CHIP 6.8K (1005) Ref. No. *a 1-208-895-81 s RES, CHIP 2.2K (1005) or Q'ty Part No. SP Description *b 1-208-917-81 s RES, CHIP 18K (1005) 1-208-879-81 s RES, CHIP 470 (1005) *a A-1559-412-A s MOUNTED CIRCUIT BOARD, PS-757 1-208-891-81 s RES, CHIP 1.5K (1005)
- Page 36 ----------------- SY-365/365A BOARD (SY-365/365A BOARD) ----------------- Ref. No. *a:[SNC-CS20] or Q'ty Part No. SP Description *b:[SNC-CM120] C157 1-125-777-81 s CAP, CHIP CERAMIC 0.1MF B 1005 Ref. No. C158 1-112-746-91 s CAP, CERAMIC 4.7MF B (1608) or Q'ty Part No. SP Description C159 1-125-777-81 s CAP, CHIP CERAMIC 0.1MF B 1005 C160...
- Page 37 (SY-365/365A BOARD) (SY-365/365A BOARD) Ref. No. Ref. No. or Q'ty Part No. SP Description or Q'ty Part No. SP Description C329 1-112-317-11 s CAP, CHIP CERAMIC 0.1MF (2012) C532 1-162-964-91 s CAP,CHIP CERAMIC 1000PF B 1608 C330 1-112-317-11 s CAP, CHIP CERAMIC 0.1MF (2012) C533 1-112-746-91 s CAP, CERAMIC 4.7MF B (1608) C331...
- Page 38 (SY-365/365A BOARD) (SY-365/365A BOARD) Ref. No. Ref. No. or Q'ty Part No. SP Description or Q'ty Part No. SP Description C818 1-100-566-91 s CAP, CHIP CERAMIC 0.1MF B 1608 FB506 1-400-382-21 s EMI FERRITE (SMD) (1608) C819 1-100-566-91 s CAP, CHIP CERAMIC 0.1MF B 1608 FB601 1-400-382-21 s EMI FERRITE (SMD) (1608) C825...
- Page 39 (SY-365/365A BOARD) (SY-365/365A BOARD) Ref. No. Ref. No. or Q'ty Part No. SP Description or Q'ty Part No. SP Description L302 1-469-555-21 s INDUCTOR, CHIP 10UH (LB2016) R151 1-218-941-81 s RES, CHIP 100 L407 1-414-398-41 s INDUCTOR (SMD) 10.0UH R152 1-218-941-81 s RES, CHIP 100 L409 1-414-398-41 s INDUCTOR (SMD) 10.0UH...
- Page 40 (SY-365/365A BOARD) (SY-365/365A BOARD) Ref. No. Ref. No. or Q'ty Part No. SP Description or Q'ty Part No. SP Description R218 1-208-860-81 s RES, CHIP 75 (1005) R703 1-218-977-81 s RES, CHIP 100K R219 1-211-971-91 s RES, CHIP 12 (1608) R704 1-218-977-81 s RES, CHIP 100K R220...
-
Page 41: A-4. Packing Materials & Supplied Accessories
A-4. Packing Materials & Supplied Accessories (SY-365/365A BOARD) ---------------------------------------- PACKING MATERIALS & SUPPLIED ACCESSORIES Ref. No. ---------------------------------------- or Q'ty Part No. SP Description Ref. No. or Q'ty Part No. SP Description RB107 1-234-371-21 s RES, NETWORK 47 (1005X4) RB116 1-234-370-21 s RES, NETWORK 22 (1005X4) 3-620-521-02 s ROPE,WIRE RB117 1-234-370-21 s RES, NETWORK 22 (1005X4) -
Page 43: Block Diagrams
Overall Overall SNC-CS20 SNC-CS20 Section B Block Diagrams BI-228 SY-365/365A LENS CN101 CN808 IC101 IC202 IC103 D_DTI VOUT_D SYS_RST IC101 D-CLKOUT 12.27MHz IC203 D_DTI VIDEO VBS+ ANALOG F/E ENCODER IC201 AFE_CTRL CLK 27MHz AFE_CTRL SYS_RST IC702 IC102 IC701 (1/3) IC701 (2/3) S701 IC407 I2S0... -
Page 44: Overall (Snc-Cm120
Overall Overall SNC-CM120 SNC-CM120 BI-227 SY-365/365A LENS CN101 CN808 IC101 IC202 IC103 D_DTI VOUT_D SYS_RST IC101 D-CLKOUT 12.27MHz IC203 D_DTI VIDEO VBS+ ANALOG F/E ENCODER IC201 AFE_CTRL CLK 27MHz X102 AFE_CTRL SYS_RST IC407 IC409 72MHz IC702 IC102 IC701 (1/3) IC701 (2/3) S701 I2S0 ELECTRICAL... -
Page 45: Schematic Diagrams
Section C Schematic Diagrams Index Board name Page BI-227 BI-228 CN-3107 PS-757/757A SY-365/365A SNC-CS20/CM120... - Page 46 BI-227 BI-227 SUFFIX: -11 SUFFIX: -11 +3.3VD FB109 L103 L105 22uH 22uH C138 C136 4.7uF 0.1uF X102 C112 C113 C119 C122 72MHz 10uF 10uF 0.1uF 0.1uF +3.3VAFE L110 10uH AFE_CTRL C168 C169 0.1uF 4.7uF CCD_CTRL JC101 JC102 IC104 JC104 TC7SH08FU(T5RSOYJF) JC105 +3.3VD D_DTI...
- Page 47 BI-228 BI-228 SUFFIX: -11 SUFFIX: -11 L103 L104 22uH 22uH C112 C111 C116 C117 0.1uF 10uF 0.1uF 10uF +3.3VAFE L110 10uH C155 C156 0.1uF 4.7uF AFE_CTRL CCD_CTRL R103 JC101 R104 IC104 JC105 L106 TC7SH08FU(T5RSOYJF) C129 22uH 0.1uF JC106 +3.3VD C144 1uF D_DTI0 C128 REFB...
- Page 48 CN-3107 CN-3107 SUFFIX: -11 SUFFIX: -11 IO_terminal I/O CONNECTOR CN904 T_ALARM_OUT0(-) ALARM OUT0(-) IO_terminal T_ALARM_OUT0(+) ALARM OUT0(+) From SY-365 T_ALARM_OUT1(-) ALARM OUT1(-) T_ALARM_OUT1(+) CN902 ALARM OUT1(+) +3.3VD T_ALARM_OUT0(-) ALARM_OUT0(-) VBS+ T_ALARM_OUT0(+) ALARM_OUT0(+) T_SENSOR_IN SENSOR IN T_ALARM_OUT1(-) ALARM_OUT1(-) T_ALARM_OUT1(+) SW_LED ALARM_OUT1(+) 10uH +3.3VD 3.3VD...
-
Page 49: Ps-757/757A
PS-757/757A PS-757/757A SUFFIX: -11 SUFFIX: -11 From SY-365 TO LENS CONT- CONT- CONT+ CONT+ DRV+ DRV+ DRV- DRV- VDR1 VDR2 VDR3 100k 6.8k PRIMARY SECONDARY GND1 HV-ADJ CONTROL GND3 LV-ADJ 10uF #R14 GND2 2.2k 10uF 10uF ST03-68F1 0.1uF SIGDISA ST03-68F1 1.2k 100k RCLASS... -
Page 50: Sy-365/365A
SY-365/365A (1/8) SY-365/365A (1/8) SUFFIX: -11 SUFFIX: -11 MOT_CTRL SNC-CS20 SNC-CM120 SNC-CS20 SNC-CM120 005,006 C115 100pF JC103 UART1 R167 AF24 AB26 X_A24 X_D31 X_A24 X_D31 R103 VOUT_D AD23 AB25 C116 100pF 1/16W X_A23 X_D30 +3.3VD X_A23 X_D30 V_A11 V_DQ31 +3.3VD AE23 AB24 V_A11... - Page 51 SY-365/365A (2/8) SY-365/365A (2/8) SUFFIX: -11 SUFFIX: -11 +3.3VD +3.3VD L201 FB202 10uH C203 C210 C202 C209 0.1uF 0.1uF 10uF 10uF R205 R206 001,003,006,008 R207 CL201 SYS_RST CL202 C206 R216 0.1uF C207 VOUT_ISCL 0.001uF R217 VOUT_ISDA +3.3VD C208 +3.3VD FB201 L202 0.1uF R218...
- Page 52 SY-365/365A (3/8) SY-365/365A (3/8) SUFFIX: -11 SUFFIX: -11 +3.3VD +3.3VD C308 0.1uF IC302 TC7SH08FU(T5RSOYJF) C329 R303 R320 0.1uF 001,002,006,008 C333 T300 100V 0.001uF SYS_RST C330 R321 R306 R310 0.1uF 100V C327 C331 R322 0.1uF R307 R311 0.1uF R301 100V C334 0.001uF +3.3VD C332...
-
Page 53: Sy-365/365A
SY-365/365A (4/8) SY-365/365A (4/8) SUFFIX: -11 SUFFIX: -11 Q401 L409 10uH 2SC4081T106R SNC-CS20 SNC-CM120 R461 C455 0.01uF 0.0047uF DC BIAS, IRIS CONTROL C447 C449 4.7uF 0.1uF Q402 R472 220k 470k 2SA1576A-T106-QR 1/16W 1/16W 0.5% 0.5% +3.3VAFE C453 +3.3VD L407 C450 R459 0.1uF 10uH... - Page 54 SY-365/365A (5/8) SY-365/365A (5/8) SUFFIX: -11 SUFFIX: -11 001,006 +3.3VD FB501 FB502 C527 C526 C528 C529 4.7uF 0.001uF 0.001uF 4.7uF C504 C506 C501 C502 C503 C505 C500 0.1uF 0.1uF 0.1uF 0.1uF 0.1uF 0.1uF 0.1uF +3.3VD FB505 FB506 C535 C534 C536 C537 001,006 4.7uF...
- Page 55 SY-365/365A (6/8) SY-365/365A (6/8) SUFFIX: -11 SUFFIX: -11 +3.3VD FB601 C601 C602 C603 C604 0.1uF 0.1uF 0.1uF 0.1uF C613 C614 0.001uF 4.7uF BUF_D 001,005 RB611 BUF_D15 X_D15 BUF_D14 X_D14 BUF_D13 X_D13 BUF_D12 RB607 X_D12 RB612 BUF_D11 X_D11 BUF_D10 X_D10 BUF_D09 X_D9 BUF_D08 RB608...
- Page 56 SY-365/365A (7/8) SY-365/365A (7/8) SUFFIX: -11 SUFFIX: -11 SSP0 +3.3VD R725 R726 100k 100k +3.3VD R704 R703 R702 100k 100k 100k FB701 R727 R724 100k 100k R701 100k I2S0 SSP0SCK R719 SSP0DOUT R743 SSP0CS C701 C704 X701 0.01uF 4.7uF 12.288MHz MIC/LINE IC702 TLV320AIC23PWR...
- Page 57 SY-365/365A (8/8) SY-365/365A (8/8) SUFFIX: -11 SUFFIX: -11 FROM PS-757 +3.3VAFE +3.3VD +2.5V +1.2V CN801 VH_+15V VL_-8.5V/-5.5V FB804 TO PS-757 3.6/3.3V FB806 3.3VAFE TO PS-757 FB807 DC_IRIS_CTRL 3.3V CN805 177988421 FB825 CONT- 3.3V CONT- FB808 FB826 CN804 CONT+ 1.2V CONT+ FB827 POE(-) POE(-)
- Page 59 BI-227, BI-228, CN-3107 Section D Board Layouts Index Board name Page BI-227 (SNC-CM120) BI-228 (SNC-CS20) CN-3107 PS-757/757A SY-365/365A BI-227 BI-227 -A SIDE- -B SIDE- SUFFIX: -11 SUFFIX: -11 SNC-CM120 SNC-CM120 BI-228 BI-228 -A SIDE- -B SIDE- SUFFIX: -11 SUFFIX: -11 SNC-CS20 SNC-CS20 CN-3107...
- Page 60 PS-757/757A, SY-365/365A PS-757/757A, SY-365/365A PS-757/757A PS-757/757A -A SIDE- -B SIDE- SUFFIX: -11 SUFFIX: -11 SY-365/365A SY-365/365A -A SIDE- -B SIDE- SUFFIX: -11 SUFFIX: -11 SNC-CS20/CM120...
-
Page 61: Appendix
Appendix SNC-CS20 SNC-CM120 DIAMETER 80 mm DIAMETER 80 mm DIAMETER 106 mm DIAMETER 106 mm SNC-CS20/CM120... - Page 64 SNC-CS20 (SY) Printed in Japan Sony Corporation SNC-CM120 (SY) E 2008. 7 22 9-968-462-01 ©2008...