Table of Contents
Advertisement
Available languages
Available languages
Operating and Installation Instructions
Panduan Penggunaan dan Pemasangan
Pancuran Mandi Elektrik (
Thank you for purchasing the Panasonic Electric Home Shower.
This appliance is intended for household use only.
For optimum performance and safety, please carefully read
this Operating and Installation Instructions and keep this
documentation in a safe place for future reference.
Terima kasih kerana memilih Pancuran Mandi Elektrik Panasonic.
Produk ini hanya untuk kegunaan di rumah sahaja.
Sila baca semua arahan ini dengan teliti demi keselamatan dan
penggunaan yang optimum dan simpan Panduan Penggunaan
ini di tempat yang selamat untuk rujukan di masa hadapan.
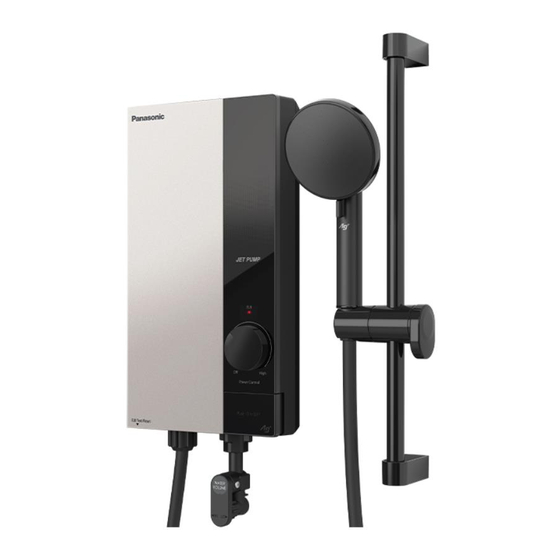
Electric Home Shower
Model No.
No. Model
Safe
Pump
U-Memory
-
+
U-Mode
Pump
Set
U-Memory
1
2
3
ELB
Off
High
Power Con trol
(Household Use)
Penggunaan Isi Rumah
DH - 3UDP1 DH - 3UP1
DH - 3UD1
TABLE OF CONTENTS
SAFETY PRECAUTIONS .............................. EN2
ACCESSORIES .......................................... EN4
PARTS IDENTIFICATION .............................. EN4
HOW TO USE ............................................. EN6
WATER FLOW RATE ADJUSTMENT ............... EN9
MAINTENANCE .......................................... EN9
TROUBLESHOOTING ................................. EN10
SPECIFICATIONS ....................................... EN10
BEFORE INSTALLATION .............................. EN11
HOW TO INSTALL ....................................... EN12
TEST OPERATION ....................................... EN15
ISI KANDUNGAN
LANGKAH-LANGKAH KESELAMATAN ......... MY2
AKSESORI ................................................ MY4
CARA-CARA MENGGUNAKANNYA ............... MY6
SEBELUM PEMASANGAN DIBUAT .................. MY11
CARA MEMASANG ....................................... MY12
CARA-CARA MENGUJI ................................. MY15
)
DH - 3US1
EN2
EN6
............ MY4
MY11
DH940A3UD1M0
Advertisement
Table of Contents

Related Manuals for Panasonic DH-3UDP1


Summary of Contents for Panasonic DH-3UDP1
-
Page 1: Table Of Contents
………… MY4 MENGENALI BAHAGIAN-BAHAGIAN PENGENALAN PAPARAN LCD & PANEL KAWALAN ………………………………… MY5 Thank you for purchasing the Panasonic Electric Home Shower. U-MODE (DH-3UDP1 & DH-3UD1) ……………… MY5 This appliance is intended for household use only. U-MEMORY (DH-3UDP1 & DH-3UD1) ………… MY5... -
Page 2: Before Using Electric Home Shower
BEFORE USING ELECTRIC HOME SHOWER SAFETY PRECAUTIONS To be followed absolutely Before operating, please read the following "Safety Instructions" carefully. To prevent personal injury, injury to others and property damage, the following instructions must be followed. ■ Incorrect operation caused by failure to follow instructions will cause harm or damage, the seriousness of which is classified as follow: This sign warns of This sign warns of... - Page 3 • Do not turn "On" and "Off" the Main Water Valve to operate the Home Shower Unit to avoid any possible damage. ● To ensure Pump reliability, Push On-Off Button must be pressed before and after each shower. (For model DH-3UDP1 & DH-3UP1) • Do not pull the Push On-Off Button, press only.
-
Page 4: Accessories
ACCESSORIES Packing: Included Items: Shower Head Packing Shower Head (1 set) Shower Hanger Packing Shower Hose (1 set) Rail Holder (2 set) Shower Hanger Ass’y (1 set) Filter Body Assembly Caution Sheet Filter Body Packing Filter Body Assembly (1 set) Rubber Packing (1 pc) (1 pc) Sliding Rail... -
Page 5: Description Of Lcd Display & Control Panel
Set Button U-Memory Po we r C on tro l U-Memory Set Button U-Mode (DH-3UDP1 & DH-3UD1) 1. U-Mode works to provide different after-shower experience depending on the individual. 2. U-Mode has three modes. Cool Down • User feels refreshed after shower. -
Page 6: How To Use Electric Home Shower
5. Press the Push On-Off Button. Water will fl ow out of the Shower Head. Simultaneously, DH-3UDP1 & DH-3UD1 - LCD Display illuminates and display Temperature Indicator, Clock & Shower Head Indicator. (When the power ON, the temperature becomes 38°C) DH-3UP1 &... - Page 7 Temperature setting. DH-3UDP1 & DH-3UD1 The shower temperature can be gradually controlled by pressing either - or + button. Each press of the button will either reduce or increase the temperature by 1 °C. Continuous press of the button will either continuously reduce or increase the temperature.
- Page 8 Timer Setting appear. Safe function. desired U-Mode. U-Memory 10. U-Memory setting. DH-3UDP1 & DH-3UD1 U-Memory function can be selected by pressing U-Memory button. U-Memory enables users to record, recall and erase data up to three memories. Steps To Do LCD Display Remarks WarmCoolHot &...
-
Page 9: Water Flow Rate Adjustment
WATER FLOW RATE ADJUSTMENT 1. How to adjust to maximum water fl ow rate. Step 1 Push the Push On-Off Button and select Wide Shower type on the Shower Head using the Shower Select Lever (refer Figure 1). Step 2 Turn “Off”... -
Page 10: Troubleshooting
3. Special skill is required for repairing. Never try to repair the Unit by yourself. 4. For DH-3UDP1 and DH-3UD1 model, in case of continuous faulty (E1, E2 or E3 fl ashing at Temperature Indication display), do not use the Unit and contact your authorized dealer immediately. -
Page 11: How To Install Electric Home Shower En11
Max. water pressure 380 kPa / 3.87 kgf/cm² / 55 psi 2.0 m Min. water pressure 4.9 kPa / 0.05 kgf/cm² / 0.71 psi (DH-3UDP1 & DH-3UP1) Max. water pressure 380 kPa / 3.87 kgf/cm² / 55 psi • How to measure the water pressure is as illustrated. Water should fl ow out of the Hose 2.0 m above the Main Water Valve. -
Page 12: How To Install
* The feeding pipe shown in Figure 2. should be 1/2 inch. • The Unit must be installed at 1.5 m ~ 1.7 m For DH-3UDP1 & DH-3UP1 For DH-3UD1 & DH-3US1 Figure 2 above the fl oor. 2. How to remove the Front Plate. - Page 13 • Mount the Unit on the wall Please ensure the Unit fi xed Back Back with 4 screws. tightly on wall by shaking it left Plate Plate Wall • Drive each Screw into the and right. Wall Screw two upper Wall Plugs through the screw holes on the Back Note: Plate.
- Page 14 Volume Knob to dry before proceed to test run with water. Water Outlet 6. How to fi x the Front Plate. DH-3UDP1 & DH-3UD1 Water Inlet Front Plate Close the Front Plate of the Unit according to the sequence as illustrated Back (Close from top to bottom).
-
Page 15: Test Operation
Check if water leaks from the Pipe Line. 3. • Press the Push On-Off Button once, the LCD Panel (DH-3UDP1 & DH-3UD1) or ELB lamp lights (DH-3UP1 & DH-3US1) will be activated and water start fl owing out of the Shower Head. -
Page 16: Sebelum Menggunakan Pancuran Mandi Elektrik My2
SEBELUM MENGGUNAKAN PANCURAN MANDI ELEKTRIK LANGKAH-LANGKAH KESELAMATAN Sila patuhi sepenuhnya Sila baca "langkah-langkah keselamatan" berikut dengan teliti sebelum menggunakan produk: Untuk mengelakkan daripada berlakunya sebarang kecederaan kepada diri sendiri dan orang lain atau kerosakan harta benda, arahan yang berikut hendaklah dipatuhi. ■... - Page 17 • Jangan buka atau tutup Injap Air Utama untuk mengendalikan Unit Pancuran Mandi untuk mengelakkan sebarang kerosakan. ● Untuk memastikan ketahanan Pam, Tuas On-Off mestilah ditekan setiap kali sebelum dan selepas mandi. (Untuk model DH-3UDP1 & DH-3UP1) • Jangan tarik Tuas On-Off, tekan sahaja.
-
Page 18: Aksesori
AKSESORI Set: Barangan disertakan: Set Kepala Pancuran Kepala Pancuran (1 set) Set Penyangkut Pemegang Batang Gelongsor Penyangkut Kepala Pancuran Hos Pancuran (1 set) Pancuran (2 set) (1 set) Lampiran Amaran Unit Badan Set Unit Badan Penapis Unit Badan Penapis (1 set) Pelapik Getah (1 keping) Penapis (1 helai) Batang Gelongsor... -
Page 19: Pengenalan Paparan Lcd & Panel Kawalan
Butang Set U-Memory Po we r C on tro l Butang Set U-Memory U-Mode (DH-3UDP1 & DH-3UD1) 1. U-Mode berfungsi untuk memberikan pengalaman selepas mandi yang berbeza bergantung kepada individu. 2. U-Mode mempunyai tiga mod. Cool Down • Pengguna merasakan kesegaran selepas mandi pancuran. -
Page 20: Cara-Cara Menggunakan Pancuran Mandi Elektrik My6
5. Tekan Tuas On-Off. Air akan mengalir dari Kepala Pancuran. Pada masa yang sama, DH-3UDP1 & DH-3UD1 - Paparan LCD menerangi dan memaparkan Penunjuk Suhu, Jam & Penunjuk Kepala Pancuran. (Apabila kuasa dihidupkan, suhu akan menunjukkan 38 °C) DH-3UP1 & DH-3US1 - Lampu ELB akan bercahaya. - Page 21 Penetapan suhu. DH-3UDP1 & DH-3UD1 Suhu pancuran boleh dikawal dengan menekan butang - atau butang +. Setiap tekanan pada butang akan mengurangkan atau meningkatkan suhu sebanyak 1 ºC. Tekanan berterusan akan mengurangkan atau meningkatkan suhu pancuran secara berterusan. Tombol Isipadu Air Larasan suhu terendah adalah 32 °C.
- Page 22 Safe U-Mode U-Mode yang dikehendaki. U-Memory 10. Penetapan U-Memory. DH-3UDP1 & DH-3UD1 Fungsi U-Memory boleh dipilih dengan menekan butang U-Memory. U-Memory membolehkan pengguna merekod, memanggil semula dan memadam data sehingga tiga memori. Langkah- Untuk dilakukan Paparan LCD Kenyataan langkah WarmCoolHot &...
-
Page 23: Cara Menyelaraskan Kadar Aliran Air
CARA MENYELARASKAN KADAR ALIRAN AIR 1. Cara melaraskan kadar pengaliran air maksima. Langkah 1 : Tekan Tuas On-Off dan pilih Pancuran Luas pada Kepala Pancuran dengan menggunakan Tuas Pilih Pancuran (rujuk Gambarajah 1). Langkah 2 : Tutup Injap Air Utama. Langkah 3 : Pusingkan Kepala Pancuran menghala ke atas pada paras pinggang. -
Page 24: Panduan Kerosakan
3. Kemahiran tertentu diperlukan untuk memperbaiki peralatan ini. Oleh itu jangan sekali-kali cuba membaikinya sendiri. 4. Untuk model DH-3UDP1 dan DH-3UD1, sekiranya kerosakan berterusan (E1, E2 atau E3 berkelip pada paparan Penunjuk Suhu), jangan gunakan Unit dan sila hubungi pengedar sah anda dengan segera. -
Page 25: Cara Memasang Pancuran Mandi Elektrik
Tekanan Air Maksima 380 kPa / 3.87 kgf/cm² / 55 psi 2.0 m Tekanan Air Minima 4.9 kPa / 0.05 kgf/cm² / 0.71 psi (DH-3UDP1 & DH-3UP1) Tekanan Air Maksima 380 kPa / 3.87 kgf/cm² / 55 psi • Cara mengukur tekanan air seperti dalam gambarajah. Air hendaklah mengalir keluar dari Hos setinggi 2.0 m dari Injap Air Utama. -
Page 26: Cara Memasang
* Saiz paip pembekal seperti yang ditunjukkan dalam Gambarajah 2. seharusnya 1/2 inci. • Unit hendaklah dipasang pada ketinggian Untuk DH-3UDP1 & DH-3UP1 Untuk DH-3UD1 & DH-3US1 Gambarajah 2 1.5 m ~ 1.7 m dari atas lantai. 2. Menanggalkan Penutup Set. - Page 27 • Unit hendaklah dipasang ke Periksa sama ada Unit dinding dengan 4 skru. diikat dengan ketat dengan Penutup Penutup • Masukkan Skru ke kedua-dua menggerakkan Unit ke kiri dan Belakang Belakang Dinding Dinding Palam Dinding melalui lubang kanan. Skru skru pada bahagian atas Penutup Belakang Unit.
- Page 28 Tombol sebelum ujian dengan air diteruskan. Isipadu Air Air Keluar 6. Menutup Penutup Set. Air Masuk DH-3UDP1 & DH-3UD1 Penutup Set Penutup Tutupkan Penutup Set seperti susunan yang Belakang ditunjukkan pada gambarajah (Tutupkan dari atas ke bawah). Pasang Skru pada bahagian bawah Unit.
-
Page 29: Cara-Cara Menguji
• Periksa sekiranya ada kebocoran air daripada Saluran Paip. 3. • Tekan Tuas On-Off sekali, Panel LCD (DH-3UDP1 & DH-3UD1) atau cahaya lampu ELB (DH-3UP1 & DH-3US1) akan diaktifkan dan air mula mengalir keluar dari Kepala Pancuran. • Laraskan suhu air. - Page 30 Panasonic Manufacturing Malaysia Berhad (196501000304) No. 3, Jalan Sesiku 15/2, Section 15, Shah Alam Industrial Site, 40200 Shah Alam, Selangor Darul Ehsan, Malaysia. http://www.panasonic.com Printed in Malaysia H0622Y0...
- Page 32 MEMO...