Table of Contents
Advertisement
BS 2/C-..., BS 2/R-...
Belt section
Valid for the following types:
3842 998 933, BS 2/C-100
3842 998 934, BS 2/C-250
3842 998 935, BS 2/C-H
3842 998 937, BS 2/R-300
BS 2/C-100
BS 2/R-300
3842 998 938, BS 2/R-700
3842 998 939, BS 2/R-H
3842 998 941, BS 2/R-V+ 1200
BS 2/C-250
BS 2/R-700
Assembly instructions
3 842 563 834/2022-08
BS 2/C-H
BS 2/R-H
BS 2/R-V+ 1200
Replaces: –
ENGLISH
Advertisement
Table of Contents

Related Manuals for Bosch rexroth BS 2/C Series


Summary of Contents for Bosch rexroth BS 2/C Series
- Page 1 BS 2/C-…, BS 2/R-… Belt section Valid for the following types: 3842 998 933, BS 2/C-100 3842 998 938, BS 2/R-700 3842 998 934, BS 2/C-250 3842 998 939, BS 2/R-H Assembly instructions Replaces: – 3842 998 935, BS 2/C-H 3842 998 941, BS 2/R-V+ 1200 3 842 563 834/2022-08 ENGLISH...
- Page 2 Our products are subject to natural wear and aging. © All rights reserved by Bosch Rexroth AG, also for the registration of industrial property rights. This document may not be reproduced or distributed to third parties without our consent.
-
Page 3: Table Of Contents
BS 2/C-100, …-250, BS 2/R-300, …-700, BS 4/R-300, …-700: Assembling two belt sections drive head-to-return unit 7.6.8 BS 2/C-H, BS 2/R-H, BS 2/R-V+ 1200: Assembling two belt sections drive head-to-return unit 3 842 563 834/2022-08, MIT: BS 2/C-…, BS 2/R-…, Bosch Rexroth AG... - Page 4 10.4.12 Shortening the conveyor chain: BS 2/C-H, BS 2/R-H, BS 2/R-V+ 1200, motor mounting (MA) = R/L 10.4.13 Shortening the conveyor chain: BS 2/R-H, BS 2/R-V+ 1200, reversible, motor mounting (MA) = R/L Bosch Rexroth AG, MIT: BS 2/C-…, BS 2/R-…, 3 842 563 834/2022-08...
- Page 5 BS 2/R-300, …-700, BS 2/R-H, BS 2/R-V+ 1200 10.5 Spare parts Decommissioning Disassembly and replacement 12.1 Preparing the product for storage/later use Disposal Upgrading and modifi cation Troubleshooting Technical data 16.1 Ambient conditions 3 842 563 834/2022-08, MIT: BS 2/C-…, BS 2/R-…, Bosch Rexroth AG...
-
Page 6: About This Documentation
Be sure to observe all safety precautions. Safety instructions are set out as follows: Bosch Rexroth AG, MIT: BS 2/C-…, BS 2/R-…, 3 842 563 834/2022-08... -
Page 7: Symbols
If this information is not observed, the product cannot be used and/or operated as designed. Single, independent action Numbered steps: The numbers indicate that the action steps are subsequent. 3 842 563 834/2022-08, MIT: BS 2/C-…, BS 2/R-…, Bosch Rexroth AG... -
Page 8: Designations
• For installation in a Rexroth TS 2plus transfer system • For transporting Rexroth WT 2 workpiece pallets • Maximum load/section load: See technical data on page 83. • For ambient conditions, see page 83. Bosch Rexroth AG, MIT: BS 2/C-…, BS 2/R-…, 3 842 563 834/2022-08... -
Page 9: Improper Use
Any use other than that described in the section "Intended use" is considered improper and is not permitted. Bosch Rexroth AG is not liable for any damage resulting from improper use. The user alone bears any risks associated with improper use. -
Page 10: Product-Specifi C Safety Instructions
• Make sure that: – There are no obstacles preventing access to the EMERGENCY STOP controls. – All delivery points, workstations and passages are kept clear. Bosch Rexroth AG, MIT: BS 2/C-…, BS 2/R-…, 3 842 563 834/2022-08... -
Page 11: Personal Protective Equipment
• Ensure that the conveyor chain is lubricated suffi ciently, see page 43. During operation – Keep a maintenance schedule. – Keep degreasers or aggressive cleaning agents away from the conveyor chain. 3 842 563 834/2022-08, MIT: BS 2/C-…, BS 2/R-…, Bosch Rexroth AG... - Page 12 • Prevent cleaning agents from getting into the system. During cleaning • Never use solvents or corrosive cleaning agents. • Do not use a pressure washer for cleaning. Bosch Rexroth AG, MIT: BS 2/C-…, BS 2/R-…, 3 842 563 834/2022-08...
-
Page 13: Scope Of Delivery
• Depending on the version, motor mounting on the right-hand side (MA = R), left-hand side (MA = L) or in the center (MA = M). • Cable/plug or terminal box motor connection. 3 842 563 834/2022-08, MIT: BS 2/C-…, BS 2/R-…, Bosch Rexroth AG... -
Page 14: Product Description
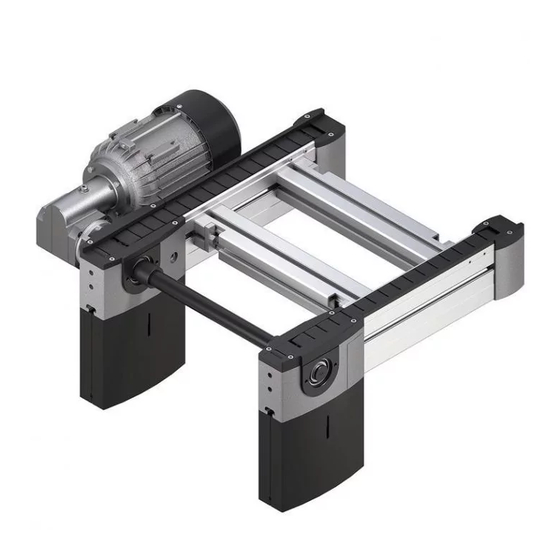
Only for l = 160, = 240. BS 2/C-H BS 2/R-300 BS 2/R-700 E, F BS 2/R-H BS 2/R-V+ 1200 563 833-01 Fig. 1: Belt sections BS 2/C-…, BS 2/R-… Bosch Rexroth AG, MIT: BS 2/C-…, BS 2/R-…, 3 842 563 834/2022-08... -
Page 15: Identifi Cation Of The Product
• Protect the product from environmental infl uences, such as dirt and moisture. • Observe the ambient conditions, see page 83. • Support the product so that there is no load on motors that are installed in a suspended position. 3 842 563 834/2022-08, MIT: BS 2/C-…, BS 2/R-…, Bosch Rexroth AG... -
Page 16: Assembly
7.3 Required tools Hex wrench (open-end): SW8, SW10, SW13, SW19, SW24. Hex socket wrench: SW4. Spirit level Combination pliers Flat smooth fi le Bosch Rexroth AG, MIT: BS 2/C-…, BS 2/R-…, 3 842 563 834/2022-08... -
Page 17: Required Accessories
BS 2/C-100, BS 2/C-250, BS 2/R-300, BS 4/R-300, BS 2/R-700, BS 4/R-700 BS 2/C-400, BS 2/C-700, BS 2/R-1200, BS 2/R-2200 BS 2/C-H, BS 2/R-H, BS 2/R-V, 3 842 530 871 3 842 563 834/2022-08, MIT: BS 2/C-…, BS 2/R-…, Bosch Rexroth AG... -
Page 18: Symbols Used
Graphical depiction of the designation of components. The letters denote the components mentioned in the accompanying text. Detail view from a different direction, for example, the back or the bottom side of the product. Bosch Rexroth AG, MIT: BS 2/C-…, BS 2/R-…, 3 842 563 834/2022-08... -
Page 19: Assembling The Product
2 leg sets: 2000 mm. BS 2/... SZ 2 SZ 2 SW13 M = 25 Nm 563 833-02 Fig. 3: Installing the belt section on leg sets (1/2) 3 842 563 834/2022-08, MIT: BS 2/C-…, BS 2/R-…, Bosch Rexroth AG... - Page 20 M = 25 Nm 3 842 146 815 "A" 3 842 526 560 SW13 M = 25 Nm 563 833-03 Fig. 4: Installing the belt section on leg sets (2/2) Bosch Rexroth AG, MIT: BS 2/C-…, BS 2/R-…, 3 842 563 834/2022-08...
-
Page 21: Modifying The Mounting Position Of The Motor-Gear Combination Or The Gear Motor
Install the screws (A / B). = 6 Nm SW10 = 8 Nm 358 723-75 Fig. 5: Swiveling the motor-gear combination or gear motor around the drive axle 3 842 563 834/2022-08, MIT: BS 2/C-…, BS 2/R-…, Bosch Rexroth AG... -
Page 22: Bs 2/C-100
Mount the protective case in reverse order. =2 Nm 563 833-80 Fig. 6: BS 2/C-100, …-250, BS 2/R-300, …-700: Disassembling the protective case Bosch Rexroth AG, MIT: BS 2/C-…, BS 2/R-…, 3 842 563 834/2022-08... -
Page 23: Bs 2/C-100
ST 2/C ST 2/C SW13 M = 10 Nm SW13 M = 10 Nm 563 833-04 Fig. 7: BS 2/C-100, … : Installing the belt section between two sections 3 842 563 834/2022-08, MIT: BS 2/C-…, BS 2/R-…, Bosch Rexroth AG... -
Page 24: Bs 2/C-H, Bs 2/R-H, Bs 2/R-V+ 1200: Installing The Belt Section Between Two Sections
= 25 Nm = 7 Nm SW10 = 8 Nm = 7 Nm 563 833-05 Fig. 8: BS 2/C-H, … : Installing the belt section between two sections Bosch Rexroth AG, MIT: BS 2/C-…, BS 2/R-…, 3 842 563 834/2022-08... -
Page 25: Bs 2/R-H, Bs 2/R-V+ 1200, Reversible: Installing The Belt Section Between Two Sections
SW13 = 25 Nm SW13 = 25 Nm = 7 Nm 563 833-06 Fig. 9: BS 2/R-H, BS 2/R-V+ 1200, reversible: Installing the belt section between two sections 3 842 563 834/2022-08, MIT: BS 2/C-…, BS 2/R-…, Bosch Rexroth AG... -
Page 26: Bs 2/C-100
Mount the outer halves of the protective case. = 15 Nm 563 833-72 Fig. 10: BS 2/C-100, … : Assembling two belt sections drive head-to-return unit Bosch Rexroth AG, MIT: BS 2/C-…, BS 2/R-…, 3 842 563 834/2022-08... -
Page 27: Bs 2/C-H, Bs 2/R-H, Bs 2/R-V+ 1200
= 7 Nm SW10 = 8 Nm SW13 = 25 Nm = 7 Nm 563 833-73 Fig. 11: BS 2/C-H, … : Assembling two belt sections drive head-to-return unit 3 842 563 834/2022-08, MIT: BS 2/C-…, BS 2/R-…, Bosch Rexroth AG... -
Page 28: Scanning The Chain Length With Sensor: Bs 2/C-100
• For control, lead the cable out through the cutout in the protective case. +0,5 563 833-07 Fig. 12: Scanning the chain length with sensor, “small” drive head Bosch Rexroth AG, MIT: BS 2/C-…, BS 2/R-…, 3 842 563 834/2022-08... -
Page 29: Scanning The Chain Length With Sensor: Bs 2/C-H, Bs 2/R-H, Bs 2/R-V+ 1200
ø4 x 16 ø5 x 25 ø5 x 25 M4 x 25 M4 x 25 358 736-108 Fig. 13: Scanning the chain length with sensor, “large” drive head (1/2) 3 842 563 834/2022-08, MIT: BS 2/C-…, BS 2/R-…, Bosch Rexroth AG... - Page 30 =1 Nm ISO14583 M4 x 25 =2,5 Nm ISO 14585 ø4,2 x 25 SH 2/UV 358 736-109 Fig. 14: Scanning the chain length with sensor, “large” drive head (2/2) Bosch Rexroth AG, MIT: BS 2/C-…, BS 2/R-…, 3 842 563 834/2022-08...
-
Page 31: Assembling The Acceleration Element (Only For L Wt = 160/240)
Replace the sliding piece with the supplied sliding piece 3 842 564 978 (without Rexroth marking). SW19 563 833-09 Fig. 15: Assembling the acceleration element (1/2) 3 842 563 834/2022-08, MIT: BS 2/C-…, BS 2/R-…, Bosch Rexroth AG... - Page 32 3 842 530 417 life of the chain. SW10 SW10 M = 8 Nm M = 8 Nm BS 2/R-300 BS 2/R-700 563 833-10 Fig. 16: Assembling the acceleration element (2/2) Bosch Rexroth AG, MIT: BS 2/C-…, BS 2/R-…, 3 842 563 834/2022-08...
-
Page 33: Electrical Connection Of The Product
For motors that come with a fi tted plug, correct the rotational direction in the control cabinet or at the socket contact (socket side). This makes replacement easier. 3 842 563 834/2022-08, MIT: BS 2/C-…, BS 2/R-…, Bosch Rexroth AG... - Page 34 34/84 Assembly Installation_A Fig. 17: Motor nameplate (example) Installation_DY Fig. 18: Delta/wye connection diagrams Installation_IEC Fig. 19: Optional motor connection with plug (AT = S) Bosch Rexroth AG, MIT: BS 2/C-…, BS 2/R-…, 3 842 563 834/2022-08...
- Page 35 Connection list Connection Pin no. Code terminals, motor 3~ Installation_Stecker Fig. 21: Motor connection with plug (AT = 1), push-in fi tting A: Connection cable side B: Motor side 3 842 563 834/2022-08, MIT: BS 2/C-…, BS 2/R-…, Bosch Rexroth AG...
-
Page 36: Commissioning
• Only commission the product if all safety equipment has been installed in the system and is ready for use. • Only commission a product that has been completely installed. Bosch Rexroth AG, MIT: BS 2/C-…, BS 2/R-…, 3 842 563 834/2022-08... - Page 37 Failure of one (or more) of its components or supply devices External disturbances (e.g. impact, vibration, electromagnetic interference) Design faults or defects (e.g. software errors) Disruption in the power supply Ambient conditions (e.g. damaged fl oors) 3 842 563 834/2022-08, MIT: BS 2/C-…, BS 2/R-…, Bosch Rexroth AG...
-
Page 38: Residual Risks
150 N. End of belt section Crushing injury to Crushing A constructive solution is required, body parts caused by e.g. by means of a stopper. falling objects Bosch Rexroth AG, MIT: BS 2/C-…, BS 2/R-…, 3 842 563 834/2022-08... -
Page 39: Re-Commissioning After A Standstill
• Switch off the conveyor section during line downtime, e.g. during breaks, at night and on weekends. • Do not select a higher speed for the conveyor section than that required for the corresponding function. 3 842 563 834/2022-08, MIT: BS 2/C-…, BS 2/R-…, Bosch Rexroth AG... -
Page 40: Loading The Workpiece Pallet
Switch off the compressed air supply to the relevant system component before performing any maintenance or repair work. Secure the system against being unintentionally switched on again. Bosch Rexroth AG, MIT: BS 2/C-…, BS 2/R-…, 3 842 563 834/2022-08... - Page 41 • Test runs with open paneling should only be performed by a person with appropriate knowledge and experience using tip switches, and if there is no possibility of interference from other switching devices. 3 842 563 834/2022-08, MIT: BS 2/C-…, BS 2/R-…, Bosch Rexroth AG...
-
Page 42: Cleaning And Care
• from the surface of the motor, • from the intake openings on the fan hood, • from between the cooling ribs. The cleaning intervals depend on the ambient and operating conditions. Bosch Rexroth AG, MIT: BS 2/C-…, BS 2/R-…, 3 842 563 834/2022-08... -
Page 43: Conveyor Chain (Fl At Top Chain / Accumulation Roller Chain)
Check the conveyor chain for wear and elongation. We recommend: the LU 2 automatic lubrication unit optimally and evenly lubricates the drive chain while in operation. See page 45. 3 842 563 834/2022-08, MIT: BS 2/C-…, BS 2/R-…, Bosch Rexroth AG... -
Page 44: Possibilities To Lubricate The Conveyor Chain Manually
Fig. 23: Greasing the conveyor chain in the drive module = 5 Nm = 5 Nm ST 2/C-W ST 2/R-W Fig. 24: Greasing the conveyor chain in the maintenance section Bosch Rexroth AG, MIT: BS 2/C-…, BS 2/R-…, 3 842 563 834/2022-08... -
Page 45: Lu 2 Automatic Lubrication Unit
+ 3 842 543 487, set AS 2/R-V Fig. 25: LU 2 automatic lubrication unit, overview The holes marked * are used to connect the LU 2 automatic lubrication unit. 3 842 563 834/2022-08, MIT: BS 2/C-…, BS 2/R-…, Bosch Rexroth AG... -
Page 46: Replacing Wear Parts
3 842 539 357 3 842 530 417 3 842 538 872 8 981 010 510 Flat top chain Accumulation roller chain Accumulation roller chain Vplus Fig. 26: Required accessories Bosch Rexroth AG, MIT: BS 2/C-…, BS 2/R-…, 3 842 563 834/2022-08... -
Page 47: Bs 2/C-100
Mount the protective case in reverse order. =2 Nm 563 833-80 Fig. 27: BS 2/C-100, …-250, BS 2/R-300, …-700: Disassembling the protective case 3 842 563 834/2022-08, MIT: BS 2/C-…, BS 2/R-…, Bosch Rexroth AG... -
Page 48: Assembly Instructions: Finding A Chain Lock With An Operable Chain
– of the fl at top chain by the gray fl at chain with hole – of the accumulation roller chain by the galvanized tab Flat top chain Accumulation roller chain Accumulation roller chain Vplus Fig. 28: Chain lock Bosch Rexroth AG, MIT: BS 2/C-…, BS 2/R-…, 3 842 563 834/2022-08... -
Page 49: Assembly Instructions: Fixing The Chain Tensioner At
Fig. 29, item 2). Loosen the chain tensioner by turning it 90° counterclockwise. Fig. 29, item 3). 563 833-38 Fig. 30: Fixing the chain tensioner: "large" drive head 3 842 563 834/2022-08, MIT: BS 2/C-…, BS 2/R-…, Bosch Rexroth AG... -
Page 50: Detecting The Chain Length At
(= 3% of the original length) is exceeded. 563 833-70 Fig. 32: Detecting the chain length with the "large" drive head Bosch Rexroth AG, MIT: BS 2/C-…, BS 2/R-…, 3 842 563 834/2022-08... -
Page 51: Motor Mounting (Ma) = R/L
SW19 3 842 535 333 8 981 010 510 563 833-41 Fig. 33: Shortening the conveyor chain BS 2/C-100, …-250, BS 2/R-300, …-700, MA = R/L (1/2) 3 842 563 834/2022-08, MIT: BS 2/C-…, BS 2/R-…, Bosch Rexroth AG... - Page 52 M = 8 Nm BS 2/C-100 BS 2/C-250 BS 2/R-300 BS 2/R-700 563 833-42 Fig. 34: Shortening the conveyor chain BS 2/C-100, …-250, BS 2/R-300, …-700, MA = R/L (2/2) Bosch Rexroth AG, MIT: BS 2/C-…, BS 2/R-…, 3 842 563 834/2022-08...
-
Page 53: Shortening The Conveyor Chain: Bs 2/C-100, Bs 2/R-300, Motor Mounting (Ma) = M
3 842 010 511 3 842 535 333 8 981 010 510 563 833-43 Fig. 35: Shortening the conveyor chain BS 2/C-100, BS 2/R-300, MA = M (1/2) 3 842 563 834/2022-08, MIT: BS 2/C-…, BS 2/R-…, Bosch Rexroth AG... - Page 54 8 981 010 511 3 842 530 417 563 833-44 Fig. 36: Shortening the conveyor chain BS 2/C-100, BS 2/R-300, MA = M (2/2) Bosch Rexroth AG, MIT: BS 2/C-…, BS 2/R-…, 3 842 563 834/2022-08...
-
Page 55: Shortening The Conveyor Chain: Bs 2/C-H, Bs 2/R-H, Bs 2/R-V+ 1200, Motor Mounting (Ma) = R/L
BS 2/C-H 8 981 010 510 3 842 535 333 563 833-45 Fig. 37: Shortening the conveyor chain BS 2/C-H, BS 2/R-H, BS 2/R-V+ 1200, MA = R/L (1/2) 3 842 563 834/2022-08, MIT: BS 2/C-…, BS 2/R-…, Bosch Rexroth AG... - Page 56 Install the gear motor. 3 842 539 357 8 981 010 511 563 833-46 Fig. 38: Shortening the conveyor chain BS 2/C-H, BS 2/R-H, BS 2/R-V+ 1200, MA = R/L (2/2) Bosch Rexroth AG, MIT: BS 2/C-…, BS 2/R-…, 3 842 563 834/2022-08...
-
Page 57: Shortening The Conveyor Chain: Bs 2/R-H, Bs 2/R-V+ 1200, Reversible, Motor Mounting (Ma) = R/L
3 842 530 417 BS 2/R-V 3 842 538 872 3 842 539 357 563 833-58 Fig. 39: Shortening the conveyor chain BS 2/R-H, BS 2/R-V+ 1200, reversible (1/2) 3 842 563 834/2022-08, MIT: BS 2/C-…, BS 2/R-…, Bosch Rexroth AG... - Page 58 3 842 530 417 BS 2/R-V 3 842 538 872 3 842 539 357 563 833-59 Fig. 40: Shortening the conveyor chain BS 2/R-H, BS 2/R-V+ 1200, reversible (2/2) Bosch Rexroth AG, MIT: BS 2/C-…, BS 2/R-…, 3 842 563 834/2022-08...
-
Page 59: Assembly Instructions: Changing Chain And Wear Parts
= 2,5 Nm = 2,5 Nm 563 833-63 Fig. 41: Wear parts We recommend: When replacing the fl at top chain, always replace the glide profi les as well. 3 842 563 834/2022-08, MIT: BS 2/C-…, BS 2/R-…, Bosch Rexroth AG... - Page 60 Use the disassembly tool to remove the affected area, with a generous margin on either end. 563 833-39 Fig. 42: Unwinding of the chain from the chain reel Bosch Rexroth AG, MIT: BS 2/C-…, BS 2/R-…, 3 842 563 834/2022-08...
-
Page 61: Assembly Instructions: Running Direction Of Chain
Accumulation roller chain Vplus Fig. 44: Lubricating points *) Also lubricate the sides of the fl at top chain (curve + section) Due to the system, the lubricant may be discharged. 3 842 563 834/2022-08, MIT: BS 2/C-…, BS 2/R-…, Bosch Rexroth AG... -
Page 62: Changing The Conveyor Chain: Bs 2/C-100
Fig. 42, page 61. 8 981 010 510 563 833-47 Fig. 45: Changing the conveyor chain BS 2/C-100, …-250, BS 2/R-300, …-700, MA = R/L (1/2) Bosch Rexroth AG, MIT: BS 2/C-…, BS 2/R-…, 3 842 563 834/2022-08... - Page 63 M = 5 Nm BS 2/C-100 BS 2/C-250 BS 2/R-300 BS 2/R-700 563 833-48 Fig. 46: Changing the conveyor chain BS 2/C-100, …-250, BS 2/R-300, …-700, MA = R/L (2/2) 3 842 563 834/2022-08, MIT: BS 2/C-…, BS 2/R-…, Bosch Rexroth AG...
-
Page 64: Changing The Conveyor Chain: Bs 2/C-100, Bs 2/R-300, Motor Mounting (Ma) = M
8 981 010 511 8 981 010 510 563 833-49 Fig. 47: Changing the conveyor chain BS 2/C-100, BS 2/R-300, MA = M (1/3) Bosch Rexroth AG, MIT: BS 2/C-…, BS 2/R-…, 3 842 563 834/2022-08... - Page 65 For the next assembly step, you need a helper or a lift aid. 563 833-50 Fig. 48: Changing the conveyor chain BS 2/C-100, BS 2/R-300, MA = M (2/3) 3 842 563 834/2022-08, MIT: BS 2/C-…, BS 2/R-…, Bosch Rexroth AG...
- Page 66 3 842 530 417 3 842 535 333 8 981 010 510 563 833-51 Fig. 49: Changing the conveyor chain BS 2/C-100, BS 2/R-300, MA = M (3/3) Bosch Rexroth AG, MIT: BS 2/C-…, BS 2/R-…, 3 842 563 834/2022-08...
-
Page 67: Changing The Conveyor Chain: Bs 2/C-H, Bs 2/R-H, Bs 2/R-V+ 1200, Motor Mounting (Ma) = R/L
3 842 539 357 8 981 010 510 8 981 010 511 563 833-52 Fig. 50: Changing the conveyor chain BS 2/C-H, BS 2/R-H, BS 2/R-V+ 1200, MA = R/L (1/3) 3 842 563 834/2022-08, MIT: BS 2/C-…, BS 2/R-…, Bosch Rexroth AG... - Page 68 = 7 Nm Mount the sliding piece into the return head. 563 833-53 Fig. 51: Changing the conveyor chain BS 2/C-H, BS 2/R-H, BS 2/R-V+ 1200, MA = R/L (2/3) Bosch Rexroth AG, MIT: BS 2/C-…, BS 2/R-…, 3 842 563 834/2022-08...
- Page 69 3 842 535 333 15 16 3 842 530 417 563 833-54 Fig. 52: Changing the conveyor chain BS 2/C-H, BS 2/R-H, BS 2/R-V+ 1200, MA = R/L (3/3) 3 842 563 834/2022-08, MIT: BS 2/C-…, BS 2/R-…, Bosch Rexroth AG...
-
Page 70: Changing The Conveyor Chain: Bs 2/R-H, Bs 2/R-V+ 1200, Reversible, Motor Mounting (Ma) = R/L
8 981 010 511 from the return head. BS 2/R-H 3 842 539 537 BS 2/R-V 563 833-56 Fig. 53: Changing the conveyor chain BS 2/R-H, BS 2/R-V+ 1200, reversible (1/2) Bosch Rexroth AG, MIT: BS 2/C-…, BS 2/R-…, 3 842 563 834/2022-08... - Page 71 Install the gear motor. 3 842 530 417 3 842 539 357 8 981 010 511 563 833-57 Fig. 54: Changing the conveyor chain BS 2/R-H, BS 2/R-V+ 1200, reversible (2/2) 3 842 563 834/2022-08, MIT: BS 2/C-…, BS 2/R-…, Bosch Rexroth AG...
-
Page 72: Changing The Connection Belt Roller / Connection Toothed Belt: Bs 2/C-H, Bs 2/R-H, Bs 2/R-V+ 1200, Motor Mounting (Ma) = R/L
Mount the side cover plates. Install the gear motor. = 7Nm 563 833-55 Fig. 55: Changing the connection belt rollers / connection toothed belt: Bosch Rexroth AG, MIT: BS 2/C-…, BS 2/R-…, 3 842 563 834/2022-08... -
Page 73: Motor Mounting (Ma) = R/L
• Install the motor in the proper position (terminal box) and connect it to the gear. If the motor is not in the proper position: Do NOT rotate the motor. Disconnect the motor from the gear and reconnect it. 3 842 563 834/2022-08, MIT: BS 2/C-…, BS 2/R-…, Bosch Rexroth AG... -
Page 74: Replacing The Motor And/Or Gear Bs 2/C-100, Bs 2/R-300, Motor Mounting (Ma) = M
• Install the motor in the proper position (terminal box) and connect it to the gear. If the motor is not in the proper position: Do NOT rotate the motor. Disconnect the motor from the gear and reconnect it. Bosch Rexroth AG, MIT: BS 2/C-…, BS 2/R-…, 3 842 563 834/2022-08... -
Page 75: Replacing The Gear Motor: Bs 2/C-H, Bs 2/R-H, Bs 2/R-V+ 1200
Mount the fl ange at the new gear motor. Install the gear motor. SW10 = 8 Nm 563 833-65 Fig. 58: Replacing the gear motor, motor mounting (MA) = R/L 3 842 563 834/2022-08, MIT: BS 2/C-…, BS 2/R-…, Bosch Rexroth AG... -
Page 76: Replacing The Gear Motor: Bs 2/C-H, Bs 2/R-H, Bs 2/R-V+ 1200, Motor Mounting (Ma) = M
If the gear motor is centered by the hexagonal shaft, tighten the screws. = 7 Nm 563 833-66 Fig. 59: Replacing the gear motor, motor mounting (MA) = M Bosch Rexroth AG, MIT: BS 2/C-…, BS 2/R-…, 3 842 563 834/2022-08... -
Page 77: Changing The Glide Profi Les
Changing the glide profi les: BS 2/C-100, …-250 (shown), BS 2/C-H (1/2) section profi le of grease, dirt and other impurities. Dirt in the slots (Y) prevents the assembly of the glide profi les in the correct position. 3 842 563 834/2022-08, MIT: BS 2/C-…, BS 2/R-…, Bosch Rexroth AG... - Page 78 Install the chain, see chapter "Changing the conveyor chain"../C-H .../C .../C-H .../C .../C 563 833-82 Fig. 61: Changing the glide profi les: BS 2/C-100, …-250, BS 2/C-H (2/2) Bosch Rexroth AG, MIT: BS 2/C-…, BS 2/R-…, 3 842 563 834/2022-08...
-
Page 79: Bs 2/R-300
(X) of the section profi le of grease, dirt and other impurities. Dirt in the slots (Y) prevents the assembly of the glide profi les in the correct position. 3 842 563 834/2022-08, MIT: BS 2/C-…, BS 2/R-…, Bosch Rexroth AG... - Page 80 "Changing the conveyor chain"../R-H .../R-V .../R .../R-V .../R-H 563 833-77 Fig. 63: Changing the glide profi les: BS 2/R-300, …-700, BS 2/R-H, BS 2/R-V+ 1200 (2/2) Bosch Rexroth AG, MIT: BS 2/C-…, BS 2/R-…, 3 842 563 834/2022-08...
-
Page 81: Spare Parts
• Observe the ambient conditions, see page 83. • For belt sections with mounted motor and/or mounted lubrication unit: Support the belt section so that the motor or lubrication unit are not overloaded. 3 842 563 834/2022-08, MIT: BS 2/C-…, BS 2/R-…, Bosch Rexroth AG... -
Page 82: Disposal
14 Upgrading and modifi cation • Do not modify the product. • The Bosch Rexroth warranty only applies to the confi guration as delivered, and to approved upgrades. The manufacturer will not accept any warranty claims for systems with unapproved modifi cations or upgrades. -
Page 83: Technical Data
fl uid. • Avoid prolonged contact with highly reactive acidic or alkaline materials. 3 842 563 834/2022-08, MIT: BS 2/C-…, BS 2/R-…, Bosch Rexroth AG... - Page 84 Bosch Rexroth AG Postfach 30 02 07 70442 Stuttgart Germany Fax +49 711 811–7777 info@boschrexroth.de www.boschrexroth.com Subject to change 3 842 563 834/2022-08...