Table of Contents
Advertisement
Quick Links
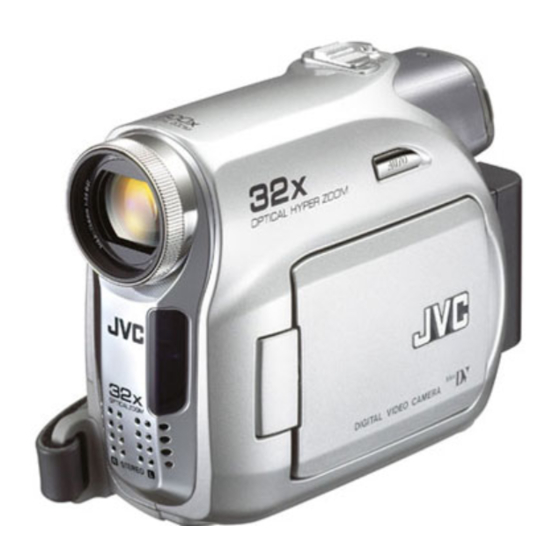
DIGITAL VIDEO CAMERA
GR-D340E/EK
Please visit our Homepage on the World Wide Web for
Digital Video Camera:
http://www.jvc.co.jp/english/cyber/
For Accessories
:
http://www.jvc.co.jp/english/accessory/
INSTRUCTIONS
Dear Customer,
Thank you for purchasing this digital
video camera. Before use, please
read the safety information and
precautions contained in the pages
2 – 5 and 11 to ensure safe use of
this product.
GETTING STARTED
VIDEO RECORDING &
PLAYBACK
ADVANCED FEATURES
REFERENCES
TERMS
To deactivate the demonstration,
set "DEMO MODE" to "OFF".
(
pg. 23, 25)
LYT1507-001A
ENGLISH
8
18
23
36
43
EN
Advertisement
Table of Contents

Related Manuals for JVC GR-D340EK


Summary of Contents for JVC GR-D340EK
- Page 1 DIGITAL VIDEO CAMERA GETTING STARTED GR-D340E/EK VIDEO RECORDING & PLAYBACK Please visit our Homepage on the World Wide Web for Digital Video Camera: http://www.jvc.co.jp/english/cyber/ ADVANCED FEATURES For Accessories http://www.jvc.co.jp/english/accessory/ REFERENCES TERMS To deactivate the demonstration, set “DEMO MODE” to “OFF”.
- Page 2 So, for important recordings, we recommend using SP mode. ● For safety and reliability. It is recommended only genuine JVC batteries and accessories are used in this camcorder. ● This product includes patented and other proprietary technology and will operate only with JVC Data Battery.
- Page 3 DO NOT make any connection to the Larger proprietary technology and will operate only Terminal coded E or Green. with JVC Data Battery. Use the JVC The wires in the mains lead are coloured in BN-VF707U/VF714U/VF733U battery packs accordance with the following code:...
- Page 4 Penalties may be applicable for incorrect disposal of this waste, in accordance with national legislation. (Business users) If you wish to dispose of this product, please visit our web page www.jvc-europe.com to obtain information about the take-back of the product. [Other Countries outside the European Union]...
- Page 5 SOME DO’S AND DON’TS ON THE SAFE USE DON’T use equipment such as personal stereos or radios so that you are distracted from the OF EQUIPMENT requirements of road safety. It is illegal to watch television whilst driving. This equipment has been designed and DON’T listen to headphones at high volume, as manufactured to meet international safety such use can permanently damage your hearing.
- Page 6 Major Features of this Camcorder Wipe/Fader Effects Backlight Compensation You can use the Wipe/Fader Effects to make Simply pressing the BACKLIGHT button pro-style scene transitions. ( pg. 31) brightens the image darkened by backlight. pg. 29) Fade in ● You can also select a spot metering area so that more precise exposure compensation is available.
-
Page 7: Table Of Contents
CONTENTS GETTING STARTED ADVANCED FEATURES Index ..............8 MENUS FOR DETAILED ADJUSTMENT....23 Provided Accessories ........11 Changing The Menu Settings ......23 Power.............. 12 Recording Menus..........24 Operation Mode ..........14 Playback Menus ..........26 Auto/Manual Mode ........14 FEATURES FOR RECORDING....... -
Page 8: Getting Started
GETTING STARTED Index... - Page 9 GETTING STARTED Controls Other Parts Rewind Button [ pg. 21) LCD Monitor ( pg. 18) Left Button [ ] ( pg. 15) Viewfinder ( pg. 16) Quick Review Button [QUICK REVIEW] Battery Pack Mount ( pg. 13) pg. 20) Shoulder Strap Eyelet ( pg.
- Page 10 GETTING STARTED LCD Monitor/Viewfinder Indications Wipe/Fader Mode Indicator ( pg. 31) Wind Cut Indicator ( pg. 25) During Video Recording Time Code ( pg. 25) Manual Focus Adjustment Indicator pg. 28) Brightness Control Indicator (LCD monitor/ Viewfinder) ( pg. 16) 10 x 1/50 BRIGHT...
-
Page 11: Provided Accessories
So, for important recordings, we recommend using SP mode. It is recommended that you use JVC brand cassette tapes. Your camcorder is compatible with all brands of commercially available cassette tapes complying... -
Page 12: Power
GETTING STARTED How To Attach The Lens Cap Power To protect the lens, attach This camcorder’s 2-way power supply system the provided lens cap to the lets you choose the most appropriate source of camcorder as shown in the power. Do not use provided power supply units illustration. - Page 13 3 hr. 25 min. NOTES: BN-VF733U 7 hr. 8 hr. ● It is recommended that only genuine JVC * Provided batteries are used in this camcorder. Using NOTES: generic non-JVC batteries can cause damage ● Recording time is reduced significantly under the to the internal charging circuitry.
-
Page 14: Operation Mode
GETTING STARTED Using AC Power Operation Mode Perform steps 4 – 6 in “Charging The Battery To turn on the camcorder, set the Power Switch Pack”. to any operation mode except “OFF” while NOTE: pressing down the Lock Button located on the The provided AC Adapter features automatic switch. -
Page 15: Power-Linked Operation
GETTING STARTED Power-Linked Operation Date/Time Settings When the Power Switch is set to “REC”, you can The date/time is recorded onto the tape at all also turn on/off the camcorder by opening/ times, but its display can be turned on or off closing the LCD monitor or pulling out/pushing in during playback. -
Page 16: Viewfinder Adjustment
GETTING STARTED Viewfinder Adjustment Brightness Adjustment Of The Display Set the Power Switch to “REC” while pressing down the Lock Button located on the switch. Set the Power Switch Make sure the LCD monitor is closed and to “REC” or “PLAY” while locked. -
Page 17: Loading/Unloading A Cassette
GETTING STARTED ● Once the cassette holder is closed, it recedes Loading/Unloading A Cassette automatically. Wait until it recedes completely before closing the cassette holder cover. The camcorder needs to be powered up to load ● When the battery pack’s charge is low, you may or eject a cassette. -
Page 18: Video Recording & Playback
VIDEO RECORDING Tape Remaining Time Basic Recording Approximate tape remaining 62 min NOTE: time appears on the display. “---min” means the Before continuing, perform the procedures listed camcorder is calculating the below: ● Power ( remaining time. When the pg. 12) ●... -
Page 19: Zooming
VIDEO RECORDING Zooming Journalistic Shooting Produces the zoom in/out effect, or an In some situations, instantaneous change in image magnification. different shooting angles may provide Zoom In more dramatic results. Slide the Power Zoom Lever towards “T”. Hold the camcorder in Zoom Out the desired position Slide the Power Zoom Lever towards “W”. -
Page 20: Quick Review
VIDEO RECORDING NOTES: ● The time code cannot be reset. ● During fast-forwarding and rewinding, the time code indication does not move smoothly. ● The time code is displayed only when “TIME CODE” is set to “ON”. ( pg. 25) Quick Review Enables to check the end of the last recording. -
Page 21: Video Playback
VIDEO PLAYBACK Once you release the button, normal playback Normal Playback resumes. ● A slight mosaic effect appears on the display during Shuttle Search. This is not a malfunction. VOL. +/– ATTENTION: Lock Button During Shuttle Search, parts of the picture may not be Speaker clearly visible, particularly on the left side of the screen. -
Page 22: Connections To A Tv Or Vcr
* Not required for watching still images only. NOTE: The S-Video cable is optional. Be sure to use the YTU94146A S-Video cable. Consult the JVC Service Centre described on the sheet included in the package for details on its availability. Make sure to connect the end with a core filter to the camera. -
Page 23: Advanced Features
MENUS FOR DETAILED ADJUSTMENT Video Recording Menus Changing The Menu Settings FUNCTION ( pg. 24) Selected This camcorder is equipped with an easy-to-use, parameter SETTING ( pg. 24) on-screen menu system that simplifies many of SYSTEM ( pg. 25) FUNCTION the more detailed camcorder settings. -
Page 24: Recording Menus
MENUS FOR DETAILED ADJUSTMENT ● It is recommended that tapes recorded in the LP Recording Menus mode on this camcorder be played back on this camcorder. ● During playback of a tape recorded on another FUNCTION camcorder, blocks of noise may appear or there The menu settings can be changed only when may be momentary pauses in the sound. - Page 25 MENUS FOR DETAILED ADJUSTMENT shutter speed is being automatically adjusted, LANGUAGE “ ” is displayed. [ENGLISH] / FRANÇAIS / ESPAÑOL / ITALIANO / NEDERLANDS WIND CUT The language setting can be changed. [OFF]: Disengages the function. pg. 15) : Helps cut down on noise created by wind.
-
Page 26: Playback Menus
MENUS FOR DETAILED ADJUSTMENT BRIGHT Playback Menus pg. 16, “Brightness Adjustment Of The Display”. [ ] = Factory-preset SOUND MODE and NARRATION DATE/TIME [OFF] / ON During tape playback, the camcorder detects the [OFF]: The date/time does not appear. sound mode in which the recording was made, ON: The date/time is always displayed. -
Page 27: Features For Recording
FEATURES FOR RECORDING Wide Mode Snapshot (Record Still Image On Tape) This camcorder allows you to choose the type of image output format for recording. This feature lets you record still images that look [ ] = Factory-preset like photographs onto a tape. Set the Power Switch to “REC”... -
Page 28: Manual Focus
FEATURES FOR RECORDING Manual Focus Exposure Control The camcorder’s Full Range AF system offers Manual exposure control is recommended in the continuous shooting ability from close-up (as following situations: ● When shooting using reverse lighting or when the close as approx. 5 cm to the subject) to infinity. background is too bright. -
Page 29: Iris Lock
FEATURES FOR RECORDING To cancel Backlight Compensation Iris Lock Press BACKLIGHT twice so that the “ ” indicator disappears. Like the pupil of the human eye, the iris NOTE: contracts in well-lit environments to keep too Using Backlight Compensation may cause the light much light from entering, and dilates in dim around the subject to become too bright and the environments to allow in more light. -
Page 30: White Balance Adjustment
FEATURES FOR RECORDING White Balance Adjustment Manual White Balance Adjustment The white balance refers to the correctness of Adjust the white balance colour reproduction under various lighting. If the manually when shooting white balance is correct, all other colours will be under various types of accurately reproduced. -
Page 31: Wipe Or Fader Effects
FEATURES FOR RECORDING Wipe Or Fader Effects Program AE, Effects and Shutter Effects These effects let you make pro-style scene transitions. Use them to spice up the transition Set the Power Switch to “REC”. from one scene to the next. Wipe or Fader works when video recording is Set “EFFECT”, “PROGRAM AE”... - Page 32 FEATURES FOR RECORDING PROGRAM AE SHUTTER OFF: Disables the function. (Factory-preset) OFF: Disables the function. (Factory-preset) SPORTS SHUTTER 1/50: The shutter speed is fixed (Variable Shutter Speed: 1/250 – 1/4000): at 1/50th of a second. Black bands that usually This setting allows fast-moving images to be appear when shooting a TV screen become captured one frame at a time, for vivid, stable narrower.
-
Page 33: Editing
* Not required for watching still images only. NOTE: The S-Video cable is optional. Be sure to use the YTU94146A S-Video cable. Consult the JVC Service Centre described on the sheet included in the package for details on its availability. Make sure to connect the end with a core filter to the camera. -
Page 34: Dubbing To A Video Unit Equipped With A Dv Connector (Digital Dubbing)
To DV OUT this occurs, turn off the power and make connections again. ● When using a DV cable, be sure to use the optional JVC VC-VDV204U DV cable. Core filter DV cable (optional) To DV IN Video unit equipped with DV connector... -
Page 35: Connection To A Personal Computer
PC with a DV connector by using the ● When using a DV cable, be sure to use the software equipped with the PC or commercially optional JVC VC-VDV206U or VC-VDV204U DV available software. cable depending on the type of DV connector ®... -
Page 36: References
If, after following the steps in the chart below, the The LCD monitor or viewfinder indications problem still exists, please consult your nearest blink. JVC dealer. ● Effect and “DIS” functions that cannot be used together are selected at the same time. The camcorder is a microcomputer-controlled HRe-read the sections Effects and “DIS”. - Page 37 HFind a white subject and compose your shot so previously set date/time has been erased. HConsult your nearest JVC dealer for replacement. that it also appears in the frame. ( pg. 27) The image taken using Snapshot is too When the image is printed from the printer, dark.
- Page 38 ● The built-in clock battery has run out and the case the camcorder’s functions become previously set date/time has been erased. unusable. ( pg. 38) Consult your nearest JVC dealer for Warning Indications replacement. LENS CAP Appears for 5 seconds after power is turned on if Displays the battery remaining power.
-
Page 39: User Maintenance
● Mould may form if the lens is left dirty. ● When using a cleaner or chemically treated cloth refer to the cautions of each product. ● To clean the viewfinder, please consult your nearest JVC dealer. -
Page 40: Cautions
CAUTIONS Battery Packs NOTES: ● It is normal for the battery pack to be warm after The supplied battery Terminals charging, or after use. pack is a lithium-ion Temperature Range Specifications battery. Before using the Charging: 10°C to 35°C supplied battery pack or Operation: 0°C to 40°C an optional battery pack, Storage: –20°C to 50°C... - Page 41 ... remove the battery pack or disconnect the power If, after using the cleaning cassette, the supply while the power is on. problems still exist, consult your nearest JVC ... leave the battery pack attached when the dealer. camcorder is not in use.
-
Page 42: Specifications
SPECIFICATIONS Camcorder For Digital Video Camera Format For General DV format (SD mode) Signal format Power supply PAL standard DC 11 V (Using AC Adapter) Recording/Playback format DC 7.2 V (Using battery pack) Video: Digital component recording Power consumption Audio: PCM digital recording, 32 kHz 4-channel Approx. -
Page 43: Terms
TERMS AC Adapter ............ 14 Shutter Effect ..........32 Auto/Manual Mode ......... 14 Snapshot Mode ..........27 Sound Mode ..........24, 26 Speaker Volume ..........21 Backlight Compensation ........ 29 Specifications ..........42 Battery Pack ........12, 14, 40 Spot Exposure Control ........29 Blank Search .......... - Page 44 Printed in Malaysia EX/EK 1105MAR-PR-VM © 2005 Victor Company of Japan, Limited...