
Related Manuals for Samsung SM-R900


Summary of Contents for Samsung SM-R900
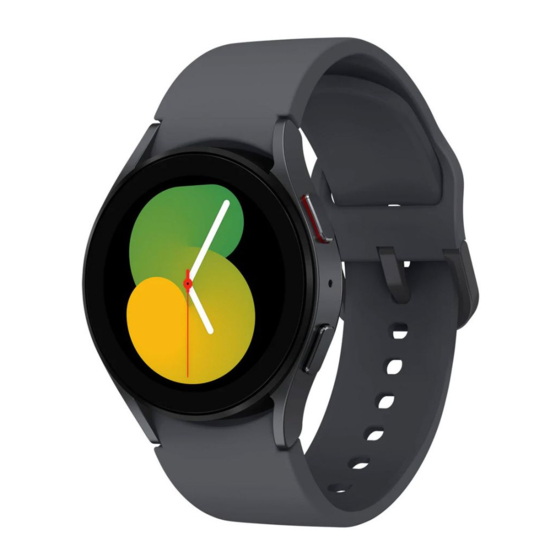
- Page 1 USER MANUAL SM-R900 SM-R905F SM-R910 SM-R915F SM-R920 SM-R925F English. 08/2022. Rev.1.0 www.samsung.com...
-
Page 2: Table Of Contents
Table of Contents Getting started 26 Controlling the screen Bezel About the Galaxy Watch5 Pro / Touchscreen Galaxy Watch5 Screen composition Device layout and functions Turning the screen on and off Watch Switching the screen Wireless charger Lock screen 12 Charging the battery 31 Watch Wireless charging Watch screen... - Page 3 Registering the emergency contacts Water Requesting an SOS Together Requesting an SOS when you are Settings hurt from a fall 73 Samsung Health Monitor Stopping SOS messages Introduction 93 Voice Recorder Precautions for measuring blood 94 Calculator pressure and ECG...
- Page 4 Table of Contents 96 Settings 112 Display 112 Samsung Health Introduction 112 Advanced features Samsung account 112 Battery Connections 112 Apps 100 Notifications 113 Manage content 100 Sounds and vibration 114 Mobile plans (SM-R905F, SM-R915F, 101 Display SM-R925F) 101 Samsung Health...
-
Page 5: Getting Started
Getting started About the Galaxy Watch5 Pro / Galaxy Watch5 The Galaxy Watch5 Pro / Galaxy Watch5 (hereafter, Watch) is a smartwatch that can analyse your exercise pattern, manage your health and allows you to use a variety of convenient apps for making phone calls and playing music. -
Page 6: Device Layout And Functions
Getting started Device layout and functions Watch ► Galaxy Watch5 Pro: Home key (Power key) / Electrical biosensor Back key / Touchscreen Electrical biosensor Atmospheric pressure sensor SM-R920: GPS antenna NFC antenna SM-R925F: LTE/GPS antenna Home key (Power key) / Electrical biosensor Microphone Touchscreen... - Page 7 Getting started Optical heart rate sensor Infrared temperature Electrical biosensors sensor Band Optical heart rate sensor Infrared temperature Electrical biosensors sensor Speaker Pressure vent Band...
- Page 8 ► Galaxy Watch5: Home key (Power key) / Electrical biosensor Touchscreen Back key / Electrical biosensor Atmospheric pressure sensor NFC antenna SM-R900, SM-R910: GPS antenna SM-R905F, SM-R915F: LTE/GPS antenna Home key (Power key) / Electrical biosensor Microphone Touchscreen Back key /...
- Page 9 Getting started Optical heart rate sensor Infrared temperature Electrical biosensors sensor Band Optical heart rate sensor Infrared temperature sensor Electrical biosensors Speaker Pressure vent Band...
- Page 10 • If you use the Watch with its glass body broken, there may be a risk of injury. Use the Watch only after it has been repaired at a Samsung Service Centre. • If dust or foreign materials enter the microphone or speaker, the Watch’s sound may become quiet or certain features may not work.
-
Page 11: Wireless Charger
Getting started Keys Function • When the Watch is off, press and hold to turn it on. • When the screen is off, press to turn on the screen. • Press and hold to start a conversation with Bixby. Refer to Using Bixby for more information. -
Page 12: Charging The Battery
Getting started Charging the battery Charge the battery before using it for the first time or when it has been unused for extended periods. Wireless charging Connect the wireless charger to the USB power adaptor. Place the Watch on the wireless charger aligning the centre of your Watch’s back side with the centre of the wireless charger. -
Page 13: Charging The Battery Using Wireless Power Sharing
Getting started Checking the charging status You can check the charging status on the screen during wireless charging. If the charging (Settings) → Display and status does not appear on the screen, on the Apps screen, tap tap the Show charging info switch to activate it. If you charge the Watch when it is turned off, press any key to check the charging status on the screen. -
Page 14: Battery Charging Tips And Precautions
Battery charging tips and precautions Use only Samsung-approved charger and cable specifically designed for your Watch. Incompatible charger and cable can cause serious injuries or damage to your device. • Connecting the charger improperly may cause serious damage to the device. Any damage caused by misuse is not covered by the warranty. - Page 15 If the battery gets hotter than usual, the charger may stop charging. • If the Watch is not charging properly, visit a Samsung Service Centre. • Avoid using a bent or damaged wireless charger cable. If the wireless charger cable is...
-
Page 16: Wearing The Watch
Getting started Wearing the Watch Connecting the band Connect the band before using your Watch. You can detach the band from the Watch and replace it with a new one. Remove the band in the reverse order of how you connected it. Be careful not to hurt your fingernail when sliding the spring bar while connecting or replacing bands. -
Page 17: Putting On The Watch
Getting started Slide the spring bar inwards and connect the band. Putting on the Watch Do not bend the band excessively. Doing so may damage the Watch. • To measure your physical condition accurately, wear the Watch firmly around your lower arm above the wrist. Refer to How to wear the Watch for accurate measurements for more information. - Page 18 Getting started ► When connecting the D-Buckle Sport Band (only for models that include this band): Open the buckle. Do not use excessive force when opening the buckle. Be careful when handling it because the buckle may be deformed and it may affect wearing the band. Open the lever, insert the band into the buckle’s hole, adjust the band, and then close the lever.
- Page 19 Getting started To open the lever after inserting the band, pull the band downwards. Place your Watch around your wrist and secure the buckle. ► When connecting other bands: Open the buckle and place your Watch around your wrist. Fit the band to your wrist, insert the pin into an adjustment hole, and then secure the buckle to close it.
-
Page 20: Band Tips And Precautions
Getting started Band tips and precautions • For accurate measurement, you have to wear the Watch so that it fits your wrist. After measuring, loosen the band to allow air to reach your skin. It is recommended to wear the Watch so that it is not too loose or tight, and that it feels comfortable in normal circumstances. -
Page 21: How To Wear The Watch For Accurate Measurements
Getting started How to wear the Watch for accurate measurements For accurate measurements, wear the Watch firmly around your lower arm above the wrist while leaving a finger’s worth of space as shown in the figure below. Electrical biosensors <Rear> Infrared temperature Electrical biosensors sensor... - Page 22 Getting started • Use the HR feature only for measuring your heart rate. The accuracy of the optical heart rate sensor may be diminished depending on measurement conditions and surroundings. • Cold ambient temperatures may affect your measurement; during winter or cold weather, keep yourself warm when checking your heart rate.
-
Page 23: Turning The Watch On And Off
Getting started Turning the Watch on and off Follow all posted warnings and directions from authorised personnel in areas where the use of wireless devices is restricted, such as aeroplanes and hospitals. Home key Back key Turning the Watch on Press and hold the Home key for a few seconds to turn on the Watch. -
Page 24: Connecting The Watch To A Smartphone
Depending on your smartphone, you can download the Galaxy Wearable app from the following places: • Samsung Android smartphones: Galaxy Store, Play Store • Other Android smartphones: Play Store • It is compatible with Android smartphones that support Google mobile services. - Page 25 Getting started • The initial setup screen may differ depending on your region. • Connection methods may vary depending on your region, model, smartphone, and software version. • The Watch is smaller than normal smartphones so the network quality may be lower, especially in areas with weak signals or poor reception.
-
Page 26: Remote Connection
Swipe the bezel anticlockwise to reject an incoming call or to activate the snooze feature for an alarm. If the bezel does not work, take it to a Samsung Service Centre without disassembling the Watch. -
Page 27: Touchscreen
Getting started Touchscreen Tapping Tapping and holding To open an app, to select a menu Tap and hold the item, or to press screen for two or an on-screen more seconds to button, tap it with access the edit your finger. mode. -
Page 28: Screen Composition
Getting started Screen composition The Watch screen is the starting point of the Home screen, which is composed of several pages. You can view tiles or open the notification panel by swiping the screen to the left or right or by using the bezel. -
Page 29: Turning The Screen On And Off
Getting started Turning the screen on and off Turning the screen on Use the following methods to turn the screen on. • Turn the screen on with the keys: Press the Home key or Back key. • Turn the screen on by raising your wrist: Raise your wrist where you wear the Watch. If the screen does not turn on after you raise up your wrist, tap (Settings) on the Apps screen, tap Display, and then tap the Raise wrist to wake switch under Screen wake-up... -
Page 30: Lock Screen
Getting started Apps screen The Apps screen displays icons for all apps installed on the Watch. The available apps may vary depending on the software version. Opening apps On the Apps screen, tap an app icon to launch the app. To launch an app from the list of recent apps, on the Apps screen, tap (Recent apps). -
Page 31: Watch
Getting started Watch Watch screen You can check the current time or view other information. When you are not on the Watch screen, press the Home key to return to the Watch screen. Changing the watch face Tap and hold the Watch screen and tap Add watch face. Use the bezel or swipe left or right on the screen, and then select a watch face. -
Page 32: Activating The Always On Display Feature
Getting started Tap Customise. Tap the screen and tap Add photo. Select a picture to apply as a watch face and tap OK → OK. To zoom in or out on the picture, double-tap the image quickly, or spread two fingers apart or pinch the picture. -
Page 33: Notifications
Getting started Notifications Notification panel Check a notification such as a new message or a missed call on the notification panel. On the Watch screen, swipe the bezel anticlockwise. Alternatively, swipe right on the screen to open the notification panel. When there are new notifications, an orange notification indicator will be visible on the Watch (Settings) →... -
Page 34: Selecting Apps For Receiving Notifications
Getting started Deleting notifications Swipe upwards on the screen while viewing a notification. Selecting apps for receiving notifications Select an app from your smartphone or Watch to receive notifications on your Watch. Launch the Galaxy Wearable app on your smartphone and tap Watch settings → Notifications. - Page 35 Getting started Checking the indicator icons Indicator icons appear at the top of the quick panel and let you know the Watch’s current status. The icons listed in the table below are most common. Icon Meaning Bluetooth connected Signal strength LTE network connected Wi-Fi connected Watch and smartphone are remotely connected...
- Page 36 Getting started Icon Meaning Activate power saving mode Open the volume menu Connect the Wi-Fi network Activate water lock mode Activate flight mode Connect the Bluetooth headset Launch the Find My Phone app Activate the location information feature Activate theatre mode Connect the mobile network (SM-R905F, SM-R915F, SM-R925F) Activate the NFC feature Activate the touch sensitivity feature...
-
Page 37: Entering Text
You can also set the input languages by tapping (Settings) on the Apps screen and tapping General → Input → Samsung Keyboard → Input languages → Manage languages. Changing the keyboard type → Input languages, select a language, and then select the... - Page 38 Getting started Additional keyboard functions Drag the icon upwards to use additional keyboard functions. Discard entered text. Change the keyboard settings. Enter text via voice input. Enter numbers and symbols. Enter text via handwriting. Enter text via the keyboard. Enter emojis. Some features may not be available depending on the language, service provider, or model.
-
Page 39: Installing And Managing Apps
Apps and features Installing and managing apps Play Store Purchase and download apps. (Play Store) on the Apps screen. Browse apps by category or tap and search for apps by keyword. • Register the Google account on your Watch to use the Play Store app. Launch the Galaxy Wearable app on your smartphone, tap Watch settings →... -
Page 40: Messages
Apps and features Setting app permissions For some apps to operate properly, they may need permission to access or use information on your Watch. To view or change app permission settings by permission category, on the Apps screen, tap (Settings) → Privacy → Permission manager. Select an item and select an app. If you do not grant permissions to apps, the basic features of the apps may not function properly. - Page 41 Apps and features Sending messages (Messages) on the Apps screen. Create a new message. Messages list Tap Recipient or tap to enter a message recipient or phone number. Or, tap select a message recipient from the contacts list. Tap the message input field and enter a message or select a text template, and then tap Recording and sending a voice message You can send a voice file after recording what you want to say.
-
Page 42: Phone
Apps and features Deleting messages (Messages) on the Apps screen. Scroll through the message list or use the bezel, and then select a contact to view your conversations. Tap and hold a message, then tap Delete. To delete multiple messages, tap and hold a message, select messages you want to delete, and then tap Delete. - Page 43 Apps and features Selecting the number to use for making calls (SM-R905F, SM-R915F, SM-R925F) You can select the number you want to use between the Watch’s number and the connected smartphone’s number when making calls. Also, if your Watch is connected to a smartphone that supports dual SIM cards, you can select a SIM card to make calls.
-
Page 44: Options During Calls
Apps and features Options during calls The following actions are available: Adjust the volume. Access additional options. Turn off the microphone so that the other party cannot hear you. End the current call. The screen’s appearance may differ depending on the model. Making a phone call with a Bluetooth headset When a Bluetooth headset is connected, you can make phone calls with it. -
Page 45: Contacts
Apps and features Missed calls If a call is missed, a missed call notification is displayed on the notification panel. On the notification panel, view missed call notifications. Alternatively, tap (Phone) on the Apps screen to view missed calls. Contacts You can make a call or send a message to a contact. -
Page 46: Samsung Pay
You can view more information, such as cards that support this feature at www.samsung.com/samsung-pay. • To make payments with Samsung Pay, the device may be required a connection to a Wi-Fi or mobile network depending on the region. • This feature may not be available depending on the service provider or model. -
Page 47: Samsung Health
Introduction Samsung Health records and manages your 24-hour activity and sleep pattern to cultivate a healthy habit. You can save and manage health-related data on the Samsung Health app of the connected smartphone. After continuously exercising for more than 10 minutes (for running, 3 minutes) while wearing the Watch, the auto detect workouts feature will be activated. -
Page 48: Steps
Tap Done. Steps The Watch counts the number of steps you have taken. Measuring your step count (Samsung Health) on the Apps screen and tap Steps. Current step total Target Target achievement graph To view additional information which is related to the steps, use the bezel or swipe upwards... - Page 49 Watch, rinse it with clean water and dry the atmospheric pressure sensor thoroughly before use. Setting the step target (Samsung Health) on the Apps screen. Tap Steps and tap Set target. Use the bezel or swipe upwards or downwards on the screen to set the target.
-
Page 50: Exercise
Apps and features Exercise Record your exercise information and check the results. • Before using this feature, pregnant women, the elderly, and young children, users suffering from conditions, such as chronic heart disease or high blood pressure, are recommended to seek the advice of a licensed medical professional. •... - Page 51 Apps and features Starting exercises (Samsung Health) on the Apps screen. Tap Exercise → Choose workout. You can start exercising directly from the Multi-workouts tile after adding workouts to Use the bezel or swipe left or right on the screen to select an exercise type you want and begin.
- Page 52 Apps and features Use the bezel or swipe upwards or downwards on the screen to view exercise information, such as your heart rate, distance, or time, on the workout screen. You can play music by swiping left on the screen.
- Page 53 Apps and features • When you select Swimming or Swimming (outdoor), water lock mode will be automatically activated and the touchscreen will be disabled. • When you select Swimming or Swimming (outdoor), the recorded value may not be accurate in following cases: –...
- Page 54 When you perform repetitive exercises such as squats or deadlifts, your Watch will count how many times you repeat the motion with beeping. (Samsung Health) on the Apps screen. Tap Exercise → Choose workout. Use the bezel or swipe left or right on the screen to select a type of repetitive exercise you want and begin.
- Page 55 Apps and features Use the bezel or swipe upwards or downwards on the screen to view exercise information, such as your heart rate, the number of repetition, or calories, on the workout screen. You can play music by swiping left on the screen. Take a minute’s rest after completing a set.
- Page 56 Apps and features Setting the exercise (Samsung Health) on the Apps screen. Tap Exercise → Choose workout. under each exercise type and set the various exercise options. • Pool length: Set the pool length. • Target: Activate the exercise target feature and set it.
- Page 57 • You can check the list of exercises which are supported by the auto detect workouts (Samsung Health) and tap Settings → feature. On the Apps screen, tap Activities to detect. If the exercises are not recognised automatically, turn on the auto detect workouts feature and tap the switch of the exercise type that uses this feature.
-
Page 58: Food
Record the calories you eat in a day and compare with your target calories to get help to manage your weight. Recording the calories (Samsung Health) on the Apps screen. Tap Food. Tap Add, tap the meal type on the top of the screen, and then select an option. -
Page 59: Sleep
Refer to How to wear the Watch for accurate measurements for more information. Measuring your sleep Sleep while wearing the Watch. The Watch will start to measure your sleep. (Samsung Health) on the Apps screen after you wake up. Tap Sleep. - Page 60 Apps and features Use the bezel or swipe upwards or downwards on the screen to view all information related to your measured sleep.
-
Page 61: Body Composition
Your snoring will be measured along with your other sleep records when you sleep while wearing the Watch. • The snore detection feature can be activated on the Samsung Health app (version 6.18 or higher) of the connected smartphone. Also, you must place the connected smartphone’s microphone so it faces you. - Page 62 Apps and features • The Watch uses the Bioelectrical Impedance Analysis (BIA) method when measuring body composition, which has more than 98% correlation compared to the Dual-energy X-ray absorptiometry (DXA) method, which is regarded as the golden standard. Be aware of following conditions before measuring your body composition: •...
- Page 63 Enter your weight and tap Confirm. • For accurate body composition measurements, you must enter your actual height, weight, and gender on the Samsung Health app profile of the connected smartphone, and also enter the actual birthday on your Samsung account.
-
Page 64: Women's Health
Also, do not use the information provided from the Samsung Health app or take medical actions without consulting with a qualified medical expert. • Activate the women’s health feature in the Samsung Health app on your smartphone to use this feature on your Watch. - Page 65 Apps and features (Samsung Health) on the Apps screen. Tap Women’s health. Tap Enter period. Tap the input field, use the bezel or swipe upwards or downwards on the screen to set your period’s start date. Tap Save. Use the bezel or swipe upwards or downwards on the screen to view all information related to your women’s health.
-
Page 66: Heart Rate
• If the sensor is not working, check the Watch’s position on your wrist and make sure nothing is obstructing the sensor. If the sensor continues to have the same problem, visit a Samsung Service Centre. Measuring your heart rate manually (Samsung Health) on the Apps screen. Tap Heart rate. - Page 67 To view additional information which is related to the heart rate, use the bezel or swipe upwards or downwards on the screen. Changing the heart rate measurement settings (Samsung Health) on the Apps screen. Tap Settings. Tap Heart rate and select the measurement settings under Measurement.
-
Page 68: Stress
• This feature may not be available depending on the region. Measuring your stress level manually (Samsung Health) on the Apps screen. Tap Stress. Tap Measure to begin measuring your stress level. Check the measured stress level on the screen. -
Page 69: Blood Oxygen
Apps and features Alleviating stress with the breathing exercise (Samsung Health) on the Apps screen. Tap Stress and move to the breathe screen by using the bezel or swiping upwards on the screen. to change the number to breathe. To change the breathe duration, tap Breathe duration. - Page 70 Apps and features Tap Measure to begin measuring your blood oxygen level. Correct measurement posture • For accurate measurements, wear the Watch firmly around your lower arm above the wrist while leaving two fingers’ worth of space as shown in the figure below. Also, place your elbow on the table while positioning your wrist close to your heart.
-
Page 71: Water
Apps and features Measuring your blood oxygen level while sleeping Set to measure your blood oxygen level continuously while sleeping. (Samsung Health) on the Apps screen. Tap Settings. Tap the Blood oxygen during sleep switch to activate it. Your sleeping blood oxygen level will be measured along with your other sleep records when you sleep while wearing the Watch. -
Page 72: Together
Together Compare your step count records with your friends who also use the together feature of the Samsung Health app. When you start step challenges with your friends, you can view the challenge status on your Watch. (Samsung Health) on the Apps screen. -
Page 73: Samsung Health Monitor
You can conveniently measure your blood pressure or ECG whenever you want to check them with the Samsung Health Monitor app of your Watch that includes both the optical heart rate sensor and electrical biosensor. You can check the measurement history using the Samsung Health Monitor app on your smartphone since your Watch and smartphone have been synced automatically. - Page 74 Apps and features • Before measuring your blood pressure or ECG, prepare a comfortable chair and a table to rest your arm and smartphone on. • Seat yourself in the comfortable chair you prepared with your back supported. Do not sit with your legs crossed, and keep both of your feet on the ground. •...
- Page 75 • If you are pregnant, your results may not be accurate when you measure your blood pressure. • Do not measure your blood pressure with the Samsung Health Monitor app if you have any of the following conditions: – Arrhythmia –...
-
Page 76: Starting To Measure The Blood Pressure
• If you are pregnant, the results may not be accurate when you take your ECG. • Do not take your ECG with the Samsung Health Monitor app if you have arrhythmia, unless it is because of atrial fibrillation. - Page 77 (Samsung Health Monitor) on the Apps screen. Tap Blood pressure → Open phone app. The Samsung Health Monitor app will be launched on your smartphone. Tap Accept. Enter your profile information, such as your name, gender, and birthday, and tap Continue.
-
Page 78: Starting To Measuring The Ecg
Starting to measuring the ECG Presetting before measuring the ECG Enter your profile on the Samsung Health Monitor app before measuring your ECG. If you do not enter a profile, you cannot measure your ECG. (Samsung Health Monitor) on the Apps screen. - Page 79 Manage your health by checking your heart status conveniently in advance through the ECG measurement results. (Samsung Health Monitor) on the Apps screen. Tap ECG → OK and place a finger lightly on the electrical biosensor. Do not leave any space between your wrist and your Watch.
- Page 80 Apps and features Checking the results Check the results and ECG wave on the Watch and the connected smartphone’s Samsung Health Monitor app screen after taking your ECG. The ECG wave shows heart rate rhythm and electric activities of your heart, and it is divided into several parts. Share the ECG graph and results with your physician to get an accurate diagnosis through a more thorough checkup when you find an abnormal results from your ECG wave and readings.
-
Page 81: Gps
GPS. Activate the smartphone’s location feature to use the GPS sensor. • The GPS antenna in your Watch will be used when using the Samsung Health feature and the health platform apps, even though your Watch is connected to your smartphone. -
Page 82: Media Controller
Apps and features Media Controller Introduction Control the media app installed on your Watch or the connected smartphone to play or pause music and video. To launch this app automatically from your Watch when you play music or videos on (Settings) →... -
Page 83: Reminder
Apps and features Reminder Register to-do items as reminders and receive notifications according to the condition you set. • To receive reminder notifications in a specific place, you have to connect your Watch to your smartphone via Bluetooth. However, the feature for setting you to receive reminder notifications in a specific place is only available on your smartphone. -
Page 84: Calendar
You can talk to Bixby. Bixby will launch a function you request or show the information you want. Visit www.samsung.com/bixby for more information. • Make sure the Watch’s microphone is not obstructed when you are speaking into it. • Bixby is only available in some languages, and certain features may not be available depending on your region. -
Page 85: Weather
Apps and features If Bixby asks you a question during a conversation, while pressing and holding the Home key, answer Bixby. Or, tap and answer Bixby. Tips for better voice recognition • Speak clearly. • Speak in quiet places. • Do not use offensive or slang words. •... -
Page 86: Alarm
Apps and features Alarm Set and manage the Watch’s alarms and the smartphone’s alarms individually. When your Watch is connected to your smartphone via Bluetooth, you can check all alarm lists on your smartphone from the Watch. Setting alarms (Alarm) on the Apps screen. Tap Add on watch to set alarms that only go off on your Watch. -
Page 87: Timer
Apps and features Timer Setting a timer (Timer) on the Apps screen. Tap the input field, use the bezel or swipe upwards or downwards on the screen to set the duration, and tap If you select a preset, the timer will start right away. You can also view more presets by using the bezel or swiping upwards or downwards on the screen. -
Page 88: Gallery
Apps and features Gallery Importing and exporting images Importing images from your smartphone Launch the Galaxy Wearable app on your smartphone. Tap Watch settings → Manage content. Tap Add images. Select a category, select files, and then tap Done. To sync images on your smartphone with your Watch, tap the Auto sync switch under Gallery to activate it. -
Page 89: Deleting Images
Apps and features Zooming in or out While viewing an image, double-tap the image quickly, spread your two fingers apart, or pinch on an image to zoom in or out. When an image is magnified, you can view the rest of the image by scrolling around the screen. -
Page 90: Find My Watch
Apps and features Find My Watch If you misplace your Watch, the Galaxy Wearable app on your connected smartphone or the SmartThings Find feature of the SmartThings app installed on your connected smartphone can help you find it. The screen may be switched automatically to find your Watch with the SmartThings Find feature if the connected smartphone supports the SmartThings Find feature. -
Page 91: Sending An Sos
Apps and features Sending an SOS Introduction In an emergency, you can send an SOS message that includes your location information to previously registered contacts, or you can set it up your Watch to send an SOS message automatically when you are hurt from a fall and your Watch recognises it. Also, you can set the Watch to automatically make an emergency call to a previously registered contact. -
Page 92: Requesting An Sos When You Are Hurt From A Fall
Apps and features Sending an SOS request In an emergency, quickly press the Watch’s Home key several times. The SOS message will be sent and the emergency call will be made to the previously registered contacts. icon will appear on the Watch screen while sending an SOS message and you can check the SOS request result on the notification panel after the SOS message has been sent. -
Page 93: Stopping Sos Messages
Apps and features Stopping SOS messages When the icon appears on the Watch screen, check your location information sharing status on the notification panel. To stop sharing your location information, tap the screen and tap Stop sharing → If you do not stop sending SOS messages, additional messages that include your location information will be continuously sent to the previously registered contacts every 15 minutes for 24 hours after the first SOS message is sent. -
Page 94: Calculator
Apps and features Changing the recording mode (Voice Recorder) on the Apps screen. Select a mode you want. • : This is the normal recording mode. • : The Watch records your voice for up to 10 minutes, converts it to text, and then saves it. -
Page 95: Buds Controller
These goals have the power to end poverty, fight inequality, and stop climate change. With Samsung Global Goals, learn more about the global goals and join the movement for a better future. -
Page 96: Google Apps
Some features in Settings may not be available depending on the region, service provider, or model. Samsung account Register the Samsung account on your connected smartphone or check the previously registered Samsung account. On the Settings screen, tap Samsung account. - Page 97 Apps and features Precautions for using Bluetooth • Samsung is not responsible for the loss, interception, or misuse of data sent or received via Bluetooth. • Always ensure that you share and receive data with devices that are trusted and properly secured.
- Page 98 Apps and features Touch the NFC antenna area of the Watch to the NFC card reader. To set the default app, on the Settings screen, tap Connections → NFC → Payment and select an app. The payment services list may not include all available payment apps. NFC antenna Disconnection alerts Set to vibrate or make an alarm when the Bluetooth connection with your smartphone is...
- Page 99 Apps and features Mobile networks (SM-R905F, SM-R915F, SM-R925F) Customise the settings to control mobile networks. On the Settings screen, tap Connections → Mobile networks and select a mobile network connection option. • Auto: Set to automatically use the Watch’s mobile network when the Bluetooth connection with your smartphone is disconnected.
-
Page 100: Notifications
Apps and features Notifications Change the notification settings. On the Settings screen, tap Notifications. • Show phone notifications on watch: Set the conditions for sending smartphone notifications to your Watch while you are wearing it. • Mute notifications on phone: Set to mute the smartphone when it receives notifications that will also be sent to your Watch while you are wearing it. -
Page 101: Display
Samsung Health You can set the various setting options related to exercise and fitness. On the Settings screen, tap Samsung Health. • Measurement: Set how to measure your heart rate and stress, and turn the additional features that can be measured during sleep on or off. -
Page 102: Advanced Features
Apps and features Advanced features Activate the advanced features. On the Settings screen, tap Advanced features. • Water lock: Activate water lock mode before entering the water. The touchscreen feature will be deactivated. • Bedtime mode: Activate bedtime mode to reduce eye strain before sleeping and prevent your sleep from being disturbed. -
Page 103: Apps
• Permissions: View the permission list for all apps, including the system apps, and change their permission settings. • Samsung app updates: Check for updates for some preinstalled Samsung apps. General Customise your Watch’s general settings or reset the Watch. -
Page 104: Accessibility
Apps and features Accessibility Configure various settings to improve accessibility to the Watch. On the Settings screen, tap Accessibility. • Functions you’re using: Check the accessibility features you are using. This feature appears only when using the accessibility feature. • TalkBack: Activate TalkBack, which provides voice feedback. To view help information to learn how to use this feature, tap Settings →... -
Page 105: Location
Some features may not be available depending on the region, service provider, or model. Accounts and backup You can use various features of the Watch after registering your Samsung or Google account on your connected smartphone. On the Settings screen, tap Accounts and backup. -
Page 106: Google
• Status info: View the information, such as the Wi-Fi MAC address, Bluetooth address, and serial number. • Legal info: View legal information related to the Watch. You can also send the Watch’s diagnostic information to Samsung. • Software info: View the software version and security status. • Battery info: View the battery information. -
Page 107: Galaxy Wearable App
Galaxy Wearable app Introduction To connect your Watch to a smartphone, you must install the Galaxy Wearable app on your smartphone. You can check the Watch’s remaining battery and configure the settings with the Galaxy Wearable app. Launch the Galaxy Wearable app on your smartphone. To search for settings by entering keywords, tap . -
Page 108: Watch Faces
To disconnect a device from your smartphone, select a device and tap Remove. • Contact us: Samsung Members offers support services to customers, such as device problem diagnosis, and lets users submit questions and error reports. You can also share information with others in the Galaxy users’... -
Page 109: Apps Screen
The watch face will be changed into the My style one. Making AR emoji watch faces Change your watch face into your own AR emoji. This feature is only available on Samsung smartphones that support the AR emoji features. On the Galaxy Wearable screen of the smartphone, tap Watch faces. -
Page 110: Tiles
Galaxy Wearable app Tiles Customise the tiles on the Watch. You can also rearrange tiles. On the Galaxy Wearable screen of the smartphone, tap Tiles. Adding or removing tiles of the tile to add under Add tiles or tap on the tiles you want to delete, and then tap Save. -
Page 111: Watch Settings
Samsung account Register the Samsung account on your connected smartphone or check the previously registered Samsung account. On the Galaxy Wearable screen of the smartphone, tap Watch settings → Samsung account. Notifications Change the notification settings. On the Galaxy Wearable screen of the smartphone, tap Watch settings → Notifications. -
Page 112: Display
Apps and features for more information. Samsung Health You can set the various setting options related to exercise and fitness. On the Galaxy Wearable screen of the smartphone, tap Watch settings → Samsung Health. Refer to Samsung Health in Apps and features for more information. -
Page 113: Manage Content
– Playlists to sync: Select a playlist to sync with the Watch automatically. This feature may appear only when the Samsung Music app is installed on your smartphone and when you turn on the Auto sync feature. -
Page 114: Mobile Plans (Sm-R905F, Sm-R915F, Sm-R925F)
Galaxy Wearable app Mobile plans (SM-R905F, SM-R915F, SM-R925F) Use various other services through the mobile network after activating it on the Watch. On the Galaxy Wearable screen of the smartphone, tap Watch settings → Mobile plans. General Customise your Watch’s general settings or reset the Watch. On the Galaxy Wearable screen of the smartphone, tap Watch settings →... -
Page 115: Accounts And Backup
On the Galaxy Wearable screen of the smartphone, tap Watch settings → Accounts and backup. • Regularly back up your data to a safe location, such as Samsung Cloud or a computer, so that you can restore it if the data is corrupted or lost due to an unintended factory data reset. - Page 116 Galaxy Wearable app Restoring data from Samsung Cloud You can restore your backup data from Samsung Cloud to your Watch. On the Galaxy Wearable screen of the smartphone, tap Watch settings → Accounts and backup. Tap Restore data under Samsung Cloud and select the Watch you want.
-
Page 117: Watch Software Update
Galaxy Wearable app Tick items you want to restore and tap Restore. Tap Done. Watch software update Update your Watch’s software via the firmware over-the-air (FOTA) service. You can also change the update settings. On the Galaxy Wearable screen of the smartphone, tap Watch settings → Watch software update. -
Page 118: Tips And User Manual
Galaxy Wearable app Tips and user manual View the Watch’s basic operations and user manual. You can also use various other services through the mobile network after activating it on the Watch. On the Galaxy Wearable screen of the smartphone, tap Tips and user manual. Store Download the apps and watch faces to be used on your Watch. -
Page 119: Usage Notices
Apps related to the content may not work properly depending on the device’s specifications and the environment that it is used in. • Samsung is not liable for performance issues caused by apps supplied by providers other than Samsung. - Page 120 These actions are violations of your Samsung licence agreement and will void your warranty. • Some functions may not work as described in this manual depending on the maker and model of the smartphone you connect to your Watch.
-
Page 121: Notes On Package Contents And Accessories
• Appearances and specifications are subject to change without prior notice. • You can purchase additional accessories from your local Samsung retailer. Make sure they are compatible with the Watch before purchase. • Except for the Watch, some supplied items and accessories may not have the same water- and dust-resistance certification. -
Page 122: Maintaining Water And Dust Resistance
Usage notices Maintaining water and dust resistance Your device supports water- and dust-resistance. Follow these tips carefully to maintain the water- and dust-resistance of the device. Failure to follow the tips below may result in damage to your device and will not guarantee its performance, including its water-resistance. •... - Page 123 Usage notices • Do not disassemble your device. The water- and dust-resistant features of the device can be damaged. • Do not expose your device to a dramatic change in air temperature or water temperature. • Do not dry your device with a heating machine like a hair drier. •...
-
Page 124: Precautions For Overheating
Usage notices Precautions for overheating If you feel discomfort due to overheating while using the device, stop using it immediately and remove it from your wrist. To avoid problems, such as device malfunction, skin discomfort or damage, and battery draining, a warning will appear on the device if it reaches a specific temperature. When the initial warning appears, device functions will be disabled until the device cools down to a specific temperature. -
Page 125: Use Caution If You Are Allergic To Any Materials On The Watch
Use caution if you are allergic to any materials on the Watch • Samsung has tested the noxious materials found on the Watch through the internal and external certificate authorities, including the test for all materials which contact with skin, skin toxicity test, and the Watch-wearing test. -
Page 126: Appendix
Before contacting a Samsung Service Centre, please attempt the following solutions. Some situations may not apply to your Watch. You can also use Samsung Members to solve any problems you might encounter while using your device. The quick panel displays network or service error messages •... - Page 127 Appendix Your Watch freezes or has errors Try the following solutions. If the problem is still not resolved, contact a Samsung Service Centre. Restarting the Watch If your Watch freezes or hangs, you may need to close apps or turn off the Watch and turn it on again.
- Page 128 Appendix A Bluetooth connection is not established or your Watch and the smartphone are disconnected • Ensure that the Bluetooth feature on both devices is activated. • Ensure there are no obstacles, such as walls or electrical equipment, between the devices. •...
- Page 129 • Ensure that you connect the Watch to the wireless charger properly. • Visit a Samsung Service Centre and have the battery replaced. The battery depletes faster than when first purchased • When you expose the Watch or the battery to very cold or very hot temperatures, the useful charge may be reduced.
-
Page 130: Removing The Battery
Data stored in the Watch has been lost Always make backup copies of all important data stored in the Watch. Otherwise, you cannot restore data if it is corrupted or lost. Samsung is not responsible for the loss of data stored in the Watch. - Page 131 No part of this manual may be reproduced, distributed, translated, or transmitted in any form or by any means, electronic or mechanical, including photocopying, recording, or storing in any information storage and retrieval system. Trademarks • SAMSUNG and the SAMSUNG logo are registered trademarks of Samsung Electronics Co., Ltd. ® • Bluetooth is a registered trademark of Bluetooth SIG, Inc.