Table of Contents
Advertisement
Advertisement
Table of Contents

Related Manuals for Pioneer VREC-150MD


Summary of Contents for Pioneer VREC-150MD
- Page 1 VREC-150MD DASH CAMERA Owner’s Manual...
-
Page 2: Table Of Contents
Contents Thank you for buying this Pioneer product. Please read through these instructions so you will know how to operate your model properly. After you have finished reading the instructions, keep this document in a safe place for future reference. -
Page 3: Precaution
Precaution Certain country and state laws may prohibit or restrict the placement and use of this product in your vehicle. Please comply with all applicable laws and regulations regarding the use, installation and operation of this product. It is the user ’s responsibility in compliance with all applicable laws and ordinance. -
Page 4: Safety Precautions
• It is the user’s responsibility in compliance with all applicable laws and ordinance. • Pioneer is not liable for any damage, due to installation other than described, or use of the product. Pioneer does take responsibility whatsoever for any damage or losses incurred as a result. - Page 5 Screen display is disabled for this product while the vehicle is moving. • It is the user’s responsibility to act upon the image displayed from the rear camera. Pioneer is not liable and does not take responsibility whatsoever for any damage or losses incurred as a result of the rear camera image.
- Page 6 they may damage internal parts of this product or they may work loose and the product may become detached. • Do not install this product where it may (i) obstruct the driver’s vision, (ii) impair the performance of any of the vehicle’s operating systems or safety features, including airbags, hazard lamp buttons or (iii) impair the driver’s ability to safely operate the vehicle.
-
Page 7: Disclaimer
Disclaimer • Given the large number of variables and conditions that can be involved in an accident, Pioneer cannot guarantee that every accident or occurrence will trigger the recording feature in this device. • This product features may not operate properly due to the effects of settings, how this product is installed, the condition of the microSD card, and driving conditions (including the road conditions). -
Page 8: How To Read This Manual
How to read this Manual Notation Meaning These symbols are used to draw your attention to items you should be aware of when using this product and items you should be aware of to maintain its performance. Notes provide useful tips and extra information about product features. Note /Notes Square brackets are used to indicate selectable items displayed on the [○○]... -
Page 9: Usage Precautions
• The internal battery is a consumable part. The operating time will slowly decrease as the battery is repeatedly charged. Contact Pioneer support if you feel that the operating time has become too short. • Do not touch the lens with your hands. Wipe the lens off with a soft cloth if you touch it. - Page 10 • If data loss or corruption occurs on the microSD card for any reason, it is usually not possible to recover the data. Pioneer accepts no liability for damages, costs or expenses arising from data loss or corruption.
-
Page 11: Check The Accessories
Check the Accessories Main Unit×1 Mounting USB Cigarette Lighter Attachments ×2 Power Cable 5 m×1 Quick Start Guide×1 Warranty×1 Rear Camera PC - USB mini USB Cable 6 m×1 1 m×1 Note • All images in this document are for illustrative purpose only and subject to change. −... -
Page 12: Before Installing The Product
Always install this product in the specified installation position to ensure a safe field of view while driving and to achieve full performance from the product. • Pioneer is not liable for any damage, due to installation or use of the product. Installation Tips Before Installing and Securing the Product •... -
Page 13: Installation
Installation Specified Installation Position over Rear View Mirror When installing this product to the rear-view mirror, install in a vehicle and in a position that satisfies all of the following conditions. • A position where this entire product is within 20% of the top edge of the height of the front windscreen (range within 20% of the actual length, excluding parts overlapping weather strips, mouldings, etc. -
Page 14: Install This Product
Install this Product 1 Install this product. 1 Using the rubber mounting straps, attach the Dash Camera over the vehicles rear view mirror and adjust the lens to the desired angle. 2 Insert the USB Cigarette Charger into the vehicle cigarette lighter socket. 3 Insert the Mini USB plug of the power cable into the USB port of the Dash Camera. - Page 15 Reverse light +12 В Rear Camera 2 Rear Camera Connection CAUTION • These illustrations are for illustration purposes only. The actual connection method is determined by the design of your vehicle. • Install the rear camera following the instructions above. •...
-
Page 16: Part Names
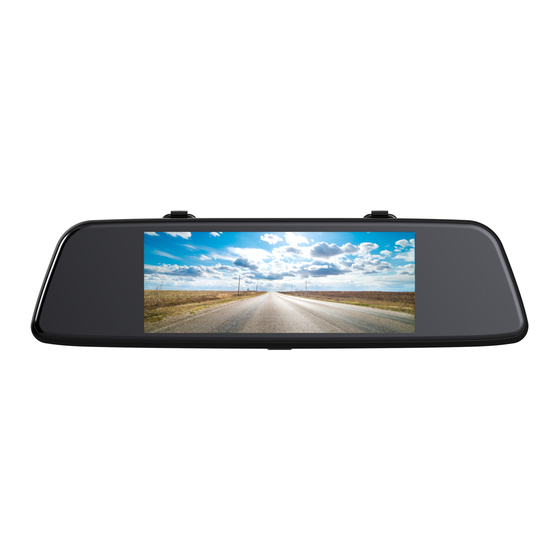
Part Names 6.7" 1 LCD touchscreen 7 Microphone Displaying images and making device 8 Power Button settings. Long press and hold a few seconds to turn on / off the Dash Camera. 2 Mirror Zone Mirror with rounded edges. Short press to enable / disable the screen saver. -
Page 17: Function Buttons
Function Buttons The functions of the function buttons are indicated by the icons displayed on the LCD touchscreen. The functions of the buttons will depend on the displayed screen. During MENU screen display Picture-in-picture mode After connecting the Rear Camera to the Dash Camera, the picture from it will be displayed in main screen. - Page 18 Front view camera mode In this mode, the rear-view camera is not displayed on the screen of the Dash Camera. Rear view camera mode In this mode, the screen displays an image only from the rear-view camera. At this point, recording from the front camera continues.
-
Page 19: Inserting And Ejecting The Microsd Card
Inserting and Ejecting the microSD™ Card Turn off the power to this product when inserting and removing the microSD card. → “Manually Turning the Power On and Off ” Inserting the microSD Card Hold the top edge of the microSD Card, position the microSD Card so that the label is facing the mirror side of the product, and slowly insert it into the microSD Card slot until it clicks. -
Page 20: Backing Up Recorded Files
Backing Up Recorded Files When the free space of the file storage areas is low, files are deleted from the oldest file. We recommend that you back up any important files you want to keep with the following procedure. Note Prepare a spare microSD card in advance. -
Page 21: Using This Product
Using this product Before using this product, first stop the vehicle in a safe location and apply the handbrake. This product Power This product starts when the vehicle’s engine is turned on (ACC ON), and it automatically starts → recording. (Video recording) “Using this product”... -
Page 22: Video Recording
Video Recording Recording automatically starts when this product is started. The recorded video is saved to the microSD card as one file of the set increment of time (default: 3 minutes), and when the microSD card runs out of free space, the files are overwritten starting from the oldest file. Notes •... -
Page 23: Event Recording
WDR (Wide Dynamic Range): Off / On This technology automatically adapts the image in situations where there is significant contrast between light and dark areas. Default setting: On Time Stamp: Off / On When this function is enabled, the system adds a date stamp in the video or photo that the Dash Camera records and saves. - Page 24 Photo Mode Make sure the Dash Camera is in photo mode. 1. Photo Settings To change the photo options, click the Photo Settings button. 2. Start To take a photo, press the Start button. 3. Video Mode The Video mode button is used to switch from photo mode to video mode. 4.
- Page 25 Photo Settings Switch to the photo settings mode and use the available functions. Photo Pixel Capture Burst Photo Quality Mode Sharpness White Color Balance Exposure Date & Time Quick Preview Pixels: VGA / 1M / 2M / 3M / 5M / 8M / 10M Default setting: 10M Capture Mode: Snap / 2 sec delay / 5 sec delay / 10 sec delay Shooting is performed at specified intervals.
- Page 26 Play / Protect / Unprotect / Delete Files Put the Dash Camera into playback mode, if there is a lot of data on the microSD memory card, the download may take at least one minute. 1. Selecting Objects Press the Select button to highlight folders or files to lock / unlock / delete. If you want to deselect the selection, press the Select button again.
- Page 27 Photo files: Protected files: 3. Home Screen To return to the home screen, press the Home button. 4. Return Press the Return button to return to the previous item. 5. Folder Press the Folder button to quickly jump to albums. Note: •...
- Page 28 Playback Make sure there are recorded files in the album. Click on the desired thumbnail to enter directly into the video / photo playback mode. 1. If the file you want is a video file, click the Play button to view its contents. 2.
- Page 29 Protecting / Unprotecting Files 1. Make sure the Dash Camera is in the video / photo files playback mode. To protect / remove protection from the current file, press the Protect button. The protect / release function is not available during video file playback. 2.
- Page 30 Deleting Files 1. Switch to the album display mode. To delete all files, press the Select button, then the Delete button. If the files are locked, unlock them before deleting them. Delete Files? Cancel Ок 2. Switch to album mode. To delete unneeded files, press the Select button and highlight the files, then press the Delete button to delete them.
-
Page 31: This Product Settings
This Product Settings Before using this product, first stop the vehicle in a safe location and apply the handbrake. These settings configure this product. You can reset the settings to the default settings. You can also format the microSD card and check this product version information. Note: •... - Page 32 3 Rear Camera 1. To view the rear camera image, press the Rear camera button. To return to the previous view, click the Return button. 4 Files 1. To view the recorded video or view photos, click the Play button (you need to click on the file itself, then the Play icon will be displayed in the middle).
- Page 33 Monitor Display: Always ON / 10 sec / 30 sec / 60 sec Function to turn off the LCD after a specified time of inactivity. To turn the display back on, press the power button or tap the screen. Default setting: 10 sec Auto Power Off: Off / 1 min / 3 min / 5 min Turns off the Dash Camera after a specified time of inactivity.
-
Page 34: Configurable Features Recording Setting
Configurable Features Recording Setting Setting Details Default Settings Sets the resolution quality of video recording. [FHD Video Resolution FHD 1920×1080 p 1920×1080 p or HD 1280×720 p] Duel-lens Recording Record data using both the front and rear camera (2-channel Recording) [ON or OFF] Video Clip Length Sets the recording time for one video recording video... -
Page 35: Configurable Features: System Setting
Configurable Features System Setting Setting Details Default Settings Turn off the LCD monitor display after a specified time Monitor Display 10 sec of inactivity. [Off / 10 sec / 30 sec / 60 sec] Powers off after a specified time of inactivity. Auto Power Off [Off / 1 min / 3 mins / 5 mins] Anti-flicker... -
Page 36: Guide To Recording Time
Guide to Recording Time The following table provides estimates of the video recording times possible with different SD card capacities. The actual values will depend on various factors, such as the microSD card being used, subject being recorded, and recording conditions. As a percentage of memory card capacity, the video recording time and photos will be 60%, and the event recording time will be 40%. -
Page 37: Troubleshooting
Troubleshooting Check the following information before sending the product in for repairs. Symptom Cause Action An error occurred during the The microcomputer in this Press the reset button. →“Part display and operation of this product is malfunctioning. Names” product. A file that should have been If there is insufficient space in We recommend that you back saved cannot be found. - Page 38 It is normal to generate some If smoke or odor appears, turn operation. heat at normal temperature. off the unit immediately and contact an authorised Pioneer service center for assistance. Traffic light signals are not LED traffic lights may cause The Dash Camera will record recorded.
-
Page 39: Specifications
Specifications Recording Medium microSDHC / microSDXC Card, Class 10 (8 GB to 64 GB) Imaging Element Approx. 2 million pixels (Built-in high sensitivity CMOS sensor) Recording Angles Main unit: 118° horizontal, 60° vertical, 150° diagonal 2nd camera: 105° horizontal, 60° vertical, 120° diagonal F-Number Main unit: F2.0 2nd camera: F2.5... -
Page 40: Trademarks & Copyrights
Trademarks & Copyrights • SD, microSD, microSDHC and microSDXC Logo are trademarks of SD-3LLC. • EU Conformity marking. • UK Conformity marking. − 40 −... - Page 41 Visit www.pioneer-car.eu/uk/ (or www.pioneer-car.eu/eur/) to register your product. PIONEER CORPORATION 28-8, Honkomagome 2-Chome, Bunkyo-ku, Tokyo 113-0021 Japan PIONEER EUROPE NV Haven 1087, Keetberglaan 1, 9120 Melsele, Belgium/Belgique Tel: +32 (0)3 570 05 11 Fax: +32 (0)3 570 08 86...