Table of Contents

Related Manuals for Siemens WM14VM69GR


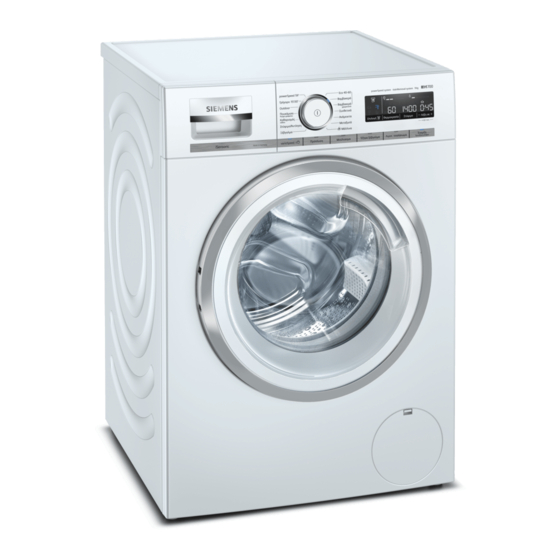
Summary of Contents for Siemens WM14VM69GR
- Page 1 Washing machine WM14VM69GR User manual and installation instructions Register your product on My Siemens and discover exclusive services and offers. siemens-home.bsh-group.com/welcome The future moving in. Siemens Home Appliances...
-
Page 2: Table Of Contents
Table of contents 1 Safety .......... 4 10 Before using for the first time........ 33 1.1 General information.... 4 10.1 Starting an empty washing 1.2 Intended use....... 4 cycle ........ 33 1.3 Restriction on user group... 4 1.4 Safe installation ...... 5 11 Laundry........ 34 1.5 Safe use ........ 7 11.1 Preparing the laundry ..... 34 1.6 Safe cleaning and mainten-... - Page 3 14 Childproof lock...... 41 14.1 Activating the childproof lock ......... 41 14.2 Deactivating the childproof lock ......... 41 15 Basic settings...... 43 15.1 Overview of basic settings .. 43 15.2 Changing the basic set- tings........ 44 16 Cleaning and servicing .... 44 16.1 Tips on appliance care... 44 16.2 Cleaning the drum.... 44 16.3 Cleaning the detergent...
-
Page 4: Safety
en Safety 1 Safety Observe the following safety instructions. 1.1 General information ¡ Read this instruction manual carefully. ¡ Keep the instruction manual and the product information safe for future reference or for the next owner. ¡ Do not connect the appliance if it has been damaged in transit. 1.2 Intended use Only use this appliance: ¡... -
Page 5: Safe Installation
Safety en 1.4 Safe installation Take note of the safety instructions when installing the appliance. WARNING ‒ Risk of electric shock! Improper installation is dangerous. ▶ Connect and operate the appliance only in accordance with the specifications on the rating plate. ▶ Connect the appliance to a power supply with alternating cur- rent only via a properly installed socket with earthing. - Page 6 en Safety WARNING ‒ Risk of injury! The high weight of the appliance may result in injury when lifted. ▶ Do not lift the appliance on your own. If this appliance is not correctly installed in a washer-dryer stack, the installed appliance may fall. ▶...
-
Page 7: Safe Use
Safety en ▶ Wear protective gloves when installing and transporting the ap- pliance. 1.5 Safe use WARNING ‒ Risk of electric shock! If the appliance or the power cord is damaged, this is dangerous. ▶ Never operate a damaged appliance. ▶ Never pull on the power cord to unplug the appliance. Always unplug the appliance at the mains. - Page 8 en Safety WARNING ‒ Risk of poisoning! Detergents and care products may result in poisoning if con- sumed. ▶ If accidentally swallowed, seek medical advice. ▶ Keep detergents and care products out of the reach of children. WARNING ‒ Risk of explosion! Laundry that has been pretreated with cleaning agents that con- tain solvents may cause an explosion in the appliance.
-
Page 9: Safe Cleaning And Maintenance
Safety en CAUTION ‒ Risk of chemical burns! If the detergent drawer is opened, detergent and care products may spray out from the appliance. Contact with eyes or skin may cause irritation. ▶ Rinse eyes and/or skin thoroughly with clean water if they come into contact with detergents or care products. -
Page 10: Preventing Material Damage
en Preventing material damage Make sure that the length of the ▶ Preventing material damage 2 Preventing material thread on the connection to the water tap is at least 10 mm. damage If the water pressure is too high or too low, the appliance may not be Follow these instructions to avoid ma- Preventing material damage able to operate properly. -
Page 11: Environmental Protection And Saving Energy
Environmental protection and saving energy en Remove all detergent residue, Reduce the washing temperature for ▶ spray residue or other residues im- lightly and normally soiled laundry. mediately if they come into contact a At low temperatures, the appliance with the appliance. consumes less energy. -
Page 12: Installation And Connection
en Installation and connection Remove any packaging and pro- Installation and connection 4 Installation and con- tective covers completely from the appliance. nection For the environmentally friendly Installation and connection disposal of the packaging materi- 4.1 Unpacking the appliance als, observe the information on the topic of Note: Please read the information in → "Disposing of packaging",... -
Page 13: Contents Of Package
Installation and connection en 4.2 Contents of package After unpacking all parts, check for any damage in transit and completeness of the delivery. Washing machine WARNING Risk of electric shock! Accompanying documents The appliance contains live parts. Touching live parts is dangerous. Water inlet hose Do not operate the appliance ▶... -
Page 14: Removing The Transit Bolts
en Installation and connection ATTENTION! Installation loca- Requirements If the appliance is installed in areas tion exposed to frost or outdoors, frozen On a wall Do not trap the residual water may damage the appli- hoses between ance and frozen hoses may crack or the wall and the split. -
Page 15: Connecting The Appliance
Installation and connection en Unscrew and remove all four Put on the four cover caps. screws for the transit bolts with a WAF 13 wrench. Press down on the four cover caps. Pull the power cord out of the holder. 4.5 Connecting the appliance Remove the four sleeves. -
Page 16: Aligning The Appliance
en Installation and connection Connect the water inlet hose. Note: Observe the draining heights. The maximum draining height is 100 cm. Drainage into a Secure the con- siphon nection point with a (24–40 mm) hose clamp. Drainage into a Fix and secure washbasin the water outlet Connect the water inlet hose to a using an elbow. -
Page 17: Connecting The Appliance To The Electricity Supply
Installation and connection en Loosen the lock nuts using a WAF Screw the lock nuts tightly against 17 wrench by turning it in a clock- the housing using a WAF 17 wise direction. wrench. In doing so, hold the foot tight and To align the appliance, turn the ap- do not adjust its height. - Page 18 en Familiarising yourself with your appliance Familiarising yourself with your appliance 5 Familiarising yourself with your appliance Familiarising yourself with your appliance 5.1 Appliance You can find an overview of the parts of your appliance here. On certain models, specific details such as the colour and shape may differ from those pictured.
-
Page 19: Detergent Drawer
Familiarising yourself with your appliance en 5.2 Detergent drawer Measuring aid for liquid deter- gent → "Using a measuring aid for liquid detergent", Page 39 Compartment II: ¡ Detergent for main wash ¡ Water softener ¡ Bleach ¡ Stain remover Compartment ¡ Fabric softener ¡... -
Page 20: Display
en Display Display 6 Display The display shows the current settings, options or relevant information. Display Display Designation Description 0:40 Programme dura- Approximate expected programme dura- tion/programme tion or programme time remaining. time remaining "Ready in" time The programme end has been set and the remaining number of hours is displayed. - Page 21 Display en Display Designation Description End of pro- Programme status gramme Childproof lock ¡ lights up: The childproof lock is activ- ated. ¡ flashes: The childproof lock is activated and the appliance has been operated. → "Deactivating the childproof lock", Page 41 ...
-
Page 22: Buttons
en Buttons Buttons 7 Buttons The selection of programme settings depends on the programme that is set. Buttons You can see the selection options for each programme in the overview for → "Programmes", Page 24. Button Selection Description Έναρξη Προσθήκη ¡ Start Start, cancel or pause the pro- ρούχων... - Page 23 Buttons en Button Selection Description Στύψιμο (Spin Basic settings Change the basic settings for the ap- Speed) pliance. → "Changing the basic settings", Page 44 Πρόπλυση (Pre- ¡ Activate Activate or deactivate prewash, e.g. wash) for washing heavily soiled laundry. ¡ Deactivate Έξτρα ξέβγαλμα ¡...
- Page 24 en Programmes Λιγοτ. τσαλάκωμα Μούλιασμα Πρόπλυση Στύψιμο (Rinse Hold) Έξτρα ξέβγαλμα Επιλογή varioSpeed Max. spin speed 1400 (rpm) Max. temperature (°C) Max. load (kg)
- Page 25 Programmes en Λιγοτ. τσαλάκωμα Μούλιασμα Πρόπλυση Στύψιμο (Rinse Hold) Έξτρα ξέβγαλμα Επιλογή – – varioSpeed Max. spin speed 1400 1400 (rpm) – Max. temperature (°C) Max. load (kg)
- Page 26 en Programmes Λιγοτ. τσαλάκωμα Μούλιασμα Πρόπλυση Στύψιμο (Rinse Hold) Έξτρα ξέβγαλμα Επιλογή varioSpeed Max. spin speed 1200 (rpm) Max. temperature (°C) Max. load (kg)
- Page 27 Programmes en Λιγοτ. τσαλάκωμα Μούλιασμα Πρόπλυση Στύψιμο (Rinse Hold) Έξτρα ξέβγαλμα Επιλογή – varioSpeed Max. spin speed 1400 (rpm) Max. temperature (°C) Max. load (kg)
- Page 28 en Programmes – Λιγοτ. τσαλάκωμα – – – Μούλιασμα – – – Πρόπλυση Στύψιμο (Rinse – Hold) – – Έξτρα ξέβγαλμα – – – Επιλογή – – – varioSpeed Max. spin speed 1400 1400 (rpm) – – Max. temperature (°C) Max.
- Page 29 Programmes en – Λιγοτ. τσαλάκωμα – Μούλιασμα – Πρόπλυση Στύψιμο (Rinse – Hold) – Έξτρα ξέβγαλμα – Επιλογή – varioSpeed Max. spin speed 1200 (rpm) – Max. temperature (°C) Max. load (kg)
- Page 30 en Programmes – Λιγοτ. τσαλάκωμα – Μούλιασμα – Πρόπλυση Στύψιμο (Rinse Hold) Έξτρα ξέβγαλμα Επιλογή – – varioSpeed Max. spin speed 1400 (rpm) Max. temperature (°C) Max. load (kg)
- Page 31 Programmes en Λιγοτ. τσαλάκωμα Μούλιασμα Πρόπλυση Στύψιμο (Rinse Hold) Έξτρα ξέβγαλμα Επιλογή – varioSpeed Max. spin speed (rpm) Max. temperature (°C) Max. load (kg)
- Page 32 en Programmes – Λιγοτ. τσαλάκωμα – Μούλιασμα – Πρόπλυση Στύψιμο (Rinse Hold) Έξτρα ξέβγαλμα – Επιλογή varioSpeed Max. spin speed 1200 (rpm) Max. temperature (°C) Max. load (kg)
-
Page 33: Accessories
Accessories en Accessories 9 Accessories Use original accessories. These have been made especially for your appliance. Accessories Order number Water inlet hose exten- Extend the water inlet WZ10131 sion hose for cold water or AquaStop (approx. 2.50 Fixing brackets Improves the stability of WX975600 the appliance. -
Page 34: Laundry
en Laundry Pull out the detergent drawer. Press Έναρξη Προσθήκη ρούχων (Start/Reload/Pause) to start the programme. a The display shows the remaining programme duration. a After the programme has ended, the display shows: -0- . Start the first wash cycle or press to switch off the appliance. -
Page 35: Sorting Laundry
Laundry en – Remove curtain hooks and lead To improve washing results and ▶ strips or use a mesh laundry prevent discolouration, sort the laundry according to the following – Use a mesh laundry bag for criteria before washing. small items of laundry, such as –... -
Page 36: Care Symbols On The Care Labels
en Detergents and care products 11.4 Care symbols on the care labels Washing care symbols Symbol Washing process Recommended pro- gramme Normal Cotton Gentle Easy-Care Particularly gentle Delicates/Silk for washing by hand Hand wash Wool Not suitable for machine-washing –... -
Page 37: Detergent Dosage
Detergents and care products en Detergent Fabrics Pro- Temperature gramme Detergent for delic- Delicate fine textiles, Delicates/ From cold up to ates silk or viscose Silk 40 °C Detergent for wool- Wool Wool From cold up to lens 40 °C Tip: Visit www.cleanright.eu to find further information on detergents, care products and cleaning agents for domestic use. -
Page 38: Basic Operation
en Basic operation 13.3 Adjusting the pro- Basic operation 13 Basic operation gramme settings Basic operation Requirement: A programme has 13.1 Switching on the appli- been set. ance → "Setting a programme", Page 38 Adjust the programme settings. Press ▶ ▶ → "Programmes", Page 24 Note: The programme settings are not saved permanently for the pro- gramme. -
Page 39: Using A Measuring Aid For Liquid Detergent
Basic operation en Insert the detergent drawer. 13.5 Using a measuring aid for liquid detergent If you order the measuring aid as an accessory, you must use the measur- ing aid. Pull out the detergent drawer. 13.6 Use the measuring aid for liquid detergent To add liquid detergent, you can use a measuring aid in the detergent drawer. -
Page 40: Adding Detergent And Care Product
en Basic operation Push in the detergent drawer. Press Έναρξη Προσθήκη ρούχων. The appliance is paused and 13.7 Adding detergent and checks whether it is possible to add or remove laundry. Take note care product of the programme status. Notes Add or remove laundry. ¡... -
Page 41: Unloading The Laundry
Childproof lock en Wipe the rubber gasket dry and re- 13.12 Unloading the laundry move any foreign objects. Note: Please read the information in the Safety → Page 4 and Preventing material damage → Page 10 sections to ensure that you use the appliance safely. Open the door. Remove the laundry. - Page 42 en Childproof lock So that the programme currently running is not cancelled, the pro- gramme selector must be set to the initial programme. goes out in the display.
-
Page 43: Basic Settings
Basic settings en Basic settings 15 Basic settings You can configure the appliance to meet your needs. Basic settings 15.1 Overview of basic settings Below is an overview of the basic settings on your appliance. Basic setting Programme posi- Value Description tion End signal 0 (off) Set the volume of 1 (quiet) -
Page 44: Changing The Basic Set- Tings
en Cleaning and servicing 15.2 Changing the basic set- Remove all de- Fresh deposits tergent residue, are easier to re- tings spray residue or move without Set the programme selector to po- other residues leaving any sition 1. immediately. residue. Keep the appli- This allows the ance door and residual water to... -
Page 45: Descaling
Cleaning and servicing en Press down on the insert and re- Fit the insert and lock it into place. move the detergent drawer. Cleaning the opening for the deter- Press out the insert upwards from gent drawer. below. Push in the detergent drawer. Clean the detergent drawer and in- sert with water and a brush, and 16.4 Descaling... -
Page 46: Cleaning The Drain Pump
en Cleaning and servicing Slide a sufficiently large receptacle 16.5 Cleaning the drain pump under the opening. Clean the drain pump in the event of faults, e.g. blockages or rattling noises. Emptying the drain pump Note: Please read the information in the Safety → Page 4 and Preventing material damage → Page 10 sections to ensure that you use the appliance safely. - Page 47 Cleaning and servicing en Cleaning the drain pump CAUTION - Risk of scalding! When you wash at high temperat- Note: Please read the information in ures, the detergent solution gets the Safety → Page 4 and Preventing hot. material damage → Page 10 sections Do not touch the hot detergent to ensure that you use the appliance ▶...
-
Page 48: Cleaning The Intake Opening In The Rubber Gasket
en Cleaning and servicing Ensure that both impellers can Insert the maintenance flap and turn. lock it into place. Insert the pump cap. Close the maintenance flap. Ensure that the parts of the ‒ 16.6 Cleaning the intake pump cap are correctly as- sembled. -
Page 49: Clean The Water Inlet Filters
Cleaning and servicing en Disconnect the appliance's mains 16.8 Clean the water inlet fil- plug from the power supply. ters. Loosen the hose clamp and care- fully remove the water outlet hose. Emptying the water inlet hose Turn off the tap. Set a programme, except for Ξέβγαλμα, Στύψιμο... - Page 50 en Cleaning and servicing Clean the filter with a small brush. Disconnect the hose from the rear of the appliance. Connect the water inlet hose and check for leaks. Use pliers to remove the filter. Clean the filter with a small brush. Cleaning the filter on the appliance Note: Please read the information in...
- Page 51 Cleaning and servicing en Connect the hose and check for leaks.
-
Page 52: Troubleshooting
en Troubleshooting Troubleshooting 17 Troubleshooting You can rectify minor faults on your appliance yourself. Read the troubleshoot- Troubleshooting ing information before contacting after-sales service. This will avoid unneces- sary costs. WARNING Risk of electric shock! Incorrect repairs are dangerous. Repairs to the appliance should only be carried out by trained specialist ▶... - Page 53 Troubleshooting en Fault Cause and troubleshooting "E:30 / -80" Remove any unapproved extensions from the water ▶ hose. Connecting the appliance "E:36 / -25 / -26" Drain pump is blocked. → "Cleaning the drain pump", Page 46 ▶ "E:38 / -25 / -26" Drain pump is blocked.
- Page 54 en Troubleshooting Fault Cause and troubleshooting flashes. Door is not closed. Close the door. Press Έναρξη Προσθήκη ρούχων to start the pro- gramme. All other error codes. Malfunction Call the after-sales service. ▶ → "Customer Service", Page 62 The appliance is not The mains plug of the power cord is not plugged in.
- Page 55 Troubleshooting en Fault Cause and troubleshooting The door cannot Water level is too high. be opened. Start the Άντληση programme. ▶ Power failure. Open the door using the emergency release. ▶ → "Emergency release", Page 60 The water is not drain- Drain pipe or water outlet hose is blocked. ing.
- Page 56 en Troubleshooting Fault Cause and troubleshooting Water is not flowing The water inlet hose is kinked or jammed. in. Detergent is not Ensure that the water inlet hose is not kinked or ▶ being dispensed. jammed. The spin cycle runs The unbalanced load detection system eliminates an several times.
- Page 57 Troubleshooting en Fault Cause and troubleshooting Drum does not turn, Load detection is active. water does not flow in. Not a fault – no action required. ▶ Note: The load detection can take up to two minutes. Heavy foam build-up Detergent dosage is too high. Immediate measure: Mix one tablespoon of fabric ▶...
- Page 58 en Troubleshooting Fault Cause and troubleshooting Loud noises during Appliance is not correctly aligned. the spin cycle. Aligning the appliance ▶ The appliance feet are not fixed. Secure the appliance feet. Aligning the appliance ▶ Transit bolts have not been removed. Removing the transit bolts ▶...
- Page 59 Troubleshooting en Fault Cause and troubleshooting The spin result is not Ensure that the drain pipe and water drain hose are ▶ satisfactory. The laun- not kinked or trapped. dry is too wet/too The unbalanced load detection system has interrupted damp. the spin cycle because the laundry is unevenly distrib- uted.
-
Page 60: Transportation, Storage And Disposal
en Transportation, storage and disposal Drain the remaining detergent 17.1 Emergency release solution. Releasing the door → "Cleaning the drain pump", Page 46 Requirement: The drain pump is Detach the hoses. empty. → Page 46 ATTENTION! Escaping water may 18.2 Inserting the transit cause material damage. bolts Do not open the door if you can ▶... -
Page 61: Using The Appliance Again
Transportation, storage and disposal en Insert all screws into the four 18.4 Disposing of old appli- transit bolts and tighten slightly. ance Valuable raw materials can be re- used by recycling. WARNING Risk of harm to health! Children can lock themselves in the appliance, thereby putting their lives at risk. -
Page 62: Customer Service
en Customer Service Make a note of your appliance's de- Customer Service 19 Customer Service tails and the Customer Service tele- phone number to find them again If you have any queries on use, are Customer Service quickly. unable to rectify faults on the appli- ance yourself or if your appliance needs to be repaired, contact Cus- tomer Service. -
Page 63: Consumption Values
Consumption values en Consumption values 20 Consumption values The following information is provided in accordance with the EU Ecodesign Consumption values Regulation. The values given for programs other than the Eco 40-60 are indicat- ive only and were determined in accordance with the applicable standard EN60456. -
Page 64: Technical Specifications
en Technical specifications You can find more information about Technical specifications 21 Technical specifica- your model online at https:// eprel.ec.europa.eu/ . This web ad- tions dress is linked to the official EU EPREL product database. At the time Facts and figures for your appliance Technical specifications of printing, its web address had not can be found here. - Page 68 Valid within Great Britain: Imported to Great Britain by BSH Home Appliances Ltd. Grand Union House Old Wolverton Road Wolverton, Milton Keynes MK12 5PT United Kingdom Manufactured by BSH Hausgeräte GmbH under the trademark licence of Siemens AG *9001423581* 9001423581 (010317)