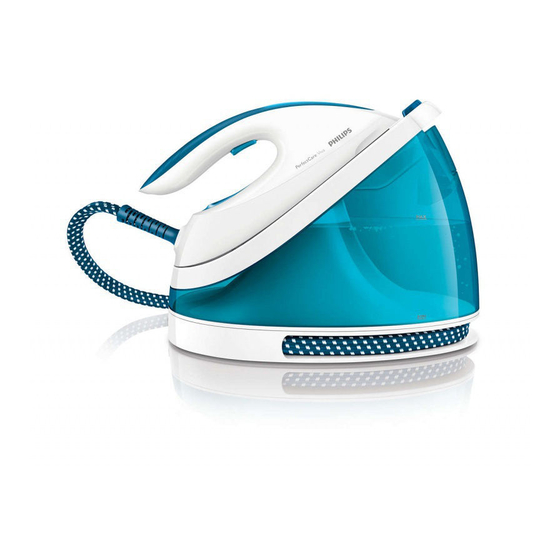
Philips PerfectCare Viva GC7011 Service Manual
Hide thumbs
Also See for PerfectCare Viva GC7011:
- User manual (102 pages) ,
- Service manual (18 pages) ,
- User manual (102 pages)
Table of Contents
Advertisement
Quick Links
Philips Consumer Lifestyle
Service Manual
Product information
Fast & powerful crease removal
• Soleplate: SteamGlide Plus
• OptimalTemp Technology
• Steam output
• Vertical steam
• Steam pressure
• Steam Pressure: Max 4.2 - 5.5 bar
• Steam tip
• Power: 2400 W
• Steam boost: 160 - 290 g
• Continuous steam output: 110 - 120 g/min
Easy to use
• Water tank capacity: 1700 ml
• Filling and emptying water: Extra large filling hole
• Refill any time
• Heat-up time: 2min
• Hose storage: Hose storage compartment
• Cord storage: Cord clip
• Hose length: 1.6m
• Safe for all fabrics: Even for delicate like silks
• Power cord length: 1.8m
Sustainability
• Energy saving: 10% energy reduction
Published by Philips Consumer Lifestyle
16/03
PerfectCare Viva Steam generator
Calc management
• Suitable for tap water
• Calc clean solution: Smart Calc Clean
• Calc clean reminder
Safety Information
• This product meets the requirements regarding
interference suppression on radio and TV.
• After the product has been repaired, it should function
properly and has to meet the safety requirements and
legal regulations as officially laid down at this moment.
Technical information
• Voltage
• Frequency
• Power
• Product dimensions
• Packaging dimensions
• Weight of iron
• Weight of iron + base
Accessories
• Calc clean container
Printed in the Netherlands
GC7011
GC7015
GC7031
GC7035
: 220 - 240 V
: 50 - 60 Hz
: 2400 W
: 32.2 x 19.4 x 23.6 cm
: 42.7 x 23.8 x 33.5 cm
: 1.24 kg
with carry lock modes
: 4.1 kg
without carry lock modes : 4 kg
© Copyright reserved
GC7036
GC7037
GC7038
GC7039
GC7040
Version 2
25-Mar-2016
Subject to modification
Advertisement
Table of Contents

Related Manuals for Philips PerfectCare Viva GC7011


Summary of Contents for Philips PerfectCare Viva GC7011
- Page 1 • Safe for all fabrics: Even for delicate like silks • Power cord length: 1.8m Accessories Sustainability • Calc clean container • Energy saving: 10% energy reduction Published by Philips Consumer Lifestyle Printed in the Netherlands © Copyright reserved Subject to modification 16/03...
- Page 2 Product matrix GC7011 - GC7040 Model Number GC7011 GC7015 GC7031 GC7035 GC7036 Color Petro Dusk Blue Blue Petro Dusk Petro Dusk Power 2400 W 2400 W 2400 W 2400 W 2400 W Heat-up time 2 min 2 min 2 min 2 minw 2 min Steam pressure...
-
Page 3: Table Of Contents
Disassembly advice - Iron GC7011 - GC7040 INLAY 10 COVER RUBBER CAP 30 IRON PCBA 6 RUBBER BUNG 31 TRIGGER SPRING SCREW & CAP 27 COVER 3 TRIGGER 9 CHASSIS 8 IRON BOTTOM CAP 28 IRON BOTTOM CAP 28 RUBBER CAP 29 SOLEPLATE ASSY 1 Remove COVER RUBBER CAP 30... - Page 4 Disassembly advice - Stand GC7011 - GC7040 TRAY CAP 20 FILLING DOOR 22 TRAY RUBBER 19 POWER BUTTON 24 TRAY 18 HOSECORD CLAMP 32 LOCK ASSY 31 HOSECORD 7 HOSE GUIDE 33 PCBA 25 STAND BOTTOM CAP 13 PUMP ASSY 14 Remove FILLING DOOR 22 STAND BOTTOM 12...
-
Page 5: Inlay
Part lists Iron & Stand GC7011 - GC7040 GC7011/20 GC7015/21 GC7031/20 GC7035/20 Description 889701120531 889701521261 889703120411 889703520151 Service code Service code Service code Service code Soleplate Assy 4239 021 85241 4239 021 85241 4239 021 83452 4239 021 83452 Dosing head 4239 026 53722 4239 026 53722 4239 026 53722... -
Page 6: Inlay
Part lists Iron & Stand GC7011 - GC7040 GC7035/20 GC7035/26 GC7035/28 GC7035/29 Description 889703520531 889703526601 889703528471 889703529051 Service code Service code Service code Service code Soleplate Assy 4239 021 83452 4239 021 83452 4239 021 83452 4239 021 83452 Dosing head 4239 026 53722 4239 026 53722 4239 026 53722... -
Page 7: Soleplate Assy
Part lists Iron & Stand GC7011 - GC7040 GC7036/27 GC7037/27 GC7038/20 GC7039/20 Description 889703627011 889703727011 889703820011 889703920291 Service code Service code Service code Service code Soleplate Assy 4239 021 83452 4239 021 83452 4239 021 83452 4239 021 83452 Dosing head 4239 026 53722 4239 026 53722 4239 026 53722... -
Page 8: Cover
Part lists Iron & Stand GC7011 - GC7040 GC7040/20 Description 889704020291 Service code Soleplate Assy 4239 021 83452 Dosing head 4239 026 53722 Cover 4239 026 58862 Housing 4239 021 83642 LED holder 4239 026 58921 Iron PCBA 4239 021 83111 Hose cord 4239 021 83653 Chassis... - Page 9 Exploded view - Iron GC7011 - GC7040 9-18...
- Page 10 Exploded view - Stand (without Carry lock) GC7011 - GC7040 10-18...
- Page 11 Exploded view - Stand (with Carry lock) GC7011 - GC7040 11-18...
- Page 12 Wiring diagram GC7011 - GC7040 3002 Pump L (Red wire) 1M(MF),5% 0.5W 9002 9012 Jumper-15mm 3001 3003 LIVE 2002 8001 56R(WW),5% 3W 75R(WW),5% 1W 9001 Net L 470nF/275V 1N4007 (MKP),10% 3007 2003 8003 100µF/63V(RE),20% 20V, 1W (0805),5% 7001 BSS84 STDBY CTRL 2001 STDBY CTRL 100nF/275V...
- Page 13 Repair Instruction GC7011 - GC7040 • Due to the high wattage of the iron, only the specified cord set must be used. • Should damage be observed on the POWER CORD 23, it must be replaced. Continued usage is not allowed. •...
- Page 14 Repair Instruction GC7011 - GC7040 8.3. Enter Self-Check mode Process Flow Chart If fail to enter Self-Check mode, Start could be due to: No power to PCBA Buttons malfunction Press and hold Power Steam trigger malfunction & ECO buttons 4. Timing incorrect Refer to Trouble shooting tip #8 - trigger press is not detected Turn on mains power /...
- Page 15 Repair Instruction GC7011 - GC7040 8.4. Perform Self-Check mode Process Flow Chart Power LED (blue), ECO LED (green) & Rinse LED Refer TS tip #2 (orange) fast blink Turn On: Entered • ECO LED (green) Check zero-crossing Power LED (blue) Self-Check mode •...
- Page 16 Repair Instruction GC7011 - GC7040 8.5. Troubleshooting Tips TS tip #1 LED(s) does not light up as specified, fault could be due to: Self-Check mode entry unsuccessful refer “How to enter Self-Check mode” Power PCBA check by test another board TS tip #2 1.
- Page 17 Repair Instruction GC7011 - GC7040 Pump - Cleaning restrictor Service center to perform pump restrictor cleaning via following step if observe pump not pumping water: 1) De-assemble water tube of pump. 2) Clean restrictor via sharp object. 3) Re-assemble stand 17-18...
- Page 18 History record GC7011 - GC7040 Version 1: Created on Oct 2015 Corrected the labelling in exploded view Removed the duplicated steps in dismantle steps Added in picture view of critical steps under dismantle steps Indicated the non spare part with table in part list page Indicated the non spare part location with numbering in exploded view Corrected the screw labelling in exploded view Highlighted critical component with zoom in picture in exploded view...