Table of Contents
Advertisement
Quick Links
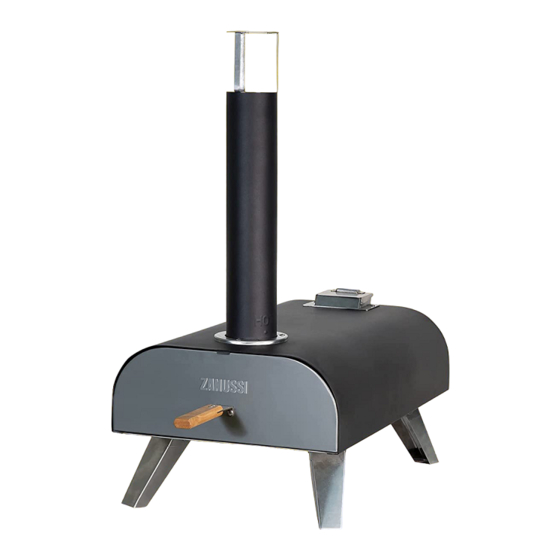
ZPO1BPC Pizza Oven Manual &
Safety Instructions
WARNING: PLEASE ENSURE YOU HAVE READ THROUGH THE
SAFETY AND OPERATING INSTRUCTIONS BEFORE USE.
PLEASE RETAIN INSTRUCTIONS FOR FUTURE REFERENCE
For Customer Services & Spare Parts please call 0330 1230 597
Please scan the QR code for step by step video
assembly instructions. Alternatively, you can visit:
zanussiheatingandcooling.uk. From here, please select
the product that you are looking to build and view the
'How To' video located at the bottom of the page.
Or visit us at zanussiheatingandcooling.uk
Advertisement
Table of Contents

Related Manuals for Zanussi ZPO1BPC


Summary of Contents for Zanussi ZPO1BPC
- Page 1 ZPO1BPC Pizza Oven Manual & Safety Instructions WARNING: PLEASE ENSURE YOU HAVE READ THROUGH THE SAFETY AND OPERATING INSTRUCTIONS BEFORE USE. PLEASE RETAIN INSTRUCTIONS FOR FUTURE REFERENCE Please scan the QR code for step by step video assembly instructions. Alternatively, you can visit: zanussiheatingandcooling.uk.
- Page 2 ZPO1BPC Pizza Oven Safety Instructions Parts List & Feature Diagram 7-17 Pizza Oven Assembly 18-20 Lighting And Extinguishing Your Pizza Oven 21-22 Cooking With Your Pizza Oven Cleaning Instructions 24-25 Troubleshooting Guarantee and Customer Services ZPO1BPC...
-
Page 3: Safety Instructions
To reduce the risk of under cooked meat, cut it open to ensure it is • cooked all the way through internally before consuming. CAUTION - if meat has been cooked sufficiently the meat juices should • be clear in colour and there should be no traces of pink/red juices or meat colouring. ZPO1BPC... - Page 4 Keep children and pets at a safe distance from the product when in use. • DO NOT cook before the fuel has a coating of ash. • Carbon Monoxide Do not use in Do Not Use Do Not Use in Use in open Poisoning Hazard Motor Homes Indoors Tents Spaces ZPO1BPC...
- Page 5 D. from the top of the chimney. • Modification of the pizza oven may be dangerous, is not permitted, and will nullify any warranty. • Failure to follow the instructions in this manual could result in serious injury or property damage. ZPO1BPC...
-
Page 6: What's Included
Pizza stone assembly Chimney pipe Oven door Hopper shovel Door handle Hopper assembly Chimney lid Pellet grid Ash tray support brackets Fire box assembly handle Screw (M4x10) Fire box assembly Pizza peel Ash tray Storage/Carry Bag Poker You will need: ZPO1BPC... -
Page 7: Pizza Oven Assembly
PIZZA OVEN ASSEMBLY STEP 1 – Unfolding the legs • With assistance, place the pizza oven body assembly (A) upside down on a soft, level surface. • Then unfold all four legs (which come pre-assembled), as illustrated in the diagram below. ZPO1BPC... - Page 8 PIZZA OVEN ASSEMBLY STEP 2 – Attaching the ash tray • Attach the ash tray (H) to the pizza oven body assembly (A), by sliding it into the ash tray support brackets (N), as illustrated in the diagram below. ZPO1BPC...
- Page 9 • Install the hopper assembly (D) to the pizza oven body assembly (A) with 2 of the screws (O) provided, as illustrated in the diagram below. • Tighten the screws with a screwdriver. ZPO1BPC...
- Page 10 PIZZA OVEN ASSEMBLY STEP 4 – Inserting the pizza stone • Slide the pizza stone (J) into the pizza oven assembly (A) as illustrated in the diagram below. ZPO1BPC...
-
Page 11: Step 5 - Assembling The Door
PIZZA OVEN ASSEMBLY STEP 5 – Assembling the door • Attach the door handle (L) to the oven door (K) with 2 of the screws (O) provided, as shown in the diagram below. • Tighten the screws with a screwdriver. ZPO1BPC... - Page 12 • Place the chimney lid (M) into the chimney pipe (B), pushing down to secure it. The bottom of the chimney lid (M) should be fully covered by the chimney pipe (B). ZPO1BPC...
- Page 13 (K) into place. This will secure the door shut. • To remove the oven door (K), use the door handle (L) to pull the bottom of the door out first. The oven door (K), should now be able to be removed. ZPO1BPC...
- Page 14 STEP 8 – Assembling the fire box • Place the pellet grid (E) into the fire box assembly (G). • Then slide the assembled fire box into the pizza oven body assembly (A), as illustrated in the diagram below. ZPO1BPC...
- Page 15 (H), or the lid of the hopper assembly (D). • Do not leave the fire box assembly handle (F) attached to any of the locations mentioned above while the pizza oven is in use, as it may get hot. ZPO1BPC...
- Page 16 (D), as illustrated in the diagram below • The hopper shovel (C) can also be used to cover the chimney pipe (B) while the pizza oven is in storage, once the chimney lid (M) has been removed. ZPO1BPC...
- Page 17 (Q). • Flip the pizza oven back over, and use the carry handles on the storage/carry bag (Q) to help transport and store the pizza oven. ZPO1BPC...
- Page 18 (approx. 300g). STEP 4 Place the fire box assembly (G) onto an even and non-flammable surface. Ignite the hardwood pellets with an igniter or fire starter and wait for around 45-90 seconds to allow the fire to spread. ZPO1BPC...
- Page 19 STEP 8 Ensure that you top up the pellets little and often so that they maintain the same level in the hopper assembly (D). Maintaining the same level throughout your cook allows for consistently high temperatures. ZPO1BPC...
- Page 20 ‘Cleaning Instructions’ page. WARNING: Pellets may still be warm and so heat resistant gloves should be worn when disposing of ash. WARNING: Do not use spirit or petrol for lighting or re- lighting. Use only fire-lighters complying to EN 1860-3. ZPO1BPC...
-
Page 21: Cooking With Your Pizza Oven
Please note: After the first round of baking is complete, if you want to continue to cook another pizza, please change the baking time to around 10 seconds between each rotation as the temperature inside the oven will have increased, and can reach up to 350 degrees. ZPO1BPC... - Page 22 This is to prevent too much air coming in from the oven door, which could cause heavy smoke inside the fire box assembly (E&G) and hopper assembly (D). Always operate the oven door (K) using the door handle (L) . • ZPO1BPC...
-
Page 23: Cleaning Instructions
(J), run the pizza oven at top temperatures for 30 minutes to burn off any excess food, and then wipe down with kitchen paper. • CAUTION: The stone baking board is not dishwasher safe - do not use dish-washing liquid. ZPO1BPC... -
Page 24: Troubleshooting
• This pizza oven can cook at very high temperatures and so it’s important to keep an eye on your food while it does. ZPO1BPC... - Page 25 3ft (1m) away from any buildings or structures. • Never use your pizza oven in high winds. ZPO1BPC...
-
Page 26: Guarantee And Customer Services
This guarantee does not cover wear and tear, damage, • misuse or consumable parts. This does not affect your statutory rights. For Customer Services & Spare Parts please call: 0330 1230 597 Or visit us at zanussiheatingandcooling.uk ZPO1BPC... - Page 27 ZANUSSI is a registered trademark used under license from AB Electrolux (publ). Made by Product Care Trading Limited, Wigan, WN2 4AY/ PCT (NI) Ltd, Belfast, BT5 5AD. For Customer Services & Spare Parts please call: 0330 1230 597 Or visit us at zanussiheatingandcooling.uk The ‘wheelie bin’...