
Related Manuals for LG LCN097HV4


Summary of Contents for LG LCN097HV4
- Page 1 OWNER’S MANUAL CONDITIONER Please read this manual carefully before operating your set and retain it for future reference. TYPE : Ceiling Cassette http://www.lghvac.com www.lg.com P/NO : MFL67449211...
-
Page 2: Table Of Contents
Multi-Type Air Conditioner Owner’s Manual TABLE OF CONTENTS FOR YOUR RECORDS A. Safety Precautions ......3 B. Electrical Safety.......6 Write the model and serial numbers here: Temporary Use of an Adapter...6 Model # Symbols used in this Manual ....6 Serial # C. -
Page 3: Safety Precautions
Safety Precautions Safety Precautions To prevent injury to the user or other people and property damage, the following instructions must be followed. n Incorrect operation due to ignoring instruction will cause harm or damage. The seriousness is classified by the following indications. This symbol indicates the possibility of death or serious injury. - Page 4 Safety Precautions Indoor/outdoor wiring connections must Safely dispose off the packing materials. Make sure to check that the power cable be secured tightly and the cable should Like screws, nails, batteries, broken plug is not dirty, loose or broken and be routed properly so that there is no things etc after installation or svc and then only insert the plug completely.
- Page 5 Safety Precautions Do not use the product for special purposes, Do not block the inlet or outlet of air flow. Use a soft cloth to clean. Do not use such as preserving foods, works of art, etc. It harsh detergents, solvents or splashing is a consumer air conditioner, not a precision water etc .
-
Page 6: Electrical Safety
Electrical Safety Electrical Safety • This appliance must be properly grounded. To minimize the risk of electric shock, you must alway plug into a grounded oulet. • Do not cut or remove the grounding prong from the power plug. • Attaching the adapter ground terminal to the wall receptacle cover screw does not ground the appliance unless the cover screw is metal and not insulated, and the wall receptacle is grounded through the house wiring. -
Page 7: Product Introduction
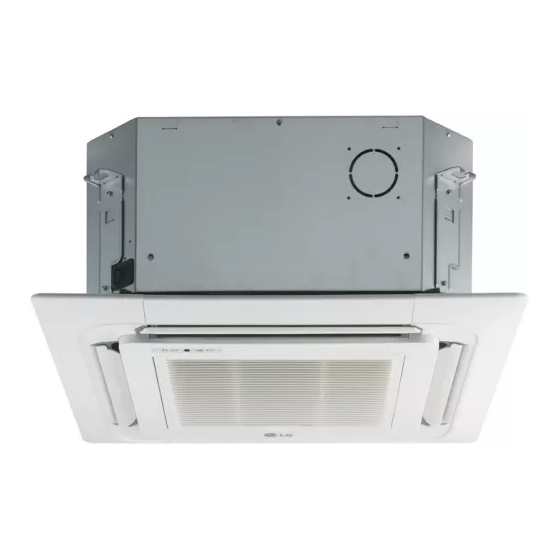
Product Introduction Product Introduction Indoor Unit [Ceiling Cassette Type] Cabinet Air Discharge Front Panel Signal receiver Air Inlet Outdoor Unit Air intake vents Control cover Connecting wire Connection pipe Drain hose Air outlet vents Base plate h The figure can be changed according to model. Owner's Manual 7... -
Page 8: Operating Instructions
Operating Instructions Operating Instructions How to insert the Batteries 1. Remove the battery cover by pulling it according to the arrow direction. 2. Insert new batteries making sure that the (+) and (-) of battery are installed correctly.(Battery Size = AAA) 3. -
Page 9: Wireless Remote Controller
Operating Instructions Wireless Remote Controller 1. VANE ANGLE Button Used to set each vane angle. 2. FUNCTION SETTING Button Used to set or clear Auto Clean, Smart Clean, Electric heater or Individual vane angle control. 3. ON/OFF Button Used to turn on/off the unit. 4. -
Page 10: Wired Remote Controller (Optional)
Operating Instructions Wired Remote Controller (Optional) 1 Operation indication screen 10 Air flow button 2 Set temperature button 11 Cooling desired temperature 3 Fan Speed button 12 Function setting button 4 Set back button 13 Up, Down, Left, Right button 5 Operation mode selection button 14 On/Off button 6 Wireless remote controller receiver... -
Page 11: Operation Mode
Operating Instructions Operation Mode Press the ON/OFF BUTTON to turn the unit on. The unit will respond with a beep. Open the door of the remote controller and press the operation mode button. Each time the button is pressed, the operation mode is shifted in the direction of the arrow. Dehumidification Cooling Mode Auto Operation... -
Page 12: Dehumidification Mode
Operating Instructions Dehumidification mode During Healthy Dehumidification Operation o If you select the dehumidification mode on the OPERATION MODE SELECTION BUTTON, the product starts to run the dehumidification function. It automatically sets the room temperature and airflow volume to the best condition for dehumidification, based on the sensed current room temperature. -
Page 13: Plasma Purification Operation (Optional)
Operating Instructions PLASMA Purification Operation (Optional) Plasma filter is a technology developed by LG to get rid of microscopic contaminants in the intake air by generating a plasma of high charge electrons. This plasma kills and destroys the contaminants completely to provide clean and hygienic air. -
Page 14: Sleep Timer Setting
Operating Instructions Sleep Timer Setting 1. Press the TIMER button to turn timer on or off. Timer Sleep 2. Press TIME SETTING buttons until the desired time is set. (7 hours is the maximum setting) 3. Press the SET / CLEAR button. On Timer Setting 1. -
Page 15: To Cancel The Timer Setting
Operating Instructions To cancel the Timer Setting • If you wish to cancel all timer setting, press the SET/CLEAR button. • If you wish to cancel each timer setting, press the each timer button to turn timer sleep or on or off as you want. And then press the SET/CLEAR button aiming the remote controller at the signal receptor. -
Page 16: Individual Vane Angle Control (Optional)
Operating Instructions Individual vane angle control (Optional) It is the function that can control 4 vane angles individually in the ceiling type 4Way cassette product group. Press the VANE ANGLE button. Individual vane angle control symbol will blink. • If you press the VANE ANGLE button for 3 seconds, all vanes are set to standard angle. -
Page 17: Forced Operation
Operating Instructions Forced operation Forced operation is used when the remote controller can't be used. The operation will be started if the ON/OFF button is pressed. If you want to stop the operation, re-press the button. [Ceiling Cassette Type] Forced Operation Button Heat pump Model Room Temp. -
Page 18: Maintenance And Service
Operating Instructions Maintenance and Service Before performing any maintenance, turn off the main power to the system, disconnect the circuit breaker and unplug the power cord. Ceiling Cassette Type Grille, Case and Remote Control p Turn the system off before cleanining, To clean, wipe with a soft, dry cloth. Do not use bleach or abrasives. NOTE Supply power must be disconnected before cleaning the indoor unit. -
Page 19: Operation Tips
Maintenance and Service Operation Tips! Do not overcool the room. Keep blinds or curtains Keep the room temperature closed. uniform. This is not good for the health and Do not let direct sunshine enter Adjust the vertical and horizontal wastes electricity. the room when the air conditioner airflow direction to ensure a is in operation. - Page 20 20 Multi Air Conditioner...
- Page 21 1. Please call the installing contractor of your product, as warranty service will be provided by them. 2. If you have service issues that have not been addressed by the contractor, please call 1-888-865-3026. CANADA Service call Number # : (888) LG Canada, (888) 542-2623...