Table of Contents
Advertisement
Quick Links
Advertisement
Table of Contents

Related Manuals for LG LMXS28626S/02


Summary of Contents for LG LMXS28626S/02
- Page 1 OWNER'S MANUAL FRENCH DOOR REFRIGERATOR Read this owner's manual thoroughly before operating the appliance and keep it handy for reference at all times. LFXS28968* LMXS28626* LFXS28566* LMXS28636* www.lg.com MFL68680499 Rev.04_110818 Copyright © 2017-2018 LG Electronics Inc. All Rights Reserved.
-
Page 2: Table Of Contents
TABLE OF CONTENTS PRODUCT FEATURES 40 SMART FUNCTIONS LG SmartThinQ Application SAFETY INSTRUCTIONS The LG SmartThinQ application allows you to communicate with the appliance using a IMPORTANT SAFETY INSTRUCTIONS smartphone. Smart Grid Function PRODUCT SPECIFICATIONS Smart Diagnosis™ Function 45 MAINTENANCE... -
Page 3: Product Features
PRODUCT FEATURES PRODUCT FEATURES Depending on the model, some of the following functions may not be available. FILTERED WATER AND ICE DISPENSER The water dispenser dispenses fresh, chilled water. The ice dispenser dispenses cubed and crushed ice. DOOR ALARM The Door Alarm function is designed to prevent refrigerator malfunctioning that could occur if a refrigerator door or freezer drawer remains open. -
Page 4: Safety Instructions
SAFETY INSTRUCTIONS SAFETY INSTRUCTIONS READ ALL INSTRUCTIONS BEFORE USE Your safety and the safety of others are very important. We have provided many important safety messages in this manual and on your appliance. Always read and follow all safety messages. This is the safety alert symbol. - Page 5 SAFETY INSTRUCTIONS • Keep packing materials out of the reach of children. Packaging material can be dangerous for children. There is a risk of suffocation. • Do not install the refrigerator in a damp or dusty place where insulation on electrical parts may deteriorate. •...
- Page 6 SAFETY INSTRUCTIONS • Keep ventilation openings, in the appliance enclosure or in the built-in structure, clear of obstruction. • Do not use mechanical devices or other means to accelerate the defrosting process, other than those recommended by the manufacturer. • Do not damage the refrigerant circuit. •...
- Page 7 SAFETY INSTRUCTIONS GROUNDING INSTRUCTIONS • Improper connection of the equipment-grounding conductor can result in a risk of electric shock. Check with a qualified electrician or service personnel if you are in doubt whether the appliance is properly grounded. Do not modify the plug provided with the appliance; if it will not fit the outlet, have a proper outlet installed by a qualified electrician.
-
Page 8: Product Specifications
PRODUCT SPECIFICATIONS PRODUCT SPECIFICATIONS The appearance and specifications listed in this manual may vary due to constant product improvements. Electrical requirements: 115 V, 60 Hz Min. / Max. water pressure: 20 - 120 psi (138 - 827 kPa) Model LFXS28968* Description Standard-depth, French door refrigerator, bottom freezer Net weight... -
Page 9: Product Overview
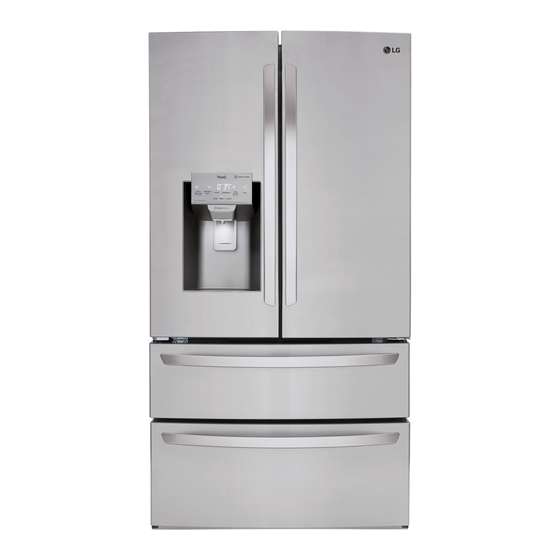
PRODUCT SPECIFICATIONS PRODUCT OVERVIEW The images in this guide may be different from the actual components and accessories, which are subject to change by the manufacturer without prior notice for product improvement purposes. Exterior Control Panel Door button (On Some Models) Sets the refrigerator and freezer temperatures, Opens the Door-in-Door Compartment. -
Page 10: Interior
10 PRODUCT SPECIFICATIONS Interior Standard Door : LFXS28968* / LMXS28626* / LMXS28636*... - Page 11 PRODUCT SPECIFICATIONS Door-in-Door : LFXS28566*...
- Page 12 12 PRODUCT SPECIFICATIONS LED interior lamps Cheese & Butter and Condiment Bins Light up the inside of the refrigerator. Cheese & Butter and Condiment bins are specially designed for these items, making spreading butter and slicing cheese easier. Water filter Purifies water.
-
Page 13: Installation
INSTALLATION INSTALLATION Installation Overview Please read the following installation instructions first after purchasing this product or transporting it to another location. Unpacking the Choosing the Proper Disassembling/ Refrigerator Location Assembling Leveling and Door Connecting the Water Alignment Line CAUTION • Connect to potable water supply only. •... -
Page 14: Unpacking The Refrigerator
14 INSTALLATION Unpacking the Refrigerator Choosing the Proper Location WARNING Water Water supply must be easily connected for the • Use two or more people to move and install the automatic icemaker. refrigerator. Failure to do so can result in back injury or other injury. - Page 15 INSTALLATION Dimensions and Clearances • Check the dimensions of the appliance and the installation path to ensure there is sufficient room to move the refrigerator through doors or narrow openings. • If an opening is too narrow to fit the refrigerator through, remove the refrigerator doors. See Removing/ Assembling the Doors and Drawers in this manual.
-
Page 16: Removing/Assembling Handles
16 INSTALLATION Removing/Assembling Removing the Refrigerator Handles Handles Loosen the set screws (1) with a 3/32 in. Allen wrench and remove the handle. • When moving the refrigerator through a narrow opening, removing the doors is preferred. • The appearance of the handles may vary from what Loosen the mounting fasteners (2) that connect is shown. -
Page 17: Removing/Assembling The Doors And Drawers
INSTALLATION Removing/Assembling the Removing the Freezer Drawer Handle Doors and Drawers Loosen the set screws (1) located on the lower side of the handle with a 1/8 in. Allen wrench and If the entrance door is too narrow for the refrigerator remove the handle. - Page 18 18 INSTALLATION Remove the screw (1) from the hinge cover at the Lift the door from the middle hinge pin and top of the refrigerator. Lift the hook (not visible), remove the door. located at the bottom of the front side of the cover (2) with a flat-head screwdriver.
- Page 19 INSTALLATION Assembling the Right Refrigerator Detach the wire harness (1). Door Install the right-side door first. Make sure that the plastic sleeve is inserted in the bottom of the door. Lower the door onto the middle hinge pin as shown in the figure. Rotate the hinge lever (1) clockwise.
- Page 20 20 INSTALLATION Assembling the Left Refrigerator Hold the water supply connection and gently push Door in the collet (1) to connect the water supply line (2) as shown. Insert the tube at least 5/8 inch (15 Install the left refrigerator door after the right door is mm) into the connector.
- Page 21 INSTALLATION Removing the Freezer Drawers Lift the front of the drawer up, then pull it straight out. For models with two freezer drawers, remove both drawers in the same way. The Pullout Drawer located above the freezer drawer is not shown for clarity. WARNING To reduce the risk of electric shock, injury to persons, and death, follow basic precautions,...
- Page 22 22 INSTALLATION Hold both rails and push them in simultaneously. Lower the door into its final position and tighten the screws located on both sides. Assembling the Freezer Drawer Push the drawer back until it clicks into place. Pull out both rails simultaneously, until they are fully extended.
-
Page 23: Connecting The Water Line
INSTALLATION Connecting the Water Line If the water pressure from the reverse osmosis system is less than 20 psi or 138 kPa or 1.4 kgf/ cm (takes more than 4 seconds to fill a cup of 7 oz or Before Beginning 198 cc capacity): This water line installation is not covered by the •... - Page 24 24 INSTALLATION • Shutoff valve to connect to the cold water line. Drill the hole for the valve. The shutoff valve should have a water inlet with a • Drill a ¼ in. hole in the water pipe using a sharp minimum inside diameter of 5/32 in.
- Page 25 INSTALLATION Route the tubing. Connect the tubing to the refrigerator. Route the tubing between the cold water line and the refrigerator. NOTE Route the tubing through a hole drilled in the wall • Before making the connection to the refrigerator, be or floor (behind the refrigerator or adjacent base sure that the refrigerator power cord is not plugged cabinet) as close to the wall as possible.
-
Page 26: Leveling And Door Alignment
26 INSTALLATION Leveling and Door Alignment Door Alignment Standard Door Leveling Both the left and right refrigerator doors have an The refrigerator has two front leveling legs. Adjust the adjustable nut, located on the bottom hinge, to raise legs to alter the tilt from front-to-back or side-to side. and lower them to align properly. -
Page 27: Turning On The Power
INSTALLATION Turning on the Power The right refrigerator door does not have an adjustable nut. • After installing, plug the refrigerator’s power cord If the space between the doors is uneven, follow the into a 3-prong grounded outlet and push the instructions below to align the right door: refrigerator into the final position. -
Page 28: Operation
28 OPERATION OPERATION Before Use Clean the refrigerator. Clean the refrigerator thoroughly and wipe off all dust that accumulated during shipping. CAUTION • Wipe adhesive residue off with your thumb or dish detergent. Do not use sharp objects or abrasive, flammable, or alcohol-based cleaners. •... -
Page 29: Control Panel
OPERATION Control Panel Depending on the model, some of the following functions may not be available. Control Panel Features NOTE • When the refrigerator is in the Power Saving Mode, the display remains off until a door is opened or a button is pressed. - Page 30 The actual refrigerator temperature depends on the food inside the refrigerator. * Wi-Fi The Wi-Fi button, when used with the LG Fresh Air Filter Smart Refrigerator smart phone app, allows the refrigerator to connect to a home Wi-Fi network.
-
Page 31: Ice And Water Dispenser
20 seconds. • If ice or water dispenses unexpectedly, turn off To deactivate / activate: the water supply and contact an LG Electronics • With either refrigerator door opened, press and Customer Information Center. -
Page 32: Ice Compartment
32 OPERATION Ice Compartment Detaching the In-Door Ice Bin Gently pull the handle to open the ice CAUTION compartment. • Keep hands and tools out of the ice compartment door and dispenser chute. Failure to do so may result in damage or personal injury. Keep the ice compartment door closed tightly. -
Page 33: Automatic Icemaker
OPERATION Automatic Icemaker Turning the Automatic Icemaker On or Off Icemaker To turn off the automatic icemaker, set the icemaker switch to OFF (O). To turn on the automatic icemaker, set the switch to ON (I). Normal Sounds You May Hear Power Switch Ice-detecting Sensor •... -
Page 34: Storing Food
34 OPERATION Storing Food Food Storage Tips Wrap or store food in the refrigerator in airtight and Depending on the model, some of the following moisture-proof material unless otherwise noted. This functions may not be available. prevents food odor and taste transfer throughout the Each compartment inside the refrigerator is designed refrigerator. -
Page 35: Humidity Controlled Crispers (On Some Models)
OPERATION Storing Frozen Food Do not use • Bread wrappers Check a freezer guide or a reliable cookbook for further information about preparing food for freezing • Non-polyethylene plastic containers or food storage times. • Containers without tight lids • Wax paper or wax-coated freezer wrap Freezing •... -
Page 36: Glide'n'serve
36 OPERATION Glide‘N’Serve Detaching/Assembling the Storage Bins The Glide’N’Serve provides storage space with a variable temperature control that can keep the Some bins may vary in appearance and will only fit in compartment at a slightly different temperature than one location. the refrigerator section. -
Page 37: Door-In-Door (On Some Models)
OPERATION Door-in-Door (On Some Crisper Cover Models) To remove, lift the front of the cover up until it detaches from the back wall of the cabinet, then pull The Door-in-Door compartment allows for easy it out. access to commonly used food items. The outer Door-In-Door door includes two door bins, the Cheese &... - Page 38 38 OPERATION Door-in-Door Case CAUTION To open the Door-in-Door case, pull evenly on the marked area. The Door-in-Door Case is removable • Do not overcrowd door bins or close doors with for easy cleaning and adjustment. excessive force. The inner door-in-door may not close properly or may be pushed open by falling items, resulting in product or property damage or personal injury.
-
Page 39: Adjusting The Refrigerator Shelves
OPERATION Adjusting the Refrigerator Shelves CAUTION The shelves in the refrigerator are adjustable to meet • Make sure that shelves are level from one side individual storage needs. Your model may have full or to the other. Failure to do so may result in the split shelves. -
Page 40: Smart Functions
• The appliance supports 2.4 GHz Wi-Fi networks only. To check your network frequency, contact your Internet service provider or refer to your wireless router manual. • LG SmartThinQ is not responsible for any network connection problems or any faults, malfunctions, or errors caused by network connection. - Page 41 Connecting to Wi-Fi This device complies with part 15 of the FCC Rules. The Wi-Fi button, when used with the LG Operation is subject to the following two conditions: SmartThinQ application, allows the refrigerator 1) This device may not cause harmful interference, to connect to a home Wi-Fi network.
-
Page 42: Smart Grid Function
20 cm (7.8 inches) between available for download. the antenna and your body. Users must follow the LG Electronics will also provide open source code specific operating instructions for satisfying RF to you on CD-ROM for a charge covering the cost exposure compliance. - Page 43 LG Open API performance is maintained. You can manage Smart Grid features for the LG If the refrigerator receives a Demand Response Smart Refrigerator. signal, the refrigerator will operate in Delay Appliance...
-
Page 44: Smart Diagnosis™ Function
Should you experience any problems with the appliance, it has the capability of transmitting data via your telephone to the LG Customer Information Center. NFC or Wi-Fi equipped models can also transmit data to a smartphone using the LG SmartThinQ application. -
Page 45: Maintenance
MAINTENANCE MAINTENANCE For products with black stainless steel exterior, spray glass cleaner on a clean, microfiber cloth and rub in direction of grain. Do not spray glass cleaner directly Cleaning at the display panel. Do not use harsh or abrasive cleaners. -
Page 46: Replacing The Fresh Air Filter
46 MAINTENANCE Replacing the Fresh Air Filter Rotate the air filter cover clockwise until the hooks engage and the cover locks in place. Replace the Fresh Air Filter: • Approximately every six months. • When the Replace Filter icon turns on. Rotate the filter cover counterclockwise to release the tabs, and remove the cover. - Page 47 NOTE To purchase a replacement water filter: • Visit your local dealer or distributor • Search using "water filter" on lg.com Replace with a new water filter. • Use replacement cartridge: ADQ747935** Take the new water filter out of its packing and remove the protective cover from the o-rings.
- Page 48 48 MAINTENANCE Performance Data Sheet Model: LT1000P/PC/PCS NSF System Trade Name Code : MDJ64844601 The concentration of the indicated substances in water entering the system was reduced to a concentration less than or equal to the permissible limit for water leaving the system as specified in NSF/ANSI Standard 42 and Standard 53.
- Page 49 MAINTENANCE Average NSF specified Average substance Avg % Permissible Influent Challenge Product Water Reduction Reduction Reduction Product Water Challenge Concentration Concentration Requirements Concentration Mercury @ pH 6.0 μg/L ± 5.6 μg/L 92.5% 0.420 μg/L 2.0 μg/L 100,000 Minimum Cyst* >99.99% 10 cysts/L ≥...
- Page 50 • Do not install if water pressure exceeds 120 psi lg.com website. (827 kPa). If your water pressure exceeds 80 For further assistance, contact the LG Electronics psi, you must install a pressure limiting valve. Customer Information Center. Contact a plumber if uncertain how to check your water pressure.
-
Page 51: Troubleshooting
TROUBLESHOOTING TROUBLESHOOTING FAQs: Frequently Asked Questions What are the best temperature settings for my refrigerator and freezer? The default setting for the refrigerator is 37° Fahrenheit (3° Celsius). The default setting for the freezer is 0° Fahrenheit (-18° Celsius). Adjust these settings as necessary to keep food at desired temperatures. -
Page 52: Before Calling For Service
52 TROUBLESHOOTING Before Calling for Service Review this section before calling for service; doing so will save you both time and money. Cooling Problem Possible Cause Solutions The refrigerator control is set • Turn the control ON. Refer to the Setting the Controls to OFF (some models). - Page 53 TROUBLESHOOTING Cooling Problem Possible Cause Solutions • When the doors are opened often or for long periods of time, warm, humid air enters the compartment. Doors are opened often or for This raises the temperature and moisture level within long periods of time. the compartment.
- Page 54 54 TROUBLESHOOTING Cooling/Ice & Water Problem Possible Cause Solutions • When the doors are opened often or for long periods of time, warm, humid air enters the compartment. Doors are opened often or for This raises the temperature and moisture level within long periods of time.
- Page 55 TROUBLESHOOTING Ice & Water Problem Possible Cause Solutions Demand exceeds ice storage • The icemaker will produce approximately 70-184 cubes capacity. in a 24 hour period. • Connect the refrigerator to a cold water supply with House water supply is not adequate pressure and turn the water shutoff valve fully connected, valve is not turned on open.
- Page 56 56 TROUBLESHOOTING Ice & Water Problem Possible Cause Solutions • Foreign substances or frost on the ice-detecting sensor The ice detecting sensor is can interrupt ice production. Make sure that the sensor obstructed. area is clean at all times for proper operation. The refrigerator is not connected to a water supply or •...
- Page 57 TROUBLESHOOTING Ice & Water Problem Possible Cause Solutions • Infrequent use of the ice dispenser will cause the cubes to stick together over time, which will prevent them from Infrequent use of the properly dispensing. Check the ice bin for ice cubes dispenser.
- Page 58 58 TROUBLESHOOTING Ice & Water Problem Possible Cause Solutions Refrigerator or freezer doors • Water will not dispense if any of the refrigerator doors are not closed properly. are left open. • After the water filter is replaced, dispense 2.5 gallons of water (flush for approximately five minutes) to remove Water filter has been recently trapped air and contaminants from the system.
- Page 59 TROUBLESHOOTING Parts & Features Problem Possible Cause Solutions Food packages are blocking • Rearrange food containers to clear the door and door the door open. shelves. Ice bin, crisper cover, pans, • Push bins all the way in and put crisper cover, pans, shelves, door bins, or baskets shelves and baskets into their correct positions.
- Page 60 60 TROUBLESHOOTING Noises Problem Possible Cause Solutions The defrost control will click when the automatic defrost cycle begins and ends. Clicking The thermostat control (or refrigerator • Normal Operation control on some models) will also click when cycling on and off. Rattling noises may come from the flow of refrigerant, the water line on the back •...
- Page 61 TROUBLESHOOTING Wi-Fi Problem Possible Cause Solutions • Delete your home Wi-Fi network The password for the Wi-Fi and begin the registration process network was entered incorrectly. again. • Turn off the Mobile data on your Mobile data for your smartphone smartphone before registering the is turned on.
-
Page 62: Limited Warranty
Should your LG Refrigerator ("Product") fail due to a defect in materials or workmanship under normal and proper use, during the warranty period set forth below, LG Electronics (“LG”) will, at its option, repair or replace the Product. This limited warranty is valid only to the original retail purchaser of the Product and applies only when purchased and used within the United States including U.S. - Page 63 If you and LG are unable to resolve the dispute within 30 days, either party...
- Page 64 Opt Out. You may opt out of this dispute resolution procedure. If you opt out, neither you nor LG can require the other to participate in an arbitration proceeding. To opt out, you must send notice to LG no later than 30 calendar days from the date of the first consumer purchaser’s purchase of the product by either: (i) sending an e-mail to...
-
Page 65: For Canada
Should your LG Refrigerator ("Product") fail due to a defect in materials or workmanship under normal and proper use, during the warranty period set forth below, LG Electronics Canada, Inc. (“LGECI”) will, at its option, repair or replace the Product upon receipt of proof of the original retail purchase. This limited warranty is valid only to the original retail purchaser of the Product and applies only to a Product distributed, purchased and used within Canada, as determined at the sole discretion of LGECI. - Page 66 (ASC), as determined by LG Canada. If your Product is located outside a 150 km radius from a ASC, as determined by LG Canada, it will be your responsibility to bring the Product, at your sole expense, to the ASC for in-warranty repair.
- Page 67 If you and LG are unable to resolve the dispute within 30 days of LG’s receipt of the Notice of Dispute, the dispute shall be resolved by binding arbitration in accordance with the procedure set out herein.
- Page 68 Limited Warranty. Opt Out. You may opt out of this dispute resolution procedure. If you opt out, neither you nor LG can require the other to participate in an arbitration proceeding. To opt out, you must send notice to LG no later than 30 calendar days from the date of the first consumer purchaser’s purchase of the product by either (i) sending an e-mail to...
- Page 69 LG Customer Information Center For inquiries or comments, visit www.lg.com or call: 1-800-243-0000 U.S.A. 1-888-542-2623 CANADA Register your product Online! www.lg.com...