Table of Contents
Advertisement
Quick Links
Advertisement
Table of Contents

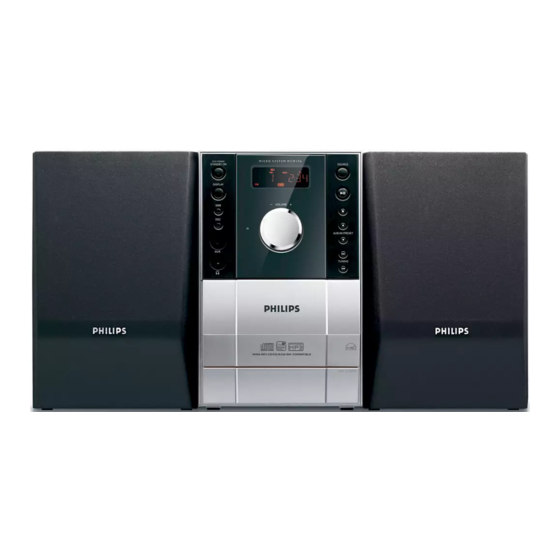
Summary of Contents for Philips MCM196/55
- Page 1 Micro Hi-Fi System MCM196 User manual Manual del usario...
-
Page 2: Aviso Importante
LEA CUIDADOSAMENTE ESTE INSTRUCTIVO ANTES DE USAR SU APARATO. AVISO IMPORTANTE Philips Mexicana, S.A. de C.V. no se hace responsable por daños o desperfectos causados por: – Maltrato, descuido o mal uso, presencia de insectos o roedores (cucarachas, ratones etc.). - Page 3 & ¡ M I C R O S Y S T E M M C M 1 9 6 ALBUM/...
-
Page 4: General Information
General Information IMPORTANT! Safety Information PLEASE NOTE THAT THE VOLTAGE ● Before operating the system, check that the SELECTOR LOCATED AT THE REAR OF operating voltage indicated on the typeplate (or THIS SYSTEM IS PRESET AT 220V FROM the voltage indication beside the voltage THE FACTORY. -
Page 5: Rear Connections
Preparations FM wire antenna MW loop antenna AERIAL AERIAL speaker speaker (right) (left) SPEAKERS RSP-134V AC power cord Rear connections Antenna Connection MW Antenna The type plate is located at the rear of the Connect the supplied MW loop antenna to the system. -
Page 6: Before Using The Remote Control
Preparations FM Antenna Before using the remote control It is unnecessary to connect the FM pigtail Pull out the plastic protective sheet. antenna since it is fixed to the main unit. Select the source you wish to control by ● Adjust the FM antenna for optimal FM stereo pressing one of the source select keys on the reception. - Page 7 Controls Tape Deck Operation Controls on the system and RECORD● ... starts recording. remote control PLAY 2 .... starts playback. SEARCHà / á fast rewinds/winds the tape. STANDBY ON (2) – switches the system to standby/on. STOP•OPENÇ0 ......... stops the tape; opens the tape DISPLAY/CLOCK compartment.
-
Page 8: Basic Functions
Basic Functions To exit without storing the Plug and Play ● PressÇon the system. ➜ M I C R O S Y S T E M M C M 1 9 6 If you do not complete the Plug and Play installation, the function will be restarted when you next turn on the main supply again. -
Page 9: Switching The System On
Basic Functions Switching the system on Adjusting volume and sound ● Turn the VOLUME control anti-clockwise to Press STANDBY ON or SOURCE decrease or clockwise to increase volume on the (or 2on the remote control). system (or press VOL -/+ on the remote ➜... -
Page 10: Basic Playback Controls
CD/MP3 Operation Basic playback controls To play a disc M I C R O S Y S T E M M C M 1 9 6 ● Press 2; to start playback. ➜ The current track number and elapsed playing time of the track are displayed during disc playback. - Page 11 CD/MP3 Operation Press TUNING 4 ¢ (on the remote Note: – The SHUFFLE and REPEAT functions cannot be control 4 ¢) to select a desired track. used simultaneously. ➜ The album number will change accordingly as you reach the first track of an album by pressing Programming track numbers 4 or the last track of an album by pressing Programme in the STOP position to select and...
-
Page 12: Radio Reception
Radio Reception Automatic programming Automatic programming will start with a chosen M I C R O S Y S T E M M C M 1 9 6 preset number. From this preset number upwards, former programmed radio stations will be overridden. -
Page 13: Tape Operation/Recording
Tape Operation / Recording Altering the VOLUME, DBB or DSC controls will not affect the recording in progress. ● The recording sound quality might differ depending on the quality of your recording source and the recording tape. ● At the very beginning and end of the tape, no recording will take place during the 7 seconds when the leader tape passes the recorder heads. -
Page 14: Other Connection
Demagnetising the heads accumulate at the disc lens. To ensure good ● Use a demagnetising tape available at your playback quality, clean the disc lens with Philips dealer. CD Lens Cleaner or any commercially available cleaner. Follow the instructions supplied with... -
Page 15: Activating And Deactivating Sleep
Clock/Timer Press TUNING 4 ¢ to set the minutes. Press TIMER to confirm the time. M I C R O S Y S T E M M C M 1 9 6 ➜ The timer is now set and activated. Activating and deactivating TIMER ●... -
Page 16: Specifications
Do not open the system as there is a risk of electric shock. If a fault occurs, first check the points listed below before taking the system for repair. If you are unable to remedy a problem by following these hints, consult your dealer or Philips for help. - Page 17 Troubleshooting Radio reception is poor. ✔ If the signal is too weak, adjust the antenna or connect an external antenna for better reception. ✔ Increase the distance between the Mini HiFi System and your TV or VCR. ✔ Recording or playback cannot be made. Clean deck parts, see “Maintenance”.
-
Page 20: Hearing Safety
Hearing Safety Listen at a moderate volume. ● Using headphones at a high volume can impair your hearing. This product can produce sounds in decibel ranges that may cause hearing loss for a normal person, even for exposure less than a minute. The higher decibel ranges are offered for those that may have already experienced some hearing loss. -
Page 21: Class 1 Laser Product
Meet Philips at the Internet http://www.philips.com/usasupport MCM196 CLASS 1 LASER PRODUCT PDCC-JH-0651 Printed in China...


