Bosch SHEM78WH5N Operating Instructions Manual
Hide thumbs
Also See for SHEM78WH5N:
- Operating instructions manual (118 pages) ,
- Operating instructions manual (66 pages)
Table of Contents
Advertisement
Quick Links
Advertisement
Table of Contents

Related Manuals for Bosch SHEM78WH5N


Summary of Contents for Bosch SHEM78WH5N
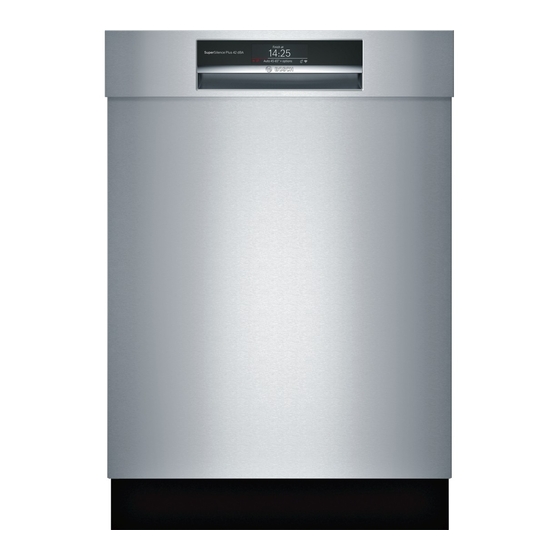
- Page 1 Dishwasher SHEM78WH5N en-us Operating instructions fr-ca Notice d'utilisation...
-
Page 3: Table Of Contents
en-us Table of contents e n - u s O p e r a t i n g i n s t r u c t i o n s Safety Definitions...5 IMPORTANT SAFETY INSTRUCTIONS . - Page 4 en-us...
-
Page 5: Safety Definitions
Safety Definitions en-us Safety Definitions S a f e t y D e f i n i t i o WARNING This indicates that death or serious injuries may occur as a result of non-observance of this warning. CAUTION This indicates that minor or moderate injuries may occur as a result of non-observance of this warning. -
Page 6: Important Safety Instructions
IMPORTANT SAFETY INSTRUCTIONS READ AND SAVE THESE INSTRUCTIONS R U C T I O N S READ AND SAVE THESE INSTRUCTIONS I M P O R T A N T S A F E T Y I N S T IMPORTANT SAFETY INSTRUCTIONS This dishwasher is provided with WARNING... - Page 7 IMPORTANT SAFETY INSTRUCTIONS READ AND SAVE THESE INSTRUCTIONS Do not wash plastic items WARNING unless they are marked “dishwasher safe” or the RISK OF ELECTRIC SHOCK! equivalent. For plastic items This appliance must be not so marked, check the grounded. In the event of a manufacturer’s malfunction or breakdown, recommendations.
- Page 8 IMPORTANT SAFETY INSTRUCTIONS READ AND SAVE THESE INSTRUCTIONS responsibility of the parents/legal NOTICE guardians to ensure the children are instructed in safe practices by It is highly recommended for the end qualified persons. user to become familiar with the procedure to shut off the incoming Proper Care and Maintenance water supply and the procedure to shut off the incoming power supply.
-
Page 9: Causes Of Damage
Causes of Damage en-us ƒ Causes of Damage NOTICES C a u s e s o f D a m a g e Never use steam cleaning products to clean your dishwasher. The manufacturer will not be liable for the possible damages or consequences. -
Page 10: Getting Started
en-us Getting Started Getting Started Appliance overview G e t t i n g S t a r t e d... - Page 11 Getting Started en-us Display indicators The numbers stated below refer to the overview images on the previous Cycle time remaining page of this manual. Refill rinse aid indicator Lights up when rinse aid is Operating panel Refill salt indicator ( On/Off button Lights up when salt is low 0 Wash cycles Remote Start indicator...
- Page 12 en-us Getting Started The selected setting has now been The following text is indicated on the stored. display window at the top @: Scroll with < > If the appliance was Note: Set with + - disconnected from the power supply Leave with Setup 3 sec.
- Page 13 Getting Started en-us Settings The dishwasher has been preset with Make the selection with setting certain settings for your convenience. buttons + - X. You can change these factory Press and hold the Info button settings. 8 for 3 seconds. The chosen setting has now been Change the setting as follows: stored.
- Page 14 en-us Getting Started Setting Factory setting Infotext by pressing Info button Network login Manual or Check WPS function on router. WiFi must be turned on Autom./ WSP for this setting to appear. No WPS function: Manual WPS function: Automatic Connect to the app Start with + Connect appliance to mobile terminal device.
-
Page 15: Home Connect
Home Connect en-us Press Info button 8 for Home Connect 3 seconds until the following text is indicated on the display window This dishwasher is Wi-Fi capable and at the top @: H o m e C o n n e c t can be remotely controlled via a Scroll with <... - Page 16 en-us Home Connect Automatic: Connect to the home About data protection: network using the WPS function of When your Home Connect your router. dishwasher is connected for the first time to a WLAN network which is connected to the Internet, your Home Connect dishwasher transmits the following categories of data to the Home Connect server (initial...
- Page 17 To activate the remote control, Declaration of Conformity can be press the Remote Start button found online at www.bosch-home.com among the If the Home Connect Assistant additional documents on the product was aborted during start-up, press page for your appliance.
- Page 18 en-us Home Connect Wi-Fi Module FCC/IC INDUSTRY CANADA STATEMENT ® Statements This device complies with Industry Canada licence-exempt Model: COM1 RSS standard(s). FCC ID: 2AHES-COMGEN1 Operation is subject to the following IC: 21152-COMGEN1 two conditions: This device may not cause The Home Connect module is a interference, and communication device designed to...
-
Page 19: Water Softening System
Water softening system / special salt en-us Adjusting the water Water softening softening system system / special salt The amount of salt dispensed can be set from 0 to 62°E. Salt is not To ensure good rinsing results, the required at the set value 0-8. s a l t s y s t e m / s p e c i a l W a t e r s o f t e n i n g... - Page 20 en-us Water softening system / special salt Switching off low salt Top off the salt as follows: Undo the screw plug on the indicator / water softening dispenser 1Z. system Fill the dispenser with water (required only when switching on If the use of combined detergents s t e m t e r s o f t e n i n g s y...
-
Page 21: Rinse Aid
Rinse Aid en-us Rinse Aid To achieve proper drying, always use R i n s e A i d a liquid rinse aid, even if your detergent contains a rinse aid or drying additive. The dishwasher indicates low Note: rinse aid by turning on the Rinse Aid indicator on the display @. - Page 22 en-us Rinse Aid Setting the amount of rinse NOTICE aid used Using no rinse aid or setting the The amount of rinse aid dispensed dispenser to 0 may result in longer can be set from 0 to 6. Set the cycle times consuming more energy amount of rinse aid to be dispensed and water.
-
Page 23: Loading The Dishwasher
Loading the Dishwasher en-us Loading the Not Recommended Acrylic Crazing or small cracks Dishwasher throughout the acrylic, may occur. Dishware material a s h e r L o a d i n g t h e D i s h w Adhesive- Adhesives that join Before using your dishwasher... - Page 24 en-us Loading the Dishwasher Loading the racks Loading the lower rack Place large items in the lower For best dishwashing results, rack 9". Load pots, pans and bowls observe the following when loading upside down. Do not block the vent the dishwasher: hole 1J with tall baking sheets.
- Page 25 Loading the Dishwasher en-us Folding the cup shelves down Upper rack 12 Note: will allow the cups to sit at an increased angle and reduce water pooling on cup bottoms. Third rack 1* Additional loading pattern Folding the cup shelves down Note: will allow the cups to sit at an 10 place setting...
- Page 26 en-us Loading the Dishwasher Unloading the dishwasher WARNING When unloading the dishwasher, to RISK OF INJURY! prevent water from dripping onto dry The sharp points and edges of dishes, unload the lower knives and other sharp utensils rack 9" first. Next, unload the can cause serious injury.
- Page 27 Loading the Dishwasher en-us Flip tines The upper and lower rack are fitted with flip tines that can be folded down depending on what you may need to load in the rack. Lower rack flip tines: To fold down, pull flip tine gently forward and release it from the notch.
- Page 28 en-us Loading the Dishwasher You can fold down the side shelves to provide more room for taller items Removing/Installing third of silverware. The front rows of rack prongs can be folded down to provide room for wider handles. Removing third rack 1* Pull out third rack all the way (1).
- Page 29 Loading the Dishwasher en-us Removing/Installing upper rack with Rackmatic ® Installing third rack 1* Pull out third rack rails all the way (1). Removing upper rack 12 Insert third rack at an angle. Make sure that the stopper hooks of Pull out upper rack all the way (1).
-
Page 30: Detergent
en-us Detergent Installing upper rack 12 Detergent Pull out upper rack rails all the way (1). Use only detergent specifically D e t e r g e n t Insert upper rack at an angle. designed for dishwashers. For best Make sure that the stopper hooks results, use fresh powdered of both rails slide in between the... - Page 31 Detergent en-us The detergent dispenser will open automatically at the ideal time for When using detergent tabs, lay the set cycle. The powder or liquid them such that they do not come detergent is distributed in the in contact with the cover, insert a appliance and is dissolved, detergent tab flat, not on its side.
-
Page 32: Dishwasher Cycles
en-us Dishwasher Cycles Dishwasher Cycles D i s h w a s h e r C y c l e s Wash cycle Recommended use Possible wash cycle option Best for cleaning items with baked-on Heavy food or grease. These dishes would normally require soaking or hand scouring. -
Page 33: Dishwasher Cycle Options
Dishwasher Cycle Options en-us dispenser 92, with no detergent being used in the prewash. The unit was not subjected to truncated testing per the definitions in the test procedure. We recommend that dish loads such as the one in the energy certification test have the rack position set in the highest position. - Page 34 en-us Dishwasher Cycle Options Wash Cycle Information makes decisions that can cause the cycle time and water usage to adjust To save energy, this dishwasher has intermittently. Wash cycle times are EcoSense where the sensors in the based on 120°F (49° C) water dishwasher automatically adjust the supply.
- Page 35 Dishwasher Cycle Options en-us Heavy Auto Delicate Normal Speed60 Express Half Load Rinse Cycle 130-150 125-150 140-155 115-125 time min. Water 4.9-6.4/ 3.5-6.5/ 2.2-5.4/ 2.7-4.4/ usage 18.6-24.2 13.1-24.5 8.3-20.6 10.2-16.5 gal/L Rinse 162/ 162/ 162/ 162/ temp. °F/°C Cycle 105-120 100-115 75-80 110-120...
-
Page 36: Operating The Dishwasher
en-us Operating the Dishwasher Operating the touch buttons Operating the Buttons are sensitive and should be Dishwasher touched gently. Avoid any grease or food particles resting on the buttons With hidden controls, the door Note: as they could activate the s h w a s h e r O p e r a t i n g t h e D i must be opened before changing... - Page 37 Operating the Dishwasher en-us AquaSensor and water consumption is increased accordingly. The AquaSensor is an optical A q u a S e n s o r measuring device which measures Very sensitive: This setting adjusts the cleanliness of the rinse water. the wash cycle strength for difficult conditions of use, for example firmly The AquaSensor is used according...
- Page 38 en-us Operating the Dishwasher Tone volume Delay start time The end of the wash cycle is You can delay the start of the wash indicated by a buzzer. You can also cycle by up to 24 hours. Depending change this setting. on the setting of the time display, the end of cycle is indicated with “Finish in”...
-
Page 39: Care And Maintenance
Care and Maintenance en-us The digital display @ shows: WARNING "Program was terminated". Close the door. RISK OF INJURY! The wash cycle sequence lasts To avoid risk of injury, always approx. 1 min. The digital display use caution when opening the @ shows: “Finished”. - Page 40 Directs the smallest of particles to the household plumbing drain. Filters Cleaning intervals The filter system 1b is designed to The Bosch filter system 1b is ® minimize maintenance while designed to prevent the need to providing premium cleaning...
- Page 41 Care and Maintenance en-us When washing normally attached Remove any residue and clean food soils that have been scraped filters by rinsing under running before loading, in a household that water. Note: do not use abrasive runs the dishwasher every other day, brushes or steel wool, etc., as your filter should be cleaned: they may damage the filter.
- Page 42 en-us Care and Maintenance Drain pump WARNING Large food remnants in the rinsing Use caution when removing water not retained by the filters may parts for cleaning as some block the waste water pump. In this debris may be sharp. case: Disconnect the appliance from the power supply.
-
Page 43: Troubleshooting
Troubleshooting en-us a malfunction of the dishwasher itself. Troubleshooting The following information may help you with a dishwasher problem Dishwashers may occasionally without involving a repair T r o u b l e s h o o t i n g exhibit problems that are unrelated to professional. - Page 44 en-us Troubleshooting Fault Cause Remedial action Error code Supply voltage too low. Not a dishwasher fault, have the supply is lit. voltage and electrical installation checked. A different A technical fault has probably Switch off dishwasher with the On/Off error code is occurred.
- Page 45 Troubleshooting en-us Fault Cause Remedial action Dishes not dry. No or too little rinse aid in the Refill rinse aid. dispenser. Wash cycle selected without drying. Select wash cycle with drying. "Dishwasher Cycles" on page 32 Water collecting in depressions on Arrange dishes in a sloping position, the dishes and silverware.
- Page 46 en-us Troubleshooting Fault Cause Remedial action Food soils on Dishes placed too closely together, Arrange dishes with adequate clearance the dishes. racks overfilled. between them ensuring that the spray jets can reach the surface of the dishes. Prevent contact points. Spray arm rotation obstructed.
- Page 47 Troubleshooting en-us Fault Cause Remedial action Detergent Detergent dispenser cover 92 Dishes must not be placed above the residue. blocked by dishes and therefore detergent tab tray 1B. These may block does not open fully. the lid of the detergent dispenser and prevent it from opening fully.
- Page 48 en-us Troubleshooting Fault Cause Remedial action White, Detergent substances are Change detergent brand. stubborn deposited. These coatings cannot Clean dishwasher mechanically. coatings; usually be removed with chemicals limescale on (dishwasher cleaner, ...). the dishes, Hardness range incorrectly set or Set water softening system according to container or water hardness greater than instructions for use or top up salt.
- Page 49 Troubleshooting en-us Fault Cause Remedial action Plastic parts Too low rinsing temperature. Select wash cycle with higher washing discolored. temperature. Dishes precleaned too intensely; Do not pre-rinse dishes. Remove only large sensors therefore decide on weak food soils. wash cycle sequence. Stubborn Increase sensitivity of the sensors.
- Page 50 en-us Troubleshooting Fault Cause Remedial action Dishwasher Power supply fuse may have been Replace blown fuse or reset tripped circuit does not start. blown or circuit breaker tripped. breaker. Door may not be properly latched. Press the main power switch to turn unit on. Unit may not be turned on.
- Page 51 Troubleshooting en-us Fault Cause Remedial action Door does not Door is not set correctly. Set the door correctly with the aid of the open. installation instructions. Child lock is activated. Press twice in quick succession at the top of the door in the middle. Dishwasher is disconnected from Check power supply plug and fuses.
- Page 52 en-us Troubleshooting Fault Cause Remedial action Filling valves Depends on domestic installation, No remedial action possible. making striking as dishwasher is not defective. No noises. effect on dishwasher function. Knocking or Spray arm strikes the dishes, Position dishes so that the spray arms do rattling noise.
-
Page 53: Customer Service
Call us at 1-800-944-2904 Customer Service Contact Customer Service from our web site: Your Bosch® dishwasher requires no www.bosch-home.com/us or C u s t o m e r S e r v i c e special care other than that www.bosch-home.ca... -
Page 54: Statement Of Limited Product
(BSH) in this Statement of Limited slight color variations due to inherent Product Warranty applies only to differences in painted and porcelain Bosch® dishwashers (“Product”) parts, as well as differences caused sold to you, the first using purchaser, by kitchen lighting, product location, provided that the Product was or other similar factors. -
Page 55: Warranty
Statement of Limited Product Warranty en-us Repair/Replace as Your affiliates or representatives of BSH). Notwithstanding the foregoing, BSH Exclusive Remedy will not incur any liability, or have responsibility, for the Product if it is During this warranty period, BSH or located in a remote area (more than one of its authorized service 100 miles from an authorized service... - Page 56 en-us Statement of Limited Product Warranty Any party’s willful misconduct, including all electrical, plumbing or negligence, misuse, abuse, other connecting facilities, for proper accidents, neglect, improper foundation/flooring, and for any operation, failure to maintain, alterations including without limitation improper or negligent installation, cabinetry, walls, floors, shelving, tampering, failure to follow etc.);...
- Page 57 Statement of Limited Product Warranty en-us shall be effective unless authorized in writing by an officer of BSH Home Appliances Corporation. How to Obtain Warranty Service TO OBTAIN WARRANTY SERVICE FOR YOUR PRODUCT, YOU SHOULD CONTACT THE NEAREST BSH AUTHORIZED SERVICE CENTER, OR CALL 1-800-944-2904...
- Page 58 Déclaration de la garantie limitée du produit fr-ca de services agréé) ou s'il se trouve Une faute intentionnelle d'un tiers, dans un environnement la négligence, la mauvaise raisonnablement inaccessible, à utilisation, l'utilisation abusive, des risque, menaçant, ou hostile ; à cet accidents, l'exploitation effet, BSH se chargera, à...
- Page 59 fr-ca Déclaration de la garantie limitée du produit objets se trouvant aux alentours du AU RESTAURANT, LES DÉPENSES Produit. Également exclus de la DE RESTRUCTURATION EN SUS garantie sont des Produits sur DES DOMMAGES DIRECTEMENT lesquels les numéros de série ont été CAUSÉS PAR BSH, OU altérés, oblitérés ou effacés ;...
- Page 61 fr-ca Déclaration de la garantie limitée du produit *9001287927* 9001287927 (9701)