
Related Manuals for LG ST600


Summary of Contents for LG ST600
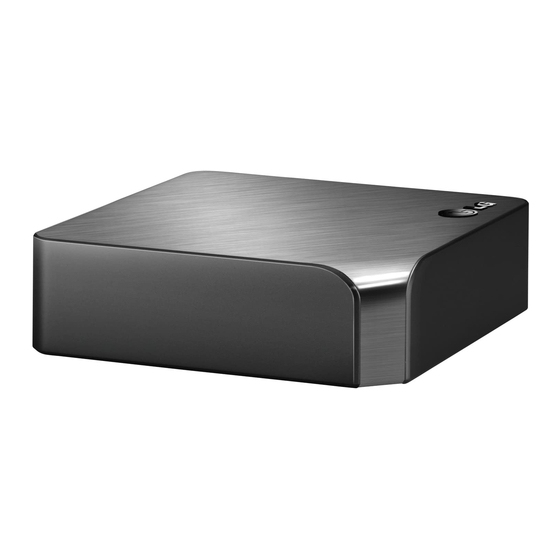
- Page 1 OWNER’S MANUAL Smart TV Upgrader Please read this manual carefully before operating your set and retain it for future reference. ST600 www.lg.com P/NO : SAC35193509...
- Page 3 Safety Information CAUTION RISK OF ELECTRIC SHOCK DO NOT OPEN CAUTION: TO REDUCE THE RISK OF ELECTRIC SHOCK DO NOT REMOVE COVER (OR BACK) NO USER-SERVICEABLE PARTS INSIDE REFER SERVICING TO QUALIFIED SERVICE PERSONNEL. This lightning flash with arrowhead symbol within an equilateral triangle is intended to alert the user to the presence of uninsulated dangerous voltage within the product’s...
- Page 4 2004/108/EC, 2006/95/EC and 2009/125/EC. Please contact to the following address for obtaining a copy of the DoC (Declaration of Conformity). European representative : LG Electronics Service Europe B.V. Veluwezoom 15, 1327 AE Almere, The Netherlands (Tel : +31-(0)36-547-8888) Indoor use only.
- Page 5 Getting Started...
-
Page 6: Table Of Contents
– Selecting a subtitle language – Changing TV Aspect Ratio – Changing subtitle code page – Changing Picture Mode Using the Premium Using the LG Apps – Signing in – Managing my Apps Using the Browser Home – About the Browser Home menu –... - Page 7 Troubleshooting Troubleshooting – General – Picture – Resetting – Network – Customer Support – Open source software notice Appendix Network Software Update – Network update notification – Software Update About Nero MediaHome 4 Essentials – Installing Nero MediaHome 4 Essentials –...
-
Page 8: Getting Started
Getting Started Introduction About the “7” Symbol Display “7” may appear on your TV display during operation and indicates that the function explained in this owner’s manual is not available on that specific media. File requirement Video files File File Location Extension “.avi”, “.divx”,... - Page 9 Note y The file name is limited to 180 characters. y Maximum files/Folder: Less than 2000 (total number of files and folders) y Depending on the size and number of the files, it may take several minutes to read the contents on the media.
-
Page 10: About Dlna
Visit “Apple iTunes” or “Google Apps Marketplace” for detailed information of “LG Remote”. Compatibility Notes y If you experience compatibility problems, please contact an authorized Customer Service Center. -
Page 11: Main Unit
BACK (x): Exits the menu or resumes playback. Getting Started g Colored (R, G, Y, B) buttons: They are also used for [Smart Share], [Premium], [LG Apps] and [Web Browser] menu. h d (Play): Starts playback. M (Pause): Pauses playback. i c/v: Searches backward or forward. -
Page 12: Connecting
Connecting Connecting the AC Adapter Connect the unit to the power supply with the supplied AC adapter. Connect the power cord to the adapter, and then plug the other end into an AC outlet. Rear of the unit AC adapter AC power cord y Contact an electrical parts distributor for assistance in selecting a suitable AC plug adapter... -
Page 13: Resolution Setting
Additional Information for HDMI y When you connect a HDMI or DVI compatible device make sure of the following: - Try switching off the HDMI/DVI device and this unit. Next, switch on the HDMI/DVI device and leave it for around 30 seconds, then switch on this unit. -
Page 14: Connecting To An Amplifier
Connecting Connecting to an Amplifier Make one of the following connections, depending on the capabilities of your existing equipment. y HDMI Audio connection (page 14) y Digital Audio connection (page 15) Since many factors affect the type of audio output, see “Audio Output Specifications”... -
Page 15: Connecting To An Amplifier Via Digital Audio Output
Connecting Connecting to an Amplifier via Digital Audio Output Connect the unit’s OPTICAL AUDIO OUT jack to the corresponding in jack (OPTICAL) on your amplifier using an optional digital audio cable. Rear of the unit Optical cable OPTICAL DIGITAL INPUT Receiver/Amplifier You will need to activate the unit’s digital output. -
Page 16: Connecting To Your Home Network
Connecting Connecting to your Home Network This unit can be connected to a local area network (LAN) via the LAN port on the rear panel or the internal wireless module. By connecting the unit to a broadband home network, you have access to services such as software updates, Web Browser and on-line content services. -
Page 17: Wired Network Setup
Wired Network Setup If there is a DHCP server on the local area network (LAN) via wired connection, this unit will automatically be allocated an IP address. After making the physical connection, a small number of home networks may require the unit’s network setting to be adjusted. -
Page 18: Wireless Network Connection
Connecting Wireless Network Connection Another connection option is to use an Access Point or a wireless router. The network configuration and connection method may vary depending on the equipment in use and the network environment. This unit is equipped with an IEEE 802.11n (Dual- band, 5 GHz and 2.4 GHz band) wireless module, which also supports the 802.11a/b/g standards. - Page 19 2. The [Connection Setting] menu appear on the screen. Use W/S to select [Wireless] and press Center button. 3. Select [Yes] and press Center button to continue. The new connection settings reset the current network settings. 4. The unit scans the all available access points or wireless routers within range and display them as a list.
- Page 20 Connecting Notes on Network Connection: y Many network connection problems during set up can often be fixed by re-setting the router or modem. After connecting the unit to the home network, quickly power off and/or onnect the power cable of the home network router or cable modem.
-
Page 21: Usb Device Connection
USB device connection This unit can play video, audio and photo files contained in the USB device. Playback content in the USB device 1. Insert a USB device to the USB port until it fits into place. When you connect the USB device on the HOME menu, the unit plays an audio file contained in the USB storage device automatically. -
Page 22: System Setting
System Setting Settings Adjust the Setup Settings You can change the settings of the unit in the [Setup] menu. 1. Press HOME (n). 2. Press green (G) colored button. The [Setup] menu appears. 3. Use W/S to select the first setup option, and press D to move to the second level. -
Page 23: [Language] Menu
Resolution Sets the output resolution of the Component and HDMI video signal. Refer to page 13 for details about the resolution setting. [Auto] If the HDMI OUT jack is connected to TVs providing display information (EDID), automatically selects the resolution best suited to the connected TV. -
Page 24: [Audio] Menu
System Setting [AUDIO] Menu Set the unit’s Audio options according to the type of audio system you use. Note Since many factors affect the type of audio output, see “Audio Output Specifications” on page 50 for details. HDMI / Digital Output [PCM Stereo] Select if you connect this unit’s HDMI OUT or DIGITAL AUDIO OUT jack to a device with two-... -
Page 25: [Network] Menu
Wi-Fi Direct™ mode. Refer to page 29 for the device connection. Premium/LG Apps [Country Setting] Select your area for displaying proper services and contents on the [Premium] and [LG Apps] feature. [ID Management] Displays the [ID Management] menu. You can manage IDs that ever logged-in on this unit. - Page 26 System Setting Factory Set You can reset the unit to its original factory settings. Note If you reset the unit to its original factory settings using [Factory Set] option, you have to set all the activation for the on-line services and network settings again.
-
Page 27: Operating
Center button. a [Premium] - Displays the Premium Home or [Edit Premium Card] screen. b [LG Apps] - Displays the [LG Apps] screen. c [Web Browser] - Displays the Browser Home screen. d [Sign In] - Displays the [Premium] or [LG Apps] Login menu screen. -
Page 28: Playing A File Media From A Network Server
Operating Playing a file media from a network server This unit can play video, audio and photo files located in a PC or a DLNA server through your home network. 1. Check the network connection and settings (page 16). 2. Press HOME (n). 3. -
Page 29: Wi-Fi Direct™ Connection
Wi-Fi Direct™ Connection Connecting to a Wi-Fi Direct™ certified device This player can play movie, music and photo files located in a Wi-Fi Direct™ certified device. The Wi-Fi Direct™ technology make the player to be directely connected to a Wi-Fi Direct™ certified device without connecting to a network device such as an access point. - Page 30 Operating Connecting to a Wi-Fi available devices This player can connect to a general Wi-Fi device using Wi-Fi Direct™ function. 1. Set the [Wi-Fi Direct] option on the [Setup] menu to [On] (page 25). 2. Press HOME (n). 3. Select [Movie], [Photo] or [Music] using A/D, and press Center button.
-
Page 31: Basic Operations For Video And Audio
Basic operations for video and audio content To stop playback Press Z (STOP) while playback. To pause playback Press M (PAUSE) while playback. Press d (PLAY) to resume playback. To play frame-by-frame (Video) Press M (PAUSE) while movie playback. Press M (PAUSE) repeatedly to play Frame-by-Frame playback. -
Page 32: Advanced Playback
Operating Advanced Playback Zoom in & out during slide show 1. During playback, press m (MENU) to display the option menu. 2. Select the [Zoom] option using W/S, and press Center button to display the [Zoom] menu. 3. Use red (R) or green (G) colored button to zoom out or in the picture. -
Page 33: Selecting A Subtitle File
Selecting a subtitle file If the subtitle file name is different from the video file name, you need to select the subtitle file on the [Movie] menu before playing the movie. 1. Use W/S/A/D to select the subtitle file you wish to play in the [Movie] menu. -
Page 34: Listening To Music While Slide Show
Operating Listening to music while slide show You can display photo files while listening to audio files. 1. While viewing a photo in full screen, press m (MENU) to display the option menu. 2. Use W/S to select [Music Select] option, and press Center button to display the [Music Select] menu. -
Page 35: Playing From Selected Time
Playing from selected time 1. Press m (MENU) during playback. The time search box shows the elapsed playing time. 2. Select the [Time] option and then input the required start time in hours, minutes, and seconds from left to right. For example, to find a scene at 2 hours, 10 minutes, and 20 seconds, enter “21020”. -
Page 36: Changing Picture Mode
When you are first time to access [Premium] or [LG Apps] feature, current country setting appears. If you want to change the country setting, select [Edit] and press Center button. -
Page 37: Using The Lg Apps
To install a paid application, you need to be a paid member. Visit www.lgappstv.com for more information. Signing in To use the [LG Apps] feature, you need to sign in with your account. 1. On the [LG Apps] or [My Apps] screen, press red (R) colored button. -
Page 38: Using The Browser Home
Operating Using the Browser Home You can browser, search web pages using the web browser feature over the Internet. Note y Web browser on this unit is different with a web browser on your PC. The web browser on this unit does not support additional plug-ins and platform-dependant technology such as ActiveX. -
Page 39: Editing Your Favorite Web
Editing your favorite web pages In the Favorites menu , you can edit your favorites. 1. Press red (R) colored button to change the highlighter to edit mode. 2. The highlighter color will be changed to green color. 3. Select a web page and press Center button to display the [Edit] menu. -
Page 40: Playing Content Via Media Link
Operating Playing content via Media Link You can enjoy music, photo, or video by installing the PLEX application on your PC via home network. Note y To enjoy Media Link, install PLEX Midea server version on the MAC or PC higher than 0.9.1.14. -
Page 41: Using The Media Link
Using the Media Link 1. Press HOME (n). 2. Select the [Media Link] using W/S/A/D, and press Center button. List of Media Link available PCs on your home network are displayed. 3. Use W/S/A/D to select a PC and press Center button to display the options as described below. -
Page 42: Using Music Section
Operating Using Music section You can listen to music or view the file information on the music section. 1. Press HOME (n). 2. Select the [Media Link] using W/S/A/D, and press Center button. 3. Select a music section using A/D, and press Center button. -
Page 43: Plug-In Installation
Plug-in installation You can enjoy a various media on the web by installing the plug-in. 1. Press HOME (n). 2. Select the [Media Link] using W/S/A/D, and press Center button. 3. Select a Plug-in section using A/D, and press Center button. a Shows available plug-in list. -
Page 44: Troubleshooting
Troubleshooting Troubleshooting General Symptom No Power. Cannot play movie, photo or audio files. The remote control does not work properly. The connected USB storage device is not recognized. Picture Symptom There is no picture. Picture noise appears Cause & Solution y Plug the power cord into the wall outlet securely. -
Page 45: Resetting
You can update the Unit using the latest software to enhance the products operation and/or add new features. To obtain the latest software for this unit (if updates have been made), please visit http://us.lgservice.com or contact LG Electronics customer care center. Open source software notice To obtain the corresponding source code under GPL, LGPL and other open source licenses, please visit http://opensource.lge.com. -
Page 46: Appendix
Appendix Network Software Update Network update notification From time to time, performance improvements and/or additional features or services may be made available to units that are connected to a broadband home network. If there is new software available and the unit is connected to a broadband home network, the unit will inform you about the update as follows. -
Page 47: About Nero Mediahome 4 Essentials
The Software Update function may not work properly depending on your internet environment. In this case, you can obtain the latest software from the authorized LG Electronics Service Center then update your unit. Refer to “Customer Support” on page 45. -
Page 48: Sharing Files And Folders
Appendix y Graphics card with at least 32 MB video memory, minimum resolution of 800 x 600 pixels, and 16- bit color settings y Windows® Internet Explorer® 6.0 or higher y DirectX® 9.0c revision 30 (August 2006) or higher y Network environment: 100 Mb Ethernet, WLAN Start up your computer, and insert the supplied CD- ROM disc into your computer’s CD-ROM drive. -
Page 49: Trademarks And Licenses
Trademarks and Licenses HDMI, the HDMI logo and High-Definition Multimedia Interface are trademarks or registered trademarks of HDMI licensing LLC. Manufactured under license from Dolby Laboratories. Dolby and the double-D symbol are trademarks of Dolby Laboratories. Manufactured under license under U.S. Patent Nos: 5,956,674;... -
Page 50: Audio Output Specifications
Appendix Audio Output Specifications Jack/Setting Source Dolby Digital Dolby Digital Plus Linear PCM 2ch Linear PCM 5.1ch Linear PCM 7.1ch Jack/Setting Source Dolby Digital Dolby Digital Plus Linear PCM 2ch Linear PCM 5.1ch Linear PCM 7.1ch *1 The secondary and interactive audio may not be included in the output bitstream if [Digital Output] or [HDMI] option is set to [Primary Pass- Thru]. -
Page 51: Specifications
Specifications General Power Supply Power consumption AC adapter Dimensions (W x H x D) Net Weight (Approx.) Operating temperature Operating humidity Outputs HDMI OUT (video/audio) DIGITAL AUDIO OUT (OPTICAL) System Signal system LAN port Wireless LAN (internal antenna) Bus Power Supply (USB) y Design and specifications are subject to change without notice. -
Page 52: Maintenance
Appendix Maintenance Handling the Unit When shipping the unit Please save the original shipping carton and packing materials. If you need to ship the unit, for maximum protection, re-pack the unit as it was originally packed at the factory. Keeping the exterior surfaces clean y Do not use volatile liquids such as insecticide spray near the unit.