Table of Contents
Advertisement
Quick Links
Advertisement
Table of Contents

Related Manuals for Philips CED1910BT/98


Summary of Contents for Philips CED1910BT/98
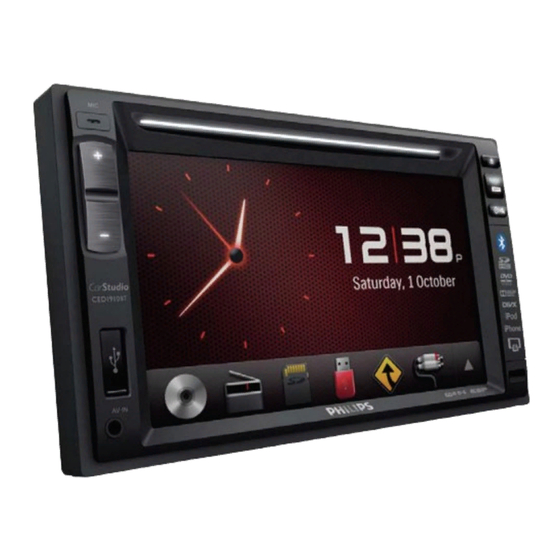
- Page 1 User manual Register your product and get support at www.philips.com/support...
-
Page 2: Table Of Contents
Contents 9 Play from an iPod/iPhone Compatible iPod/iPhone models 29 1 Safety Connect your iPod/iPhone Control play 2 Your car entertainment system Charge your iPod/iPhone Introduction What's in the box 10 Smart Connect Link Overview of the main unit Overview of the remote control 11 Universal USB Charging 3 Install the car entertainment 12 Adjust sound... -
Page 3: Safety
1 Safety • Never use solvents such as benzene, thinner, cleaners available commercially, or anti-static sprays intended for discs. Read and understand all instructions • Clean the device with soft, damp before you use the device. If damage is cloth. Never use substances such caused by failure to follow instructions, as alcohol, chemicals or household the warranty does not apply. -
Page 4: Your Car Entertainment System
Check and identify the contents of the system package: Congratulations on your purchase, and welcome to Philips! To fully benefit from the support that Philips offers, register your product at www.philips.com/ welcome. Introduction With the car entertainment system, you •... -
Page 5: Overview Of The Main Unit
Smart Phone h AV-IN Mirror Box (Not supplied by • Connect to the audio and video Philips) is connected with output sockets of an external system via Smart Connect Link player by a composite AV cable. (refer to chapter 10). -
Page 6: Overview Of The Remote Control
Overview of the remote • Switch to video playback mode. control • Enable or disable the FullSound effect. i DVD AUDIO • Select an audio language or audio channel. j DBB • Enable or disable the DBB (Dynamic Bass Boost) sound effect. k EQ •... -
Page 7: Install The Car Entertainment System
3 Install the car v BAND • Select a tuner band. entertainment /PRESET +/PRESET - • Tune to the previous or next system preset radio station. • Skip to the previous or next folder. Always follow the instructions in this chapter in sequence. -
Page 8: Connect Wires
ISO male Connect to Connect wires connectors Blue strip, white Amplifier relay Note strip control lead • h Black strip Ground Make sure that all loose leads are insulated with electrical tape. Yellow strip The +12V car • Consult a professional to connect wires as battery which is instructed below. - Page 9 Connectors and sockets on rear panel External sockets or connectors For ISO male connectors As indicated above REAR OUT R (Red socket) Rear right speaker AV-IN R (Red socket) Right audio channel output socket of an external player AV-IN L (White socket) Left audio channel output socket of an external player REAR OUT L (White socket)
- Page 10 (Not Supplied) b c d e...
-
Page 11: Mount Into The Dashboard
• Since the unit cannot be used if Mount into the the dashboard opening's slant dashboard angle is above 20 degrees, make sure that the horizontal slant of the car dashboard opening is Note between 0 and 20 degrees. • Make sure that wires are correctly Slide the unit into the dashboard connected before you mount the main unit... -
Page 12: Get Started
• Risk of car accidents! Never watch video or operate this system while driving. Turn on Press » PHILIPS logo and a progress bar are Prepare the remote displayed while boot-up. control • To turn off the system, press and hold for 3 seconds. -
Page 13: Use The Home Menu
[SWC]: Access the interface to assign functions to buttons on the steering wheel. • [Settings]: Access the system menu. • [Car Mirror]: Access the Smart Phone Mirror Box (Not supplied by Philips) via Smart Connect Link (refer to chapter 10). -
Page 14: Set The Date And Time
Customize the home menu Tap [Clock mode] to select a time format. • [24hr]: 24-hour time format Tap and hold an icon until it is • [12hr]: 12-hour time format movable. Tap [Date] to display the interface Drag it to the target place, and then for setting the date. -
Page 15: Switch Display Designs
5 Play from Switch display designs hard media Select a preset display design. In any mode, tap , and then [Display Design]. You can use this system to listen to » The [Display Design] interface is audio, watch videos, and view photos displayed. -
Page 16: Connect A Usb Storage Device
Region code Insert an SD/SDHC card This system can play DVD discs marked with the following region code. Note DVD region Countries and regions • Make sure that the SD/SDHC card contains code compatible files. South Africa • NTFS (New Technology File System) file system is not supported. -
Page 17: Control Play
Control play Videos • : Select a repeat mode. • DVD: [Repeat chapter] (repeat the current chapter), [Repeat title] (repeat the current title), [Repeat all] (repeat all chapters • : Return to the home menu. and titles), or [Repeat off] •... - Page 18 Audios Pictures • : Return to the home menu. • : Return to the home menu. • • : Zoom in or out of the picture. • • Press once to access the track : Rotate the picture clockwise list. or anti-clockwise by 90 degrees.
-
Page 19: Browse Recorded Files
Find the DivX VOD code on your ® Browse recorded files product. > to access the full menu During playing recorded files, you can with all feature icons displayed. access the file list and select files from the list. [Settings] to access the system setup menus. -
Page 20: Listen To Radio
6 Listen to Play non-VOD DivX videos radio Transfer the videos and subtitle files onto a supported recordable disc, USB storage device, or SD/SDHC card. Switch to radio mode Play the video files from the disc, USB storage device, or SD/SDHC After the boot-up at the first time, card. -
Page 21: Tune To A Radio Station
Select a radio range Tune to a radio station Tap [Radio Range]. Tap FM or AM to select a band. • FM bands: FM1, FM2, FM3 Tap [Distance] or [Local] to select a • AM bands: AM1, AM2 tuner sensitivity. repeatedly until the •... -
Page 22: Tune To A Preset Radio Station
Store radio stations Search for RDS programs of a automatically specific type You can search for a radio station with intro search, which broadcasts a 10-second preview of each detected radio station. Select a band. Tap [Auto Store]. » Auto search starts. The six strongest stations of the selected band are saved in >... -
Page 23: Use The Navigation System
7 Use the Item Program Description type navigation VARIED Entertainment programs system POP M Pop music ROCK M Rock music MOR M Light music Insert the map data card LIGHT M Light classical music CLASSICS Classical music OTHER M Special music Note programs •... -
Page 24: Navigate Your Road Trip
8 Use Navigate your road trip Bluetooth Note devices • Risk of traffic accident! Never operate the navigation system during drive. Complete the setting of your destination and other navigation specifications before you drive. With this system, you can listen to audio from a player and make a call through Press NAVI. - Page 25 » [Paired OK!] flashes, and then [Connecting] is displayed on this system. On your device, enable or permit the connection with CED1910BT. • If a player is connected, the music playback interface is displayed on this system. on this system to search for other Bluetooth devices.
- Page 26 Tap [New pairing] to start searching : Tap it to display the phone for Bluetooth devices. book that is synchronized with your mobile phone and keypad. Repeat steps 3 to 5 that are indicated in the above section "Pair : Tap it to display the list of the first device"...
-
Page 27: Play Audio From A Connected Device
Tap the name of the paired device Tap icons on the interface to control that you want to reconnect, play. • disconnect, or delete. : Pause or resume play. • • : Tap to reconnect the : Select the previous device. - Page 28 Make sure that the microphone to send the call. is connected to this system (see • To end the call, tap 'Connect wires' on page 8). • To enter numbers during the call, to display the keypad first. Place the microphone at a proper location, such as, stick it onto the dashboard, or clip it on the sun- Redial the last called number...
- Page 29 Manage the phone book Tap the name of a contact from the list. » The following options are displayed. • [Delete one]: Delete the selected contact. • [Delete all]: Delete all contacts. • [Cancel]: Return to the phone to transfer the phone call to book interface.
-
Page 30: Play From An Ipod/Iphone
9 Play from an iPod/iPhone Note • During play, no audio signals are transferred through the headphone socket of your iPod/iPhone. to display the favorite call list. behind a sequence number. Compatible iPod/iPhone Enter the number and then tap OK to confirm. -
Page 31: Control Play
• the USB socket on the front panel • : Tap to select a play mode. of this system, and • (highlighted): Play tracks • your iPod/iPhone. randomly. » The system starts playing tracks • (in gray): Play tracks in that are stored on your iPod/ sequence. -
Page 32: Smart Connect Link
Philips that offers integration playback from pen drive to now being between external peripheral (TV box, able to supply current for charging smart devices, etc) and Philips’s car smart devices. entertainment system. Smart Connect The current required for recharging Link brings the attached peripheral’s... -
Page 33: 12 Adjust Sound
This feature is unavailable when you listen to radio. Adjust the volume level Philips FullSound restores the audio details that are lost due to compression. It enriches the music signals so that Press +/- repeatedly on the front panel. -
Page 34: Others
to select a preset • : Tap to display the [Fader/ Balance] interface for adjusting the sound equalizer. • [Custom], [Techno], [Rock], fader and balance. • [Classic], [Jazz], [Optimal], [Flat], : Tap to display the or [Pop] [SubWoofer] interface for setting »... -
Page 35: Adjust Settings
13 Adjust Select a listening zone settings Philips’ innovative Zone technology enables the driver or passengers to enjoy music with the best speakers balance and experience more vivid Access system setup spacial effect as the artist is intended menus to create. You can switch the music... -
Page 36: Adjust General Settings
Swipe your finger up or down to Settings Options Description view more settings. [Clock [12Hr] / Select a time Tap an option to view details or mode] [24Hr] format. change the setting. [Date] Set the date. • To exit the menu, tap [Time] Set the time. -
Page 37: Adjust Navigation Settings
Settings Options Adjust Bluetooth [Restore Tap to display the dialog settings factory box for restoring the system. defaults] • Tap [Yes] to restore the system to factory default status. • Tap [No] to return to the previous menu. Adjust Navigation settings Bluetooth Options... -
Page 38: 14 Others
14 Others Bluetooth Options Description settings [Pin Code] Set the password for Play external audio/ pairing the car video input entertainment system with another You can connect an external audio/ video player to this system. Bluetooth device. The default password is 0000. -
Page 39: Use Rear Monitors
• [Off]: Disable the signal Use rear monitors transferring to rear monitors. » When it is enabled, the following If one or two monitors are connected interface is displayed. for backseat passengers, you can select different sources for front and backseat passengers. -
Page 40: Use Buttons On The Steering Wheel
Press and hold the button on the » When blinks with and [Rear steering wheel for one second. zone] displayed, the current control » The following interface is interface is for the rear source. displayed. Use buttons on the steering wheel You can assign a function to a button on the steering wheel, and then control the system with that button. -
Page 41: Upgrade The Firmware
• If the fuse gets damaged immediately after it is replaced, an internal malfunction may Check the current firmware version occur. In this case, consult your Philips of this system (see 'View system retailer. information' on page 35). Go to www.philips.com/support. -
Page 42: Product Information
15 Product Total harmonic Less than 0.3% distortion information Channel > 55 dB separation Video signal NTSC/PAL format Note Video output 1 +/- 0.2 V p-p • Product information is subject to change without prior notice. Radio Frequency range 87.5 - 108.0 MHz General - FM (50 kHz per step) - Page 43 • Supported sampling frequencies: 32 Compatible Hands-Free kHz, 44.1kHz, 48 kHz Bluetooth profiles Profile (HFP) • Supported Bit-rates: 32-320 Kbps Handset Profile and variable bit rate (HSP) Advanced Audio Supported video formats: Distribution Profile • (A2DP) • Divx Audio Video Remote Control Note Profile (AVRCP)
-
Page 44: Trouble Shooting
Use a disc with proper Philips Web page region code. (www.philips.com/support). When you contact Philips, make sure that Cannot play DivX file from an SD/SDHC the product is nearby and the model card or USB storage device number and serial number are available. -
Page 45: About The Bluetooth Device
Preset stations are lost. The paired mobile phone connects and • disconnects constantly. Battery cable is not correctly • connected. Connect the battery The Bluetooth reception is poor. Move the mobile phone closer to cable to the terminal that is always live. -
Page 46: 17 Notice
17 Notice if disassembled by a specialized company. Please observe the local regulations regarding the disposal of packaging materials, exhausted Any changes or modifications made batteries and old equipment. to this device that are not expressly approved by Gibson Innovations may void the user’s authority to operate the Trademark notice equipment. -
Page 47: Copyright
To obtain your registration code, locate are registered trademarks of Koninklijke the DivX VOD section in your device Philips N.V. and are used under license. setup menu. Go to vod.divx.com for Specifications are subject to change more information on how to complete without notice. - Page 48 Email: info@ the Supplier for replacement or to the most connoisseur.co.za convenient Philips Authorized Service Centre Australia: Our Goods come with guarantees that for your Goods to be repaired. In some case we cannot be excluded under the Australian Consumer may require that you return to the Goods to us Law.
- Page 49 This product has been manufactured by, and is sold under the responsibility of Gibson Innovations Ltd.,and Gibson Innovations Ltd. is the warrantor in relation to this product Philips and the Philips Shield Emblem are registered trademarks of Koninklijke Philips N.V. and are used under license. CED1910BT_98_UM_V6.0...