
Related Manuals for Philips CEM2250/51


Summary of Contents for Philips CEM2250/51
- Page 1 Always there to help you Register your product and get support at www.philips.com/welcome CEM2250/51 Question? Contact Philips U ser manual Посібник користувача Р уководство пользователя 25 Қолданушының нұсқасы...
-
Page 2: Table Of Contents
Contents 1 Important 7 Play from iPod/iPhone Safety Compatible iPod/iPhone Notice Connect your iPod/iPhone Control play Charge your iPod/iPhone 2 Your car audio system Introduction 8 Connect external sound source What's in the box Overview of the main unit 9 Adjust sound 3 Install the car audio Connect wires 10 Adjust system settings Mount into the dashboard Attach the front panel... -
Page 3: Important
1 Important • The apparatus shall not be exposed to dripping or splashing. • Do not place any sources of danger on the apparatus (e.g. liquid filled objects, lighted candles). Safety Notice • Read and understand all instructions before you use your apparatus. If damage is Any changes or modifications made to this caused by failure to follow instructions, the device that are not expressly approved by... - Page 4 This apparatus includes this label: local regulations regarding the disposal of packaging materials, exhausted batteries and old equipment. 2013 © WOOX Innovations Limited. The making of unauthorized copies of copy- All rights reserved.Specifications are subject protected material, including computer to change without notice. WOOX reserves programs, files, broadcasts and sound the right to change products at any time recordings, may be an infringement of...
-
Page 5: Your Car Audio System
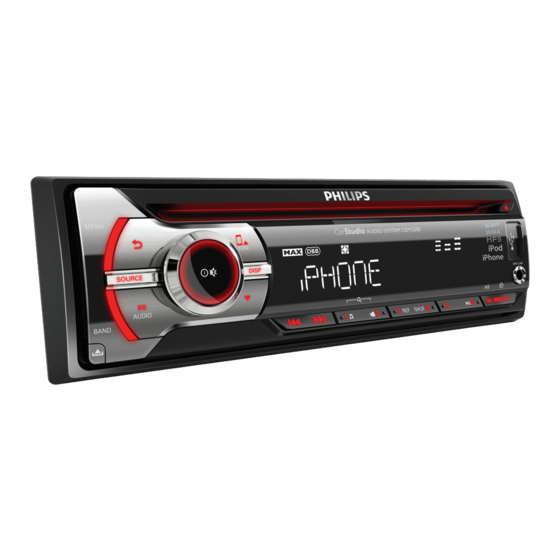
Main unit (with a sleeve) Congratulations on your purchase, and b Front panel welcome to Philips! To fully benefit from the c Trim plate support that Philips offers, register your product at www.philips.com/welcome. d Carrying case for front panel... -
Page 6: Overview Of The Main Unit
Overview of the main unit • Press to mute or unmute sound. a SOURCE • Rotate to adjust volume. • Select audio source. • Rotate to switch between menu b MENU options. • Access system menu. ZONE / • In radio mode. press to select tuner •... - Page 7 • Press and hold to switch music listening zone. • In radio mode, press to tune for radio station. • For iPod/iPhone, press repeatedly to select a control mode. • Press to skip/search for track. • Press to fast backward/forward playback.
-
Page 8: Install The Car Audio
If you have any questions regarding installation kits, consult • Consult a professional to connect CEM2250 as your Philips car audio dealer. instructed below. Caution Check the car's wiring carefully and connect them to the the supplied male •... -
Page 9: Mount Into The Dashboard
ISO male Connect to connectors • The pin arrangement for the ISO connectors depends Ignition key +12V DC on the type of vehicle you drive. Be sure to make when ON/ACC proper connections to prevent damage to the unit. Blue Motor/electric antenna relay control lead White edged blue... -
Page 10: Attach The Front Panel
Remove the mounting sleeve with the Slide the unit into the dashboard until you supplied disassembly tools. hear a click sound. Install the sleeve into the dashboard and bend the tabs outward to fix the sleeve. Attach the trim plate. Reconnect the negative terminal of the car Place the supplied rubber cushion over the battery. -
Page 11: Get Started
4 Get started Press the left end of the front panel inwards until it is securely locked with a "click". For the first time use Note • Select correct country/region for this unit, otherwise the unit can not work properly. Detach the front panel Press to turn the unit on. -
Page 12: Select A Source
Switch music listening zone Philips’ innovative Zone technology enables driver or passengers to enjoy music with the best speakers balance and experience more vivid spacial effect as the artist is intended to create. -
Page 13: Listen To Radio
5 Listen to radio Select radio band Press SOURCE repeatedly to select radio mode. Press BAND or repeatedly to select Select a tuner region band: [FM1], [FM2], [FM3], [AM1], or [AM1]. You can select suitable country/region of the radio. Search for a radio station Press SOURCE to select radio mode. -
Page 14: Play With Rds
Rotate to select a type, then press Store stations manually confirm. Press repeatedly to select a tuner Item Program Description band. type NEWS News services Tune to a radio station that you want to store. AFFAIRS Politics and current affairs Press a numeric button for 3 seconds. - Page 15 Use alternate frequencies Note • If the current received TA signal remains weak for If the radio signal is poor, turn on AF (Alternate over 120 seconds, the unit will activate TA Seek mode Frequency) to search for another station with automatically.
-
Page 16: Play From Hard Media
6 Play from hard Play from USB storage device media Note • Ensure that the USB device contains playable music. You can use this system to listen to audios that are stored on a compatible disc or USB storage Insert the USB device device. -
Page 17: Switch Tracks
7 Play from iPod/ Button Function Press repeatedly to select a repeat iPhone mode: • [REP TRK] (repeat one track): play current track repeatedly. • [REP FLD] (repeat a folder): play all You can enjoy audio from iPod/iPhone through tracks in the current folder repeat- this unit. -
Page 18: Control Play
Connect an Apple 30-pin or lighting USB cable Search for a track on iPod/iPhone • the USB socket on the front panel of this Press SOURCE repeatedly to select iPod system, and mode. • your iPod/iPhone. Press to browse iPod/iPhone menu. »... -
Page 19: Connect External Sound Source
8 Connect external sound source Connect the external sound source to MP3 LINK socket with a 3.5 mm cable. MP3-LINK Press SOURCE repeatedly until [MP3-- LINK] is displayed. Operate the external component (refer to the instructions supplied with the external component). -
Page 20: Adjust Sound
9 Adjust sound The following operations are applicable to all supported media. Button Function Rotate to increase or decrease the volume level. Press to mute or restore sound. Press to enable or disable the maximum volume. DBB/AS Press to enable or disable the Dynamic Bass Boost (DBB) effect. Press repeatedly to select a sound equalizer. -
Page 21: Adjust System Settings
10 Adjust system settings Press MENU to access system settings. Press repeatedly until one of the following settings scrolls. • [BEEP], [DIMMER], [DEMO], [BLACK OUT], or [DANCE] Rotate to change the setting. [BEEP] [BEEP ON] Enable the beep sound of buttons. [BEEP OFF] Disable the beep sound of buttons. [DIMMER] [DIMMER HIGH] Increase the brightness level of the screen. -
Page 22: Additional Information
• If the new fuse gets damaged again, there may be an » All settings are reset to factory default. internal malfunction. Consult your Philips dealer. Replace fuse If there is no power, check the fuse and replace if it is damaged. -
Page 23: Product Information
12 Product information Note • Product information is subject to change without prior notice. Power supply 12 V DC (11 V - 16 V), negative ground Fuse 15 A Suitable speaker impedance 4 - 8 Maximum power output 50 W x 4 Continuous power output 21 W x 4 RMS (4 10% T.H.D.) -
Page 24: Troubleshooting
MP3 files with extension .dlf are requesting service. If the problem remains ignored and not played. unsolved, go to the Philips web site (www. • AAC, WAV, PCM audio files philips.com/support). When you contact Philips, •... -
Page 25: Glossary
14 Glossary • Ensure that the CD is not encoded with copyright protection technologies. The CD skips tracks • Ensure that the CD is not damaged or dirty. • Ensure that random mode is deactivated. A file format with a sound data compression Disc cannot be ejected system. - Page 26 Specifications are subject to change without notice. 2013 © WOOX Innovations Limited. All rights reserved. This product was brought to the market by WOOX Innovations Limited or one of its affiliates, further referred to in this document as WOOX Innovations, and is the manufacturer of the product. WOOX Innovations is the warrantor in relation to the product with which this booklet was packaged. Philips and the Philips Shield Emblem are registered trademarks of Koninklijke Philips N.V. CEM2250_51_UM_V2.0...