
Related Manuals for Brother CV3550


Summary of Contents for Brother CV3550
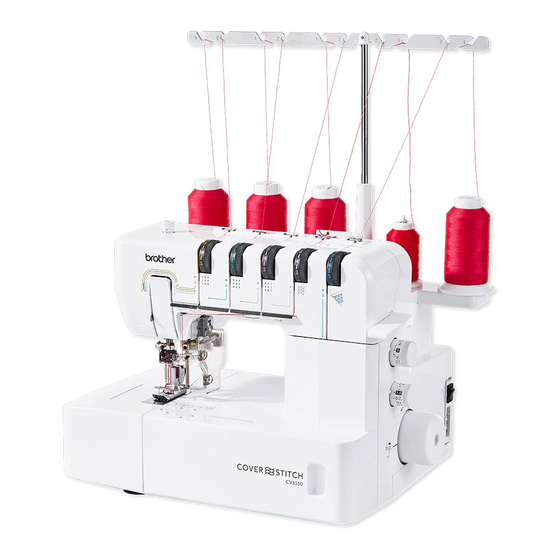
- Page 1 Brother CV3550 Coverstitch Machine View & Buy Here: https://www.thesewingstudio.co.uk/brother-cv3550-coverstitch-machine.ir...
- Page 2 Operation Manual Cover stitch machine / Top cover stitch machine Product Code: 884-B30 / B31 Be sure to read this document before using the machine. We recommend that you keep this document nearby for future reference.
- Page 3 IMPORTANT SAFETY INSTRUCTIONS When using the sewing machine, basic safety precautions should always be followed, including the following. Read all instructions before using this machine. DANGER - This machine is approved for use in the country of purchase only. 17. This sewing machine is not intended for use by young To reduce the risk of electric children or infirm persons without supervision.
- Page 4 SAVE THESE INSTRUCTIONS This machine is intended for household use. FOR USERS IN COUNTRIES EXCEPT CENELEC COUNTRIES This appliance is not intended for use by persons (including children) with reduced physical, sensory or mental capabilities, or lack of experience and knowledge, unless they have been given supervision or instruction concerning use of the appliance by a person responsible for their safety.
- Page 5 CONGRATULATIONS ON CHOOSING THIS COMPACT OVERLOCK MACHINE Your machine is a high quality, easy-to-use product. To fully enjoy all the features, we suggest that you study this booklet. If you need more information regarding the use of your machine, your nearest authorized dealer is always happy to be of service.
-
Page 6: Table Of Contents
Contents Chapter 1 : NAMES OF PARTS AND THEIR FUNCTIONS ............ 4 Machine (Cover stitch model) (Product code: 884-B30) .............4 Accessories (Cover stitch model) ..................5 Machine (Top cover stitch model) (Product code: 884-B31) ..........6 Accessories (Top cover stitch model) .................7 Powering the machine......................8 Turning direction of handwheel ...................8 Opening/Closing front cover ....................8... -
Page 7: Chapter 1 : Names Of Parts And Their Functions
CHAPTER 1 NAMES OF PARTS AND THEIR FUNCTIONS Machine (Cover stitch model) (Product code: 884-B30) Inside of the front cover H Spool support 1 Thread tree I Stitch length adjustment dial 2 Presser foot pressure adjustment screw J Differential feed ratio adjustment dial 3 Thread take-up cover K Handwheel 4 Thread cutter... -
Page 8: Accessories (Cover Stitch Model)
Accessories (Cover stitch model) „ Included accessory Part Name Part Code Soft cover XB3264001 Accessory box XB3291001 Tweezers XB1618001 Thread net (4) X75904000 Thread spool cap (4) X77260000 Cleaning brush X75906001 Hexagonal driver XB0393001 Needle set (130/705H) XB1216001 #90: 3 pcs. Clear foot XB3361001 Attachment screw (2) -
Page 9: Machine (Top Cover Stitch Model) (Product Code: 884-B31)
Machine (Top cover stitch model) (Product code: 884-B31) Inside of the front cover 1 Thread tree J Spool cushion 2 Presser foot pressure adjustment screw K Spool support 3 Thread take-up cover L Stitch length adjustment dial 4 Thread cutter M Differential feed ratio adjustment dial 5 Material plate cover N Handwheel... -
Page 10: Accessories (Top Cover Stitch Model)
Accessories (Top cover stitch model) „ Included accessory Part Name Part Code Soft cover XB3264001 Accessory box XB3291001 Tweezers XB1618001 Thread net (5) X75904000 Thread spool cap (5) X77260000 Cleaning brush X75906001 Hexagonal driver XB0393001 Needle set (130/705H) XB1216001 #90: 3 pcs. Clear foot XB3361001 Top cover spreader... -
Page 11: Powering The Machine
Powering the machine Opening/Closing front cover It is necessary to open the front cover when „ Turning on the machine threading this machine. Slide it to the right 1, and 1. Insert the three-pin plug into the socket on the then open it 2. -
Page 12: Free-Arm Sewing (Removing The Bed Extension)
Free-arm sewing Looper thread tension (removing the bed extension) adjustment lever Free-arm sewing enables tubular pieces to be With the looper thread tension adjustment lever, sewn more easily. fine adjustments can be made to the looper thread tension. When sewing stretch fabric or with a small 1. -
Page 13: Stitch Length
Stitch length The normal setting is 1.0 on the differential feed adjustment dial. The normal stitch length setting is 3 mm. To To adjust the differential feed, turn the dial on the change the stitch length, turn the stitch length lower-right side of the machine. -
Page 14: Adjusting The Presser Foot Pressure
Adjusting the presser „ Tension control foot pressure Sewing is possible at position “4” for most circumstances. (Standard: SPAN #60) Turn the pressure adjustment screw on the left of If the stitch quality is insufficient, select a different the top of the machine. Refer to the value on the tension setting. -
Page 15: Needle
Needle To remove: 1. Turn off the main power and light switch. This machine uses a standard home sewing 2. Turn the handwheel so that the line on the machine needle. handwheel is aligned with the line on the The recommended needle is 130/705H (#90). machine. -
Page 16: Chapter 2 : Preparation Before Threading
CHAPTER 2 PREPARATION BEFORE THREADING CAUTION Thread tree Raise the telescoping thread tree to its highest position. Make sure that the thread holders are Before using a thread spool, be sure to remove the in alignment above the spool pins as illustrated spool cushion. -
Page 17: Using The Thread Net
Using the thread net If you are sewing with loosely spun nylon thread, we recommend that you cover the spool with the included net in order to prevent the thread from slipping off the spool. Adapt the net to the shape of the spool. Before threading 1. -
Page 18: Chapter 3 : Threading (Cover Stitch Model)
CHAPTER 3 THREADING (Cover stitch model) CAUTION 1. Open the front cover by sliding it to the right and guiding the top toward you. 2. Pull the thread off the spool and directly up Before threading, turn off the machine for safety. through thread holder 1 and thread holder 2 on the thread tree, from back to front. -
Page 19: Threading The Needles
Threading the needles Threading the left needle Run the thread in the sequence illustrated, following the yellow numbers and marks next to „ Needle threads used by the various the threading points. (1-9) stitches Threading the center needle The triple cover stitch (three-needle, four-thread Run the thread in the sequence illustrated, cover stitch) uses the left needle thread, center following the green numbers and ... -
Page 20: Chapter 4 : Threading (Top Cover Stitch Model)
CHAPTER 4 THREADING (Top cover stitch model) CAUTION 1. Open the front cover by sliding it to the right and guiding the top toward you. 2. Pull the thread off the spool and directly up Before threading, turn off the machine for safety. through thread holder 1 and thread holder 2 on the thread tree, from back to front. -
Page 21: Threading The Needles
Threading the needles Threading the left needle Run the thread in the sequence illustrated, following the yellow numbers and marks next to „ Needle threads used by the various the threading points. (1-9) stitches Threading the center needle The triple cover stitch (three-needle, four-thread Run the thread in the sequence illustrated, cover stitch) uses the left needle thread, center following the green numbers and ... -
Page 22: Attaching/Removing The Top Cover Spreader And Top Cover Thread Guide
Attaching/Removing „ Removing the top cover spreader and top cover thread guide the top cover spreader and 1. Turn the handwheel so that the line on the top cover thread guide handwheel is aligned with the line on the machine. „... -
Page 23: Threading The Top Cover Spreader
Threading the top cover 1. Pull the thread off the spool and directly up through thread holder 1 and thread holder 2 spreader on the thread tree, from back to front. 2. Pass each thread through 3, shown in the NOTE: illustration. -
Page 24: Chapter 5 : Type Of Stitches Comparison Chart
CHAPTER 5 TYPE OF STITCHES COMPARISON CHART Thread tension dial Model Type of Number Number Stitch Left Center Right Top cover Looper Cover Top cover stitch of needles of threads needle needle needle thread* thread stitch stitch Triple cover ... - Page 25 „ Cover stitch (Wide/Narrow) Balanced tension The needle thread sews a straight seam on the surface of the fabric, and the looper thread forms loops on the back. Stitching direction Needle thread is too loose. Turn the needle thread tension dial to a higher number to increase the tension, or turn the looper thread tension dial to a lower number to decrease the tension.
- Page 26 „ Triple top cover stitch Balanced tension The top cover thread sews a straight seam on the surface of the fabric, and the looper thread forms loops on the back. Stitching direction Top cover thread is too loose. Turn the top cover thread tension dial to a higher number to increase the tension, or turn the needle thread tension dial to a lower number to reduce the tension.
-
Page 27: Chapter 6 : Sewing
Chapter 6 SeWING CaUtION NOTE: When sewing stretch fabrics, adjust the differential feed and check that the desired While the machine is in operation, pay special finish is achieved. attention to the needle location. In addition, keep removing the fabric your hands away from all moving parts such as the needle and handwheel, otherwise injuries may from the machine... -
Page 28: Removing The Fabric From The Machine (Top Cover Stitch Model)
Removing the fabric 5. Slowly pull the fabric in the direction of the arrow so that the ends of the needle threads from the machine are pulled to the back of fabric. (Top cover stitch model) 1. By hand, turn the handwheel toward you until the needle is at its highest position. - Page 29 5. Slowly pull the fabric in the direction of the 7. Use a pointed object, such as a needle, to push arrow so that the ends of the needle threads in the top cover thread from the surface of the are pulled to the back of fabric.
-
Page 30: Sewing A Cover Stitch
Sewing a cover stitch Sewing tubular garments (for example, cuffs) 1. Determine how much of the fabric will be folded „ Without free-arm sewing 2. Fold up the fabric the desired amount, and then iron it in place. 1. Raise the presser foot, insert the fabric as shown in the illustration, lower the presser foot, 3. -
Page 31: Stabilizing The Beginning And End Of Stitching
Stabilizing the beginning and „ With free-arm sewing end of stitching 1. Remove the bed extension. To sew with the beginning and end of stitching stabilized, finish the beginning and end of stitching with a 4-cm-square piece of scrap fabric as described below. -
Page 32: Chapter 7 : Troubleshooting
CHAPTER 7 TROUBLESHOOTING This sewing machine is designed for trouble-free operation. However, the following chart indicates trouble which may occur if basic adjustments are not made properly. Trouble Cause Remedy 1. Does not feed Presser foot pressure too loose Turn the pressure adjustment screw clockwise to increase the presser foot pressure. -
Page 33: Chapter 8 Maintenance
CHAPTER 8 MAINTENANCE Cleaning CAUTION Turn off the machine before cleaning. Periodically clean out dust, trimmed fabric and thread with the included cleaning brush. -
Page 34: Specifications
SPECIFICATIONS „ Cover stitch model Fine to heavy materials Sewing speed Maximum 1,000 stitches per minute Stitch width 6 mm / 3 mm Stitch length (pitch) 2 mm to 4 mm (5/64 to 5/32 inch) Needle bar stroke 29 mm (1 1/8 inches) Presser foot Free presser type Presser foot lift... - Page 37 Please visit us at http://support.brother.com/ where you can get product support and answers to frequently asked questions (FAQs). English 884-B30/B31 Printed in Taiwan XB3391-201...