Table of Contents
Advertisement
Quick Links
Advertisement
Chapters
Table of Contents

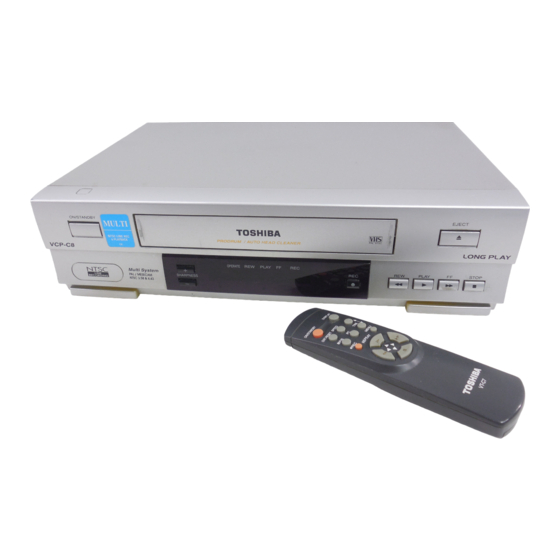
Related Manuals for Toshiba VCP-C8


Summary of Contents for Toshiba VCP-C8
- Page 1 FILE NO. 120-200170 SERVICE MANUAL VIDEO CASSETTE RECORDER VCP-C8 MAY, 2001...
- Page 2 TOSHIBA VIDEO PRODUCTS PTE LTD 438B ALEXANDRA ROAD BLOCK B #06-01 ALEXANDRA TECHNOPARK SINGAPORE 119968...
- Page 3 TOTAL CONTENTS 1. Precautions 2. Reference Information 3. Product Specifications 4. Disassembly and Reassembly 5. Alignment and Adjustment 6. Exploded View 7. Replacement Parts List 8. Block Diagram 9. PCB Diagrams 10. Schematic Diagrams...
- Page 4 Alternatively, wear a discharging Wrist-strap device. (Be sure to remove it prior to applying power--this is an electric shock precaution.) Toshiba...
- Page 5 Always inspect for pinched, out- of-place, or frayed wiring. Do not change the spacing between components and the printed circuit board. Check the AC power cord for damage. Make sure that leads and components do not touch thermally hot parts. Toshiba...
- Page 6 Press the buttons, until the cursor is placed in front of the VCR OUTPUT CH option. Select the required output channel (CH21~CH69) by pressing the buttons. On completion, press MENU twice to exit the menu. Then tune your television again. Toshiba...
- Page 7 – on the battery with – on the remote control Replace the cover by aligning it with the base of the remote control and pushing it back into place. Do not mix different battery types (manganese and alkaline for example). Toshiba...
- Page 8 AUTO or PAL corresponding copyright. SECAM MESECAM MESECAM To prevent accidental To record again NTSC NT3.58 NTSC erasure Cover the tab hole with Remove this safety tab adhesive tape. with a screwdriver. Toshiba...
- Page 9 AUTO or NTPB NT4.43 AUTO or NT4.43 NT3.58 AUTO or NT3.58 Warning Do not insert your hands or any foreign objects into the compartment. This may result in injury or damage. Take special care with children to avoid accidents. Toshiba...
- Page 10 Press DISPLAY: Once to display the current function, recording speed and counter Twice to display the counter only Three times to display the time remaining on the cassette Four times to clear the display Toshiba...
- Page 11 + or - buttons on the front of the VCR. Result: The tape is automatically rewound to the start If you do not press a button within ten seconds, the point. “INTERVAL REPEAT” is displayed. PICTURE menu disappears automatically. On completion, press the MENU button again. Toshiba...
- Page 12 Reference Information 2-2 IC Blocks 2-2-1 IC301 (LA71598M) Toshiba...
- Page 13 Reference Information 2-2-3 IC601 (uPD784928) Toshiba...
- Page 14 Wow and flutter (WTD) 0.4% max (SP) Signal-to-noise ratio 42 dB min (IHF A filter) Frequency response 100Hz - 8KHz Power requirement AC 100-240V 50/60 Hz Power consumption Approx. 15 watts Operation temperature 41°F-104°F (5°C-40°C) Operation humidity 10%-75% Weight 3.1 Kg (net) Toshiba...
- Page 15 Product Specifications MEMO Toshiba...
- Page 16 Fig. 4-1 Cabinet Top Removal 4-1-2 Bottom Cover Removal Œ RELEASE 2 SNAPFITS ´ RELEASE 3 HOOKS (Bottom View) Fig. 4-3 Ass’y Front Panel Removal ´ Lift up the Bottom Cover in the direction of arrow. Fig. 4-2 Bottom Cover Removal Toshiba...
- Page 17 4-1-5 Chassis Removal ˇ 3 SCREWS ¨ Lift the Ass'y Deck up. Ø Lift the Ass'y Main PCB up to Remove. Œ 2 SCREWS ˆ RELEASE 1 TAB ASSEMBLY POINT (ALIGN TWO ARROWS) PUSH ´ BRACKET-FRAME Fig. 4-5 Chassis Removal Toshiba...
- Page 18 4-2-1 Top View Œ ´ ˇ ¨ ˆ Ø Fig. 4-6 Top parts Location-1 Œ GEAR FL CAM ´ MOTOR LOADING ASS’Y ˇ LEVER FL ARM ASS’Y ¨ HOLDER FL CASSETTE ASS’Y ˆ LEVER FL DOOR Ø SLIDER FL DRIVE Toshiba...
- Page 19 ´ CYLINDER ASS’Y ˝ GEAR IDLE ˇ ACE HEAD ASS’Y Ô LEVER IDLE ¨ LEVER UNIT PINCH ASS’Y LEVER T BRAKE ASS’Y ˆ LEVER #9 GUIDE ASS’Y Ò DISK T REEL Ø LEVER TENSION ASS’Y ∏ BAND BRAKE ASS’Y Toshiba...
- Page 20 Œ GEAR JOINT 1 ´ GEAR JOINT 2 ˇ BRACKET GEAR ¨ MOTOR CAPSTAN ASS’Y ˆ LEVER T LOAD ASS’Y Ø GEAR LOADING DRIVE ∏ LEVER S LOAD ASS’Y ” HOLDER CLUTCH ASS’Y ’ BELT PULLEY ˝ SLIDER CAM Toshiba...
- Page 21 Lever FL Cassette-R ´ at disassembling and "B" reassembling. ´ LEVER FL DOOR ˇ HOOK "C" Fig. 4-9 Lever FL Door Removal RAIL [B] Œ HOLDER FL ´ LEVER FL CASSETTEE -R CASSETTEE ASS`Y "A" BOSS [A] Fig. 4-10 Holder FL Cassette Ass’y Removal Toshiba...
- Page 22 Œ LEVER FL ARM ASS`Y Fig. 4-13 Lever FL Arm Ass’y Removal ´ GEAR FL CAM Œ SLIDER FL DRIVE Fig. 4-11 Slider FL Drive Removal Œ GEAR FL CAM GEAR WORM WHEEL POST TIMING POINT Fig. 4-12 Gear FL Cam, Gear Worm Toshiba...
- Page 23 1) Remove the screw Œ. 1) Remove the Gear Worm wheel Œ. 2) Remove the Motor Loading Ass’y ´. ´ MOTOR LOADING ASS`Y Œ SCREW Œ GEAR WORM WHEEL Fig. 4-15 Motor Loading Ass’y Removal Fig. 4-14 Gear Worm Wheel Removal Toshiba...
- Page 24 Fig. 4-16 Bracket Gear, Gear Joint 1,2 Removal Fig. 4-18 Gear Loading Drive, Slider Cam, Lever T, S Load Ass’y Removal Œ GEAR JOINT1 ´ GEAR JOINT2 ˇ SLIDER CAM TIMING POINT 2 TIMING POINT 1 Fig. 4-17 Gear Joint 1,2 Assembly Toshiba...
- Page 25 LEVER LOAD T LEVER LOAD S Lever Tension Drive Removal TIMING POINT 2 TIMING POINT 3 PIN A PIN C PIN D PIN B ˇ SLIDER CAM Fig. 4-19 Gear Loading Drive, Slider Cam, Lever Load S, T Ass’y Assembly Toshiba 4-10...
- Page 26 ˇ SPRING BRAKE Œ SPRING TENTION LEVER STOPPER Œ LEVER S BRAKE ASS`Y "A" HOOK(C) MARK[B] HOOK(B) ´ LEVER T BRAKE ASS`Y Fig. 4-21 Lever Tension Ass’y, Band Brake Ass’y Removal Fig. 4-22 Lever Brake S, T Ass’y Removal 4-11 Toshiba...
- Page 27 ´ DISK T REEL add oil in the boss of Lever Idle Œ. "A" Œ LEVER IDLE ´ GEAR IDLE "B" ´ GEAR IDLE HOOK "C" Fig. 4-24 Disk S, T Reel Removal Fig. 4-23 Gear Idle Ass’y Removal Toshiba 4-12...
- Page 28 DETAIL B Fig. 4-26 Lever Up Down Ass’y Removal SPRING GEAR CENTER ASS'Y GUIDE LEVER UP DOWN ASS'Y RING <BAD> <GOOD> GEAR POST HOOK Fig. 4-25 Holder Clutch Ass’y Removal MAIN BASE Fig. 4-27 Lever Up Down Ass’y Removal 4-13 Toshiba...
- Page 29 Œ GUIDE CASSETTE DOOR Œ LEVER UNIT PINCH ASS`Y HOOK [A] ´ PLATE JOINT ˇ SPRING PINCH DRIVE Fig. 4-28 Guide Cassette Door Removal Fig. 4-29 Lever Unit Pinch Ass’y, Plate Joint, Spring Pinch Drive Removal Toshiba 4-14...
- Page 30 2) After reinstalling, check the bottom side of the Post #9 Guide to the top side of Main Base. "A" Œ SPRING #9 GUIDE ´ LEVER #9 GUIDE ASS`Y "B" Fig. 4-31 FE Head Removal Fig. 4-30 Lever #9 Guide Ass’y Removal 4-15 Toshiba...
- Page 31 2) Remove the screw Œ. 3) Lift the ACE Head Ass’y ´. Œ SLIDER S ASS`Y Œ SCREW ´ SLIDER T ASS`Y ´ HEAD ACE ASS`Y Fig. 4-33 Slider S, T Ass’y Removal Fig. 4-32 ACE Head Removal Toshiba 4-16...
- Page 32 1) Release the Hook Œ. 2) Lift the Lever Head Cleaner Ass’y ´. ´ LEVER HEAD CLEANER ASS'Y Œ HOOK SLEEVE-HEAD CLEANER ˇ CYLINDER ASS'Y Fig. 4-34 Plate Ground Deck, Cylinder Ass’y Removal Fig. 4-36 Level Head Cleaner Ass’y Removal 4-17 Toshiba...
- Page 33 3) Rotate Gear Worm Œ clockwise using screw driver again up to the state of eject mode and then pick out the tape.(Refer to Fig. 4-38) ˇ MOTOR CAPSTAN ASS'Y Fig. 4-37 Damper Capstan,Motor Capstan Ass’y Removal FRAME Fig. 4-39 Toshiba 4-18...
- Page 34 ∆ CAPSTAN MOTOR PULLEY BELT PULLEY ∆ HOLDER CLUTCH ASS’Y GEAR CENTER ASS’Y GEAR IDLE (2Point) LOADING MOTOR BAND BRAKE ASS’Y BRAKE T ASS’Y ◆ : Add Oil ∆ : Cleaning O : Check and replacement in necessary 4-19 Toshiba...
- Page 35 Disassembly and Reassembly MEMO Toshiba 4-20...
- Page 36 - If the adjustment is completed, be sure to turn the power off. 5-1-1 Location of adjustment button of remote control ON/STANDBY DISPLAY CNT.RESET SPEED X-Point (Tracking Center) Adjustment IIP/S Head Switching Adjustment MENU NVRAM Option Setting Remote Control for adjusment is not supplied as a Servcie Jig Fig. 5-1 Toshiba...
- Page 37 Alignment and Adjustment 5-1-2 SW703 location for adjustment mode setting SW701 SW702 SW703 PRESS Fig. 5-2 Main PCB (Top View) Toshiba...
- Page 38 Fig. 5-3 Location of Tape Transport Adjustment PINCH ROLLER FE HEAD CYLINDER ASS'Y GUIDE ROLLER "S" GUIDE ROLLER "T" POST TENSION #8 GUIDE POST #9 GUIDE POST #3 GUIDE POST MAIN BASE ACE HEAD CAPSTAN SHAFT Fig. 5-4 Tape Travel Diagram Toshiba...
- Page 39 Test point : TP601 (Control Pulse) TP602 (H’D S/W -Trigger) TP301 (Envelope) TP302 (Audio output) TP303 (Video output) Test tape : ST-N1 BLANK TAPE : T-160 AUDIO OUTPUT ENVELOPE HEAD SWITCHING Fig. 5-5 Location of Test point (Main PCB-Top View) Toshiba...
- Page 40 4) Connect the CH-1 probe to TP303 (Envelope) the CH-2 probe to TP601 (H’D switching pulse) and then trigger to CH-1. 5) Insert the (-) driver into the X-Point adjustment hole and adjust it so that envelope waveform is maximum. 6) Turn the Power off. Toshiba...
- Page 41 ) driver to obtain a flat video RF envelope as shown in Fig. 5-11. IDEAL ENVELOPE S HEIGHT TOO HIGH S HEIGHT TOO LOW T HEIGHT TOO HIGH T HEIGHT TOO LOW GUIDE ROLLER S GUIDE ROLLER T Fig. 5-11 Guide Roller S, T Height Adjustment Toshiba...
- Page 42 3) Brake is operated by slider cam at FF/REW mode. 4) Transportation of accurate driving force is done by gears. (Gear Center Ass’y) Note : If the spec. does not meet the followings speci- fications, replace the holder clutch ass’y and then recheck. Toshiba...
- Page 43 65 66 67 68 69 70 71 72 PLEASE WAIT CNG : OK SAVE : MENU Fig. 5-14 Fig. 5-15 <Table 5-2> MODEL OPTION NUMBER VCP-C8 10, 20, 22, 33, 35, 37, 42, 45, 49, 53, 57, 61, 63 Toshiba...
- Page 44 6-3 Mechanical Parts (Top Side) - - - - - - - - - - - - - - - - - - - - - - - 6-4 Mechanical Parts (Bottom Side) - - - - - - - - - - - - - - - - - - - - Toshiba...
-
Page 45: Packing Assembly
Exploded View 6-1 Packing Assembly Y102 Y101 UT01 A702 A702 A701 Toshiba... -
Page 46: Instrument Assembly
Exploded View 6-2 Instrument Assembly Toshiba... -
Page 47: Mechanical Parts (Top Side)
6-3 Mechanical Parts (Top Side) G001 K490 K502 K530 G555 B473 G530 B474 G450 G510 G680 G420 G480 (OPTIONAL) K546 K250 K240 (OPTIONAL) K248 B575 G681 B410 K350 K110 B440 K182 B448 K340 K330 B452 G546 K470 K140 K188 G527 G520 G070 G060 Toshiba... -
Page 48: Mechanical Parts (Bottom Side)
Exploded View 6-4 Mechanical Parts (Bottom Side) G542 B462 B456 B560 B460 B500 B458 B464 B488 B501 B489 B484 B468 K222 K200 K225 K221 B478 B570 Toshiba... - Page 49 Exploded View MEMO Toshiba...
- Page 50 Y101 BY634593 AC68-01175B MANUAL USERS;VCP-C8/TSB,-,ARABIC,-,-,-,T Y101 BY634594 AC68-01175C MANUAL USERS;VCP-C8/TSB,-,RUSIA,-,-,-,TS Y102 BY634253 AC39-00017A CABLE-ETC-RF(PAL);-,MALE/FEMALE,1200MM,R - INSTRUMENT PARTS - BY634581 AC97-00521C ASSY-FRONT PANEL;HIPS 94HB,VCP-C8/TSB,- BY634585 AC64-00686B DOOR-CASSETTE;VCP-C8/TSB,ABS94HB NTR,-,S BY730093 AC61-62032A SPRING-MASK;X-9,-,SUS,-,4.4,-,SV-C130 BY730732 AC64-00400D CABINET TOP-;V-611UK,PCM(SECC),T;0.525,- BY730730 AC63-00015A COVER-BOTTOM;-,SECC,-,T;0.5,SECC T0.5,-, 70790218 AC60-12126A SCREW-BH;-,-,FE,FZY,BH,-,-,4*12,-,-...
- Page 51 K546 BY730086 AC61-50658A GUIDE-CASS. DOOR;X-9,POM,-,-,-,NTR SC01 22797145 6003-000283 SCREW-TAPTITE;BH,+,B,M3,L8,ZPC(YEL),SM20 SC02 22797145 6003-000283 SCREW-TAPTITE;BH,+,B,M3,L8,ZPC(YEL),SM20 - ELECTRICAL PARTS - BY630208 AC92-00810A ASSY PCB-MAIN;VCP-C8,VCP,FREE < INTEGRATED CIRCUITS > IC1SF1 BY631087 1203-001802 IC-PWM CONTROLLER;STR-G6551,TO-220F,5P,- IC1SS1 BY530021 0604-000186 PHOTO-COUPLER;TR,-,200mW,DIP-4,ST IC1SS2 BY631008 AC14-12006D IC;KA431Z,TO-92,TAPING IC301 BY631102 1204-001648 IC-VIDEO PROCESS;LA71578M,QFP,100P,-,PLA...
- Page 52 BY130009 2401-001545 C-AL;47uF,20%,25V,GP,TP,6.3x7mm,2.5 C1P106 BY130009 2401-001545 C-AL;47uF,20%,25V,GP,TP,6.3x7mm,2.5 C1P108 BY130288 2401-001573 C-AL;47uF,20%,50V,GP,TP,6.3x11,2.5 C1SD03 BY130216 2201-000812 C-CERAMIC,DISC;2.2nF,20%,400V,Y5U,BK,12. C1SD04 BY130216 2201-000812 C-CERAMIC,DISC;2.2nF,20%,400V,Y5U,BK,12. C1SD11 BY130181 2401-003303 C-AL;82uF,20%,400V,GP,BK,22X30,10 C1SD12 BY130226 2305-001029 C-FILM,MPEF;10nF,10%,630V,TP,12x9x12.5,5 C1SD13 70795070 2201-000376 C-CERAMIC,DISC;0.22nF,5%,50V,SL,TP,6.3x3 C1SF12 BY130290 2401-001200 C-AL;33uF,20%,50V,WT,TP,6.3x11,5 C1SS01 BY130272 2305-001021 C-FILM,MPEF;100nF,20%,275V,TP,17.5x7x13. Toshiba...
- Page 53 BY130145 2301-000253 C-FILM,PEF;39NF,5%,100V,TP,7.5X4.5X12.5M C3A12 BY130282 2401-003107 C-AL;47uF,20%,16V,GP,TP,5x7,5 C3A13C 70796336 2203-000323 C-CERAMIC,CHIP;12nF,10%,50V,X7R,TP,2012, C3A14C 70796337 2203-001105 C-CERAMIC,CHIP;6.8nF,10%,50V,X7R,TP,2012 C3A15C 70796281 2203-000260 C-CERAMIC,CHIP;10nF,10%,50V,X7R,TP,2012 C3A16 70795626 2401-003122 C-AL;4.7uF,20%,50V,LL,TP,4X7,1.5 C3A17 BY130273 2401-000414 C-AL;10uF,20%,16V,GP,TP,4x7,5 C3A18C BY130011 2203-001665 C-CERAMIC,CHIP;0.56nF,10%,50V,X7R,TP,201 C3A21C BY130166 2203-000495 C-CERAMIC,CHIP;2.2nF,10%,50V,X7R,TP,2012 C3A22 BY130027 2202-002037 C-CERAMIC,MLC-AXIAL;100nF,80-20%,50V,Y5V Toshiba...
- Page 54 BY130015 2401-001479 C-AL;470uF,20%,10V,GP,TP,-,- C702C 70796281 2203-000260 C-CERAMIC,CHIP;10nF,10%,50V,X7R,TP,2012 C703 BY130262 2202-000173 C-CERAMIC,MLC-AXIAL;1nF,10%,50V,Y5P,TP,1 C806C 70795969 2203-000239 C-CERAMIC,CHIP;0.1nF,5%,50V,NP0,TP,2012 C821 BY130015 2401-001479 C-AL;470uF,20%,10V,GP,TP,-,- C822C 70795969 2203-000239 C-CERAMIC,CHIP;0.1nF,5%,50V,NP0,TP,2012 C837C BY130344 2203-000784 C-CERAMIC,CHIP;0.33nF,5%,50V,NP0,TP,2012 C845C BY130344 2203-000784 C-CERAMIC,CHIP;0.33nF,5%,50V,NP0,TP,2012 C851 BY130136 2401-002299 C-AL;4.7uF,20%,50V,GP,TP,5x7,5 R694 BY130027 2202-002037 C-CERAMIC,MLC-AXIAL;100nF,80-20%,50V,Y5V Toshiba...
- Page 55 70795704 2007-000931 R-CHIP;470OHM,5%,1/10W,DA,TP,2012 R3A14 70795021 2001-000522 R-CARBON;22KOHM,5%,1/8W,AA,TP,1.8X3.2MM R3A16 70795006 2001-000290 R-CARBON;10KOHM,5%,1/8W,AA,TP,1.8X3.2MM R3A17 70795036 2001-000613 R-CARBON;3.9KOHM,5%,1/8W,AA,TP,1.8X3.2M R3A18 70795036 2001-000613 R-CARBON;3.9KOHM,5%,1/8W,AA,TP,1.8X3.2M R3A19C 70795522 2007-000449 R-CHIP;180OHM,5%,1/10W,DA,TP,2012 R3A22C BY230238 2007-000703 R-CHIP;3.6KOHM,5%,1/10W,DA,TP,2012 R3A23C 70795516 2007-000300 R-CHIP;10KOHM,5%,1/10W,DA,TP,2012 R3A24C 70795527 2007-000586 R-CHIP;22KOHM,5%,1/10W,DA,TP,2012 R3A25C 70795519 2007-000221 R-CHIP;1.2KOHM,5%,1/10W,DA,TP,2012 Toshiba...
- Page 56 70795688 2007-000401 R-CHIP;150OHM,5%,1/10W,DA,TP,2012 R722C 70795704 2007-000931 R-CHIP;470OHM,5%,1/10W,DA,TP,2012 R727C 70795521 2007-000409 R-CHIP;15KOHM,5%,1/10W,DA,TP,2012 R728C 70795521 2007-000409 R-CHIP;15KOHM,5%,1/10W,DA,TP,2012 R731 70795006 2001-000290 R-CARBON;10KOHM,5%,1/8W,AA,TP,1.8X3.2MM R807C BY230097 2007-001166 R-CHIP;75OHM,5%,1/10W,DA,TP,2012 R812C BY230097 2007-001166 R-CHIP;75OHM,5%,1/10W,DA,TP,2012 R813C 70795515 2007-000468 R-CHIP;1KOHM,5%,1/10W,DA,TP,2012 R815C 70795515 2007-000468 R-CHIP;1KOHM,5%,1/10W,DA,TP,2012 R828C 70795683 2007-000290 R-CHIP;100OHM,5%,1/10W,DA,TP,2012 Toshiba...
- Page 57 SW719 BY632001 3404-000165 SWITCH-TACT;12V,50mA,160gf,6x6mm,SPST SW720 BY632001 3404-000165 SWITCH-TACT;12V,50mA,160gf,6x6mm,SPST SW723 BY632001 3404-000165 SWITCH-TACT;12V,50mA,160gf,6x6mm,SPST SW724 BY632001 3404-000165 SWITCH-TACT;12V,50mA,160gf,6x6mm,SPST TM401 BY634586 AC40-00011A RF MODULATOR;RMUP74055VR,PAL G/I/K,-,-,- VA1SS1 BY634022 1405-001026 VARISTOR;470V,600A,9x7mm,TP XT301 BY633009 2801-001397 CRYSTAL-UNIT;4.433619MHZ,HC-49/U-S 15PPM XT302 BY633012 2801-003399 CRYSTAL-UNIT;3.579545MHz,15ppm,28-AAA,S, XT602 BY633010 2801-003139 CRYSTAL-UNIT;8MHz,50ppm,28-AAA,22pF,80oh Toshiba...
- Page 58 FILE NO. 120-200170 SERVICE MANUAL VIDEO CASSETTE RECORDER VCP-C8 MAY, 2001...
- Page 59 8. Block Diagram WITHOUT CANAL MODELS Toshiba...
- Page 60 Block Diagram MEMO Toshiba...
- Page 61 9-1 Main - - - - - - - - - - - - - - - - - - - - - - - - - - - - - - - - - - - - - - - - - - - - - - - - - - Toshiba...
- Page 62 PCB Diagrams 9-1 Main Toshiba...
- Page 63 PCB Diagrams Toshiba...
- Page 64 PCB Diagrams MEMO Toshiba...
-
Page 65: Table Of Contents
10-7 Input-Output - - - - - - - - - - - - - - - - - - - - - - - - - - - - - - - - - - - - - - - - - - - 10-9 Toshiba 10-1... -
Page 66: Block Identification Of Main Pcb
Important safety notices : Components identified with the mark have the special characteristics for safety. When replacing any of these components. Use only the same type. ◆ Block Identification of Main PCB 10-2 Toshiba... -
Page 67: Free)
Schematic Diagrams 10-1 S.M.P.S. (FREE) Toshiba 10-3... -
Page 68: Power
Schematic Diagrams 10-2 Power 10-4 Toshiba... -
Page 69: System Control/Servo/Display
Schematic Diagrams 10-3 System Control/Servo/Display Toshiba 10-5... -
Page 70: Audio/Video
Schematic Diagrams 10-4 Audio/Video 10-6 Toshiba... -
Page 71: Tm-Block
Schematic Diagrams 10-5 TM-Block Toshiba 10-7... -
Page 72: Osd/ Vps/ Pdc
Schematic Diagrams 10-7 OSD/ VPS/ PDC 10-8 Toshiba... -
Page 73: Input-Output
Schematic Diagrams 10-8 Input-Output Toshiba 10-9... - Page 74 Schematic Diagrams MEMO 10-10 Toshiba...