Table of Contents
Advertisement
Quick Links
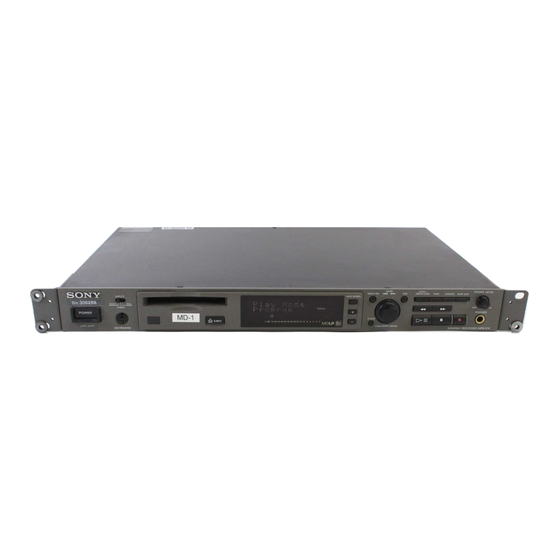
Mini-disc Recorder
MDS-E12
Operating Instructions
Thank you very much for purchasing this Sony product.
Sony products are designed with safety in mind. If electrical
products are used incorrectly, however, there is a risk of death
or serious injury, so be sure to obey the following to avoid
accidents.
2000 Sony Corporation
TABLE OF CONTENTS
Warning ......................................
Location and Function of Parts
Getting Started ..........................
Recording on MDs ....................
Playing MDs ...............................
Editing Recorded MDs ..............
Other Functions ........................
Rear Panel Terminal Function .
Operating the MD Recorder
Using a Keyboard ..................
Additinal Information ................
2-347-245-11(1)
2
5
15
18
27
40
52
55
59
64
Advertisement
Table of Contents

Related Manuals for Sony MDS-E12


Summary of Contents for Sony MDS-E12
- Page 1 Operating Instructions Thank you very much for purchasing this Sony product. Sony products are designed with safety in mind. If electrical products are used incorrectly, however, there is a risk of death or serious injury, so be sure to obey the following to avoid accidents.
-
Page 2: Warning
The model and serial numbers are located on the rear of the unit. Record the serial number in the space provided below. Refer to them whenever you call upon your Sony dealer regarding this product. Model No. ___________ Serial No. ___________... -
Page 3: Handling Mds
If you have any questions or problems concerning your recorder, please consult your nearest Sony dealer. Handling MDs The MD is enclosed in a cartridge to protect the disc from debris or fingerprints and to make it easy to handle. -
Page 4: Table Of Contents
Starting Recording With 6 Seconds of Prestored Audio Data (Time Machine Recording) ... 24 Synchro-recording With the Audio Component of Your Choice (Music Synchro-recording) ... 25 Synchro-recording With a Sony CD Player (CD Synchro-recording) ... 25 Playing MDs ... 27 Playing an MD ... 27 Playing a Specific Track ... -
Page 5: Location And Function Of Parts
Location and Function of Parts... -
Page 6: Front Panel Descriptions
Preparation Front Panel Descriptions 1 POWER button Press to turn the recorder on. When you press the button again, the recorder turns off. 2 INPUT selector Use to select the input jack (or connector) of the program source to be recorded. 3 MD insertion slot Insert the MD as illustrated below. -
Page 7: Rear Panel Descriptions
Rear of the Recorder PUSH PUSH OUTPUT LEVEL +4dBu -10dBu ANALOG(BAL) 1 ANALOG (BALANCE) input terminal (XLR type) Inputs as an analog signal the sound of the component connected by an XLR connecting cable. 2 OUTPUT LEVEL (BALANCE) selector Changes the output level of the BALANCE. 3 ANALOG (BALANCE) output terminal (XLR type) Outputs as an analog signal the contents of the MD of this recorder to the component connected by an XLR... -
Page 8: Remote Descriptions
0 CD-SYNCHRO button Press to operate the CD-Synchro-recording of a CD component. !¡ CD PLAYER button Press to pause or locate tracks the CD component. !™ DISPLAY button Press to select the information to be displayed in the window. - Page 9 !• M.SCAN button Press to successively play the located tracks only for the set time. !ª SCROLL button Press to scroll the name of a track or MD. @º CLEAR button Press to cancel the selection. @¡ x (stop) button Press to stop play or recording, or clear the MENU mode.
-
Page 10: Display Window Descriptions
Display Window Discriptions 1 Disc, track, and time display Displays MD information, the set contents of “Edit Menu” or “Setup Menu,” and time information. 2 AUTO PAUSE and AUTO CUE display Lights up when AUTO PAUSE or AUTO CUE is selected. -
Page 11: Using The Display Window
Using the Display Window The display window shows information about the MD or track. This section describes the information that is displayed for each recorder status. TIME LEVEL / DISPLAY / CHAR TIME DISPLAY The display format that you’ve selected in each of the recorder statuses (play, recording, etc.) will be displayed whenever the recorder enters that status and you press LEVEL/DISPLAY/CHAR (or DISPLAY) or TIME until you... - Page 12 While the recorder is recording Press LEVEL/DISPLAY/CHAR (or DISPLAY) repeatedly to change the display. Each press of the button changes the display as follows: Track number and recorded time of the current track (default display) N a m e 3 m 0 5 s Press Sampling frequency is indicated only when the digital signal is input.
- Page 13 z You can check the remaining time Press TIME. Each press of the button changes the display as follows: Track number and elapsed time of the current track (default display) D R E A M 2 m 3 3 s Press Track number and remaining time of the current track D R E A M...
-
Page 14: Getting Started
Getting Started After Unpacking Check the supplied accessories. • Remote commander (remote) RM-DR1E (1) • AA-size (R6) batteries (2) • Connecting cable (control S cable) (1) Inserting batteries into the remote Insert two AA-size (R6) batteries with the 3 and # properly oriented to the markings into the battery compartment. -
Page 15: Hooking Up The Audio Components
Hooking Up the Audio Components Hook up a mixer, CD player, DAT recorder, and other components to the MD recorder. Be sure to turn off the power of each component to do so. ANALOG DIGITAL CTRL-S PUSH PUSH INPUT LEVEL... - Page 16 (CD player, DAT recorder, other MD recorders, mixer with a coaxial digital input connector) When this recorder is connected with a CD player, MD recorder, or DAT recorder, digital recording is possible. Use a coaxial digital connecting cable that can be purchased separately.
-
Page 17: Setting The Clock
Setting the Clock A clock is built in this recorder. The recording time is recorded automatically on the disc to set the clock in advance. You can check the recording time during play. MENU / NO Press the Menu/NO button twice during stop. “Setup Menu”... -
Page 18: Recording On Mds
Recording on This chapter explains the various ways to record to an MD , as well as how to mark track numbers and perform synchro- recording with other components. Recording on an MD If the MD has recorded material on it, the recorder will automatically start recording from the end of the recorded portion. -
Page 19: Notes On Recording
Operations you may want to do during recording Press Stop recording Pause recording Resume recording after Eject the MD after stopping recording A Changing display during recording Press LEVEL/DISPLAY/CHAR (DISPLAY) repeatedly. For the contents of display, see “Using the Display Window”... -
Page 20: Recording For Long Times
The digital output connectors of the mini-disk recorder output the signal input from the digital input connectors as it is during recording or recording pause. Use an input monitor function (page 22) when only a built- in sampling rate converter is used. Recording for long times In addition to normal stereo recording, this recorder has two long time recording modes: LP2 and LP4. -
Page 21: Adjusting The Recording Level
Adjusting the Recording Level You can adjust the recording level for both analog and digital recording. MENU / NO Do steps 1 to 7 of “Recording on an MD” on page Play the portion of the program source with the strongest output. -
Page 22: Recording Tips
Recording Tips INPUT MENU / NO Z EJECT Monitoring the input signal (Input Monitor) You can monitor the selected input signal even when you aren’t recording it. Press Z to eject the MD. Use INPUT to select the program source to be monitored. -
Page 23: Marking Track Numbers While Recording (Track Marking)
Additional information on Automatic Track Marking • When recording from a CD player or MD recorder connected to the DIGITAL IN connector, the entire material may be recorded as a single track in the... -
Page 24: Audio Data (Time Machine Recording)
• When recording from a component connected to the ANALOG IN jacks with “Track Mark Off” selected or when recording from a DAT recorder or DBS tuner connected to the DIGITAL IN connector, the entire material may be recorded as a single track. •... -
Page 25: Synchro-Recording With The Audio Component Of Your Choice (Music Synchro-Recording)
Synchro-recording With a Sony CD Player (CD Synchro-recording) Z When the recorder is connected to a Sony CD player or Hi- Fi component system, you can easily copy the contents of CDs to the MD using the recorder’s remote. As the same... - Page 26 Resume recording CD-SYNCHRO START after pausing Check the remaining TIME of the recorder recordable time on the MD You can use the remote of the CD player during CD Synchro- recording Press To change the And change the recorder to...
-
Page 27: Playing Mds
Playing MDs This chapter explains the various ways to play MDs. Playing an MD POWER Turn on the mixer. Adjust the fader or level of the connected channel of the mixer. Press POWER to turn on the recorder. Insert an MD. If necessary, turn AMS (or press ./>... - Page 28 z You can adjust the analog signal output level. 1 While the recorder is playing, press LEVEL/DISPLAY/ CHA (or DISPLAY) repeatedly until the line output adjustment display appears. 2 Turn AMS (or press LEVEL +/_ repeatedly) to adjust the output signal level. z You can use Setup Menu to adjust the analog output level 1 Press MENU/NO twice.
-
Page 29: Playing A Specific Track
Playing a Specific Track While the recorder is playing, pause or stopped, use the procedure below to quickly play any track. NUMBER BUTTONS M.SCAN Locating a track with AMS* To go to Do the following: The next or a succeeding Turn AMS clockwise (or press track during play >... -
Page 30: Locating A Particular Point In A Track
Reserving the next track during play (Next Track Play) A desired one track can be reserved for the next track by turning “Next Tr Play (Next Track Play)” of “Setup Menu” to “On.” Press MENU/NO twice during stop. “Setup Menu” appears in the display. Turn AMS (or press ./>... -
Page 31: Playing Tracks Repeatedly (Repeat Play)
Playing Tracks Repeatedly (Repeat Play) You can play an entire MD repeatedly. This function can be used with Shuffle Play to repeat all the tracks in random order, or with Program Play to repeat all the tracks in the program. You can also repeat a specific track or portion within a track. -
Page 32: Playing Tracks In Random Order (Shuffle Play)
Repeating a specitic portion within a track (Repeat A-B Play) Z You can specify a portion within a track to play repeatedly. This is convenient to study language or memorize words. Note that the portion that you specity must be within the bourdaries of a single track. -
Page 33: Creating Your Own Program (Program Play)
Creating Your Own Program (Program Play) You can pick out the tracks that you like and specify the playback order in a program containing up to 25 tracks. MENU / NO DISPLAY CONTINUE MENU / NO PROGRAM NUMBER BUTTONS CLEAR Programming the tracks While the recorder is stopped, press MENU/NO twice. -
Page 34: Storing The Located Track To Start Play Instantaneously (Multi-Access Play)
Changing the contents of the program While the recorder is stopped and “PROGRAM” lights up, do steps 1 and 2 of “Programming the tracks” on page 33, followed by one of the procedures below. Do the following: Erase a track Press m/M repeatedly until the number of the unwanted track flashes, then press CLEAR. - Page 35 If you entered the wrong track number Press m repeatedly until the wrong track number appears and turn AMS (or press ./> ) to enter a correct track number. Press CLEAR to erase the track order so that the track order is moved up. To enter a track number over 26 Use >25.
-
Page 36: Setting Play Start Position After Play Is Stopped (Resume Play)
Setting Play Start Position After Play Is Stopped (Resume Play) After play is stopped by pressing STOP, you can set play start position when play starts. MENU / NO While the recorder is stopped, press MENU/NO twice. “Setup Menu” appears in the display. Turn AMS (or press ./>... -
Page 37: Pausing After Each Track (Auto Pause)
Fine adjusting the marked point (Rehearsal) You can fine adjust the determined point while monitoring the sound of play. While the recorder is stopped, press MENU/NO twice. “Setup Menu” appears in the display. Turn AMS (or press ./> repeatedly) to select “Mark Rehear”, then press AMS or YES. -
Page 38: Making Track Play Start Soon (Auto Cue)
Making Track Play Start Soon (Auto Cue) You can skip the portion from the beginning of a track to actual sound playing start. This is convenient to add a sound during video editing (postrecording). AUTO CUE Press AUTO CUE repeatedly until “A.CUE” lights up at the display window. -
Page 39: Changing Playback Speed (Variable Speed Play)
Changing Playback Speed (Variable Speed Play) You can adjust the play time by changing the speed of play. You can adjust the speed of a track in the normal range of ±12.5%. You can play late at up to 12.5% of normal speed (in this case, a pitch is low) and fast at up to 12.5% of normal speed (in this case, a pitch is high). -
Page 40: Editing Recorded Mds
Editing Recorded This chapter explains the various editing methods that are available. Before you start editing RAM editing and DISC editing Two edit modes are available. DISC editing : The results of editing are recorded to the disc’s TOC. RAM editing : The results of editing are not recorded, but are only temporarily edited for output. -
Page 41: Erasing Tracks (Erase)
Using buttons and control for editing operations The buttons and control of the recorder can be used as described below to erase, divide, move or combine tracks. Note When a name is given to a track or disc, the functions of the buttons and control described below will change. - Page 42 Erasing all tracks on an MD (ALL ERASE) All tracks on the MD and the all name are erased. Press MENU/NO while the recorder is stopped, playing, or paused. “Edit Menu” appears in the display. Turn AMS (or press ./> repeatedly) until “All Erase?”...
-
Page 43: Combining Tracks (Combine)
Combining Tracks (COMBINE) This allows you to combine any two tracks into a single track. The two tracks do not have to be consecutive to be combined. Tracks from the end of the track order can be combined with those in the front. Several independently selected portions of tracks can be combined into a single track. -
Page 44: Moving Tracks (Move)
Moving Tracks (MOVE) This function lets you change the order of any track Example: Moving the second track after the third track After you move a track, the tracks are automatically renumbered. Press MENU/NO while the recorder is stopped, playing, or paused. “Edit Menu”... -
Page 45: Dividing Tracks (Divide)
Dividing Tracks (DIVIDE) This function allows you to divide recorded material that has multiple tracks but only one track number, or to set a new beginning point in the middle of a track. Example: Dividing the second track When you divide a track, the total number of tracks are automatically increased by one and renumbered. -
Page 46: Naming A Track Or Md (Name)
Naming a Track or MD (NAME) You can enter a name for a recorded MD, as well as for individual tracks. Names can consist of uppercase and lowercase letters, numbers and symbols. A total number of 1,700 characters can be stored for all names on the MD. MENU / NO CLEAR NENU / NO... - Page 47 Turn AMS to select the character. The selected character flashes. T r 2 1 To change a selected character Repeat steps 5 and 6. Press AMS. The selected character is entered and is continuously displayed. The cursor moves to the next position, and again flashes.
- Page 48 Copying names (Name Copy) You can copy track or disc names to other tracks within the disc. Press MENU/NO while the recorder is stopped, playing, or paused. “Edit Menu” appears in the display. Turn AMS (or press ./> repeatedly) until “Name?”...
- Page 49 Renaming a track or MD Z To rename a track or disc name, do the following: • To rename a track While the track number is displayed and the recorder is stopped, playing, paused or recording, press NAME. • To rename a disc When the total number of tracks is displayed and the recorder is stopped, press NAME.
-
Page 50: Undoing The Last Edit (Undo)
Undoing the Last Edit (UNDO) You can undo the last edit operation and restore the contents of the MD to the condition that existed before the operation. Please note, however, that you cannot undo an edit operation if you performed any of the following operations after the edit: •... - Page 51 To Use Fade In/Fade Out Press MENU/NO while the recorder is stopped. “Edit Menu” appears in the display. Turn AMS (or press ./> repeatedly) until “S. F Edit” appears in the display; press AMS or YES. Turn AMS (or press ./> repeatedly) until “Fade In?”...
-
Page 52: Other Functions
SCROLL NAME CHAR T.REC MUSIC SYNC CD-SYNC STOP START STANDBY CD PLAYER FADER FADER LEVEL RM-DR1J Note The level of the signal output from the DIGITAL OUT connector does not change in Fade-in Play or Fade-out Play. Fade-in Play and Fade-in Recording During pause play (for Fade-in Play) or recording pause (for Fade-in recording), press FADER. -
Page 53: Notification Of The Track End And The Disc End (End Of Track/Disc)
Notification of the track end and the disc end (End Of Track/Disc) This function gives an indication by a flashing message in the display when there is very little remaining time to the end of track durring playback, or to the end of disc during recording. -
Page 54: Using A Timer
Using a Timer By connecting a timer (not supplied) to the recorder, you can start and stop playback/recording operations at specified times. For further information on connecting the timer or setting the starting and ending times, refer to the instructions that came with the timer. MENU / NO Playing an MD using a timer Do steps 1 to 4 of “Playing an MD”... -
Page 55: Rear Panel Terminal Functions
Rear Panel Terminal Functions This chapter provides information on the functions of the control and remote rear panel terminals. Control terminal functions Control terminal (CTRL-S) —Mini-jack type This recorder allows external control by connecting system controller to the CTRL-S terminal as remote. Control functions The functions are the same as for the recorder’s remote. - Page 56 Cabling for Relay Input signal From divide equipment ANALOG DIGITAL PUSH PUSH INPUT LEVEL OUTPUT LEVEL +4dBu -10dBu COAXIAL ANALOG(BAL) ANALOG(UNBAL) ANALOG DIGITAL PUSH PUSH INPUT LEVEL OUTPUT LEVEL +4dBu -10dBu COAXIAL ANALOG(BAL) ANALOG(UNBAL) ANALOG DIGITAL PUSH PUSH INPUT LEVEL OUTPUT LEVEL +4dBu -10dBu...
-
Page 57: Parallel Input-Output
Example of input-output terminals circuit Output circuit example Input circuit example MDS-E12 Output pins (pins 7 to 9) GND (pin 6) The standard settings (PRESET) or user settings (USER) can be selected by the “Set up Menu.”... - Page 58 Electrical specifications Input terminal Input system Make contact Input on voltage 0.5V or less Input off voltage 3V or more Open Terminal voltage Input pulse width 100msec or more Input withstand voltage _0.5 to +10V Output terminal Output system NPN transistor open collector On residual voltage 0.5V or less On maximum inflow...
-
Page 59: Operating The Md Recorder Using A Keyboard
Operating the MD Recorder Using a Keyboard This chapter explains simple ways to name a track or MD using an optional keyboard, as well as how to operate the MD recorder directly through the keyboard. Setting the keyboard You can use any IBM*-compatible keyboard with a PS/2 interface**. -
Page 60: Naming A Track Or Md Using The Keyboard
Naming a Track or MD Using the Keyboard You can easily enter or edit names. Short cut to the naming procedure To give a name to a track or MD, do the following. • To name a track Press Num Lock while the desired track number is displayed and the recorder is stopped, playing, paused or recording. -
Page 61: Operating The Recorder Through The Keyboard
Operating the Recorder Through the Keyboard You can operate the MD recorder by using the keyboard keys. This allows you to control the recorder and edit MDs without using the recorder buttons and controls or the remote. For more detail on the functions below, see “Front Panel Descriptions”... -
Page 62: Assigning Characters To Keyboard Keys
Assigning Characters to Keyboard Keys Assigning a character If your keyboard layout is not that of an English or Japanese keyboard, the display may show the wrong characters, or no characters at all, when you press the keys. In this case, you must assign characters to the keys. While the recorder is stopped, press [Esc] twice. -
Page 63: Keyboard Operations (English Keyboard Layout)
Keyboard Operations (English Keyboard Layout) Press the same number MENU/NO A.CUE as for the track number A.PAUSE to be played VARI SPEED TIME PLAY MODE Caps Lock Shift Ctrl * .: [Shift] + [Tab] Recz: [Shift]+[Enter] MUSIC SYNC: [Ctrl]+[Enter] ** Effective only during track playback (or while choosing a track) *** All tracks are erased at once when stopped. -
Page 64: Additional Information
Additional Information This chapter provides additional information that will help you understand and maintain your MD recorder. System Limitations The recording system of your MD or Mini-disc recorder is radically different from those use din cassette and DAT recorders, and is characterized by the limitations described below. -
Page 65: Trouble Shooting
1) A first-genaration copy means the first recording of a digital audio source through the recorder’s digital input connector. For example, if you record from a CD player connected to the DIGITAL IN connector, that copy is a first-generation copy. -
Page 66: Self-Diagnosis Function
MD recorder when an error occurs, displays message. Refer to the table below to perform the indicated countermeasure. If after two or three attempts the problem persists, consult your nearest Sony dealer. Message (code) Cause/Remedy... -
Page 67: Display Messages
Display Messages The following table explains the various messages that appear in the display. Please also see the recorder’s Self Diagnosis function on page 66. Message Meaning Auto Cut The Auto Cut function is on (page 22) Blank Disc A new (blank) or erased MD has been inserted. -
Page 68: Specifications
Specifications System Mini-disc digital audio system Disc Mini-disc Laser Semiconductor laser ( =780nm) Emission duration: continuous Laser output MAX 44.6 W 1) This output is the value measured at a distance of 200 mm from the objective lens surface on the Optical Pick-up Block with 7 mm aperture. -
Page 69: Exterior Dimensions
Exterior dimensions REMOTE RS-232C RELAY Rack mounting This recorder can be rack mounted on a standard EIA 19- inch rack. After removing the four feet, the unit can be mounted in a rack. To remove the for feet attached to the bottom of the recorder, use a pair of tweezers or similar tool to remove the plastic pin set at the center of each foot. -
Page 70: Edit Menu Table
Setup Menu Table The following table provides an overview of the various Setup Menu items, including their parameters, factory setting, and reference page (s) in the manual. To access the Setup Menu Press MENU/NO twice with the recorder stopped; “Startup Menu” appears in the display. (Note : The menu items available when MENU/NO is pressed may vary according to the current status of the recorder.) Menu item Function... -
Page 71: Setup Menu Table
Menu item Function Relay Turns relay function off Sets relay playback function Sets relay record function Play/Pause Enables eject during playback Disables eject during playback Next Tr Play Reserve the next track during play. Date Time Sets display of date Parallel Sets and confirms assignment of parallel input-output terminal... - Page 72 Printed in Japan...