Logitech ZONE Complete Setup Manual
Wireless plus receiver
Hide thumbs
Also See for ZONE:
- User manual ,
- Setup manual (263 pages) ,
- Complete setup manual (118 pages)
Advertisement
Quick Links
Advertisement

Related Manuals for Logitech ZONE


Summary of Contents for Logitech ZONE
- Page 1 ZONE WIRELESS PLUS RECEIVER Complete Setup Guide 完整设置指南 完整設定指南 설치 가이드...
- Page 2 CONTENTS English 繁體中文 简体中文 한국어...
-
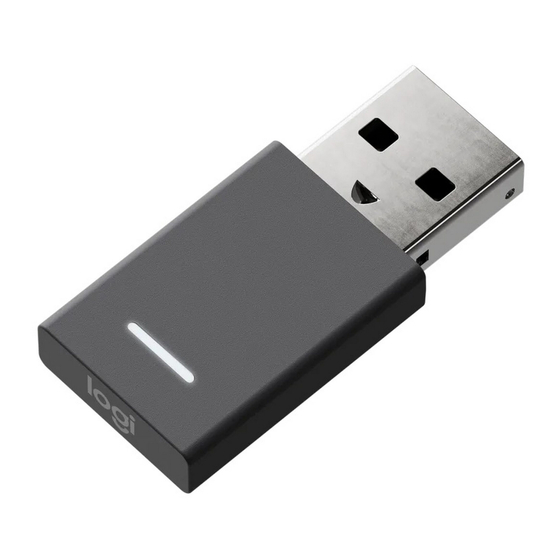
Page 3: Know Your Product
KNOW YOUR PRODUCT USB-A Unifying ™ + Audio receiver Light indicator WHAT’S IN THE BOX USB-A Unifying + Audio receiver English... - Page 4 3 Logi Tune Desktop will confirm that a new receiver is found Click Done to start connecting to the headset Zone Plus connected With Zone Plus you can connect up to 6 mice and keyboards. Add mouse or keyboard Done...
- Page 5 Cancel pairing 6 Once you see this screen, the receiver is now paired with the headset Light indicators on the receiver and headset will turn solid white Zone Wireless connected Your headset is ready to use. Done English...
- Page 6 © 2020 Logitech Logitech, Logi, 罗技 and the Logitech Logo are trademarks or registered trademarks of Logitech Europe S A and/or its affiliates in the U S and other countries Logitech assumes no responsibility for any errors that may appear in this manual Information contained English herein is subject to change without notice...
- Page 7 了解您的产品 USB-A Unifying ™ 优联 + 音频接收器 指示灯 包装内容 USB-A Unifying™ 优联 + 音频接收器 简体中文...
- Page 8 将接收器与耳机麦克风进行连接 1 接收器插入电脑的 USB-A 端口。 USB-A 2 安装并启动 Logi Tune 桌面版。下载请访问 www logitech com/logitune。 3 Logi Tune 桌面版将确认找到新的接收器。点击完成开始 连接耳机麦克风。 Zone Plus connected With Zone Plus you can connect up to 6 mice and keyboards. Add mouse or keyboard Done 简体中文...
- Page 9 示灯将闪烁白色。 Connecting to your headset Keep your receiver plugged in during the connection process and make sure your headset for is in pairing mode. Cancel pairing 6 看到此屏幕画面后,接收器即已与耳机麦克风配 对。接收器和耳机麦克风指示灯将常亮白色。 Zone Wireless connected Your headset is ready to use. Done 简体中文...
- Page 10 7 使用 Zone Wireless Plus 接收器,您可以配对 6 个或更 多罗技 Unifying™ 优联外设。 Zone Wireless a 在 Logi Tune 桌面版上,前往“设置”,然后点击添加 鼠标或键盘。 SOUND SETTINGS About the headset b 如果您的电脑已安装 Unifying™ 优联软件,将自动 Firmware update available 启动软件。若未启动,将自动下载并安装软件。 Add mouse or keyboard Dongle support multiple devices c 按照...
- Page 11 瞭解您的產品 USB-A Unifying ™ + 音訊接收器 指示燈 包裝內容 USB-A Unifying™ + 音訊接收器 繁體中文...
- Page 12 1 將接收器插入到電腦的 USB-A 連接埠。 USB-A 2 安裝並開啟 Logi Tune Desktop。此軟體可從 www logitech com/logitune 下載 3 Logi Tune Desktop 會確認找到新接收器。按一下完成開 始連線到耳機麥克風。 Zone Plus connected With Zone Plus you can connect up to 6 mice and keyboards. Add mouse or keyboard Done 繁體中文...
- Page 13 Connecting to your headset Keep your receiver plugged in during the connection process and make sure your headset for is in pairing mode. Cancel pairing 6 當看到此畫面時,接收器即已和耳機麥克風配對。 接收器和耳機麥克風上的指示燈會轉為亮起穩定 白燈。 Zone Wireless connected Your headset is ready to use. Done 繁體中文...
- Page 14 7 使用 Zone Wireless Plus 接收器,您可以與 6 個或更多 的羅技 Unifying 週邊設備配對。 Zone Wireless a 在 Logi Tune Desktop 中,前往「設定」然後按一下 SOUND SETTINGS 新增滑鼠或鍵盤。 About the headset b 如果您電腦上已經有安裝有 Unifying 軟體,其應會 Firmware update available 開啟。如果沒有,則會自動下載並安裝。 Add mouse or keyboard Dongle support multiple devices c 遵循...
- Page 15 제품 설명 USB-A Unifying ™ + 오디오 수신기 표시등 박스 내용물 USB-A Unifying + 오디오 수신기 한국어...
- Page 16 2 Logi Tune 데스크탑을 설치하고 엽니다 www logitech com/logitune에서 다운로드 3 Logi Tune 데스크탑에서 새 수신기를 감지하였음을 확인합니다 헤드셋 연결을 시작하려면 완료를 클릭합니다 Zone Plus connected With Zone Plus you can connect up to 6 mice and keyboards. Add mouse or keyboard Done 한국어...
- Page 17 Keep your receiver plugged in during the connection process and make sure your headset for is in pairing mode. Cancel pairing 6 이 화면이 표시되면 수신기가 헤드셋과 페어링된 것입니다 수신기와 헤드셋의 표시등은 흰색으로 유지됩니다 Zone Wireless connected Your headset is ready to use. Done 한국어...
- Page 18 높이 x 너비 x 높이: 35 5 mm x 16 2 mm x 5 3 mm www.logitech.com/support/zone-wireless-plus-receiver © 2020 Logitech, Logi 및 Logitech 로고는 미국과 기타 국가에서 Logitech Europe S A 및/또는 그 계열사의 상표 또는 등록 상표입니다 로지텍은 이 설명서에 명시된 어떤 오류에 대해서도 책임지지...