Sony CDX-G3200UV Operating Instructions Manual
Hide thumbs
Also See for CDX-G3200UV:
- Operating instructions manual (192 pages) ,
- Operating instructions manual (56 pages)
Table of Contents
Advertisement
Quick Links
PHONES
(044) 338-0-130
(050) 332-0-130
(063) 577-0-130
(067) 353-0-130
CAR RECEIVERS — Receivers • Media receivers and stations • Native receivers • CD/DVD changers • FM-modulators/USB adapters • Flash memory • Facia plates and adapters • Antennas • Accessories |
CAR AUDIO — Car audio speakers • Amplifiers • Subwoofers • Processors • Crossovers • Headphones • Accessories | TRIP COMPUTERS — Universal computers • Model computers • Accessories |
GPS NAVIGATORS — Portable GPS • Built-in GPS • GPS modules • GPS trackers • Antennas for GPS navigators • Accessories | VIDEO — DVR • TV sets and monitors • Car TV tuners • Cameras • Videomodules
• Transcoders • Car TV antennas • Accessories | SECURITY SYSTEMS — Car alarms • Bike alarms • Mechanical blockers • Immobilizers • Sensors • Accessories | OPTIC AND LIGHT — Xenon • Bixenon • Lamps
• LED • Stroboscopes • Optic and Headlights • Washers • Light, rain sensors • Accessories | PARKTRONICS AND MIRRORS — Rear parktronics • Front parktronics • Combined parktronics • Rear-view mirrors
• Accessories | HEATING AND COOLING — Seat heaters • Mirrors heaters • Screen-wipers heaters • Engine heaters • Auto-refrigerators • Air conditioning units • Accessories | TUNING — Vibro-isolation
• Noise-isolation • Tint films • Accessories | ACCESSORIES — Radar-detectors • Handsfree, Bluetooth • Windowlifters • Compressors • Beeps, loudspeakers • Measuring instruments • Cleaners • Carsits
• Miscellaneous | MOUNTING — Installation kits • Upholstery • Grilles • Tubes • Cable and wire • Tools • Miscellaneous | POWER — Batteries • Converters • Start-charging equipment • Capacitors
• Accessories | MARINE AUDIO AND ELECTRONICS — Marine receivers • Marine audio speakers • Marine subwoofers • Marine amplifiers • Accessories | CAR CARE PRODUCTS — Additives • Washer fluid •
Care accessories • Car polish • Flavors • Adhesives and sealants | LIQUID AND OIL — Motor oil • Transmission oil • Brake fluid • Antifreeze • Technical lubricant
In store "130" you can find and buy almost all necessary goods for your auto in
Kyiv and other cities, delivery by ground and postal services. Our experienced
consultants will provide you with exhaustive information and help you to chose
the very particular thing. We are waiting for you at the address
http://130.com.ua
Internet store of
autogoods
SKYPE
km-130
Advertisement
Table of Contents

Related Manuals for Sony CDX-G3200UV


Summary of Contents for Sony CDX-G3200UV
- Page 1 Internet store of PHONES (044) 338-0-130 autogoods (050) 332-0-130 (063) 577-0-130 SKYPE (067) 353-0-130 km-130 CAR RECEIVERS — Receivers • Media receivers and stations • Native receivers • CD/DVD changers • FM-modulators/USB adapters • Flash memory • Facia plates and adapters • Antennas • Accessories | CAR AUDIO —...
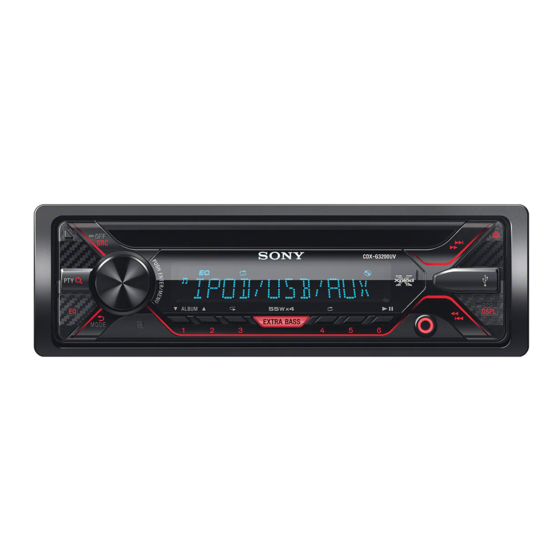
- Page 2 FM/MW/LW Operating Instructions Compact Disc Player To cancel the demonstration (DEMO) display, see page 10. For the connection/installation, see page 21. CDX-G3200UV Autogoods “130”...
- Page 3 The recycling of the materials will help to conserve natural Hereby, Sony Corporation declares that this resources. equipment is in compliance with Directive In case of products that for safety, 2014/53/EU.
-
Page 4: Table Of Contents
Listening to the Radio ....7 prior notice. Sony does not bear any responsibility in these sorts of situations. -
Page 5: Guide To Parts And Controls
Guide to Parts and Controls Main unit Front panel release button PTY (program type) Select PTY in RDS. SRC (source) Turn on the power. (browse) (page 9) Change the source. Enter the browse mode during playback. (Not available when a USB device in Android™... -
Page 6: Getting Started
EXTRA BASS Reinforces bass sound in synchronization with the volume level. Press to change Getting Started the EXTRA BASS setting: [1], [2], [OFF]. AUX input jack Detaching the Front Panel DSPL (display) You can detach the front panel of this unit to Change display items. -
Page 7: Setting The Clock
Setting the area/region Connecting a USB Device After resetting the unit, the area/region setting display appears. Turn down the volume on the unit. Press ENTER while [SET AREA] is Connect the USB device to the unit. displayed. To connect an iPod/iPhone, use the USB The area/region currently set appears. -
Page 8: Listening To The Radio
Using Radio Data System Listening to the Radio (RDS) Listening to the Radio Setting alternative frequencies To listen to the radio, press SRC to select (AF) and traffic announcement [TUNER]. (TA) Storing automatically (BTM) AF continuously retunes the station to the strongest signal in a network, and TA Press MODE to change the band (FM1, provides current traffic information or traffic... -
Page 9: Playback
Local Link function (UK only) This function enables you to select other local stations in the area, even if they are not Playback stored on your number buttons. During FM reception, press a number button Playing a Disc (1 to 6) on which a local station is stored. Within 5 seconds, press again a number Insert the disc (label side up). -
Page 10: Searching And Playing Tracks
• Playback of the following files is not supported. Searching a track by name (Quick- MP3/WMA/FLAC: – copyright-protected files BrowZer™) – DRM (Digital Rights Management) files – Multi-channel audio files Not available when a USB device in Android MP3/WMA: – lossless compression files mode or iPod is connected. -
Page 11: Settings
General Setup (GENERAL) Settings AREA Specifies the area/region to use this unit: Canceling the DEMO Mode [EUROPE], [RUSSIA]. If the area/region currently set is You can cancel the demonstration display changed, this unit is reset, then the clock which appears when the source is off and is displayed. -
Page 12: Sound Setup (Sound)
EDIT CUSTOM BTM (best tuning memory) (page 7) Registers the functions (SOURCE, ATT, (Available only when the tuner is VOL +/–, SEEK +/–) to the steering wheel selected.) remote control: Rotate the control dial to select the FIRMWARE function you want to assign to the (Available only while the source is off and steering wheel remote control, then the clock is displayed.) -
Page 13: Display Setup (Display)
FADER BUTTON-C (button color) Adjusts the relative level: [FRONT-15] – Sets a preset color or customized color for [CENTER] – [REAR-15]. the buttons. COLOR S.WOOFER (subwoofer) Selects from 15 presets colors, 1 SW LEVEL (subwoofer level) customized color. Adjusts the subwoofer volume level: CUSTOM-C (custom color) [+6 dB] –... -
Page 14: Additional Information
• This unit is designed to play discs that conform to the Compact Disc (CD) standard. DualDiscs and some of the music Additional Information discs encoded with copyright protection technologies do not conform to the Updating the Firmware Compact Disc (CD) standard, therefore, these discs may not be playable by this To update the firmware, visit the support site unit. -
Page 15: Maintenance
Please note that the use of this accessory with iPod or iPhone may affect wireless performance. If you have any questions or problems concerning your unit that are not covered in this manual, consult your nearest Sony dealer. Autogoods “130”... -
Page 16: Specifications
CD Player section Specifications Signal-to-noise ratio: 95 dB Frequency response: 10 Hz – 20,000 Hz Tuner section Wow and flutter: Below measurable limit The maximum number of: (CD-R/CD-RW only) Tuning range: – folders (albums): 150 (including root When [AREA] is set to [EUROPE]: folder) 87.5 MHz –... - Page 17 Inputs: libFLAC Remote controller input terminal Copyright (C) 2000-2009 Josh Coalson Antenna (aerial) input terminal Copyright (C) 2011-2013 Xiph.Org Foundation AUX input jack (stereo mini jack) Redistribution and use in source and binary USB port forms, with or without modification, are Power requirements: 12 V DC car battery permitted provided that the following (negative ground (earth))
-
Page 18: Troubleshooting
The display disappears from/does not Troubleshooting appear in the display window. The dimmer is set to [DIM-ON] (page 12). The following checklist will help you remedy The display disappears if you press and problems you may encounter with your unit. hold OFF. - Page 19 USB device playback The SEEK starts after a few seconds of listening. You cannot play items via a USB hub. The station is non-TP or has weak signal. This unit cannot recognize USB devices via – Deactivate TA (page 7). a USB hub.
-
Page 20: Messages
OVERLOAD: The USB device is overloaded. Messages Disconnect the USB device, then press SRC to select another source. The following messages may appear or flash The USB device has a fault, or an during operation. unsupported device is connected. CD ERROR: The disc cannot be played. - Page 21 [REGISTER] is blinking (about 6 seconds) (page 11). If these solutions do not help improve the situation, consult your nearest Sony dealer. If you take the unit to be repaired because of CD playback trouble, bring the disc that was used at the time the problem began.
-
Page 22: Connection/Installation
Parts List for Installation Connection/Installation Cautions • Run all ground (earth) leads to a common ground (earth) point. × 2 • Do not get the leads trapped under a screw, or caught in moving parts (e.g., seat ... -
Page 23: Connection
Connection Subwoofer* Power amplifier* For details, see “Making connections” (page 23). See “Power connection diagram” (page 23) for details. from a wired remote control (not supplied)* from a car antenna (aerial)* *1 Not supplied *2 Speaker impedance: 4 Ω – 8 Ω × 4 *3 RCA pin cord (not supplied) *4 Depending on the type of car, use an adaptor for a wired remote control (not supplied). - Page 24 Subwoofer Easy Connection Making connections You can use a subwoofer without a power If you have a power antenna (aerial) without amplifier when it is connected to a rear a relay box, connecting this unit with the speaker cord. supplied power supply lead may damage the antenna (aerial).
-
Page 25: Installation
Common connection Installation Removing the protection collar and the bracket Yellow Yellow Before installing the unit, remove the protection collar and the bracket from continuous power Yellow the unit. supply 15 switched power supply Pinch both edges of the protection collar , then pull it out. - Page 26 If the fuse blows again after replacement, there may be an internal 182 mm (7 malfunction. In such a case, consult your 53 mm (2 nearest Sony dealer. Catch Mount the unit onto the bracket , then attach the protection collar .