Toshiba B-EX4T3 Series Owner's Manual
Hide thumbs
Also See for B-EX4T3 Series:
- Printer driver operating manual (105 pages) ,
- Key operation specification (190 pages)
Table of Contents
Advertisement
Quick Links
Advertisement
Table of Contents

Related Manuals for Toshiba B-EX4T3 Series


Summary of Contents for Toshiba B-EX4T3 Series
- Page 1 Toshiba Barcode Printer B-EX4T3 SERIES Owner’s Manual...
- Page 2 Regulation> <...
-
Page 3: Table Of Contents
1. PRODUCT OVERVIEW ENGLISH VERSION EO1-33114 1.1 Introduction TABLE OF CONTENTS PRODUCT OVERVIEW ..............................2 1.1. Introduction ................................2 Features ..................................2 Unpacking .................................. 2 Appearance ................................. 3 1.4.1 Dimensions ................................3 1.4.2 Front View ................................3 1.4.3 Rear View ................................3 1.4.4 Operation Panel .............................. -
Page 4: Product Overview
PRODUCT OVERVIEW 1.1. Introduction Thank you for choosing the TEC B-EX4T3 series barcode printer. This Owner’s Manual contains from general set-up through to how to confirm the printer operation using a test print, and should be read carefully to help gain maximum performance and life from your printer. For most queries please refer to this manual and keep it safe for future reference. -
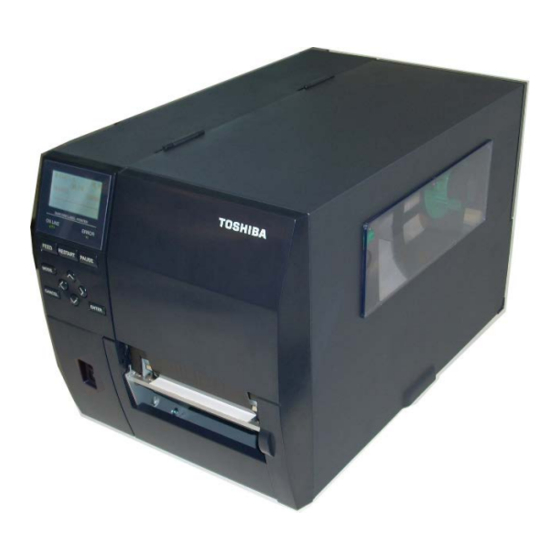
Page 5: Appearance
1. PRODUCT OVERVIEW ENGLISH VERSION EO1-33114 1.5 Appearance Appearance The names of the parts or units introduced in this section are used in the following chapters. 1.4.1 Dimensions 278 (10.9) 460 (18.1) (12.2) Dimensions in mm (inches) 1.4.2 Front View Top Cover LCD Message Display Supply Window... -
Page 6: Operation Panel
1. PRODUCT OVERVIEW ENGLISH VERSION EO1-33114 1.5 Appearance 1.4.4 Operation Panel ERROR LED ONLINE LED PAUSE FEED RESTART MODE LEFT RIGHT ENTER CANCEL DOWN Please see Section 3 for further information about the Operation Panel. 1.4.5 Interior Damper Ribbon Shaft Supply Shaft Ribbon Stopper Locking Ring... -
Page 7: Options
B-EX700-RTC-QM-R This card holds the current time: year, month, day, interface card hour, minute, second and provides a USB host interface. NOTE: To purchase the optional kits, please contact the nearest authorized Toshiba Tec representative or Toshiba Tec Head Quarters. -
Page 8: Printer Setup
2. PRINTER SETUP ENGLISH VERSION EO1-33114 PRINTER SETUP This section outlines the procedures to setup your printer prior to its operation. The section includes precautions, loading media and ribbon, connecting cables, setting the operating environment of the printer and performing an online print test. - Page 9 For example when changing the ribbon, loading the media, or cleaning the printer. For best results, and longer printer life, use only Toshiba Tec recommended media and ribbons. Store the media and ribbons in accordance with their specifications.
- Page 10 2. PRINTER SETUP ENGLISH VERSION EO1-33114 2.2 Connecting the Power Cord 1. Make sure that the printer Power Switch is in the OFF () position. Connecting the Connect the Power Cord to the printer as shown in the figure below. Power Cord CAUTION! Power Inlet...
-
Page 11: Loading Supplies
2. PRINTER SETUP ENGLISH VERSION EO1-33114 2.3 Loading Supplies Loading Supplies WARNING! 1. Do not touch any moving parts. To reduce the risk of fingers, jewelry, clothing, etc., being drawn into the moving parts, be sure to load the media once the printer has stopped moving completely. 2. -
Page 12: Loading The Media
2. PRINTER SETUP ENGLISH VERSION EO1-33114 2.3 Loading Supplies The following procedure shows the steps to properly load the media into 2.3.1 Loading the Media the printer so that it feeds straight through the printer. The printer prints both labels and tags. 1. - Page 13 2. PRINTER SETUP ENGLISH VERSION EO1-33114 2.3 Loading Supplies 2.3.1 Loading the Media Align the tab of the Supply Holder with the groove in the Supply (Cont.) Shaft, and push the Supply Holder against the media until the media is held firmly in place. This will center the media automatically. NOTE: Turn the Locking Ring clockwise to secure the Supply Holder.
- Page 14 2. PRINTER SETUP ENGLISH VERSION EO1-33114 2.3 Loading Supplies 10. Lower the Print Head Block. 2.3.1 Loading the Media 11. Once the media is loaded it may be necessary to set the Media (Cont.) Sensors used to detect the start position for label or tag. Setting the Feed Gap Sensor position (1) Manually move the Media Sensor so that the Feed Gap Sensor is positioned at the center of the labels.
- Page 15 2. PRINTER SETUP ENGLISH VERSION EO1-33114 2.3 Loading Supplies 12. Batch mode 2.3.1 Loading the Media In the batch mode, the media is continuously printed and fed until the (Cont.) number of labels/tags specified in the issue command have been printed.
- Page 16 2. PRINTER SETUP ENGLISH VERSION EO1-33114 2.3 Loading Supplies 2.3.1 Loading the Media (Cont.) When the cutter module is fitted: WARNING! The cutter blade is sharp, so care must be taken not to injure yourself when handling the cutter. When the optional cutter module is fitted, insert the leading edge of the media into the cutter until it comes out the media outlet of the cutter cover.
- Page 17 2. PRINTER SETUP ENGLISH VERSION EO1-33114 2.3 Loading Supplies When the high-precision peel-off module is fitted: When the optional peel-off module is fitted, a label is automatically removed from the backing paper at the strip plate as each label is printed. Press the peel-off unit release button to open the peel-off unit.
- Page 18 2. PRINTER SETUP ENGLISH VERSION EO1-33114 2.3 Loading Supplies Set the ribbon shaft holder plate and turn the head lever to LABEL2 position. Ribbon shaft holder plate Head lever Close the top cover. Top cover...
- Page 19 2. PRINTER SETUP ENGLISH VERSION EO1-33114 2.3 Loading Supplies When the peel-off module is fitted: Remove enough labels from the leading edge of the media to leave 500mm of backing paper free. Pull the backing paper out of the media outlet, then insert the leading edge of the backing paper under the strip plate.
-
Page 20: Loading The Ribbon
2. PRINTER SETUP ENGLISH VERSION EO1-33114 2.3 Loading Supplies 2.3.2 Loading the Ribbon Grasp the tabs on the top and bottom of the Ribbon Stoppers and move them back to the end of the Ribbon Shaft. Ribbon Stopper NOTES: 1. When attaching the ribbon stoppers, make sure that the pinchers face into the printer 2. - Page 21 2. PRINTER SETUP ENGLISH VERSION EO1-33114 2.3 Loading Supplies 3. Slide the Ribbon Stoppers along the Ribbon Shafts so that the ribbon 2.3.2 Loading the Ribbon will be centered when fitted. (Cont.) 4. Lower the Print Head Block and set the Ribbon Shaft Holder Plate aligning its holes with the Ribbon Shafts.
-
Page 22: Connecting The Cables To Your Printer
2. PRINTER SETUP ENGLISH VERSION EO1-33114 2.5 Turning the Printer ON/OFF The following paragraphs outline how to connect the cables from the Connecting the printer to your host computer, and will also show how to make cable connections to other devices. Depending on the application software Cables to Your you use to print labels, there are 4 ways to connect the printer to your host computer. -
Page 23: Turning The Printer On/Off
2. PRINTER SETUP ENGLISH VERSION EO1-33114 2.5 Turning the Printer ON/OFF Turning the Printer When the printer is connected to your host computer it is good practice to ON/OFF turn the printer ON before turning on your host computer and turn OFF your host computer before turning off the printer. -
Page 24: Maintenance
3. MAINTENANCE ENGLISH VERSION EO1-33114 3.1 Cleaning MAINTENANCE WARNING! 1. Be sure to disconnect the power cord before performing maintenance. Failure to do this may cause CAUTION! an electric shock. 1. Do not use any volatile solvent including thinner and benzene, as 2. -
Page 25: Covers And Panels
Sensors (Cont.) NOTE: Please purchase the Print Head Cleaner from your authorized Thermal Head Toshiba Tec service representative. Pinch Roller Platen Feed Roller Paper sensor 7. Wipe the Platen, Feed Roller, and Pinch Roller with a soft cloth slightly moistened with alcohol. -
Page 26: Optional Cutter Module
3. MAINTENANCE ENGLISH VERSION EO1-33114 3.1 Cleaning 3.1.3 Optional Cutter Module The disc cutter are available as an option. WARNING! Loosen the two Plastic Head Screws to remove the Cutter 1. Be sure to turn the power Cover. off before cleaning the Remove the jammed paper. -
Page 27: Printer Specifications
4. PRINTER SPECIFICATIONS ENGLISH VERSION EO1-33114 PRINTER SPECIFICATIONS This section describes the printer specifications. Model B-EX4T3-HS12-QM/CN-R Item Dimension (W x D x H) 278 mm x 460 mm x 310 mm (10.9” x 18.1” x 12.2”) Weight (kg) 17 kg Operating temperature range 5 degC to 40 degC (40 degF to 104 degF) Relative humidity... - Page 28 4. PRINTER SPECIFICATIONS ENGLISH VERSION EO1-33114 Model B-EX4T3-HS12-QM/CN-R Item Barcode types JAN8, JAN13, EAN8, EAN8+2 digits, EAN8+5 digits, EAN13, EAN13+2 digits, EAN13+5 digits, UPC-E, UPC-E+2 digits, UPC-E+5 digits, UPC-A, UPC-A+2 digits, UPC-A+5 digits, MSI, ITF, NW-7, CODE39, CODE93, CODE128, EAN128, Industrial 2 to 5, Customer Bar Code, POSTNET, KIX CODE, RM4SCC (ROYAL MAIL 4 STATE CUSTOMER CODE), GS1 DataBar Two-dimensional code...
-
Page 29: Supply Specifications
SUPPLY SPECIFICATIONS Media Please make sure that the media being used is approved by Toshiba Tec. The warranty does not apply when a problem is caused by using media that is not approved by Toshiba Tec. For information regarding Toshiba Tec approved media, please contact a Toshiba Tec authorized service representative. - Page 30 (*1) When using the High precision peel-off module(B-EX904-HH-QM-R). NOTES: 1. To ensure print quality and print head life use only Toshiba Tec specified media. 2. When the Disc cutter is used, the minimum label length shall be 18.0 mm – (Gap length/2) or longer.
-
Page 31: Detection Area Of The Transmissive Sensor
5. SUPPLY SPECIFICATIONS ENGLISH VERSION EO1-33114 5.1 Media 5.1.2 Detection Area of the Transmissive Sensor The Transmissive Sensor is movable from the center to the left edge of media. The Transmissive Sensor detects a gap between labels, as illustrated below. (Min. -
Page 32: Detection Area Of The Reflective Sensor
5. SUPPLY SPECIFICATIONS ENGLISH VERSION EO1-33114 5.1 Media 5.1.3 Detection Area of the Reflective Sensor 1. The sensor is movable in the range from the center of the paper to the left end. 2. The reflectance of the black mark must be 10% or less with a waveform length of 950 nm. 3. -
Page 33: 5.1.4 Effective Print Area Of Paper
5. SUPPLY SPECIFICATIONS ENGLISH VERSION EO1-33114 5.1 Media 5.1.4 EFFECTIVE PRINT AREA OF PAPER 5.1.4.1 Relationship between Print Head Effective Print Width and Paper Width Paper Paper position position (Left) (Right) Printing area Outside Outside printing 104mm printing area 3 mm area Feed direction 110.0mm... -
Page 34: Ribbon
5.2 Ribbon Ribbon Please make sure that the ribbon being used is approved by Toshiba Tec. The warranty does not apply to any problem caused by using non-approved ribbons. For information regarding Toshiba Tec approved ribbon, please contact a Toshiba Tec service representative. -
Page 35: Care/Handling Of Media And Ribbon
5. SUPPLY SPECIFICATIONS ENGLISH VERSION EO1-33114 5.4 Care/Handling of Media and Ribbon 5.3 Media and Ribbon Types (Cont.) Ribbon type Description Smear-less ribbon (Wax resin ribbon) Good match for coated paper. The printed image will resist water and light rubbing. Very good match for plastic films (synthetic paper, PET, polyimide, Scratch and solvent resistance ribbon etc.) - Page 36 Copyright © 2015-2021 Toshiba Tec Corporation, All Rights Reserved R210120X0000-TTEC 1-11-1, Osaki, Shinagawa-ku, Tokyo 141-8562, Japan...
- Page 37 Update Information Other information Please contact your authorized Toshiba Tec Corporation representative for the latest version of the manual. Troubleshooting Symptom Cause Solutions Printing is done intermittently. This will occur in order to cool Continue to use the printer in down a print head whose this condition.