Hitachi CMP307XU User Manual
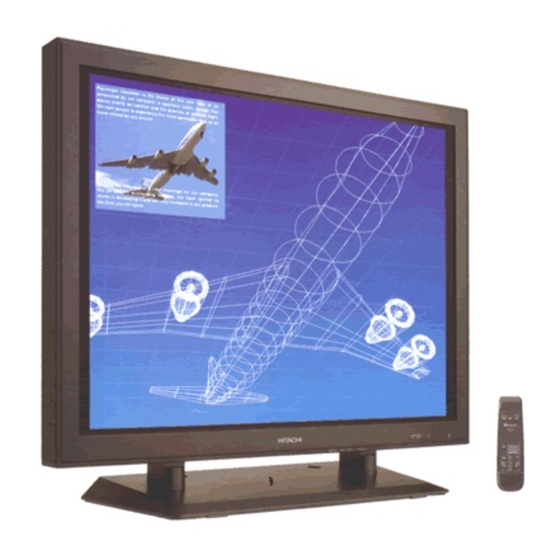
37-inch high definition xga plasma display
Hide thumbs
Also See for CMP307XU:
- User manual (30 pages) ,
- Service manual (15 pages) ,
- User manual (30 pages)
Table of Contents
Advertisement
Quick Links
Download this manual
See also:
Instruction Manual
Advertisement
Table of Contents

Related Manuals for Hitachi CMP307XU


Summary of Contents for Hitachi CMP307XU
- Page 1 PLASMA Display CMP307XU 37” Hi g h Resol u ti o n XGA High resolution XGA (1024 x 768) 4:3 aspect ratio 160 degree viewing angle Theater operation (capable of 16 million colors) Multiscan capability (PC Analog RGB) Standard video inputs (BNC, s-video)
-
Page 2: External Dimensions
PDP at full screen, it is recommended that display monitors utilize the native resolution (1024x768 for CMP307XU) capabiliy of the panel and are operated at their optimal resolution when text or fine lines are being viewed. -
Page 3: Features
FEATURES The following features are provided by the color Plasma Display Monitor. Large-screen, high-definition plasma display panel The 37-inch color plasma display panel, with a resolution of 1024 (H) x 768(V) pixels, creates a high-definition, large-screen (aspect ratio : 4:3) and low-profile flat display. Free from electromagnetic interferences from geomagnetic sources and ambient power lines, the panel produces high-quality display images free from color misconvergence and display distortion. -
Page 4: Table Of Contents
CONTENTS FEATURES CONTENTS SAFETY GUIDELINES INSTALLATION INSTRUCTIONS Standard accessories Installation Anti-tumble measures Component Names Installation and Cabling Handling the Remote Controller OPERATING INSTRUCTIONS Turning Power On and Off Input Selection Volume Adjustment Contrast Adjustment Sound Mute Input Signal Status Display On-Screen Display System, EasyMenu OTHER FEATURES Automatic Store... -
Page 5: Safety Guidelines
SAFETY GUIDELINES This monitor is designed to be safe to use. However, due to high voltage of about 400 V, fire or serious injury may occur unless you use this monitor in correct way. You are strongly suggested to follow the instruction shown below in order to avoid such injury. - Page 6 SAFETY GUIDELINES(continued) Fire or electric shock may cause death or serious injury unless you Warning follow the instruction below. If something smells strange or smoke comes from the monitor: Turn off the monitor and disconnect the power plug from the power point immediately. Contact service center after confirming that the smoking has stopped.
- Page 7 Electric shock or other accidents may cause serious injury or damage to Caution your property. You must to check the user manual of the computer when you connect to the monitor. The weight of the monitor or obstructing the ventilation hole of the computer equipment may cause distortion or damage of the computer equipment.
- Page 8 SAFETY GUIDELINES(continued) Precautions Installation environment Do not obstruct a ventilation hole. Do not put the monitor on carpet or blanket, or near a curtain which has a possibility of obstructing a ventilation hole of the monitor. Do not put the monitor in the following places. Hot places such as near heater, place exposed to the direct rays of the sun.
-
Page 9: Installation Instructions
INSTALLATION INSTRUCTIONS Standard accessories This product is complete with the display monitor, plus the accessories shown below. If any of these accessories is missing, please contact your dealer. Color Plasma Display Monitor USER MANUAL CMP307EU MANUEL UTILISATEUR EasyMenu! READ THE INSTRUCTIONS INSIDE CAREFULLY. KEEP THIS USER MANUAL FOR FUTURE REFERENCE. -
Page 10: Component Names
INSTALLATION INSTRUCTIONS (continued) Component Names Panel Control panel The Adjustment button is located on the bottom. RGB/VIDEO MENU SELECT VOLUME button SELECT button MENU button RGB/VIDEO button Front Stand STANDBY(RED) Indicating [VOLUME] lamp Cabinet (front frame) (GRN) Subpower button Remote-control sensor... -
Page 11: Remote Controller
Power cable connector Main power switch External device connection terminals RGB INPUT AUDIO RGB2 [ BNC ] RS232C IN (MONO) RGB input terminals Remote controller POWER button RECALL button MUTE button MENU button Rear VIDEO2 INPUT [COMPONENT] AUDIO AUDIO RGB1 (MONO) [ D-SUB ] VIDEO input terminals... -
Page 12: Installation And Cabling
INSTALLATION INSTRUCTIONS (continued) Installation and Cabling Connecting to the PC Read Usage Notes ( these steps: (1) Make sure that the display signals produced by your PC meet the specifications of this product. For the specifications of this product, see Product Specifications ( (2) Choose an appropriate site and install the product on a level table where the stand is secure. -
Page 13: Connecting To Video Equipment
Connecting to Video Equipment (such as a video disc player, a DVD player, or a video camera) Read Usage Notes ( these steps: (1) Choose an appropriate site and install the product on a level table where the stand is secure. Install the monitor to have ready access to a power socket available. -
Page 14: Handling The Remote Controller
INSTALLATION INSTRUCTIONS (continued) Handling the Remote Controller Loading Batteries (1) Open the battery cover. Slide the battery cover towards the arrow mark while pressing it. (2) Load batteries. Load two Size AA batteries included observing the correct polarities. When replacing the batteries, always use the R6P AA (or SUM-3) type. (3) Close the battery cover. -
Page 15: Operating Instructions
OPERATING INSTRUCTIONS Turning Power On and Off To turn on the set power supply, set the MAIN POWER switch ( ) of the main unit to ON and then press the SUB POWER button ( ) or the POWER button of the remote control. To turn off the set power supply, press the SUB POWER button ( ) of the main unit or the POWER button of the remote control, then set the MAIN POWER switch ( ) to OFF. -
Page 16: Input Selection
OPERATING INSTRUCTIONS (continued) Input Selection Press the RGB/VIDEO button on the remote controller or the unit to switch the input in the sequence of RGB1 RGB2 The kinds of input for which SKIP has been selected with the on-screen display system, EasyMenu ( ), are skipped. -
Page 17: Contrast Adjustment
Contrast Adjustment While the on-screen display system, EasyMenu controller SELECT button When you press these buttons, the status of contrast adjustment and the input horizontal (H) and vertical (V) frequencies of the input signal will be displayed in a guidance image. While the guidance is on display, press the narrow the difference between darkness and brightness. -
Page 18: On-Screen Display System, Easymenu
OPERATING INSTRUCTIONS (continued) On-Screen Display System, EasyMenu Press the MENU button to open an adjustment menu allowing you to complete various adjustments and settings using the SELECT buttons (remote controller keys, or the set SELECT key). Press the SELECT buttons (remote controller keys) to move the pink marker to select an item. - Page 19 Adjustment Item List Selected Menu item characters CONTRAST BRIGHTNESS PICTURE (in RGB is selected) COLOR SELECT R-GAIN COLOR G-GAIN BALANCE B-GAIN PRESENTATION OPTIONS GAMMA VIDEO LEVEL Input signal level Set to 0.7 V. Adjustment item Narrows the gap Broadens the gap between between Contrast...
- Page 20 OPERATING INSTRUCTIONS (continued) Adjustment Item List (continued) Selected Menu item characters CONTRAST BRIGHTNESS PICTURE (in VIDEO COLOR is selected) TINT SHARPNESS COLOR SELECT PRESENTATION OPTIONS GAMMA VIDEO LEVEL VOLUME BALANCE TREBLE SOUND BASS MUTE VOLUME Adjustment item Narrows the gap Broadens the gap between between...
- Page 21 Selected Adjustment Menu item characters item Display DISPLAY AREA area H.POSITION Horizontal position DISPLAY (in RGB is selected) V.POSITION Vertical position CLOCK Dot clock frequency PHASE Dot clock phase DISPLAY INITIALIZE Display initialization INIT. DISPLAY SIZE Display size Horizontal position with an aspect ratio of 4: 3 and WIDE setting.
- Page 22 OPERATING INSTRUCTIONS (continued) Adjustment Item List (continued) Selected Menu item characters LANGUAGE FUNCTION AUTO FREQ. HALFTONE FUNCTION (in RGB is INTERPOLATION selected) LINE INTP. 3D COMB VIDEO SYSTEM COMPONENT SD1 COMPONENT SD2 COMPONENT HD1 COMPONENT HD2 COMPONENT HD3 Adjustment item ENGLISH (E) DEUTSCH (D) Language...
- Page 23 Selected Adjustment Menu item characters RGB1 input RGB1 INPUT RGB2 input RGB2 INPUT VIDEO1 input VIDEO1 INPUT INPUT SELECT VIDEO2 input VIDEO2 INPUT RGB1 SOUND RGB1 audio RGB2 SOUND RGB2 audio Burn-in reduction SCREEN SAVER Amount of screen MOVING DOTS movement selection.
-
Page 24: Other Features
OTHER FEATURES Automatic Store Approximately 1 sec. after adjustment is completed, the adjustments will be recorded as shown in the table below. Item Sound volume Sound balance Treble Bass Mute volume Input status automatic display Half tone Enlargement Line correction Three-dimensional Y/C separation HD signal Input select... -
Page 25: Reset (Settings Initialization)
Reset (Settings Initialization) The Easy Menu shown to the right will be displayed when the SELECT button is used to select DISPLAY and moreover DISPLAY INT is selected from the On-screen Display System Easy Menu during RGB1/RGB2 input. If the key (select Yes) of the SELECT button is pressed at this time, the user adjustment values in the table below for the signal currently being received will be deleted and the factory settings will be restored. -
Page 26: Switching The Display Method
OTHERFEATURES (continued) Switching the Display Method The display method can be switched by changing the settings of the display area (when the RGB input jack is selected) or display size (when the Video input jack is selected). Switching when the RGB input jack is selected Input signal ( (Resolution) 640 x 400... -
Page 27: Power Save Mode
Power Save Mode When the RGB input jack is selected This unit meets the power-saving requirements of VESA and International Energy Program. When this unit is connected to a VESA DPMS computer, the Power Save (Standby/Suspend/Off) mode can be set to be activated automatically when the computer is not being used to reduce power consumption by this unit. -
Page 28: Troubleshooting
TROUBLESHOOTING Symptoms That Seemingly Appear to be Failures Make the checks suggested below depending on the symptoms observed. If the symptoms remain uncorrected, contact your dealer. Customer servicing can be hazardous. Symptom The screen appears blank with the power-indicating lamp off. The message “POWER SAVE”... -
Page 29: Actions To Correct Abnormal Displays
Actions to Correct Abnormal Displays When RGB input is selected, the display screen may not be normal in some cases, depending on the system devices connected. When this happens, always make the following adjustments. Text displayed across the screen appears vertically streaked, with some characters blurred (display 1). Symptom 1 The display image appears flowing (display 2) (RGB input). -
Page 30: Product Specifications
The monitor takes at least 30 minutes to attain the status of optimal picture quality. Use RGB input signals in non-interlaced mode. CMP307XU RGB input VIDEO1 video input terminal : Composite video VIDEO1 S video input terminal : S VIDEO,... -
Page 31: Signal Input
Signal Input RGB terminal (D-sub 15-pin connector) Input signal R. video G. video or SYNC. on Green B. video No connection No connection R.GND G.GND B.GND No connection No connection Bi-directional Data (SDA) H. sync or H/V composite sync V.sync. Data Clock (SCL) When different kinds of input signals are simultaneously input to the monitor via a graphics board or the like, the monitor will automatically select the signals in the following priority order:... -
Page 32: Factory Settings
PRODUCT SPECIFICATIONS (continued) Recommended Signal List Screen controls are factory-preset for the following signal modes (RGB input): Signal mode Signal name Resolution 640 X 400 640 X 480 640 X 480 640 X 480 800 X 600 800 X 600 800 X 600 VESA 800 X 600...