Table of Contents
Advertisement
Quick Links
Advertisement
Chapters
Table of Contents

Related Manuals for Philips VideoTracer VTR8101


Summary of Contents for Philips VideoTracer VTR8101
- Page 1 VoiceTracer 音视频记录仪 VTR8400 使用手册 User manual...
-
Page 3: Table Of Contents
目录 7 拍照 1 欢迎 8 录音 1.1 产品特点 9 视频模式 2 重要须知 9.1 视频播放 2.1 安全 10 照片模式 3 您的音视频记录仪 3.1 供货范围: 11 语音模式 3.2 主机概览: 11.1 语音播放 4 开始使用 12 设置模式 4.1 开 / 关机 12.1 录音设置 4.2 充电方法 12.2 录像设置... - Page 4 14 常见问题 14.1 无法启动音视频记录仪 14.2 显示时间 / 日期不正确 14.3 拍照 / 录像图像模糊,不清楚 14.4 音视频记录仪无法录音或者录像 14.5 音视频记录仪无法播放录音或者录像 14.6 音视频记录仪死机后如何处理 15 技术参数 15.1 存储器 15.2 尺寸和重量 15.3 系统要求 15.4 录音 15.5 运行条件...
-
Page 5: 产品特点
• 录像资料自动分割保存,防止误操作造成资料丢失。 • 外置存储卡,最大支持 128G。 • 高清扬声器:采用高品质喇叭 , 无论播放录音文件或录像文 欢迎来到飞利浦世界!您能选择和购买飞利浦的产品,我们非 件,都给人身临其境的享受。 常高兴。您可在我们的官方网站上获得飞利浦公司的全方位技 • 以常见的 MP3 格式录音。 术支持,如:使用手册、软件下载、保修信息等。 • 使用高速 USB 2.0 快速存取录音文件和数据。 www.philips.com • 可作为大容量的 USB 存储设备,确保最大的兼容性。 • 可调节任意角度的阻尼轴背夹,佩戴灵活可靠。 1.1 产品特点 • 一键录音:仅仅按下录音键即可实现录音,再按一下录音键 保存录音。 • 一键录像:向上拨动录像键即可实现录像,向下拨动录像键 保存录像。 • 超大广角镜头,录像无死角。 • F1.6 超大光圈镜头 , 进光量更充足 , 画面更清晰通透。... -
Page 6: 重要须知
2 重要须知 2.1 安全 注意 • 请注意,切勿挤压电缆,特别是插头处。 小心 特别声明:使用本产品前请仔细阅读本说明书,如因人为操作 或不可抗力因素而导致数据丢失,本公司一概不予负责。特别 提醒用户小心操作,注意将资料另外备份。... -
Page 7: 您的音视频记录仪
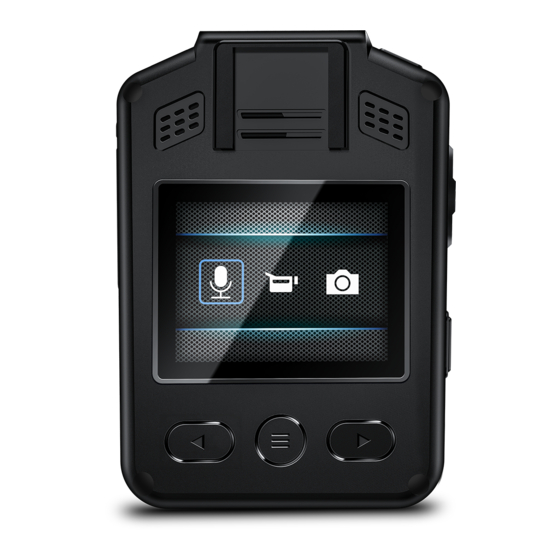
3 您的音视频记录仪 3.2 主机概览: 3.1 供货范围: 1 2 录像键 电源开/关 3 4 白光灯 镜头 5 6 USB接口/TF卡插口/复位键 扬声器 7 8 屏幕 上键/快退 9 10 菜单键/返回键 下键/快进 11 12 拍照键 工作指示灯 13 录音键... -
Page 8: 开始使用
4 开始使用 4.1 开 / 关机 注意 • 第一次使用机器时,请对该机器充电三小时以确保机器有 电工作! 提示 • 本机使用不可拆卸锂电池供电,如果长时间不使用音视频 关机状态下,长按开机键 3s,本机立即自动开机,然后显示飞 记录仪,请长按开关机键 3s 关掉机器。 利浦图标,如下图所示: • 如果音视频记录仪无法正常工作,请确认机器是否已没电。 • 机器工作过程中,请勿直接把外置卡拔出,否则会损坏文 件或导致机器导常。 • 当电量指示标志为“ ”时,请及时充电。 4.2 充电方法 然后机器进入预览界面,如下图所示,预览状态下,工作状态 (1) 使用 USB 数据线将本机与 PC 相连接,充电过程中充电指示 指示灯亮绿灯,在此界面短按菜单键,机器回到设置界面。长 灯常亮绿色。 按“ ”或“ ”键放大或缩小预览界面,实现数码变焦功能。... -
Page 9: 连接电脑
提示 • 本机充电可以使用关机充电和开机充电的方式,一般情况 下,关机充满电需要 4 小时左右,开机充满电需要 6 小时 左右(建议关机充电)。 4.3 连接电脑 音视频记录仪可作为大容量的 USB 存储设备,并可方便地与电 脑相连,VTR8101 无须安装软件,音视频记录仪会自动显示为 可移动设备。连接电脑图标如下图所示。 提示 • 在文件移入或移出机器时,请不要断开机器与电脑的连接。... - Page 10 5 录像 录像界面说明 当您初次使用音视频记录仪录像时, 请注意本节中的内容说明! (1) 在摄像预览状态下, 向上拨动 “录像” 键开始录像, 机器 “滴” 一声,状态指示灯将红灯闪烁。 (2) 向下拨动“录像”键结束录像,机器”滴滴”两声,红色 指示灯灭,并回到摄像预览状态界面,状态指示灯亮绿色。 (3) 在预览界面长按“ ”或“ ”键放大或缩小,实现数码 变焦功能。 (4) 在黑夜或者光线暗的环境下录像时,长按录音键,照明灯 将打开,补充光源。 1 2 录像分辨率 录像图标 (5) 按“拍照”键可以抓拍当前摄录画面。 3 4 系统当前日期 ID号水印 (6) 录像过程中长按拍照键,文件将会标记为重要文件,循环 5 6 录像状态 录像时长 录像打开时,标记的文件不会被删除。...
-
Page 11: 当前录像时长
6 当前录像时长 注意 • 电池标记符显示空格时, 表明低电。 低电时系统会自动关机。 如果正在录像或者录音,系统自动保存录音文件后再关机。 电量不足时,请及时充电。低电关机时显示屏会有相应的 提示,显示屏的提示图标如下所示。 提示 • 录像前,请先设置所需的录像参数。 • 请先删除一些不必要的文件再录。... - Page 12 7 拍照 当您初次使用音视频记录仪拍照时, 请注意本节中的内容说明! 在摄像预览状态下,直接按拍照按键进行拍照,拍照时红色指 示灯亮,并发出“咔嚓”一声,在黑夜或者光线暗的环境下拍 摄需要开启机器补光灯进行拍摄(补光灯:在预览界面长按录 音键可打开补光灯,再长按一次关闭补光灯,补光灯打开后, 预览界面左上角显示灯图标,如图二)。在录像状态下,按下 拍照按键可以抓拍当时摄录照片 , 拍照界面如图一。 图 1 图 2...
- Page 13 8 录音 提示 • 录音前,请先设置所需的录音灵敏度。 当您初次使用音视频记录仪录音时, 请注意本节中的内容说明! • 请先删除一些不必要的文件再录。 (1) 在摄像预览状态按下“录音键”开始录音;工作状态指示 • 请先测试录音,以确认音视频记录仪设置是否正确。 灯将亮黄灯; 请将内置麦克风对准音源。 • 在录音或者录像过程中禁止直接将卡拔出,否则可能导致 (2) 按下“录音”键结束录音,并回到预览界面。 文件损坏。 录音参考界面如下图所示: • 录音或者录像时请勿断电,否则这会导致音视频记录仪故 障,文件丢失或文件损坏等问题。 • 如果需要长时间使用,请在录音前充电。 录音界面说明 1 2 3 录音状态 当前录音时长 电量指示...
-
Page 14: 视频模式
9 视频模式 录像文件播放界面说明: 在摄像预览状态界面中,我们可以使用“ ”键进入查阅回放 界面,按“ ”或“ ”键,选择视频选项,然后短按菜单键 确认进入视频文件列表界面,视频文件列表参考界面如下图所 示: 1 2 当前时长 播放状态 3 4 进度条 文件总时长 5 6 文件名 ID水印 按“ ”或“ ”键选择需要播放的视频文件,短按菜单键进 入视频播放界面,视频播放参考界面如下图所示: 9.1 视频播放 (1) 按“ ”或“ ”键,选择要播放的文件。 (2) 按“菜单”键开始播放,工作状态指示灯将亮绿灯。 (3) 播放过程中,按“菜单”键暂停播放,再次按下“菜单”键, 将继续先前位置的播放。 (4) 播放时短按 “ ”... -
Page 15: 照片模式
10 照片模式 在摄像预览状态界面中,我们可以使用“ ”键进入查阅回放 界面,按“ ”或“ ”键,选择拍照选项,然后短按菜单键 进入拍照文件列表界面,拍照文件列表参考界面如下图所示: 按“ ”或“ ”键选择需要播放的照片文件,短按菜单键进 入照片浏览状态,按“ ”或“ ”键切换照片。... -
Page 16: 语音模式
11 语音模式 语音文件播放界面说明: 在摄像预览状态下,你可以使用“ ”键进入查阅回放界面, 按“ ”或“ ”键,选择录音选项,然后短按菜单键进入语 音文件列表界面,语音文件列表参考界面如下图所示: 1 2 播放状态 当前播放时长 3 4 时间文件名 播放进度条 5 文件总时长 按“ ”或“ ”键选择需要播放的音频文件,短按菜单键进 入语音播放界面,语音播放参考界面如下图所示: 11.1 语音播放 (1) 按“ ”或“ ”键,选择要播放的文件。 (2) 按“菜单”键开始播放,工作状态指示灯将亮绿灯。 (3) 播放过程中,按菜单键暂停播放,再次按下菜单键,将继 续播放。... -
Page 17: 设置模式
12 设置模式 12.2 录像设置 录像设置菜单栏包括:分辨率, 视频质量, 视频预录, 视频延录。 在摄像预览状态界面按下菜单键,系统将会进入设置界面。系 按“ ”或“ ”键选择所需设置的选项,然后按菜单键进入。 统设置包括:录音设置,录像设置,拍照设置和系统设置。 按“ ”或“ ”键选择 , 按菜单键进入选中的选项。长按“菜 单“键返回预览界面。 11.2.1 分辨率 录 像 分 辨 率 有 1920×1080 30P、1440×1080 30P、1280×720 12.1 录音设置 30P、848×480 30P 四个级别,多种录像分辨率选择,可满足 按“菜单“键进入设置模式,按“ ”或“ ”键选择录音设 大部分应用场合,按“ ”或“ ”键选择合适的分辨率,选... -
Page 18: 拍照设置
12.2.2 视频质量 12.3 拍照设置 在视频质量菜单中有三种画质可供选择: “超精细, 良好, 正常” 。 拍照设置菜单栏包括:照片大小,照片质量,连拍。按“ ” 根据不同的需求选择不同的画质效果,画质越好,相同录像时 或“ ”键选择所需设置的选项,然后按菜单键进入。 间所占的内存越大。 12.3.1 照片大小 12.2.3 视频预录 拍照照片的大小有 34M、28M、23M、18M、13M、9M、6M、4M 这 使用视频预录功能, 你可以提前录制事件触发前十几秒的画面, 七个级别,按“ ”或“ ”键选择合适的分辨率,选择完成 视频预录有关闭和打开两种选择,按“ ”或“ ”键进行选择, 后按菜单键确定,长按菜单键可返回上一级菜单。参考界面如 选择完成后按菜单键确定,长按菜单键可返回上一级菜单。 下图所示: 预录时间:约 16 秒。 12.2.4 视频延录 使用视频延录功能,你可以在按下按键保存录像后继续摄录设 定的时间,视频延录设置关闭、5 秒、10 秒、20 分钟、30 分钟、 五个选择,按“... -
Page 19: 系统设置
12.3.3 连拍 连拍是指在取景预览模式下或在录像过程中,按一次拍照键机 器能够连续拍摄照片。 在拍照设置菜单中, 选择 “连拍” 菜单, 再按菜单键进入连拍菜单。 连拍设置可以设置关闭、3 张、5 张、10 张、20 张五个选择, 按“ ”或“ ”键选择合适的连拍张数,选择完成后按菜单 键确定,长按菜单键可返回上一级菜单。 12.4.2 默认设置 12.4 系统设置 使用此功能,你可以重置机器的设置选项。 系统设置菜单栏包括:语言,默认设置,屏亮度,系统时间, 自动关机,自动关屏,音量,车载模式,循环录像,车载录音, 12.4.3 屏亮度 分段录像,按键音,指示灯,移动侦测,曝光补偿,ID 号和系 统信息。按“ ”或“ ”键选择所需设置的选项,然后按菜 使用此功能,可以根据需要调节显示屏的亮度。屏亮度设置可 单键进入。 以设置高、中、低三个级别,按“ ”或“ ”键选择合适的 选项, 选择完成后按菜单键确定, 长按菜单键可返回上一级菜单。 12.4.1 语言... - Page 20 12.4.6 自动关屏 自动关屏时间有四种时长可供选择:关闭、 30 秒、 1 分钟、 3 分钟。 如果在设定的时间内没对机器做任何操作, 显示屏将会自动灭。 如果选择“关闭”,显示屏将会常亮。 在此界面下,按菜单键与“ ”或“ ”键可以设置实时时间。 12.4.7 音量 按“ ”或“ ”键改变相应位置数值,短按菜单键确认,长 使用此功能,你可以设置机器的输出音量。 按菜单键返回上一级菜单。 音量设置可以从 0~10 之间 11 个数值选择,按“ ”或“ ” 键选择合适的音量值,选择完成后按菜单键确定。 12.4.5 自动关机 如果在设定的时间内没对机器做任何操作, 系统将会自动关机。 12.4.8 循环录像 自动关机设置参考界面如下: 在录像设置菜单中,选择“循环录像”菜单,再按菜单键进入 循环录像菜单。有关闭和打开两种选择,按“ ”或“ ”键...
- Page 21 12.4.11 按键音 使用此功能,按键操作将会有声音提示。 12.4.12 指示灯 使用此功能,你可以根据需要打开或者关闭状态指示灯。 12.4.9 车载录音 使用此功能,你可以选择是否需要录下车内的声音。 12.4.13 移动侦测 音视频记录仪在待机状态下,有物体进入音视频记录仪拍摄范 12.4.10 分段录像 围内后自动开启录像功能,物体离开音视频记录仪拍摄范围后 结束录像功能并保存录像文件。移动侦测功能设置可选择: 视 频 分 段 有 1 分 钟、5 分 钟、10 分 钟、15 分 钟、20 分 钟、30 关闭 / 开启。 分钟六个级别,在录像过程中,视频分段在所设定的时间自动 将视频文件分段保存并自动进入下一个文件录像,并且是无缝 切换。视频分段功能参考界面如下图所示: 12.4.14 曝光补偿 曝光补偿是一种曝光控制方式,曝光补偿可以让照片更明亮或...
- Page 22 12.4.15 ID 号 ID 号设置界面,参考图片如下: 在此界面下,按菜单键与“ ”或“ ”键可以设置机器的设 备编号和用户编号。按“ ”或“ ”键改变相应位置数值, 短按菜单键确认,长按菜单键返回上一级菜单。 12.4.16 系统信息 系统信息菜单中包括:总存储容量,可用空间,可用录像时间, 可用录音时间,电池电量和版本号。 总存储容量:本机内存大小信息。 可用空间:剩余空间信息。 可用录像时间:当前录像分辨率可录像时长。 可用录音时间:当前录音类型可录音时长。 电池电量:当前电池电量信息。 版本号:固件版本信息。...
-
Page 23: 背夹的装取
13 背夹的装取 ①装背夹时将背夹插片的 R 位导入主机槽口后,缓慢推进背夹 直至插片顶到插槽底部为止 ②拆背夹时,一手握住背夹,一手握住主机并扶住插片,轻缓 拔出即可。如下图所示: 取出背夹时按相反的方向并加向上的力拉出。... - Page 24 14 常见问题 14.5 音视频记录仪无法播放录音或者录像 电池电量已耗尽,请充电。 此处列举了常见问题的解答,可帮助解决音视频记录仪出现的 简单问题。如果故障仍无法排除,请咨询经销商或访问我们的 官方网站:www.philips.com/support 14.6 音视频记录仪死机后如何处理 你有时在操作中会遇到开不了机,黑屏,操作不了等死机现像, 14.1 无法启动音视频记录仪 通常处理方法是,复位一下,复位键位置:打开 USB 盖,槽内 有一个小孔,用镊子或尖的东西点按一下小孔即可。 电池电量已耗尽请及时充电。 注:本操作不会造成文件数据丢失或者损坏。 14.2 显示时间 / 日期不正确 音视频记录仪时间不准确,请在菜单上重新设置时间。 14.3 拍照 / 录像图像模糊,不清楚 镜头不干净。请用干净的绒布清洁镜头。 14.4 音视频记录仪无法录音或者录像 音视频记录仪存储空间已满并且未开启循环录像。请删除部分 文件或将其移至外部存储设备。...
- Page 25 15 技术参数 15.5 运行条件 温度:-10℃ ~55℃ 15.1 存储器 空气湿度:10% – 90%, 不凝结 外置存储空间 参考录音时间(16GB):录音时间约 290 小时 内置存储器类型:C10 TF 卡 移动存储器 (PC):是 15.2 尺寸和重量 宽 × 高 × 深:56×78×25 (mm) 重量 (含电池): 110g( 不含背夹) 15.3 系统要求 操作系统:Windows 7/8/10/Vista/XP/2000, Mac OS X, Linux 接口:USB 接口...
- Page 26 Content 8 Voice Recording 1 Welcome 9 Video Mode 1.1 Product features 9.1 Video playing 2 Important Notice 10 Photo Mode 2.1 Safety 11 Audio Mode 3 Your Audio/Video Recorder 11.1 Voice play 3.1 What's in the box 3.2 Overview of your audio recorder 12 Setting Mode 12.1 Voice recording 4 Start to Use...
- Page 27 14.5 Unable to play audio or video files 14.6 How to respond to recorder failure 15 Technical Parameters 15.1 Memory 15.2 Dimensions and weight 15.3 PC Interface 15.4 Voice recording 15.5 Operating conditions...
-
Page 28: Welcome
• Super long file name: All recorded video files contain Welcome to the world of Philips! We are honored by your information such as product serial number, recording time choice and purchase of Philips’ products. You can have Philips’... -
Page 29: Important Notice
2 Important Notice 2.1 Safety Notice • Protect the cables from being pinched, particularly at plugs. Warning Special Announcement: Before using the product, please read the Manual carefully. The Company shall not be held liable for any data loss due to incorrect manual operation or force majeure. -
Page 30: Your Audio/Video Recorder
3 Your Audio/Video Recorder 3.2 Overview of your audio recorder 3.1 What's in the box 1 Video recording button 3 Additional light Lens 5 USB interface / TF card socket / reset Loudspeaker 7 Screen Up / FB 9 Down / FF Menu key / Back Key Photo button Working indicator... -
Page 32: Start To Use
During shutdown mode, long press Turn ON button for 3 Notice seconds, and the device will be turned on, showing the Philips • This device is powered by a non-removable lithium logo, as shown below: battery. If you do not use the audio and video recorder for a long time, long press the power button for 3 seconds to turn off the device. -
Page 33: Charging Methods
4.2 Charging methods (1)Use USB cable to connect the device with PC, the indicator will show green light during charging. (2)Use USB cable and the connector to charge the device. The device indicator will show green light first, which will be extinguished after the device is fully charged. -
Page 34: Video Recording
5 Video Recording When you use the recorder for the first time, please pay attention to the requirements in this section! (1)In the camera preview state, push the Video button up to start the video recording. The device makes the sound of 'tick' and the status indicator will flash in red. -
Page 35: Current Video Duration
6 Current Video Duration Reminder • Before recording, please adjust the recording parameters first. Notice • Please delete some unnecessary files before recording. • When the battery icon is showing empty, it means low on battery. When the low battery icon occurs, the system will automatically shut down. -
Page 36: Photo
7 Photo When you use the device for photo taking for the first time, please read the instructions in this section! In the camera preview state, directly press the camera button to take a photo. In the state of photo taking, the red indicator lights on, and the device makes a sound of ‘beep’. -
Page 37: Voice Recording
8 Voice Recording Audio recording interface When you use the device for audio recording for the first time, please read the instructions in this section! (1) Press the ‘Voice button’ in the video preview state to start recording; the working indicator lights on in yellow; please point the built-in microphone to the voice source. - Page 38 Reminder • Before recording, please adjust the desired recording sensitivity. • Please delete some unnecessary files before recording. • Please test the voice recording first to confirm that the audio and video recorder settings are correct. • Do not pull out the memory card during audio/video recording mode.
-
Page 39: Video Mode
9 Video Mode Recorded File Playing Illustration: On the camera preview status interface, we can use the ‘ ’ button to enter the review playback interface, press ‘ ’ or ‘ ’to select the video option, and then press the menu button to confirm the video file list interface. - Page 40 will return to the previous position. (4)Press ‘ ’ or ‘ ’during playback to select 2 times, 4 times, 8 times, 16 times, 32 times, 64 times, 128 times to fast backward or fast forward the currently playing file.
-
Page 41: Photo Mode
10 Photo Mode In the camera preview status interface, the ‘ ’button can be used to enter the review playback interface. Press ‘ ’ or ‘ ’button to select the camera option, then press the menu button to enter the camera file list interface. The camera file list reference interface is shown below: Press ‘... -
Page 42: Audio Mode
11 Audio Mode In the camera preview state, you can use the ‘ ’ button to enter the review playback interface, press the ‘ ’ or ‘ ’ button to select the voice recording option, and then press the menu button to enter the voice file list interface. The voice file list reference interface is as shown below: Audio File Playing Interface Illustration: Press the ‘... -
Page 43: Voice Play
11.1 Voice play (1)Press‘ ’ or ‘ ’button to select the file you want to play. (2)Press the ‘Menu’ button to start playback, the working indicator will light on in green. (3)During playback, press the menu button to pause playback and press the menu button again to resume playback. -
Page 44: Setting Mode
12 Setting Mode 12.2 Recording setting The video settings menu includes: resolution, video quality, Press the menu button in the camera preview status inter- video pre-recording, video delay recording. face, the system will enter the setting interface. System set- Press ‘ ’... -
Page 45: Photo Setting
to select and press the menu button to confirm after the 12.2.2 Video quality selection is completed. Long press the menu button to return to the previous menu. There are three quality options to choose from on the Video Quality menu: ‘Highres’, ‘Good’, ‘Normal’. According to different needs, different quality effects are selected. -
Page 46: System Setting
‘ ’ or ‘ ’ to select the option you want to set, and then 12.3.2 Photo quality press the menu button to enter. There are three quality options to choose from on the Photo 12.4.1 Language Quality menu: ‘Highres’, ‘Good’, ‘Normal’. According to dif- ferent needs, different quality effects are selected. - Page 47 brightness of the screen. The screen brightness can be set automatically shuts down after a certain period of time. The to three levels: high, medium and low. Press ‘ ’ or ‘ ’ to interface looks like following: select the appropriate option. Press the menu button to con- firm after the selection is completed.
- Page 48 12.4.8 Loop video 12.4.10 Segmented video On the video settings menu, select ‘Loop video’ and press the The segmented video has six levels: 1 minute, 5 minutes, 10 menu button to enter. Press ‘ ’ or ‘ ’ to choose from minutes, 15 minutes, 20 minutes, and 30 minutes.
- Page 49 12.4.12 Indicator light 12.4.15 ID number When the function is used, you can turn on or off the status ID number setting interface is as shown below: indicator as needed. 12.4.13 Motion detection In the standby state, the audio and video recorder automat- ically turns on the recording function after an object enters the shooting range of the audio and video recorder.
- Page 50 Available video time: the time length for the current video recording resolution. Available audio time: the time length for the current audio recording type. Battery level: current battery level information. Version number: Firmware version information.
-
Page 51: Mounting Of Shoulder Clip
13 Mounting of Shoulder Clip ① When mounting the shoulder clip, introduce the R of the clip into the main slot, and then slowly push it until the top of the clip reaches the bottom of the slot. ② When removing the shoulder clip, hold it with one hand, hold the device body with the other hand and hold the clip. -
Page 52: Faq
14.5 Unable to play audio or video files video recorder. If such issues persist, please consult our dealers or visit our official website: www.philips.com/support The batter is used up, please charge your device. 14.1 Unable to start audio and video recorder 14.6 How to respond to recorder failure... - Page 53 15 Technical Parameters 15.5 Operating conditions Temperature: -10℃ ~55℃ 15.1 Memory Air humidity: 10% – 90%, non-condensing External Memory Recording time reference(16GB): about 290 hours Type of Internal Storage: C10 TF card Mobile storage device (PC): Yes 15.2 Dimensions and weight Width ×...
- Page 55 VTR8101...
- Page 58 © 2020 Speech Processing Solutions GmbH. Register your product and get support at 版权所有文档版本 1.3, 2020/02/20 www.philips.com/welcome...