Advertisement
Quick Links
Thank you for purchasing a Sealey product. Manufactured to a high standard this product will give you years of trouble free performance if these instructions are carefully followed and the
product is correctly maintained.
IMPORTANT: PLEASE READ THESE INSTRUCTIONS CAREFULLY. NOTE THE SAFE OPERATIONAL REQUIREMENTS, WARNINGS AND CAUTIONS. USE THIS
PRODUCT CORRECTLY AND WITH CARE FOR THE PURPOSE FOR WHICH IT IS INTENDED. FAILURE TO DO SO MAY CAUSE DAMAGE OR PERSONAL INJURY,
AND WILL INVALIDATE THE WARRANTY. PLEASE RETAIN THESE INSTRUCTIONS FOR FUTURE USE.
1.
SAFETY INSTRUCTIONS
! Maintain the stand in good condition, Replace or repair damaged parts. Use recommended parts only. Non authorised parts may be dangerous and will invalidate the warranty.
! Before use ensure that all stand nuts and bolts are tight and that moveable and clamping parts are in good working order.
! Place stand on a sound level surface offering adequate working clearance for its function. Keep area clean, tidy and free from unrelated materials. Ensure there is adequate lighting.
! When mounted ensure the bicycle centre of gravity is between the stand legs.
! Remove ill fitting clothing. Remove ties, watches, rings, and other loose jewellery, and contain long hair.
! Maintain correct balance and footing. Ensure the floor is not slippery and wear non slip shoes.
! Keep children and unauthorised persons away from the working area.
% DO NOT exceed the stand’s maximum holding capacity of 18kg.
% DO NOT use the stand for any purpose other than for which it is designed.
% DO NOT get the stand wet or use in damp or wet locations or areas where there is condensation.
! When not in use store the stand in a safe, dry, child proof area.
34
38
19
34
2.
ASSEMBLY INSTRUCTIONS
Unpack the product and check contents against the parts list in these instructions. Should there be any damaged or missing parts contact your supplier immediately. When all is satisfactory
assemble the stand as follows. Please refer each assembly item to the relevant diagram figure.
Fig1.
Insert one foot tube into the rear of base clamp (20). Place together upper base clamp (21) and lower base clamp (20) and insert bolt (19) from below ensuring the flat washer (11)
and locking washer (35) are in the correct order.
Insert aluminium cone (22) and fit nut (10) do not tighten at this stage. Insert hex bolts (36) from upper side and loosely fit the nuts (37).
Fig2.
Insert the remaining two foot tubes (34) into the base unit (20) (21) to the maximum depth and tighten the hex bolts (36). Then fit lower post tube (32) to upper base clamp (21)
ensuring it is pushed as far as it will go and tighten bolt (19).
Fig3.
Bolt the clamp (24) to the lower post tube (32) using hex bolts (12) in the lower two holes and hex bolt (14) in one of the upper holes, in the remaining hole insert hex bolt (18) and
place washer (9) and screw on locking wheel (4) onto the end. Insert upper post tube (31) into clamp (24) and lower post tube (32) to the required height and tighten the locking
wheel (4).
Fit the parts tray (25) by sliding it over the upper post tube (31) to the required height and clamp it in place by using hex bolt (13) and nut (8).
Fig4.
Attach the T-clamp (23) with bearing arm (33) and jaws (30) to the upper post tube (31) and secure with the lower hex bolts (12) and nuts (8). In the remaining hole insert hex bolt
(18) and then fit washer (9) and locking wheel (4). Apply the two rubber grip strips (2) onto the jaws (30).
8
18 8x60
12 8x20
14 8x30
32
NOTE: It is our policy to continually improve products and as such we reserve the right to alter data, specifications and component parts without prior notice.
IMPORTANT: No responsibility is accepted for incorrect use of this product. WARRANTY: Guarantee is 12 months from purchase date. Proof of purchase will be required for any claim.
INFORMATION: Please call us for a copy of our latest catalogue
fig 2
32
21
25
13 8x25
31
fig 3
24
9
4
8
Sole UK Distributor
Sealey Group,
Bury St. Edmunds, Suffolk.
INSTRUCTIONS FOR:
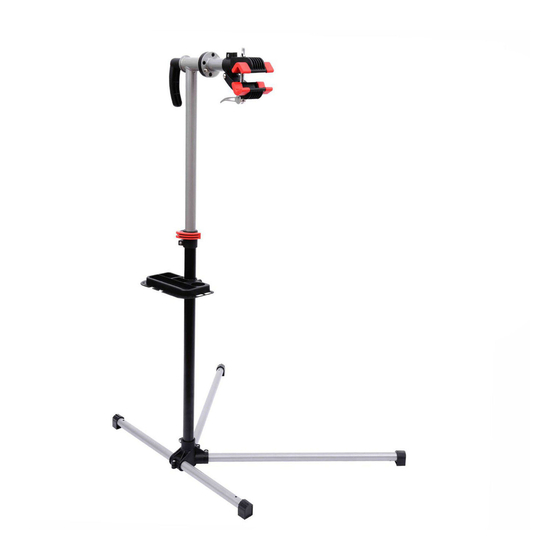
BICYCLE STAND
BS1.V2
Model:
fig 1
36
37
3
23
fig 4
01284 757500
01284 703534
34
10
22
21
36
20
37
11
35
19
2
30
33
30
www.sealey.co.uk
9A>
sales@sealey.co.uk
email
BS1.V2 - 1 - 311003
Advertisement

Related Manuals for Sealey BS1.V2


Summary of Contents for Sealey BS1.V2
- Page 1 BS1.V2 Model: Thank you for purchasing a Sealey product. Manufactured to a high standard this product will give you years of trouble free performance if these instructions are carefully followed and the product is correctly maintained. IMPORTANT: PLEASE READ THESE INSTRUCTIONS CAREFULLY. NOTE THE SAFE OPERATIONAL REQUIREMENTS, WARNINGS AND CAUTIONS. USE THIS PRODUCT CORRECTLY AND WITH CARE FOR THE PURPOSE FOR WHICH IT IS INTENDED.
- Page 2 INFORMATION: Please call us for a copy of our latest catalogue 01284 757500 01284 757500 Sole UK Distributor Sole UK Distributor www.sealey.co.uk www.sealey.co.uk Sealey Group, Sealey Group, 9A> 01284 703534 01284 703534 Bury St. Edmunds, Suffolk. Bury St. Edmunds, Suffolk. sales@sealey.co.uk sales@sealey.co.uk email email BS1.V2 - 1 - 311003...