Pioneer AVX-7000 UC Service Manual
7 inch wide av system display
Hide thumbs
Also See for AVX-7000 UC:
- Manual (24 pages) ,
- Operation manual (100 pages) ,
- Service manual (16 pages)
Table of Contents
Advertisement
Quick Links
ervice
anual
AVX-7000
7 INCH WIDE AV SYSTEM DISPLAY
AVX-7000
AVX-7000
NOTE:
- For the details of the LCD module and the drive mech unit, refer to the separate manual CRT2276.
CONTENTS
1. SAFETY INFORMATION............................................2
2. EXPLODED VIEWS AND PARTS LIST ......................2
4. PCB CONNECTION DIAGRAM................................17
5. ELECTRICAL PARTS LIST........................................23
6. ADJUSTMENT .........................................................25
PIONEER ELECTRONIC CORPORATION
PIONEER ELECTRONICS SERVICE INC.
PIONEER ELECTRONIC [EUROPE] N.V.
PIONEER ELECTRONICS ASIACENTRE PTE.LTD. 253 Alexandra Road, #04-01, Singapore 159936
C PIONEER ELECTRONIC CORPORATION 1999
EW
ES
4-1, Meguro 1-Chome, Meguro-ku, Tokyo 153-8654, Japan
P.O.Box 1760, Long Beach, CA 90801-1760 U.S.A.
Haven 1087 Keetberglaan 1, 9120 Melsele, Belgium
7. GENERAL INFORMATION.......................................26
7.1 DISASSEMBLY ...................................................26
7.2 IC
..................................................................30
7.3 MECHANISM DESCRIPTIONS...........................33
8. OPERATIONS AND SPECIFICATIONS ....................37
K-ZZU. APR. 1999 Printed in Japan
ORDER NO.
CRT2380
UC
Advertisement
Table of Contents

Related Manuals for Pioneer AVX-7000 UC


Summary of Contents for Pioneer AVX-7000 UC
-
Page 1: Table Of Contents
P.O.Box 1760, Long Beach, CA 90801-1760 U.S.A. PIONEER ELECTRONICS SERVICE INC. PIONEER ELECTRONIC [EUROPE] N.V. Haven 1087 Keetberglaan 1, 9120 Melsele, Belgium PIONEER ELECTRONICS ASIACENTRE PTE.LTD. 253 Alexandra Road, #04-01, Singapore 159936 C PIONEER ELECTRONIC CORPORATION 1999 K-ZZU. APR. 1999 Printed in Japan... - Page 2 P.O.Box 1760, Long Beach, CA 90801-1760 U.S.A. PIONEER ELECTRONICS SERVICE INC. PIONEER ELECTRONIC [EUROPE] N.V. Haven 1087 Keetberglaan 1, 9120 Melsele, Belgium PIONEER ELECTRONICS ASIACENTRE PTE.LTD. 253 Alexandra Road, #04-01, Singapore 159936 C PIONEER ELECTRONIC CORPORATION 1999 K-ZZU. APR. 1999 Printed in Japan...
- Page 3 AVX-7000 NOTE: - Parts marked by “*”are generally unavailable because they are not in our Master Spare Parts List. - Screws adjacent to ∇ mark on the product are used for disassembly. - PACKING SECTION PARTS LIST Part No. Mark No. Description AVX-7000/UC AVX-7000/EW AVX-7000/ES...
- Page 4 AVX-7000 2.2 EXTERIOR(1/2)
- Page 5 AVX-7000 EXTERIOR(2/2)
- Page 6 AVX-7000 (1) EXTERIOR SECTION PARTS LIST Mark No. Description Part No. Mark No. Description Part No. 1 Screw BMZ26P050FZK 51 Screw BPZ20P100FMC 2 IC(IC24) PNA4603H00LB 52 Screw BPZ20P120FZK 3 Screw BSZ26P040FMC 53 Screw BPZ26P050FMC 4 Screw BSZ30P040FMC 54 Button(ANGEL,WIDE) See Contrast table(2) 5 Transistor(Q1809) 2SD2396 55 Screw...
- Page 7 AVX-7000 Mark No. Description Part No. 101 Button(DIM) See Contrast table(2) 102 Button(OPEN/CLOSE) See Contrast table(2) 103 Button(RESET) See Contrast table(2) 104 Spring CBH22239 105 Spring CBH2302 106 Cover See Contrast table(2) 107 Grille See Contrast table(2) ••••• 109 Cord Assy See Contrast table(2) 110 Cord Assy See Contrast table(2)
-
Page 8: Block Diagram And Schematic Diagram
AVX-7000 3. BLOCK DIAGRAM AND SCHEMATIC DIAGRAM RGB UNIT 3.1 BLOCK DIAGRAM SYSTEM UNIT... - Page 9 AVX-7000...
- Page 10 AVX-7000 3.2 SYSTEM UNIT Note: When ordering service parts, be sure to refer to “EXPLODED VIEWS AND PARTS LIST” or “ELECTRICAL PARTS LIST”. RGB UNIT SYSTEM MICRO COMPUTER VDD REGULATOR VIDEO REGU...
-
Page 11: Pcb Connection Diagram
AVX-7000 SYSTEM UNIT V.SEL 1K(1/2W) I.SENS 1K(1/2W) C1818 C1817 EO REGULATOR MOTOR DRIVER... - Page 12 AVX-7000 3.3 RGB UNIT RGB UNIT UC,EW model RELAY UNIT CN51 SYNCHRONIZING SEPARATION CN1603...
- Page 13 AVX-7000 3.4 PANEL KEYBOARD UNIT PANEL KEYBOARD UNIT EW model S52 CSN1052 SENSOR SW UC,ES model CN2602 UC,ES model SW UNIT EW model...
- Page 14 AVX-7000 3.5 RELAY UNIT AND ENCODER UNIT BACK SENSOR ANGLE SENSOR FX2484 10k(B) FX2484 ENCODER UNIT CN2902 8R2K RELAY UNIT...
- Page 15 AVX-7000 LCD KEYBOARD UNIT CN21 MODULE...
- Page 16 AVX-7000 3.6 LCD KEYBOARD UNIT LCD KEYBOARD UNIT NORMAL FULL ZOOM CINEMA JUST S21-S23 EW model:CSG1113 CN55 UC,ES model:CSG1112 EWmodel...
-
Page 17: Electrical Parts List
AVX-7000 5. ELECTRICAL PARTS LIST NOTE: - Parts whose parts numbers are omitted are subject to being not supplied. - The part numbers shown below indicate chip components. Chip Resistor RS1/_S___J,RS1/__S___J Chip Capacitor (except for CQS..) CKS.., CCS.., CSZS..=====Circuit Symbol and No.===Part Name Part No. - Page 18 AVX-7000 =====Circuit Symbol and No.===Part Name Part No. =====Circuit Symbol and No.===Part Name Part No. ------ ------------------------------------------ ------------------------- ------ ------------------------------------------ ------------------------- Unit Number : CWM6426(UC,ES model) Inductor CTF1379 Inductor CTF1379 CWM6427(EW model) Inductor CTF1306 Unit Name : LCD Keyboard Unit Inductor CTF1306 Inductor...
-
Page 19: Adjustment
AVX-7000 =====Circuit Symbol and No.===Part Name Part No. =====Circuit Symbol and No.===Part Name Part No. ------ ------------------------------------------ ------------------------- ------ ------------------------------------------ ------------------------- 1801 Inductor CTF1487 CAPACITORS 1601 Radiator 6.290MHz CSS1451 FU 1801 Micro-Fuse 2A CEK1190 1610 CKSRYB473K16 FU 1802 Micro-Fuse 400mA CEK1184 1611 CKSRYB473K16... -
Page 20: General Information
AVX-7000 7. GENERAL INFORMATION 7.1 DISASSEMBLY Removing the Detach Grille Assy (Fig.1) 1. Remove the detach grille assy. Removing the Grille Assy (Fig.1) 1. Remove the two screws. 2. Disengage the stopper eight of the grille assy. Grille Assy 3. Disconnect the connector. Detach Grille Assy Fig.1 Case... - Page 21 AVX-7000 Removing the Case (Fig.4) 1. Remove the four screws. Case 2. Remove the case. Fig.4 Removing the Case (Fig.5) 1. Remove the four screws A. 2. Remove the two screws C. 3. Remove the case. 4. Remove the six screws B. Case Fig.5...
- Page 22 AVX-7000 Removing the Relay Unit (Fig.6) 1. Remove the connector B , connector C and connector D. 2. Straighten the two tabs indicated by Arrow (I). Holder 3. Remove the relay unit. Encoder Removing the Angle Motor Section (Fig.6) Unit 1.
- Page 23 AVX-7000 Cautions on assembling (Fig.9) 1. When installing the display assy in the case, use the reference scale on the surface of the case to set the display assy properly (not slantigly), as shown in the Fig.17. Case Reference scale Reference scale Display Assy Fig.9...
- Page 24 AVX-7000 7.2 IC BA6247FP BA00ASFP BA7071F BU2092FV DATA CLOCK Control circuit Q4 9...
- Page 25 AVX-7000 - Pin Functions (PE5038A) Pin No. Pin Name Format Function and Operation Not used AVSS BRIGHT Bright control output DIMMER Dimmer control output AVREF1 D/A converter reference voltage (Connects to VDD) LEDDT Data output for the WIDE MODE indicating LED driver LEDCLK Clock output for the WIDE MODE indicating LED driver LEDLCK...
- Page 26 AVX-7000 Pin No. Pin Name Format Function and Operation VSELIN2 VSEL input 2 REMIN Remote controlling signal input asens ACC sensor input bsens Backup input Not used Oscillator output Oscillator input Connection to grounding circuit Sub-clock terminal TESTIN Test mode AVDD Analog power for A/D converter AVREF0...
-
Page 27: Mechanism Descriptions
AVX-7000 7.3 MECHANISM DESCRIPTIONS - Electric conditions - Outlines of the hardwares Sensor signals Drive motors Encoder Discharge (position) motor ANGLEIN: Angle sensing analog sensor Angle raising (angle) motor Sensor signals Sensors (PUSH) Angle detection rotary encoder LIFT SW: End of discharge detecting sensor (“L” End of discharge detecting switch (“L”... - Page 28 AVX-7000 - Discharging operations 1. When the OPEN key or the ACC is turned “ON”(or detach grille installing ), (2 sec. after) the position motor will be activated under the high speed mode. 2. When the longitudinal position sensing switch (PUSH SW)/(LIFT SW) turns H - L, the position motor will be stopped and, at the same time, the angle motor will be activated at high speed.
- Page 29 AVX-7000 - Angle adjustment 1. For example, from the initial position (about 90°), when the UP key is pressed, the position motor will be activated at high speed for the time during the UP key is being pressed and held. When the UP key has been released, or when a second has passed after the hard-stopper is activated, the system will go under the braking mode.
- Page 30 AVX-7000 - Precautions 1. The angular position will be kept updated while the angle adjusting key is being pressed and held and the last angle will be memorized. 2. When the angular potential does not change toward the expected direction, the system deems it a functional failure to stop the movement at the position.
-
Page 31: Operations And Specifications
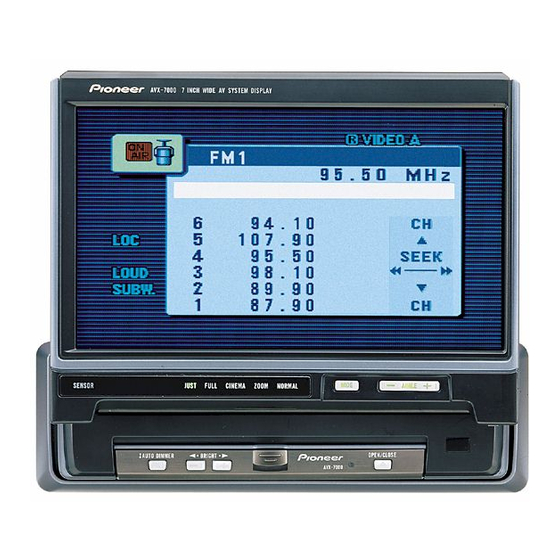
AVX-7000 8. OPERATIONS AND SPECIFICATIONS 8.1 OPERATIONS Key Finder This Product The following diagram shows the display when it is deployed. Display WIDE button Wide mode indicators ANGLE button Signal Receptor DIM button BRIGHTNESS OPEN/CLOSE button button Release Section RESET button Note: •... - Page 32 AVX-7000 8.2 SPECIFICATIONS General Power source ..14.4 V DC (10.8 – 15.1 V allowable) Grounding system ........Negative type Max. current consumption ........2.0 A Dimensions (DIN) (mounting size) ......178 (W) × 50 (H) × 160 (D) mm (front face) ..