
Related Manuals for Electrolux EWF14113S


Summary of Contents for Electrolux EWF14113S
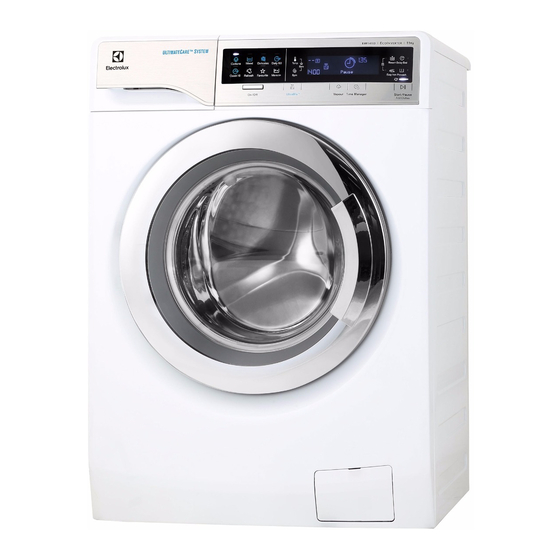
- Page 1 EWF14113 EWF14113S Washing Machine User Manual Máy Giặt Tài Liệu Hướng Dẫn Sử Dụng...
-
Page 2: Table Of Contents
WE’RE THINKING OF YOU Thank you for purchasing an Electrolux appliance. You’ve chosen a product that brings with it decades of professional experience and innovation. Ingenious and stylish, it has been designed with you in mind. So whenever you use it, you can be safe in the knowledge that you’ll get great results every time. - Page 3 ENGLISH CONTENTS DAILY USE 5.1 Loading The Laundry ....................15 5.2 Using Detergent And Additives ..................16 5.3 Options Setting ......................17 5.4 Starting A Cycle ......................17 5.5 Interruption Of A Program .................... 17 5.6 Changing A Program ....................17 5.7 Changing The Options ....................
-
Page 4: Safety Information
SAFETY INFORMATION 1.1 Conditions Of Use This appliance is intended to be used in household and similar applications such as: Farm houses ● By clients in serviced apartments, holiday apartments ● and residential type environments. In the interest of your safety and to ensure the correct... -
Page 5: Child Safety Device (Door Block Button)
ENGLISH Make sure that children or pets do not climb into the ● drum. This machine is provided with child safety lock option ● ) to prevent children playing with the control panel. (see page 14) 1.3 Child Safety Device (Door Block Button) When you activate this device, you cannot close the door. -
Page 6: Installation
● Always unplug the appliance and turn May cause electric shock! if the off the water supply after use, clean machine is not connected to an and maintenance. earthed/ground system. DO NOT touch the wet clothes and metal ●... -
Page 7: Product Description
ENGLISH PRODUCT DESCRIPTION 2.1 Parts Worktop Detergent/Softener Dispenser For more information see page 16. Control Panel Door Door Handle Drain Pump Filter For more information see page 23. Level Adjustment Feet (Front) Drum Light Drum Lifter Rating Label Child Safety Device For more information see page 5. -
Page 8: Product Feature
2.2 Product Feature Load Sensor Detergent Quantity Indicator ● ● This machine has “Load Sensing The text bar also gives the indication Device” which shows how much load about the detergent quantity, when the you put in the machine and maximum door is closed after the laundry load. -
Page 9: Accessories
Electrolux Store, please contact your local Service Centre. Only appropriate accessories To connect the drain hose on the edge approved by Electrolux ensure the of a sink. safety standards of the appliance. If unapproved parts are used, any claims will be invalidated. -
Page 10: Control Panel
CONTROL PANEL 3.1 Control Panel Description Program Touchpads Prewash Touchpad Start/Pause, Add Clothes Touchpad Spin Selection Touchpad Temperature Selection Touchpad Add Clothes Function Symbol Save Favourite Program Easy Iron Touchpad Display Time Manager Touchpad Child Lock (see page 14) -
Page 11: Program Chart
ENGLISH 3.3 Program Chart Max. Load Program ; (Dry Clothes) ; Temperature Type of load and soil level Max. Spin range Speed Cottons ; 11 kg ; White and coloured cotton. (Adjust wash time according to 1400 rpm soil level. See Time Manager table on page 13) to 90 °C Mixed ;... -
Page 12: Program Options Compatibility
3.4 Program Options Compatibility Program Spin Option No Spin Rinse Hold Extra Silent Cottons Mixed Delicates ... - Page 13 ENGLISH Delay End Touchpad ( Prewash Touchpad ( Before you start the program, this option Select this option if you wish your laundry makes it possible to define the end of the to be pre-washed before the main wash. washing program from minimum of 1 Use this option for heavy soil.
-
Page 14: Settings
To set “Child Lock” option: UltraMix ( ● To activate the function, press When you select this option, the detergent “Rinse + ( ) and Easy Iron ( )” is blended and dissolved in water within a touchpads at the same time until the “pre-mixing technology”... -
Page 15: Before First Use
ENGLISH To restart the program from the point at Pressing the “Start/Pause” which it was interrupted, press this touchpad to pause the program. touchpad again, the Start/Pause pilot Wait for the machine to come to a light will stop flashing. complete stop before opening the door. -
Page 16: Using Detergent And Additives
Using Detergent And When you use the liquid detergent: Additives Do not use gelatinous or thick IMPORTANT: Please read liquid detergents. “Detergents Type and Do not put more liquid than the Quantity of Detergent”on maximum level. page 20 before use. -
Page 17: Options Setting
ENGLISH 5.3 Options Setting 5.5 Interruption Of A Program If you want your laundry to be spun or To pause, press Start/ Pause. The use temperature different from the one indicator will start flashing. proposed by the washing machine, Press the Start/Pause again. The pess the Spin “... -
Page 18: At The End Of The Program
5.9 At The End Of The Program When the program is completed and the door lock indicator “ ” goes off, The appliance stops automatically. you can open the door. The acoustic signal will operate. Press the “On/Off” button to deactivate The display will show “... -
Page 19: Washing Hints
ENGLISH WASHING HINTS 6.1 Sorting The Laundry Never wash whites and coloureds together. Whites may lose their Follow the wash code symbols on each “whiteness” in the wash. garment label and the manufacturer’s New coloured items may run in the first washing instructions. -
Page 20: Detergents Type And Quantity Of Detergent
Mould stains: treat with bleach, rinse The choice and quantity of detergent will well (whites and fast coloureds only). depend on ; Grass: soap lightly and treat with bleach type of fabric (delicates, woollens, (whites and fast coloureds only). -
Page 21: International Wash Code Symbols
ENGLISH INTERNATIONAL WASH CODE SYMBOLS These symbols appear on fabric labels, in order to help you choose the best way to treat your laundry. Energetic Max. wash Max. wash Max. wash Max. wash DO NOT temperature temperature temperature temperature Hand wash wash wash at all 95 °C... -
Page 22: Maintenance Wash With "Tub Clean" Program
8.4 Maintenance Wash With To aid cleaning, the top part of the additive compartment should be “Tub Clean” Program removed. With the use of low temperature washes it is possible to get a build up of residues inside the drum. - Page 23 ENGLISH 2. Do not remove the filter while the 3. Place a suitable water container appliance is operating. Do not clean below the recess of the drain pump the drain pump if the water in the to collect the water that flows out. appliance is hot.
-
Page 24: Cleaning The Water Inlet Filter
5. Pull back the drainage duct and turn Clean the filter under the water tap. the filter counter-clockwise to remove it. Put the filter back in the pump into the special guides. Make sure that you correctly tighten the filter to prevent leakages. -
Page 25: Frost Precautions
ENGLISH 8.9 Frost Precautions If the appliance is installed in an area where the temperature can be less than 0 °C, remove the remaining water from the inlet hose and the drain pump. Remove the inlet hose behind the Emergency Drain appliance. -
Page 26: Troubleshooting
TROUBLESHOOTING 9.1 Possible Failures Alarm Code: Certain problems are due to lack of simple The appliance does not fill with maintenance or oversights, which can be water properly. solved easily without calling out an engineer. The appliance does not drain Before contacting your local Service Centre, the water. - Page 27 ENGLISH Malfunction Possible cause => Solution The drain hose is squashed or kinked. (Error code: ) => Check the drain hose connection. The drain pump is clogged. (Error code: ) => Clean the drain The machine filter. does not empty and/or does The option “Extra Silent”...
-
Page 28: Emergency Door Opening
Malfunction Possible cause => Solution The cycle is shorter than the The appliance calculated a new time according to the laundry load. time displayed. The electronic unbalance detection device has cut in because the laundry is not evenly distributed in the drum. The laundry is redistributed by reverse rotation of the drum. -
Page 29: Technical Data
ENGLISH To open the door proceed as follows: 5. Take out the laundry. 6. Close the filter flap. 1. Press the On/Off button to switch the appliance off. If you are unable to identify or 2. Disconnect the mains plug from the solve the problem, contact our mains socket. -
Page 30: Installation
INSTALLATION 11.1 Unpacking CAUTION! All transit bolts and packing must be removed before using the appliance. You are advised to keep all transit devices so that they can be refitted if the machine ever has to be transported again. -
Page 31: Positioning
ENGLISH 11.2 Positioning It is important that your washing machine stands firm and leveled on the floor to ensure correct operation. The appliance must not be installed behind a lockable door, a sliding door or a door with a hinge on the opposite side to avoid restricting the washing machine door. -
Page 32: Water Inlet
11.4 Water Drainage When the washing machine is levelled, try to rock it from corner to The end of the drain hose can be corner. If it does rock, adjust the positioned in three ways: legs again until it is levelled and does not rock. -
Page 33: Electrical Connection
ENGLISH 11.5 Electrical Connection The manufacturer declines any responsibility for damage or injury This machine is designed to operate on through failure to comply with the above a 220-240 V, single-phase, 50 Hz safety precaution. supply. Should the appliance power supply cable “An incorrect power supply may void need to be replaced, this shall be carried your warranty.”... - Page 34 CHÚNG TÔI LUÔN NGHĨ VỀ KHÁCH HÀNG Cảm ơn bạn đã mua thiết bị Electrolux. Bạn đã chọn một sản phẩm trong đó có chứa đựng cả hàng thập niên kinh nghiệm chuyên gia và sự đổi mới. Tinh tế và sành điệu, thiết bị...
- Page 35 TIẾNG VIỆT NỘI DUNG SỬ DỤNG HÀNG NGÀY 5.1 Bỏ Đồ Giặt Vào Máy ..................... 47 5.2 Sử Dụng Bột Giặt Và Chất Phụ Gia ................48 5.3 Cài Đặt Tùy Chọn ......................49 5.4 Bắt Đầu Chương Trình ....................49 5.5 Gián Đoạn Chương Trình ....................
-
Page 36: Thông Tin Về An Toàn
THÔNG TIN VỀ AN TOÀN 1.1 Các Điều Kiện Sử Dụng Thiết bị này nhằm sử dụng trong các ứng dụng gia dụng và tương tự như: Nhà ở xây trong trang trại. ● Cho khách hàng trong căn hộ dịch vụ, căn hộ cho ●... -
Page 37: Thiết Bị An Toàn Trẻ Em
TIẾNG VIỆT Hãy đảm bảo rằng trẻ em hoặc vật nuôi không leo vào ● bên trong lồng giặt. Máy này được cung cấp tùy chọn Khóa Trẻ Em ( ● nhằm tránh trường hợp trẻ em phá phách bảng điều khiển (vui lòng xem trang 46). -
Page 38: Lắp Đặt
● ● Luôn rút phích cắm của thiết bị và tắt Bất kỳ công việc điện nào cần để lắp nguồn nước sau khi sử dụng, vệ sinh đặt thiết bị này cũng phải được tiến và bảo trì. -
Page 39: Mô Tả Sản Phẩm
TIẾNG VIỆT MÔ TẢ SẢN PHẨM 2.1 Các Bộ Phận Nắp Máy Ngăn Định Lượng Bột Giặt/ Chất Làm Mềm Vải (Tham khảo trang 48) Bảng Điều Khiển Cửa Tay Cầm Cửa Bộ Lọc Bơm Xả (Tham khảo trang 55) Điều Chỉnh Mức Độ... -
Page 40: Tính Năng Sản Phẩm
2.2 Tính Năng Sản Phẩm Load Sensor (Cảm Biến ● Cài Đặt Lượng Chất Giặt Tẩy ● Trọng Lượng) Thanh chữ sẽ hiển thị về lượng bột giặt hoặc chất giặt tẩy, sau khi cho đồ Máy này có “Cảm Biến Trọng Lượng”... -
Page 41: Phụ Kiện
Chỉ có phụ kiện thích hợp của Để treo ống xả trên mép bồn. Electrolux đã được phê duyệt đảm bảo các tiêu chuẩn an toàn của thiết bị. Bộ phận không được chấp thuận được sử dụng, bất kỳ khiếu nại sẽ bị... -
Page 42: Bảng Điều Khiển
BẢNG ĐIỀU KHIỂN 3.1 Mô Tả Bảng Điều Khiển Giặt 60 Phút Đồ Cotton Đồ Tổng Hợp Đồ Mỏng Xã Thêm Trì Hoãn Nhiệt Độ Daily 60 Cottons Mixed Delicates Rinse Delay End Temp Save Giặt Sơ Dễ Là/Ủi Yêu Thích... -
Page 43: Sơ Đồ Chương Trình
TIẾNG VIỆT 3.3 Sơ Đồ Chương Trình Trọng Lượng Chương Trình; Quần Áo Tối Đa Loại Quần Áo Cho Vào Và Độ Bẩn Của (Quần Áo Khô); Nhiệt Độ Quần Áo Tốc Độ Vắt Cottons Áp dụng cho đồ trắng và vải cotton. (Điều chỉnh 11 kg ;... -
Page 44: Chương Trình + Tùy Chọn
3.4 Chương Trình + Tùy Chọn Chương Spin Trình Không Giữ Xả Yên Tĩnh Tùy Chọn Vắt Hơn Cottons (Đồ cotton) ... - Page 45 TIẾNG VIỆT Phím Điều Khiển Giặt Sơ ( LƯU Ý: Nếu thời gian chương trình dài hơn 3 tiếng, tùy chọn Trì Hoãn Chọn tùy chọn này nếu bạn muốn xử lý sơ Kết Thúc tối thiểu bắt đầu từ 4 tiếng. đồ...
-
Page 46: Cài Đặt
Đặt tùy chọn Child Lock (Khóa Trẻ Em): LƯU Ý ● Để kích hoạt chức năng này, nhấn các Nên sử dụng tùy chọn này với nước ở phím điều khiển “Rinse + ( ) và nhiệt độ phòng, ngay cả nước ở nhiệt độ... -
Page 47: Trước Khi Sử Dụng Lần Đầu
TIẾNG VIỆT Nhấn phím “Start/Pause” để dừng Để khởi động lại chương trình từ thời chương trình. điểm bị dừng, nhấn lại phím này, đèn hiệu Bắt Đầu/Dừng sẽ ngừng nhấp Đợi máy giặt dừng hoàn toàn rồi mới nháy. mở... -
Page 48: Sử Dụng Bột Giặt Và Chất Phụ Gia
Sử Dụng Bột Giặt Và Chất Khi sử dụng nước giặt tẩy: Phụ Gia Không sử dụng bột giặt dạng QUAN TRỌNG: Xin vui lòng gel hoặc đặc. đọc hướng dẫn sử dụng chất Không cho dung dịch nước giặt giặt tẩy trong trang 40 trước... -
Page 49: Cài Đặt Tùy Chọn
TIẾNG VIỆT 5.5 Gián Đoạn Chương Trình 5.3 Cài Đặt Tùy Chọn Nếu bạn muốn đồ giặt của mình được Để tạm dừng, hãy nhấn Start/Pause. vắt hoặc sử dụng nhiệt độ khác với Chỉ báo sẽ bắt đầu nhấp nháy. nhiệt độ... -
Page 50: Cuối Chương Trình
5.9 Cuối Chương Trình Để xả hết nước : Nhấn bàn phím cảm ứng “Start/Pause Thiết bị tự động dừng. ”. Thiết bị xả hết nước và quay với Tín hiệu âm thanh sẽ vang lên. tốc độ quay tối đa cho chương trình Màn hình hiển thị... -
Page 51: Gợi Ý Giặt
TIẾNG VIỆT GỢI Ý GIẶT 6.1 Phân Loại Đồ Giặt Không bao giờ giặt đồ trắng và đồ nhuộm màu cùng nhau. Đồ trắng có thể Tuân theo các biểu tượng mã giặt trên mất đi “độ trắng” trong quá trình giặt. mỗi nhãn quần áo và... -
Page 52: Loại Chất Giặt Tẩy Và Lượng Chất Giặt Tẩy
Vết mốc: xử lý bằng thuốc tẩy, rồi xả sạch Lựa chọn và định lượng chất giặt tẩy sẽ (chỉ đồ trắng và đồ nhuộm bền màu). phụ thuộc vào; loại vải (vải dễ nhăn, vải bông, vải len, Nhựa cây: xoa nhẹ... -
Page 53: Các Biểu Tượng Mã Giặt Quốc Tế
TIẾNG VIỆT CÁC BIỂU TƯỢNG MÃ GIẶT QUỐC TẾ Biểu tượng này xuất hiện trên nhãn vải để giúp bạn lựa chọn cách tốt nhất để xử lý đồ giặt của mình. Giặt mạnh Nhiệt độ Nhiệt độ Nhiệt độ Nhiệt độ... -
Page 54: Giặt Bảo Trì Với Chương Trình "Tub Clean
8.4 Giặt Bảo Trì Với Để hỗ trợ việc làm sạch, phần trên cùng của ngăn chất phụ gia cần được tháo ra. Chương Trình “Tub Clean” Với việc sử dụng chế độ giặt ở nhiệt độ thấp, có thể cặn sẽ tích tụ bên trong lồng giặt. - Page 55 TIẾNG VIỆT 2. Không tháo bộ lọc ra trong khi thiết bị 3. Đặt vật đựng dưới hốc bơm xả để hoạt động. Không vệ sinh bơm xả hứng nước chảy ra. nếu nước trong thiết bị còn nóng. Nhấn hai cần gạt và kéo về phía ống Nước phải lạnh trước khi bạn vệ...
-
Page 56: Vệ Sinh Bộ Lọc Nạp Nước
5. Kéo lại ống xả và xoay bộ lọc để Vệ sinh bộ lọc dưới vòi nước. tháo ra. Đặt lại bộ lọc trong bơm vào trong các ống dẫn đặc biệt. Chắc chắn rằng bạn siết chặt bộ lọc một cách phù... -
Page 57: Các Biện Pháp Phòng Ngừa Đóng Băng
TIẾNG VIỆT Các Biện Pháp Phòng Ngừa Đóng Băng Nếu thiết bị được lắp đặt ở khu vực có nhiệt độ có thể xuống dưới 0 °C, tháo bỏ nước còn lại khỏi ống dẫn nước vào và bơm thoát nước. Tháo ống nạp nước đằng sau Thoát Nước Khẩn Cấp thiết bị. -
Page 58: Khắc Phục Sự Cố
KHẮC PHỤC SỰ CỐ 9.1 Nguyên Nhân Có Thể Có Mã Báo Động Một số vấn đề là do thiếu bảo trì đơn giản hoặc sơ suất mà có thể được giải quyết dễ dàng mà Máy không được đổ đầy nước. - Page 59 TIẾNG VIỆT Hỏng hóc Nguyên nhân có thể có => Giải pháp Ống xả bị đè hoặc bị xoắn lại. (Mã lỗi: ) => Kiểm tra đầu nối ống xả. Bơm xả bị tắc nghẽn. (Mã lỗi: ) => Vệ sinh bộ lọc tách nước. Máy không Tùy chọn “Extra Silent”...
-
Page 60: Mở Cửa Khẩn Cấp
Hỏng hóc Nguyên nhân có thể có => Giải pháp Sử dụng quá nhiều bột giặt. => Giảm khối lượng bột giặt hoặc sử dụng bột giặt khác. (tham khảo trang 52 “Loại chất giặt tẩy và Lượng chất Thời gian chu... -
Page 61: Dữ Liệu Kỹ Thuật
TIẾNG VIỆT Để mở cửa, vui lòng thao tác như sau: 5. Lấy đồ trong lồng giặt ra. 1. Nhấn nút “On/Off” để tắt thiết bị. 6. Đóng cửa bộ lọc. 2. Rút điện ra khỏi nguồn. Nếu bạn không thể xác định hoặc 3. -
Page 62: Lắp Đặt
LẮP ĐẶT 11.1 Mở gói thiết bị THẬN TRỌNG : Phải tháo tất cả các bulông vận chuyển và vỏ trước khi sử dụng thiết bị. Bạn nên giữ tất cả các thiết bị vận chuyển sao cho có... -
Page 63: Định Vị
TIẾNG VIỆT 11.2 Định Vị Điều quan trọng là máy giặt của bạn cần đứng vững chắc và nằm trên sàn nhà để đảm bảo vận hành đúng cách. Việc thiết bị không được lắp đặt sau cửa khóa được, cửa trượt hoặc cửa có... -
Page 64: Đầu Nạp Nước
11.4 Xả Nước Khi máy giặt được đặt bằng phẳng, hãy cố gắng lắc từ góc này qua góc Đầu ống xả có thể được bố trị theo kia. Nếu máy lắc, hãy điều chỉnh lại ba cách: các chân cho đến khi máy được đặt bằng phẳng và... -
Page 65: Các Vấn Đề Về Môi Trường
TIẾNG VIỆT “Nối máy với ổ cắm điện tiếp Nếu dây nguồn điện của thiết đất.” bị cần được thay thế, điều này cần do Trung Tâm Dịch Kiểm tra việc lắp đặt điện gia dụng Vụ của chúng tôi thực hiện. có... - Page 68 www.electrolux.com...