Table of Contents
Advertisement
Quick Links
Operating Instructions
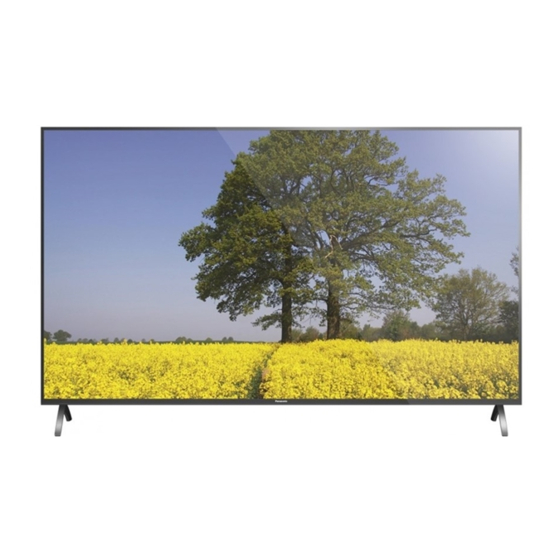
LED TV
Model No.
TH-65GX800A
For more detailed instructions, please refer to [eHELP]
(Built-in Operating Instructions).
●
How to use [eHELP]
Thank you for purchasing this Panasonic product.
Please read these instructions carefully before operating this product and
retain them for future reference.
Please carefully read the "Safety Precautions" of this manual before use.
The images shown in this manual are for illustrative purposes only.
M0419-0
(p. 17)
English
TQB4GD0221
English
Advertisement
Table of Contents

Related Manuals for Panasonic TH-65GX800A


Summary of Contents for Panasonic TH-65GX800A
- Page 1 ● How to use [eHELP] (p. 17) Thank you for purchasing this Panasonic product. Please read these instructions carefully before operating this product and retain them for future reference. Please carefully read the “Safety Precautions” of this manual before use.
-
Page 2: Table Of Contents
The Bluetooth word mark and logos are registered trademarks owned by Bluetooth SIG, Inc. and any use of such marks by Panasonic Corporation is under license. Other trademarks and trade names are those of their respective owners. x.v.Colour™ is a trademark. -
Page 3: Important Notice
Additional information may be obtained from MPEG LA, our customers and the integrity of our Service as well as LLC. to protect the rights or property of Panasonic. If you wish See http://www.mpegla.com. to know more about the processing of your information... -
Page 4: Safety Precautions
Mains Plug and lead types vary depending on the ● model and countries. Do not use an unapproved pedestal / mounting equipment. Be sure to ask your local Panasonic ● dealer to perform the setup or installation of approved This TV is designed to operate on AC 220-240 V, wall-hanging brackets. - Page 5 Do not use the pedestal if it becomes warped or and the devices that use 2.4 GHz signal. physically damaged. If this occurs, contact your ■ Ventilation nearest Panasonic dealer immediately. ● Caution During setup, make sure that all screws are securely tightened.
-
Page 6: Accessories
■ Moving the TV Accessories Caution Before moving the TV, disconnect all cables. Remote Control ● At least two people are required to move the TV. ● N2QAYB001189 Support the TV as shown below to prevent injury that may be caused by the tipping or falling of TV (p. -
Page 7: Installing The Tv
■ <Style2> Installing the TV Assembling / Removing the pedestal Preparations Take out the pedestal and the TV from the packing case and put the TV onto a work table with the screen panel down on the clean and soft cloth (blanket, etc.) ●... -
Page 8: Installing The Wall-Hanging Bracket
Preventing the TV from falling over Installing the wall- It is recommended to secure the pedestal to a furniture hanging bracket as shown to prevent the TV from falling over. ● This information is designed to reduce the risk of injuries caused by the TV falling over. -
Page 9: Connections
Connections Terminals ● External equipment and cables shown are not supplied with this TV. ● Please ensure that the unit is disconnected from the mains socket before attaching or disconnecting any cables. ● Check the terminal type and cable plugs are correct for connection. - Page 10 AV devices Basic connections ■ ■ DVD Recorder / VCR Mains lead AC 220-240 V, 50 / 60 Hz Mains lead ■ Aerial RF cable HDMI cable DVD Recorder / VCR Aerial ■ Set top box RF cable Aerial ● For Digital TV, Analogue TV ●...
- Page 11 ■ Wireless connection Other connections ■ DVD Player (COMPONENT equipment) Internet environment Built-in wireless LAN (Rear of the TV) Access point Connections for 4K compatible (Listening) (Viewing) equipment DVD Player HDMI cable Audio cable (Shielded) 4K compatible equipment Component video cable (Shielded) ●...
- Page 12 ■ Amplifier (listening with external speakers) Cable arrangement ● To enjoy multi-channel sound from external Fix the cables using the pedestal cover. equipment (e.g. Dolby Digital 5.1ch), connect the equipment to the amplifier. For information about the Pedestal Cover connections, read the manuals of the equipment and amplifier.
- Page 13 3 Close the latch by clipping it back. Attaching the cable cover / terminal cover ● Do not apply load to the cable cover / terminal cover. ● Be careful not to nip the cables between the TV and the cable cover / terminal cover. ●...
-
Page 14: Identifying Controls
8 [Option Menu] Identifying Controls ● Easy optional setting for viewing, sound, etc. 9 Coloured buttons Remote Control (red-green-yellow-blue) ● Used for the selection, navigation and operation of various functions. 10 Volume Up / Down 11 Numeric buttons ● Changes channel. ●... - Page 15 ■ Installing / Removing batteries 5 Channel Up / Down Cursor Up / Down (when in the menu system) 6 Volume Up / Down Pull open Cursor Left / Right (when in the menu system) 7 Mains power On / Off switch Hook ●...
-
Page 16: First Time Auto Tuning
Tick the TV signal mode to tune, and then select First time Auto [Start Auto Tuning] : Digital TV Tuning : Digital TV (DVB-T2) : Analogue TV When the TV is turned on for the first time, it will Auto Tuning is now complete and automatically search for available TV channels and give your TV is ready for viewing. -
Page 17: Watching
Watching TV How to Use eHELP [eHELP] is the detailed operating instructions built into Turn power on the TV, and gives a more detailed explanation for a better understanding of the operation of each feature. (TV) Display [eHELP] (Remote Control) ●... - Page 18 ● To scroll the description (if more than 1 page) While the description is highlighted ● To open the reference screen ( ● To display the menu related to the description (only for some descriptions) (red) ● To check the features of this TV Search by Purpose >...
-
Page 19: Faqs
● Check the mains lead is plugged into the TV and the mains socket. About the inquiry ● Please contact your local Panasonic dealer for The TV goes into Standby mode assistance. ● Auto power standby function is activated. If you make an inquiry from a place where this TV... -
Page 20: Maintenance
Specifications ■ First, remove the mains plug from the mains socket. Model No. TH-65GX800A Display panel, Cabinet, Pedestal Dimensions (W × H × D) Regular care: Gently wipe the surface of the display panel, cabinet, 1 454 mm × 915 mm × 325 mm (With Pedestal) or pedestal by using a soft cloth to remove dirt or 1 454 mm ×... - Page 21 Built-in wireless LAN HDMI 1 / 2 / 3 input Standard compliance and Frequency range* TYPE A Connectors IEEE802.11a/n/ac HDMI1 / 3: 5.15 GHz -5.35 GHz, 5.47 GHz -5.85 GHz 4K, Content Type, Deep Colour, x.v.Colour™ IEEE802.11b/g/n HDMI2: 2.400 GHz -2.4835 GHz 4K, Content Type, Audio Return Channel, Security Deep Colour, x.v.Colour™...
- Page 23 Distributors, or Dealers, and only where the products are used and serviced within Australia or its territories. Warranty cover only applies to the services that are carried out by a Panasonic Authorised Service Centre and only if valid proof of purchase is presented when the warranty service is requested.
- Page 24 Warranty Service purposes. Model Number Serial Number English Web Site: http://www.panasonic.com Printed in Malaysia © Panasonic Corporation 2019 04-2019...