
Related Manuals for Huawei EDGE-U06


Summary of Contents for Huawei EDGE-U06
- Page 1 EDGE-U06 Simplified Maintenance Manual 2.0 Issue Date 2013-10-12 HUAWEI TECHNOLOGIES CO., LTD.
- Page 2 Notice The purchased products, services and features are stipulated by the contract made between Huawei and the customer. All or part of the products, services and features described in this document may not be within the purchase scope or the usage scope. Unless otherwise specified in the contract, all statements, information, and recommendations in this document are provided "AS IS"...
-
Page 3: About This Document
12. 8 in yellow. phone. 2. Added chapter 12 to provide guidance on how to replace the PCBA without removing the battery. Issue 1.0 (2013-01-12) Huawei Proprietary and Confidential Copyright © Huawei Technologies Co., Ltd. -
Page 4: Table Of Contents
5.6.1 Installing the USB Driver ........................20 5.6.2 Performing a Normal Upgrade ......................21 5.6.3 Forcible Upgrade Guidance ........................23 5.7 Troubleshooting Upgrade Failures ......................... 23 6 Maintenance Tools ........................25 Issue 1.0 (2013-01-12) Huawei Proprietary and Confidential Copyright © Huawei Technologies Co., Ltd. - Page 5 11.3.4 MMI Test ............................. 69 11.3.5 MT ............................... 82 12 Replacing the P6's PCBA Without Removing the Battery ..........84 12.1 Disassembly Procedure ..........................84 12.2 Assembly Procedure ............................. 88 Issue 1.0 (2013-01-12) Huawei Proprietary and Confidential Copyright © Huawei Technologies Co., Ltd.
-
Page 6: Overview
1 and level 2. Being Huawei proprietary, this document is accessible only for authorized service centers. Although every effort was made to ensure the accuracy of the document, errors may still exist. -
Page 7: Product Overview
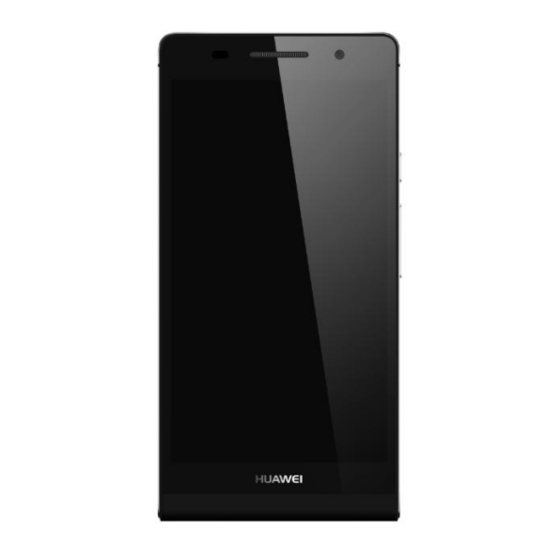
EDGE U0-6 Simplified Maintenance Manual 2 Product Overview Product Overview 2.1 Appearance Figure 2-1 shows the appearance of the HUAWEI EDGE U0-6 mobile phone (U0-6). Figure 2-1 U0-6 Issue 1.0 (2013-01-12) Huawei Proprietary and Confidential Copyright © Huawei Technologies Co., Ltd. -
Page 8: Specifications
WCDMA Band II [1900 MHz]: 1850–1910 MHz (UL), 1930-1990 MHz (DL) WCDMA Band IV [1700 MHz]: 1710–1755 MHz (UL), 2110-2155 MHz (DL) WCDMA Band V [850 MHz]: 824–849 MHz (UL), 869–894 Issue 1.0 (2013-01-12) Huawei Proprietary and Confidential Copyright © Huawei Technologies Co., Ltd. - Page 9 Talk time: TBD Charging duration: 4 h Operating humidity 5%–95% RH Camera Rear camera: 8 MP Front camera: 5 MP FM radio Built-in FM radio Bluetooth Bluetooth 3.0 Issue 1.0 (2013-01-12) Huawei Proprietary and Confidential Copyright © Huawei Technologies Co., Ltd.
- Page 10 GSM 850 MHz: > –109 dBm GSM 900 MHz: > –109 dBm DCS 1800 MHz: > –109 dBm PCS 1900 MHz: > –108 dBm Issue 1.0 (2013-01-12) Huawei Proprietary and Confidential Copyright © Huawei Technologies Co., Ltd.
-
Page 11: Exploded View
30. Primary 20. Battery cover microphone rubber antenna microphone protective film 23. Headset jack 21. Battery cover 25. Main 27. Speaker cover (with the antenna support eject tool) Issue 1.0 (2013-01-12) Huawei Proprietary and Confidential Copyright © Huawei Technologies Co., Ltd. -
Page 12: Spare Parts
4.1 Commonly Used Parts Figure 4-1 is for your reference only. It is subject to changes without notice. Obtain the latest component information from the Huawei TCS. If you have any questions, contact the local technical support. Table 4-1 Commonly used parts... - Page 13 Part name Motor support Part USB port plastic Part USB port metal name support name support Part name microSD card holder-white Part name SIM card holder-white Issue 1.0 (2013-01-12) Huawei Proprietary and Confidential Copyright © Huawei Technologies Co., Ltd.
- Page 14 EDGE U0-6 Simplified Maintenance Manual 4 Spare Parts Part name Terminal antenna Part name Rear camera lens Part TP front+LCD+Receiver+Speaker+Antenna Part name Battery cover assembly name housing assembly (used for repair) Issue 1.0 (2013-01-12) Huawei Proprietary and Confidential Copyright © Huawei Technologies Co., Ltd.
-
Page 15: How To Obtain Part Numbers
Step 2 Choose Basic Information > BOM Tree Info. Define the values for Product Line, Product Type, Product Model, and Product Description. The PNs are displayed in detail in the tree shape, as shown in Figure 4-2. Issue 1.0 (2013-01-12) Huawei Proprietary and Confidential Copyright © Huawei Technologies Co., Ltd. - Page 16 Step 3 Click the PN of the part to query. The system displays the picture of the part. Use the picture to confirm whether the part is what you want. Figure 4-3 Part picture ----End Issue 1.0 (2013-01-12) Huawei Proprietary and Confidential Copyright © Huawei Technologies Co., Ltd.
- Page 17 Figure 4-4 Entering the part code Step 5 Click the PN. The system displays the part picture. Figure 4-5 Part picture ----End Issue 1.0 (2013-01-12) Huawei Proprietary and Confidential Copyright © Huawei Technologies Co., Ltd.
-
Page 18: Software Upgrade
The power remaining of the battery is more than 50%. It is recommended that you connect the phone to its power adapter for power supply and do not remove its battery during the upgrade. Issue 1.0 (2013-01-12) Huawei Proprietary and Confidential Copyright © Huawei Technologies Co., Ltd. -
Page 19: Checking The Software Version
Figure 5-1 Checking the software version 5.3 How to Distinguish Between Software Versions 5.3.1 Software Types There are two types of software: factory-level software and version software. Issue 1.0 (2013-01-12) Huawei Proprietary and Confidential Copyright © Huawei Technologies Co., Ltd. -
Page 20: Software Naming Convention
CT or other functional tests on a phone after you load this software on the phone. This software should not be delivered to customers. Please use the newest edition software to repair. You can download the software from ComPartner or the Huawei service website. -
Page 21: How To Obtain The Version Software
----End 5.4.2 Method 2 Log in to http://support.huaweidevice.com/, select the desired phone model, click the Software tab page, and search for and download the latest version software. Issue 1.0 (2013-01-12) Huawei Proprietary and Confidential Copyright © Huawei Technologies Co., Ltd. -
Page 22: Using The Microsd Card For Upgrade
Step 4 Insert the microSD card into the phone and power on the phone. On the dialing screen, enter *#*#2846579#*#*. Choose ProjectMenu > Upgrade > SD card upgrade and touch Confirm. Issue 1.0 (2013-01-12) Huawei Proprietary and Confidential Copyright © Huawei Technologies Co., Ltd. - Page 23 5 Software Upgrade Figure 5-7 Operations on the phone for a normal upgrade using the microSD card The screen shows the upgrade progress, as shown in Figure 5-8. Issue 1.0 (2013-01-12) Huawei Proprietary and Confidential Copyright © Huawei Technologies Co., Ltd.
-
Page 24: Forcible Upgrade
JTAG. For details, see the advanced version of the maintenance manual. 5.6 Using the USB Cable for Upgrade Figure 5-9 shows the hardware connection. Issue 1.0 (2013-01-12) Huawei Proprietary and Confidential Copyright © Huawei Technologies Co., Ltd. -
Page 25: Installing The Usb Driver
*#*#2846579#*#* and choose ProjectMenu > Background settings > Usb ports setting > Manufacture mode. Step 4 Upgrade the phone using the upgrade tool. Figure 5-11 Port information ----End Issue 1.0 (2013-01-12) Huawei Proprietary and Confidential Copyright © Huawei Technologies Co., Ltd. -
Page 26: Performing A Normal Upgrade
Step 3 Choose the phone model. In the left navigation tree, select Upgrade Tool. On the right panel, double-click the upgrade tool. In the displayed dialog box, enter the password Huawei and click OK. - Page 27 After the upgrade is complete, the upgrade tool displays Download Success, as shown in Figure 5-16. Step 6 Wait for two or more seconds and remove the USB cable. Issue 1.0 (2013-01-12) Huawei Proprietary and Confidential Copyright © Huawei Technologies Co., Ltd.
-
Page 28: Forcible Upgrade Guidance
1. Check whether the USB cable has been properly connected to phone using a USB the computer and phone. cable 2. Check whether the target version is higher than the original one. 3. Perform the upgrade again. Issue 1.0 (2013-01-12) Huawei Proprietary and Confidential Copyright © Huawei Technologies Co., Ltd. - Page 29 1. Check whether the upgrade file is correct. phone using a microSD 2. Check whether the upgrade method is correct. card 3. Check whether the microSD card functions properly. 4. Perform the upgrade again. Issue 1.0 (2013-01-12) Huawei Proprietary and Confidential Copyright © Huawei Technologies Co., Ltd.
-
Page 30: Maintenance Tools
Usage: heats components Name: heat gun Usage: heats components Name: soldering iron Usage: solders components Name: DC power supply Usage: supplies power Name: soldering fixture Usage: secures PCBAs Issue 1.0 (2013-01-12) Huawei Proprietary and Confidential Copyright © Huawei Technologies Co., Ltd. - Page 31 Mark:This camp is used in big repair center Name:EDGE battery cover assemble camp Item code: 02430833 Usage:Battery cover assemble Mark:This camp is used in big repair center Issue 1.0 (2013-01-12) Huawei Proprietary and Confidential Copyright © Huawei Technologies Co., Ltd.
- Page 32 EDGE U0-6 Simplified Maintenance Manual 6 Maintenance Tools Name: Knife Usage:Tear down mobile phone Name:Cupule Usage:Tear down battery cover Mark:Used for ASC repair Issue 1.0 (2013-01-12) Huawei Proprietary and Confidential Copyright © Huawei Technologies Co., Ltd.
-
Page 33: Disassembly Procedure
2. Wear an ESD wrist strap. screwdriver, and tweezers. 4. Remove the two card holders. 3. Use the eject tool to expel the SIM card and microSD card holders from the phone. Issue 1.0 (2013-01-12) Huawei Proprietary and Confidential Copyright © Huawei Technologies Co., Ltd. - Page 34 10. Clamp the phone with your palms and push 9. Wear a pair of anti-skid ESD gloves. along the battery cover to use friction to snap out the battery cover. Issue 1.0 (2013-01-12) Huawei Proprietary and Confidential Copyright © Huawei Technologies Co., Ltd.
- Page 35 15. Remove the two metal sheets with caution. 16. Release the headset jack BTB connector from Do not damage surrounding components or deform the the PCBA. metal sheets. Issue 1.0 (2013-01-12) Huawei Proprietary and Confidential Copyright © Huawei Technologies Co., Ltd.
- Page 36 The battery power cannot exceed 50% at most. Attach the double-sided adhesive to the battery compartment if it is removed during maintenance. Issue 1.0 (2013-01-12) Huawei Proprietary and Confidential Copyright © Huawei Technologies Co., Ltd.
- Page 37 24. Pry the second buckle of the GPS antenna direction. support. The arrow in the above figure shows the prying force direction. Issue 1.0 (2013-01-12) Huawei Proprietary and Confidential Copyright © Huawei Technologies Co., Ltd.
- Page 38 30. Slide the antenna up and down to release it last buckle on the Y axis. from the last buckle on the Y axis. Operate slowly to avoid damaging the FPC at the battery BTB connector. Issue 1.0 (2013-01-12) Huawei Proprietary and Confidential Copyright © Huawei Technologies Co., Ltd.
- Page 39 36. Slightly pry the buckles of the main antenna to 35. Slightly remove the two cameras from the PCBA. lift the PCBA up. Do not damage surrounding components. Issue 1.0 (2013-01-12) Huawei Proprietary and Confidential Copyright © Huawei Technologies Co., Ltd.
- Page 40 Remove the two screws that fix the receiver FPC. 42. Slightly pry the FPC up using the box cutter. 41. Pry the steel stiffening board using the box cutter. Issue 1.0 (2013-01-12) Huawei Proprietary and Confidential Copyright © Huawei Technologies Co., Ltd.
- Page 41 45. Insert the tweezers into the screw hole, push downward to remove the lower metal support. 48. Gently press the headset jack FPC. Lift the main antenna support. 47. Release the speaker buckles. Issue 1.0 (2013-01-12) Huawei Proprietary and Confidential Copyright © Huawei Technologies Co., Ltd.
- Page 42 53. Slide the receiver rightward using the tweezers to Remove screws from the GPS antenna rack, the remove it. GPS antenna rack, and the PCBA. Issue 1.0 (2013-01-12) Huawei Proprietary and Confidential Copyright © Huawei Technologies Co., Ltd.
-
Page 43: Assembly Procedure
Way of bending: Press the corner R of the FPC using a finger of your right hand. Bend the BTB connector area using your left hand. Otherwise, the FPC will be covered by the PCBA. Issue 1.0 (2013-01-12) Huawei Proprietary and Confidential Copyright © Huawei Technologies Co., Ltd. - Page 44 Criteria: The motor is smoothly attached. The motor cable does not exceed the motor height. The motor cable is pressed by the motor. The connector of the cable is Issue 1.0 (2013-01-12) Huawei Proprietary and Confidential Copyright © Huawei Technologies Co., Ltd.
- Page 45 14. Install the TP and LCD BTB connector protective Sequence of tightening the screws: See the above support. figure. Torque: 0.7–0.8 kgf*cm Speed: low Criteria: No screws or threads are stripped out. Issue 1.0 (2013-01-12) Huawei Proprietary and Confidential Copyright © Huawei Technologies Co., Ltd.
- Page 46 20. Install the USB connector to the front cover. FPC. Criteria: The USB connector is properly installed in its slot. Ensure that the Wi-Fi antenna's pad is properly attached before you install the receiver FPC. Issue 1.0 (2013-01-12) Huawei Proprietary and Confidential Copyright © Huawei Technologies Co., Ltd.
- Page 47 3. Secure the RF connector of the cable using the RF switch wrench, as shown in the first figure. Criteria: The rubber is correctly and securely 4. Insert the RF connector into the socket on the PCBA. Issue 1.0 (2013-01-12) Huawei Proprietary and Confidential Copyright © Huawei Technologies Co., Ltd.
- Page 48 30. Remove the protective film from the rear camera. 29. move the battery back about 20cm from the top of battery compartment. Care about the battery fpc. Issue 1.0 (2013-01-12) Huawei Proprietary and Confidential Copyright © Huawei Technologies Co., Ltd.
- Page 49 36. Attach the IMEI label to the position shown in the phone between your palms and press it for 5–6 above figure. seconds with a force of 160–240 N. Issue 1.0 (2013-01-12) Huawei Proprietary and Confidential Copyright © Huawei Technologies Co., Ltd.
- Page 50 Ensure that the battery cover is smoothly 42. Place the phone into the battery installing jig. Close installed, with all buckles fastened. the jig cover and push the handle of the jig. Issue 1.0 (2013-01-12) Huawei Proprietary and Confidential Copyright © Huawei Technologies Co., Ltd.
- Page 51 46. Place the decoration on the phone, as shown in the left figure. Fasten the battery cover side of the decoration then the TP side. Criteria: The decoration is properly installed to the phone, without mismatch. Issue 1.0 (2013-01-12) Huawei Proprietary and Confidential Copyright © Huawei Technologies Co., Ltd.
- Page 52 48. After you install the rear camera lens, press the jig to press-fit the lens with your hands for 5–6 seconds. 47. Install the rear camera lens to the phone using the vacuum sucking pen. Issue 1.0 (2013-01-12) Huawei Proprietary and Confidential Copyright © Huawei Technologies Co., Ltd.
-
Page 53: Faqs
Then scroll to Yes-delete all user data and press the power key. Issue 1.0 (2013-01-12) Huawei Proprietary and Confidential Copyright © Huawei Technologies Co., Ltd. - Page 54 EDGE U0-6 Simplified Maintenance Manual 9 FAQs Figure 9-1 Recovery screen Figure 9-2 Scrolling to Yes-delete all user data Issue 1.0 (2013-01-12) Huawei Proprietary and Confidential Copyright © Huawei Technologies Co., Ltd.
-
Page 55: My Phone Responds Slowly After It Runs For A Period Of Time. What Can I Do
To check the phone IMEI and SN: On the dialing screen, enter *#*#2846579#*#* to access engineering mode and choose ProjectMenu > Veneer information query > Other query. Issue 1.0 (2013-01-12) Huawei Proprietary and Confidential Copyright © Huawei Technologies Co., Ltd. - Page 56 EDGE U0-6 Simplified Maintenance Manual 9 FAQs Figure 9-4 Wi-Fi and Bluetooth addresses Figure 9-5 IMEI and SN Issue 1.0 (2013-01-12) Huawei Proprietary and Confidential Copyright © Huawei Technologies Co., Ltd.
-
Page 57: Troubleshooting
If the phone fails to start, the power-on failure is caused by the battery fault. Replace the faulty battery for free if the phone is still in its warranty period. Issue 1.0 (2013-01-12) Huawei Proprietary and Confidential Copyright © Huawei Technologies Co., Ltd. - Page 58 3.7 V after the battery is properly battery is charged for 30 functioning minutes? Confirm the battery fault cause Issue 1.0 (2013-01-12) Huawei Proprietary and Confidential Copyright © Huawei Technologies Co., Ltd.
- Page 59 Figure 10-4 Troubleshooting no current power-on failures No current power- on failure Replace Is the battery connector J1301 J1301 malfunctioning? Is the power key S2201 Replace malfunctioning? S2201 Replace the PCBA Issue 1.0 (2013-01-12) Huawei Proprietary and Confidential Copyright © Huawei Technologies Co., Ltd.
- Page 60 Figure 10-5 Battery interface circuit diagram Figure 10-6 Critical parts on the PCBA for power-on failures Battery connector J1301 Power key S2201 Troubleshooting process for weak current power-on failures Issue 1.0 (2013-01-12) Huawei Proprietary and Confidential Copyright © Huawei Technologies Co., Ltd.
-
Page 61: Restarts And Screen Freezing
After you press and hold the power key, the phone repeatedly restarts and cannot display the Home screen. After you press and hold the power key, the phone freezes at the Huawei logo screen and cannot display the Home screen. Solution Check the power-on current of the phone. -
Page 62: Overheat And Short Standby Time
Test the power-on and standby currents. If both currents exceed the normal values, the problem is probably caused by the PCBA. If the preceding items are proved normal, the problem is caused by the battery. Replace the battery. Issue 1.0 (2013-01-12) Huawei Proprietary and Confidential Copyright © Huawei Technologies Co., Ltd. -
Page 63: Charging Failure
Is the USB port Replace the USB smudged, poorly soldered, port FPC or damaged? Is the issue addressed Replace the PCBA after you replace the battery? Replace the PCBA Issue 1.0 (2013-01-12) Huawei Proprietary and Confidential Copyright © Huawei Technologies Co., Ltd. -
Page 64: No Ringtone
Is the speaker Replace the properly speaker functioning? Check the Is the speaker signal connection of circuit normal? LB1202 and LB1203 Re-solder or replace J2205 and J2206 Issue 1.0 (2013-01-12) Huawei Proprietary and Confidential Copyright © Huawei Technologies Co., Ltd. -
Page 65: Receiver Failure
Replace the functioning? receiver Is the receiver FPC Replace the properly functioning? receiver FPC Are the related signal Exclude the circuits properly circuit faults. functioning? Replace the PCBA Issue 1.0 (2013-01-12) Huawei Proprietary and Confidential Copyright © Huawei Technologies Co., Ltd. -
Page 66: Microphone Failure
Exclude the microphone sub- Are the related signal board, FPC, and circuits properly functioning? related signal circuit faults Replace the PCBA Issue 1.0 (2013-01-12) Huawei Proprietary and Confidential Copyright © Huawei Technologies Co., Ltd. -
Page 67: Weak Or No Reception
Replace the Is the SIM card SIM card with a malfunctioning? standard one Is the main antenna Replace the malfunctioning? main antenna Replace the PCBA Issue 1.0 (2013-01-12) Huawei Proprietary and Confidential Copyright © Huawei Technologies Co., Ltd. -
Page 68: Sim Card Detection Failure
If neither of the cameras is detected or the power supply is abnormal, replace the PCBA directly. Issue 1.0 (2013-01-12) Huawei Proprietary and Confidential Copyright © Huawei Technologies Co., Ltd. -
Page 69: Touchscreen Failure
The TP assembly has a great independence and multiplex power supply and communication interfaces with other circuits. Therefore, you can replace the front cover to identify whether the failure is a touchscreen failure or a PCBA-related circuit failure. Issue 1.0 (2013-01-12) Huawei Proprietary and Confidential Copyright © Huawei Technologies Co., Ltd. -
Page 70: Quality Inspection Procedure And Methods
(Ensure that the battery voltage is lower than 3.5 V before charging it.) Current test Test the power-off current. 0 mA Test the power-on peak current. < 600 mA Issue 1.0 (2013-01-12) Huawei Proprietary and Confidential Copyright © Huawei Technologies Co., Ltd. -
Page 71: Inspection Tools
Connect the DC power supply to the phone. Used for the current test microSIM card Tests the SIM card function of the phone. Used for the MMI test Issue 1.0 (2013-01-12) Huawei Proprietary and Confidential Copyright © Huawei Technologies Co., Ltd. - Page 72 Tests the phone's reception metric. Used for the MT Couples phone signals. Shielding box Tests the phone's reception metric. Used for the MT Shields the phone from interference signals. Issue 1.0 (2013-01-12) Huawei Proprietary and Confidential Copyright © Huawei Technologies Co., Ltd.
-
Page 73: Instruction Instructions
When the phone display the Home screen, press the power key to turn off the screen and check the phone's standby current. If the reading on the power supply exceeds 10 mA, current leakage occurs. Issue 1.0 (2013-01-12) Huawei Proprietary and Confidential Copyright © Huawei Technologies Co., Ltd. -
Page 74: Charging Test
To enter MMI test mode, insert a microSD card and a SIM card into the phone, power on the phone, and on the dialing screen, enter #*#*2846579#*#*. Press the volume down key to start Issue 1.0 (2013-01-12) Huawei Proprietary and Confidential Copyright © Huawei Technologies Co., Ltd. - Page 75 Step Description Instructions Enter On the dialing screen, enter MMI test *#*#2846579#*#* to enter mode. MMI test mode. Press the volume down key to start the test. Issue 1.0 (2013-01-12) Huawei Proprietary and Confidential Copyright © Huawei Technologies Co., Ltd.
- Page 76 After all keys are tested, press the volume down key to proceed to the next test item. Mark:only test power key,volume + key,volume- key. Then press volume- to next test item. Issue 1.0 (2013-01-12) Huawei Proprietary and Confidential Copyright © Huawei Technologies Co., Ltd.
- Page 77 If the LCD backlight backlight repeatedly turns on and off, test the LCD backlight functions properly. Press the volume down key to proceed to the next test item. Issue 1.0 (2013-01-12) Huawei Proprietary and Confidential Copyright © Huawei Technologies Co., Ltd.
- Page 78 After the phone displays the camera preview screen, press the test volume up key to take a picture. Press the volume down key to proceed to the next test item. Issue 1.0 (2013-01-12) Huawei Proprietary and Confidential Copyright © Huawei Technologies Co., Ltd.
- Page 79 Touch the test bar, the bar test turns from red to green, and the flashlight is on. Press the volume down key to proceed to the next test item. Issue 1.0 (2013-01-12) Huawei Proprietary and Confidential Copyright © Huawei Technologies Co., Ltd.
- Page 80 If the touchscreen functions properly, the vertical lines you touched will change to color stripes. Press the volume down key to proceed to the next test item. Issue 1.0 (2013-01-12) Huawei Proprietary and Confidential Copyright © Huawei Technologies Co., Ltd.
- Page 81 Use your hand to block the light hole, the value will decrease to approximately 10 if the light sensor functions properly. Issue 1.0 (2013-01-12) Huawei Proprietary and Confidential Copyright © Huawei Technologies Co., Ltd.
- Page 82 Speaker If the speaker delivers soft and test clear sound, this test item passes. Press the volume down key to proceed to the next test item. Issue 1.0 (2013-01-12) Huawei Proprietary and Confidential Copyright © Huawei Technologies Co., Ltd.
- Page 83 Insert the headset into the phone, and use the similar method to test the headset microphone loopback function. Press the volume down key to proceed to the next test item. Issue 1.0 (2013-01-12) Huawei Proprietary and Confidential Copyright © Huawei Technologies Co., Ltd.
- Page 84 Insert the headset. The in icon wire turns green. Remove the control headset, and the out icon turns test green. Press the volume down key to proceed to the next test item. Issue 1.0 (2013-01-12) Huawei Proprietary and Confidential Copyright © Huawei Technologies Co., Ltd.
- Page 85 Bluetooth devices and displays the devices that have been found. Press the volume down key to proceed to the next test item. (This test requires another device with Bluetooth enabled.) Issue 1.0 (2013-01-12) Huawei Proprietary and Confidential Copyright © Huawei Technologies Co., Ltd.
- Page 86 Press the volume down key to display the test results. The MMI test is complete, and the test results are displayed on the screen. Issue 1.0 (2013-01-12) Huawei Proprietary and Confidential Copyright © Huawei Technologies Co., Ltd.
- Page 87 RF connection: indicates the RF connection information. The antenna coupler is Willtek 4916, and the shielding box model is 4921. Position: The phone's coordinate on the antenna coupler is 5B. Issue 1.0 (2013-01-12) Huawei Proprietary and Confidential Copyright © Huawei Technologies Co., Ltd.
- Page 88 It is an important receive quality metric in digital transmission, one of several used to quantify the accuracy of the received data. Figure 11-7 MT script Issue 1.0 (2013-01-12) Huawei Proprietary and Confidential Copyright © Huawei Technologies Co., Ltd.
-
Page 89: Replacing The P6'S Pcba Without Removing The Battery
Note: The GPS antenna rack can be bent only twice. If bent for the third time, the GPS antenna rack must be scrapped together with the battery. Issue 1.0 (2013-01-12) Huawei Proprietary and Confidential Copyright © Huawei Technologies Co., Ltd. - Page 90 Release the receiver FPC and battery BTB connector. Then use the coaxial cable driver to release the coaxial cable connector. Apply force vertically to avoid damaging the coaxial cable connectors. b. Release the LCD BTB connector. Figure 1 Figure 2 Issue 1.0 (2013-01-12) Huawei Proprietary and Confidential Copyright © Huawei Technologies Co., Ltd.
- Page 91 Use tweezers to pry the clip for the main antenna spring. Then slowly lift the PCBA and do not damage the surrounding components. Figure 1 Figure 2 b. After the PCBA is lifted, pull it out upward. Do not drag the LCD BTB connector. Issue 1.0 (2013-01-12) Huawei Proprietary and Confidential Copyright © Huawei Technologies Co., Ltd.
- Page 92 Restore the bent GPS antenna rack to its original position along the turning line, and fasten the clips 3, 4, 5, and b. Attach protective film to the screen from the top of the phone and wrap the phone. Issue 1.0 (2013-01-12) Huawei Proprietary and Confidential Copyright © Huawei Technologies Co., Ltd.
-
Page 93: Assembly Procedure
Figures 3 and 4 show the phone with the protective film attached. Figure 3 Figure 4 c. Place the phone into the red ESD bag. 12.2 Assembly Procedure 1. Install the front and rear cameras. Issue 1.0 (2013-01-12) Huawei Proprietary and Confidential Copyright © Huawei Technologies Co., Ltd. - Page 94 Note: Do not press the FPCs when you pull them through the groove on the PCBA; otherwise, the FPCs may be ripped. d. Install the front and rear cameras into the correct slots and fix the PCBA with two screws. Issue 1.0 (2013-01-12) Huawei Proprietary and Confidential Copyright © Huawei Technologies Co., Ltd.
- Page 95 PCBA spring is in good contact with the main antenna pad. 3. Press-fit the receiver FPC, battery BTB connector, and LCD BTB connector with your hands. Issue 1.0 (2013-01-12) Huawei Proprietary and Confidential Copyright © Huawei Technologies Co., Ltd.
- Page 96 GPS antenna performance will be affected. Clips 3 This screw has and 4 change to a white must be screw, which item properly code is 51623418 fastened. Figure 1 Figure 2 Issue 1.0 (2013-01-12) Huawei Proprietary and Confidential Copyright © Huawei Technologies Co., Ltd.
- Page 97 Figures 3 shows the phone with the protective racks for the TP/LCD BTB connector and motor properly installed. Figure 3 6.Attach the PCBA tamper-resistant label and IMEI label, and manually install the battery cover. Issue 1.0 (2013-01-12) Huawei Proprietary and Confidential Copyright © Huawei Technologies Co., Ltd.