
Related Manuals for Sony RM-TP504 Primary


Summary of Contents for Sony RM-TP504 Primary
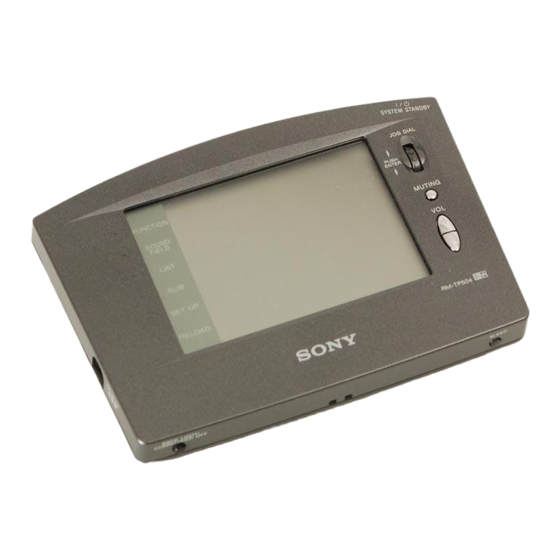
- Page 1 Remote Commander Operating Instructions RM-TP504 2000 by Sony Corporation 4-227-951-14(1)
-
Page 2: About This Manual
When the battery becomes weak or dead, replace the battery with a Sony CR2032 lithium battery, use of any other battery may present a risk of fire or explosion. Dispose of used battery promptly, keep away from children. -
Page 3: Table Of Contents
Before You Use the Commander Understanding the 2 way remote system This commander operates under a 2 way remote system. With the 2 way remote system, the component responds to signals sent from the commander by sending additional signals (information about the status of the component, text data, etc.) back to the commander. -
Page 4: Preparations
AV components connected to the receiver. Compatible Components This unit can be used to operate Sony AV components as well as AV components made by other manufacturers. Setup is necessary in order to operate components made by other manufacturers (see page 23). -
Page 5: Preparing The Commander
When you are going to use the AC power adapter only for a long time, it is recommended to remove alkaline batteries. We recommend the use of Sony AC-E60HG (AC power adapter). Notes •... - Page 6 If the tip of the touch pen is damaged, or the touch pen is lost, please consult your nearest Sony dealer. Turn CONTRAST to adjust brightness of the LCD. CONTRAST control Touch panel adjustment Adjust the position of the touch panel’s LCD.
- Page 7 1 m ~ 2 m Notes • To ensure good communication conditions, carry out initial setup from directly in front of, and close to the receiver. • Do not move the unit during initial setup. If a communication error occurs during setup An error message will be displayed.
-
Page 8: Screen Hierarchy
Screen Hierarchy The following diagram shows the basic composition of this unit’s screen hierarchy. FUNCTION screen Normally, the FUNCTION screen is displayed. You can use the JOG DIAL to scroll. To display a different screen, touch the left side of the LCD. SOUND FIELD screen SETUP screen Touch when the song titles of a CD or MD being played back are not... -
Page 9: Location Of Parts And Basic Operations
5 ?/1/SYSTEM STANDBY button Normally used to turn the receiver on or off. Can also be used to turn off all Sony components (SYSTEM STANDBY) when this button is set to SYSTEM STANDBY in the SETUP screen (see page 29). -
Page 10: Rear Panel
4 ?/1/SYSTEM STANDBY button Normally used to turn the receiver on or off. Can also be used to turn off all Sony components (SYSTEM STANDBY) when this button is set to SYSTEM STANDBY in the SETUP screen (see page 29). -
Page 11: Operation
Operation This chapter explains how to operate the receiver and connected audio/ video components. Basic Operations Displaying the FUNCTION screen To operate components connected to the receiver, first display the FUNCTION screen, then select the component you wish to operate (CD, MD, etc.). Normally, the FUNCTION screen is displayed. - Page 12 Basic Operations FUNCTION screen hierarchy The following diagram shows the composition of the FUNCTION screen hierarchy. The types of icons that can be displayed on the FUNCTION screen can be set using FUNCTION HOOK UP in the SETUP screen. (For details on FUNCTION HOOK UP, see page 24.) SUB/ JOG DIAL SUB/...
-
Page 13: Example: Operating A Cd Player
Touch SUB or use the JOG DIAL to scroll. Another set of buttons is displayed and ready for use. To view the LIST Touch LIST to view the song titles in a Sony CD changer (5/50/200/300/400 CD) or MD deck connected by a CONTROL A1/A1 cord. In this case, the information must be downloaded from the receiver (see page 24 for details). -
Page 14: Example: Operating The Tuner
Example: Operating the Tuner This section describes how to operate the tuner. For details on tuner operation, please refer to the operating instructions provided with the receiver. Touch FUNCTION. The FUNCTION screen appears. Touch The receiver’s function switches to TUNER and the tuner screen appears. -
Page 15: Example: Recording From Cd To Md
Example: Recording from CD to MD This section describes how to record audio from a CD to an MD as an example of recording audio/video. Other operations Recording from a DVD to a video deck is basically the same procedure. For details on the buttons used in recording, refer to the operating instructions supplied with the receiver and other components. -
Page 16: Performing Several Commands In Sequence Automatically (Macro Play)
“WAIT TIME” between each command. To set “WAIT TIME”, refer to “Macro Play setting” on page 25 and 26. • For some makers other than Sony, there are some commands that cannot be used in Macro Play. -
Page 17: Using A Command That Has Been Learned
Using a command that has been learned By using the Learning function, it is possible for this commander to perform learned operations. For details on how to learn the operation codes of other components using the Learning function, see page 27. Touch FUNCTION. -
Page 18: Selecting Sound Fields
Selecting Sound Fields These sections describe how to select and make adjustments to the sound fields. For details concerning sound fields, please refer to the operating instructions supplied with the receiver. Displaying the SOUND FIELD screen Touch SOUND FIELD. SOUND FIELD The SOUND FIELD screen appears. - Page 19 Selecting the sound field For details concerning which sound fields can be selected, please refer to the operating instructions supplied with the receiver. Touch SOUND FIELD. The SOUND FIELD screen appears. Touch Sound Field Mode. The Sound Field Mode screen appears. Use the JOG DIAL or touch 4 or $ to scroll through the list.
-
Page 20: Adjusting Sound Fields
Adjusting Sound Fields Set up the SOUND FIELD screen menus to fully enjoy the surround sound created by the sound fields. On the EQ EDIT screen, adjust the frequency bands of front, center and rear speakers of the equalizer preset (EQ PRESET 1~5) that you selected on the EQ BANK screen. - Page 21 Adjusting the surround parameters Touch SURR EDIT on the SOUND FIELD screen. The SURROUND screen appears. Use the JOG DIAL or touch 4 or $ to scroll through the list. Scroll the JOG DIAL to select an item or touch the aspect you want to adjust.
-
Page 22: Adjusting The Commander's Operating Environment
Adjusting Sound Fields Adjusting the speaker settings Touch SETUP on the SOUND FIELD screen. The SETUP screen appears. Use the JOG DIAL or touch 4 or $ to scroll through the list. Scroll JOG DIAL to select a parameter or touch the parameter you want to adjust. - Page 23 The FUNCTION&USER IR: MAKER CODE screen appears. Touch the remote controller mode of the connected component (Ex: Sony VTR1). The component selected in steps 4 to 5 will be registered at the function selected in step 3, and the FUNCTION&USER IR screen reappears. A long beep sound is emitted to indicate that registration was successful.
- Page 24 TUNER PRESET NAME: Broadcast station names etc., memorized in receiver. CD MEMO: CD song titles or disc titles etc., from a Sony CD changer (5/50/200/300/400 CD) connected to the receiver with CONTROL A1/A1 cord. Downloading starts, and the progress is displayed.
- Page 25 The Macro Play function lets you link several IR codes in sequential order as a single command. The following is an example of how to set the command “POWER” for SONY VTR 1 in BOX 2 of MACRO 1. Set other commands in a similar manner.
- Page 26 If you press ALL CLEAR on the SETUP screen, all the registered MACRO programs are cleared. MACRO 1 has been factory set MACRO 1 has been factory set to power code of Sony Audio Visual component. Setting the function name Touch SETUP.
- Page 27 Touch NAME EDIT. The NAME EDIT screen appears. Current name display Name input display Name input buttons Enter the name. After the name has been entered, touch SET. The new function name is set in the commander. After the name has been entered, point the commander toward the receiver and touch UPLOAD.
- Page 28 Adjusting the Commander’s Operating Environment Point the remote code receiver section of the commander toward the receiver/transmitter on the remote control to be learned. About 5 cm ~ 15 cm Press the appropriate button on the remote control to send the remote control code. Lightly pressing the button once should be sufficient.
- Page 29 The turn off time is factory set to 10 seconds. Select a short turn off time in step 2. p Changing the function of the POWER button SYSTEM STANDBY: Switches power of all Sony AV components off. POWER ON/OFF: Switches only the receiver on or off.
- Page 30 ON: When a video function (DVD, etc.) is selected, the commander sends numerous codes to the appropriate Sony AV components. You can select the preset input for the TV (VIDEO1 ~ VIDEO4) so that the TV switches to the input after it has been turned on.
-
Page 31: Additional Information
If the tip of the touch pen is damaged, or the touch pen is lost, please consult your nearest Sony dealer. On battery life When the backlight is not neccessary, do not press BACK LIGHT/COMMANDER OFF to turn on the LCD. -
Page 32: Troubleshooting
Please place away from the florescent light. / Make sure you have selected the correct function on the remote. / When you operate a programmed non-Sony component, the remote may not function properly depending on the make and model of the component. -
Page 33: Specifications
Specifications Operating system Liquid crystal touch panel Liquid crystal size 3.8 inches (256 x 200 dots) Liquid crystal type Reflection system (Monochrome type) Touch panel Resistant membrane system Analog type Power requirements For operation: DC 6V (Type AA alkaline batteries), DC IN 6V jack accepts (300 mA minimum) - Page 36 Sony Corporation Printed in Malaysia...