
Related Manuals for Miele TKB 550 WP


Summary of Contents for Miele TKB 550 WP
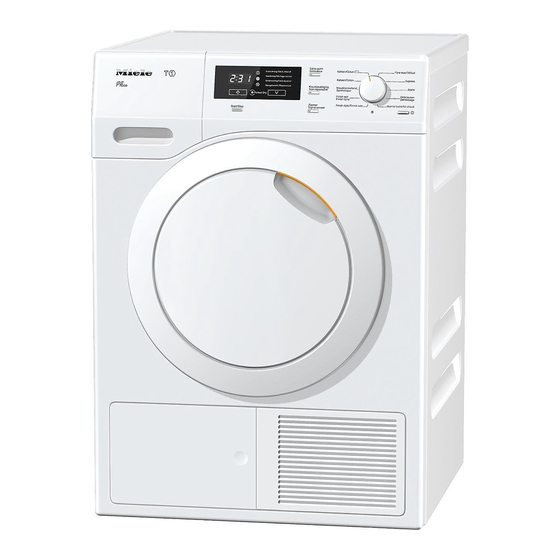
- Page 1 Operating instructions Heat pump dryer To avoid the risk of accidents or damage to the appliance it is essential to read these instructions before it is installed and used for the first time. en-GB M.-Nr. 10 544 570...
-
Page 2: Caring For The Environment
/ recycling centre for electrical and electronic appliances, or contact your dealer or Miele for advice. You are also responsible (by law, depending on country) for deleting any personal data that may be stored on the appliance... -
Page 3: Table Of Contents
Contents Caring for the environment ................. 2 Warning and Safety instructions ................. 6 Operating the tumble dryer ................ 17 Control panel ......................17 Display........................18 Before using for the first time ................ 19 1. Notes on correct laundry care ............... 20 Points to note regarding washed laundry.............. - Page 4 Contents Plinth filter......................36 Removing the plinth filter ................. 36 Cleaning the plinth filter.................. 36 Cleaning the plinth filter panel................ 37 Checking the condenser unit ................ 37 Replacing the plinth filter.................. 38 Fragrance flacon.................... 40 Inserting a fragrance flacon................... 40 Replacing the fragrance flacon................
- Page 5 Contents Programmable functions .................. 63 Programming ......................63 Example......................... 65 Cottons programme - drier or damper ............66 Minimum iron programme - drier or damper..........66 Extended cool down ..................66 Buzzer volume....................66 Keypad tone ....................66 ...
-
Page 6: Warning And Safety Instructions
If using dry cleaning kits, do so at your own risk, and follow the instructions provided on the packaging. Any other applications may be dangerous. Miele cannot be held liable for damage resulting from incorrect or improper use or operation. - Page 7 Warning and Safety instructions This tumble dryer can only be used by people with reduced physical, sensory or mental capabilities, or lack of experience or knowledge, if they are supervised whilst using it or have been shown how to use it in a safe way and understand and recognise the consequences of incorrect operation.
- Page 8 It is essential that this standard safety requirement is met. If in any doubt, please have the household wiring system tested by a qualified electrician. Miele cannot be held liable for the consequences of an inadequate earthing system (e.g. electric shock).
- Page 9 This tumble dryer must not be used in a non-stationary location (e.g. on a ship). Do not make any alterations to the tumble dryer, unless authorised to do so by Miele. Heat pump technology and refrigerant: The heat pump in this tumble dryer uses a refrigerant which is...
- Page 10 This special lamp must only be used for the purpose it is intended for. It is not suitable for room lighting. Replacement lamps may only be fitted by a Miele authorised person or the Miele Service Department.
- Page 11 Warning and Safety instructions To prevent the risk of fire, the following textiles must not be dried in this tumble dryer: – Items which have not been washed. – Items, such as workwear, which have not been thoroughly cleaned and which are still soiled with grease, oil or other deposits (such as cosmetics, lotions etc).
- Page 12 Warning and Safety instructions Remove all items from pockets (e.g. lighters, matches). Warning: Do not switch the dryer off before the drying programme has finished. If this is done, the laundry must be hung up or spread out to cool it down. ...
- Page 13 Warning and Safety instructions In many programmes, the heating phase is followed by a cooling down phase to ensure that the items are not too hot to handle when you remove them (this also avoids the danger of the laundry self- igniting).
- Page 14 Warning and Safety instructions If the water is drained externally through the drain hose instead of being collected in the condensed water container, make sure the drain hose is securely attached if you hang it in a sink or basin to avoid the hose slipping and the water causing damage.
- Page 15 Warning and Safety instructions Using a fragrance flacon (optional accessory) Only use genuine Miele original fragrance flacons. The fragrance flacon must be stored in its packaging so please make sure you retain this. Caution. The fragrance can leak out of the flacon. Make sure that...
- Page 16 (available to order) to match your tumble dryer and washing machine is required. If you order a plinth for this tumble dryer (available from Miele as an optional accessory - depending on country), make sure it is the correct one.
-
Page 17: Operating The Tumble Dryer
Operating the tumble dryer Control panel a Display with and sensors d Programme selector See the following page for more For selecting the programme. information. e Optical interface b Start/Stop button For service technicians. For starting the programme selected f ... -
Page 18: Display
Operating the tumble dryer i Drying level display Display For selecting the drying level for programmes with a selectable drying level. See " sensor". j sensor This sensor has two functions. Touching the symbol will .. -
Page 19: Before Using For The First Time
Before using for the first time Remove the protective foil and stickers Remove – the protective foil from the door. – any stickers from the front and the lid. Please do not remove any labels (e.g. the data plate), visible when you open the door. -
Page 20: Notes On Correct Laundry Care
1. Notes on correct laundry care Points to note regarding See "Warning and Safety" washed laundry instructions for further information. Loading or using the tumble dryer – When washing very heavily soiled incorrectly could cause a fire. items ensure that you use sufficient detergent and select a high –... -
Page 21: Garment Care Label Symbols
1. Notes on correct laundry care Garment care label symbols – Down-filled garments have linings which have a tendency to shrink, Drying depending on the quality of the item. They can be partially dried using the Normal/higher temperature Gentle smoothing programme. ... -
Page 22: Load The Tumble Dryer
2. Load the tumble dryer It is essential to read "1. Notes on correct laundry care" first of all. Press the button to switch the dryer on. The interior drum lighting will come on. The interior drum lighting will automatically go out after a few minutes and/or after the start of a programme to save energy. -
Page 23: Select A Programme And Start It
3. Select a programme and start it Any drying level can be selected for the Select a programme Cottons and Express programmes. A more limited range is available when using the other programmes. Additional drying levels Tip: Using the programmable functions you can activate/deactivate additional drying levels. - Page 24 3. Select a programme and start it Other programmes and the timed drying programmes – Cottons , Woollens handcare, Silks handcare The drying level is preset and cannot be altered. – Warm air You can select the duration in ten- minute stages.
-
Page 25: Select Any Options Or Delay Start (If Required)
3. Select a programme and start it Delay start Select any options or delay start (if required) You can delay the start of the programme. Please see "Options" for further However: delay start cannot be used information. with the Warm air programme. To select options ... -
Page 26: Remove The Laundry
4. Remove the laundry End of programme/Anti-crease Check that all items have been removed from the drum. At the end of the programme: will If items are left in the dryer, they light up in the display and the Start/ could be damaged by overdrying Stop button will go out. -
Page 27: Options
Options Buzzer A buzzer will sound to let you know that the programme has finished. The continuous buzzer which sounds when there is a fault is not dependent on the setting for the buzzer at the end of the programme. Selectable options Gentle tumble Anti-crease... -
Page 28: Delay Start
Delay start – The drum will turn briefly every hour To select delay start until the start of the programme to With delay start you can delay the start reduce creasing. of the programme by up to a maximum of 24 hours. To change delay start after it has started counting down However: delay start cannot be used... -
Page 29: Programme Chart
Programme chart Cottons ** Max. load 8.0 kg* Use for Cotton items such as those described under Cottons Normal with normal residual moisture. Note – Items are dried to a Normal level only. – The Cottons programme is the most energy-efficient for drying cotton items with normal residual moisture levels. - Page 30 Programme chart Woollens handcare Max. load 2.0 kg* Use for Woollen garments and fabric containing wool blends, e.g. pullovers, jackets and socks. Note – Wool and wool blend items are only fluffed up; they are not dried completely. – Remove garments as soon as the programme has finished. Silks handcare Max.
- Page 31 Programme chart Gentle smoothing Max. load 1.0 kg* Normal, Hand iron Use for – Cotton and linen fabric – Minimum iron items made of cotton, synthetic or mixed fibre, e.g. trousers, jackets, shirts. Note – Suitable for dry and damp laundry. –...
-
Page 32: Changing The Programme Sequence
Changing the programme sequence You cannot change to another Adding or removing laundry programme once a programme has after a programme has started started (this prevents unintentional Press the Start/Stop button. alterations). The items will be cooled down, If you move the programme selector, depending on the temperature reached ... -
Page 33: Cleaning And Care
Cleaning and care Emptying the condensed water container The condensed water is collected in the condensed water container. Empty the condensed water container after every drying programme. The indicator will light up if the maximum level of the condensed water container is reached. -
Page 34: Fluff Filters
Cleaning and care Fluff filters This tumble dryer has 2 fluff filters in the door opening: the upper and lower fluff filters trap fluff produced during the drying process. Removing visible fluff Remove any fluff after every drying cycle. Tip: You can also use a vacuum cleaner so that you can remove the fluff without ... -
Page 35: Cleaning The Fluff Filters And Air Flow Openings Thoroughly
Cleaning and care Hold the dial and pull the fluff filter Cleaning the fluff filters and air flow openings thoroughly forwards to remove it. If the drying duration has become longer or the surface of the filters is visibly compacted with fluff, you should carry out the following cleaning procedure. -
Page 36: Plinth Filter
Cleaning and care Removing the plinth filter will cause the Plinth filter right hand guide pin in the dryer to Only clean the plinth filter when the come out. This pin ensures that the indicator lights up. heat exchanger access panel can only be closed if the plinth filter is inserted To turn the ... -
Page 37: Cleaning The Plinth Filter Panel
Cleaning and care Cleaning the plinth filter panel Checking the condenser unit Danger of injury. Do not touch the cooling fins. You could cut yourself. Look to see if fluff has accumulated. If there is visible soiling: Clean using a vacuum cleaner with a dusting brush attached. -
Page 38: Replacing The Plinth Filter
First insert the handle with the plinth filter attached over the two guide pins. – The word Miele on the handle must be the correct way up. Push the plinth filter in completely. The act of pushing in the plinth filter will also push in the right hand guide pin. - Page 39 Cleaning and care Tumble dryer Disconnect the tumble dryer from the mains electricity supply. Do not use solvents, abrasive cleaners, glass cleaners or all- purpose cleaners. These could damage plastic surfaces and other parts. Clean the tumble dryer with a slightly damp cloth and a mild non-abrasive cleaning agent or a solution of washing-up liquid and water.
-
Page 40: Fragrance Flacon
Fragrance flacon Using a fragrance flacon (optional If you are not using a fragrance accessory) will add a pleasant flacon: the cover must always remain fragrance to your laundry. closed (push the cover down completely with the tab). Before using a fragrance flacon, please read "Warning and safety instructions - Using a fragrance flacon (optional accessory)". - Page 41 Fragrance flacon – You will feel a slight resistance and hear a soft click. Marker must be in position : this is the position at which you can feel a resistance. Before drying You can select the intensity of the fragrance.
-
Page 42: Replacing The Fragrance Flacon
See the following section. Replace the fragrance flacon with a new one. Fragrance flacons are available to order from Miele or online at www.miele-shop.com. - Page 43 Fragrance flacon – when purchasing new fragrance flacons: only remove the protective seal just before use Cleaning the fluff filters The intensity of the fragrance will be diminished if the fluff filters and the plinth filter are not cleaned. The fragrance filter must be removed before cleaning the fluff filter.
-
Page 44: What To Do If
Switch the dryer off and then on again. programme has been Start a programme. cancelled If the programme is cancelled again and an error message appears, there is a fault. Contact the Miele Service Department. - Page 45 What to do if ... Problem Cause and remedy lights up at the end There is a build-up of fluff in the airways. of a programme Clean the fluff filters. Clean the plinth filter. See "Cleaning and care". To switch ...
-
Page 46: Unsatisfactory Drying Results
What to do if ... Unsatisfactory drying results Problem Cause and remedy The laundry is not The load consisted of different types of fabric. sufficiently dry Finish drying using the Warm air timed drying programme. Select a different programme next time. Tip: You can alter the drying levels for some programmes (see "Programmable functions"). -
Page 47: Other Problems
What to do if ... Other problems Problem Cause and remedy The drying process The room in which the dryer is located is too warm. goes on too long or Ventilate the room thoroughly. even switches off * Detergent residues, hair and fine fluff can clog the filters. - Page 48 What to do if ... Problem Cause and remedy A programme does not No obvious cause. start Connect the tumble dryer to the mains Turn on the tumble dryer Close the door Check whether the mains fuse has tripped Has there been a power cut? When power is restored any previously running programme will restart automatically.
-
Page 49: Bottom Right Grille
What to do if ... Bottom right grille Danger of injury. Do not touch the cooling fins. You could cut In general, the cooling fins yourself. behind the grille on the bottom right do not need cleaning. They should ... -
Page 50: After Sales Service
In the event of any faults which you Optional accessories for this tumble cannot remedy yourself, please contact dryer are available from Miele, your your Miele Dealer or the Miele Service Miele dealer or via the internet at: Department. Dryer basket... -
Page 51: Installation And Connection
Installation and connection Front view a Mains connection cable e Heat exchanger access panel – do not open during drying b Control panel f Four height adjustable screw feet c Condensed water container g Cool air intake grille – empty after every drying cycle –... -
Page 52: Rear View
Installation and connection Rear view If transporting the dryer at an angle, only tip towards the left side. a Protruding lid for holding when moving the dryer (see arrows) b Accessories for external drainage of condensed water: hose clip, adapter and hose holder c Hose for external drainage of condensed water... -
Page 53: Installation
Installation and connection Ventilation Installation The cool air intake at the front of Levelling the dryer the dryer must not be blocked or Make sure the dryer door can be covered. This would hinder a opened without hindrance after sufficient intake of cool air for the installation. -
Page 54: Additional Installation Requirements
Optional accessories – Washer-dryer stack The tumble dryer can be combined with a Miele washing machine in a washer- dryer stack. The appropriate Miele washer-dryer stacking kit is required. – Plinth The tumble dryer can be fitted on a... -
Page 55: External Condensed Water Outlet
Installation and connection Installation conditions requiring a External condensed water non-return valve outlet There is a risk of back-flow into Notes the dryer if a non-return valve is not When drying is in progress, fitted. condensed water is pumped into the Back-flow could damage the dryer condensed water container through and also the room in which it is... -
Page 56: Arranging The Drain Hose
Installation and connection Arranging the drain hose Do not pull on the drain hose and do not stretch it or allow it to become kinked. This could damage the hose. There will be a small amount of residual water left in the drain hose. Have a container ready to collect this. -
Page 57: Examples
Installation and connection Examples Direct connection to a sink drain outlet – Drainage into a sink or floor gully Use the hose holder to prevent the drain hose from becoming kinked. Remove the following from the back of the dryer at the top: Adapter 1 and hose clip 3 behind it. - Page 58 Installation and connection Fit adapter 1 to the sink drain outlet using nut 2. The nut is usually fitted with a washer which must be removed. Attach the end of the hose 4 to adapter 1. Use the hose holder. ...
-
Page 59: Electrical Connection U.k
Installation and connection Electrical connection U.K. Non-rewireable plugs BS 1363 All electrical work should be carried out The fuse cover must be refitted when by a suitably qualified and competent changing the fuse, and if the fuse cover person, in strict accordance with is lost, the plug must not be used until a current national and local safety suitable replacement is obtained. -
Page 60: Consumption Data
Consumption data Final spin Residual Energy Duration Load speed in a moisture domestic washing machine 1000 1.94 Cottons 1000 1.10 Cottons Normal 1200 1.75 1400 1.65 1600 1.45 Cottons Normal + Gentle tumble 1000 1.96 Cottons Hand iron 1000 1.58 1200 1.40... -
Page 61: Technical Data
Technical data Height 850 mm Width 596 mm Depth 636 mm Depth with door open 1054 mm Suitable for pushing under a worktop Suitable for stacking Weight approx. 62 kg Drum volume 120 litres Load size 8.0 kg (weight of dry laundry) Capacity of condensed water container 4.8 l Hose length 1.60 m... - Page 62 Programmable functions Various settings can be reprogrammed to alter the dryer's electronics to suit different requirements. They can be altered at any time.
-
Page 63: Programmable Functions
Programmable functions Programming II) To select a programmable function You can use the programmable functions to alter the dryer's The number of the programmable electronics to suit your requirements. function will appear in the display as and a number: Please read the following pages e.g. - Page 64 Programmable functions Confirm your selection of the option III) To select a different option selected by pressing the Start/Stop The options allow you to alter the button. features of the particular programmable The number of the programmable function. function: e.g. will light up again. The option will appear in the time display as ...
-
Page 65: Example
Programmable functions III) To select a different option Example will light up in the time display. The example describes how to call up These numbers mean that the keypad the " Keypad tone" programmable tone is switched off. function. When the Keypad tone programmable function is switched To switch on the keypad tone: on, a tone will sound every time a... -
Page 66: Cottons Programme - Drier Or Damper
Programmable functions Cottons programme - drier Extended cool down or damper The automatic cooling down phase which takes place before the end of a programme can be extended for all Minimum iron programme programmes with selectable drying levels. -
Page 67: Code
Programmable functions Code Conductivity The code prevents your dryer being This programmable function used without your knowledge. should only be set if the residual moisture reading in your laundry is When the code has been activated, you incorrect due to extremely soft water. -
Page 68: Additional Drying Levels
Programmable functions Additional drying levels You can activate additional drying levels for many of the programmes: Normal+ (drier than the Normal drying level); Slightly dry (damper than Normal drying level); Hand iron (damper than the Hand iron drying level). This programmable function is only available for programmes with a selectable drying level. -
Page 69: Standby
Programmable functions Standby To switch the display and buttons back on again To save energy the display and – Turn the programme selector or press buttons will go out after 10 minutes a button. Neither will have any effect and only the Start/Stop button will if a programme is running. -
Page 70: Automatic Switch-Off
Programmable functions Automatic switch-off Memory To save energy the dryer will switch off The electronics will store in memory a automatically after 15 minutes. You drying level or options for a selected can lengthen or shorten the time. programme. - Page 71 Tel. +971 4 3044 999 Tel: (01) 461 07 10, Fax: (01) 461 07 97 Fax. +971 4 3418 852 E-Mail: info@miele.ie, Internet: www.miele.ie 800-MIELE (64353) Manufacturer: Miele & Cie. KG E-Mail: info@miele.ae Website: www.miele.ae Carl-Miele-Straße 29, 33332 Gütersloh, Germany...
- Page 72 TKB 550 WP en-GB M.-Nr. 10 544 570 / 00...