Table of Contents
Advertisement
Quick Links
Advertisement
Table of Contents

Related Manuals for Bosch CBG675B 3 Series


Summary of Contents for Bosch CBG675B 3 Series
- Page 1 Build-in oven CBG675B.3 [ N] Instructions Build-in oven...
-
Page 3: Table Of Contents
Table of contents Use according to directions ... 4 nl]Use instruc tio n nbouwov en Child lock ......19 Activate and deactivate . -
Page 4: Use According To Directions
8 years and above and persons with parts and services can be found on the internet: reduced physical, sensory or mental www.bosch-home.com and in the online shop: www.bosch-eshop.com capabilities or lack of experience and knowledge if they are supervised by a person responsible for their safety or have been instructed in the use of this appliance. -
Page 5: Important Safety Instructions
Important Safety Instructions Hot steam may escape when the (Important ■ appliance door is opened. Depending on safety regulations the temperature, no steam is visible. Do not stand too close to the device when opening. Open the appliance door General Call angr ijkev ei li ghei ds for sc hr ift en carefully. -
Page 6: Halogen Lamp
Important Safety Instructions Halogen lamp Warning – Health risk! The cleaning function heats up the cooking Warning – Danger of burns! compartment to a very high temperature so that residues from roasting, grilling and baking The lamps in the interior become very hot. burn. -
Page 7: Causes Of Damage
Causes of damage ]Causes of damage 7Environmental protection General Your new appliance is particularly energy efficient. Mil li eubes c her mi ng Ear pockets of sc hade Here you will find tips on how to save even more energy Attention! when using your appliance and how to dispose of the Accessories, foil, baking paper or molds on the... -
Page 8: Environmentally Friendly Disposal
Environmental protection Open the appliance door as little as possible Environmentally friendly disposal ■ during preparation. Dispose of the packaging in an environmentally friendly manner. This appliance is labeled in accordance with the European directive 2012/19/EU on waste electrical and electronic equipment (WEEE). The directive sets the framework for the take-back and disposal of old appliances that is valid in the EU. -
Page 9: Getting To Know The Device
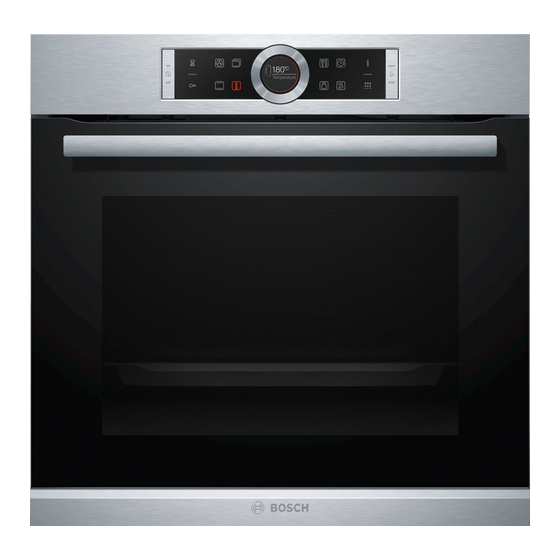
Getting to know the device Control panel Getting to know the device You can use the control panel to set the various functions of your device using buttons, touch fields In this chapter we explain the indications and and a control ring. The display shows the current L er and know the device controls. -
Page 10: Display
Getting to know the device control ring Temperature indication The control ring changes the setting values shown on After the start, the current temperature in the the display, interior is shown graphically on the display. For most selection lists, eg for the temperature, you Warming line The white line under the temperature becomes have to turn the control ring back again when the red from left to right as the interior heats up. -
Page 11: Heating Methods
Getting to know the device Heating methods In order to always be able to determine the right You can see which types of heating are involved by heating method for your dish, we explain the means of the individual symbols. differences and applications. -
Page 12: Information
To belong More information _To belong In most cases, the device will provide you with prompts and more information about the action Various accessories come with your device. Here is an just performed. To belong overview of the supplied accessories and how they are Tip on the field °.The indication appears on the display used. - Page 13 To belong Lock function Additional accessories The accessories can be pulled out about half way until Additional accessories can be purchased from the after-sales service, they click into place. The locking function prevents the specialist shops or via the Internet. You will find an extensive range for accessories from tipping over when removed.
-
Page 14: Before First Use
Before first use Switch off the appliance after the specified time with kBefore first use the on/off . button . When the cooking compartment has cooled down, Before you can use your new appliance, you must clean the smooth surfaces with soapy water and a For the first use k make a few settings: In addition, clean the interior and cleaning cloth. -
Page 15: Operate Device
All touch fields light up red. The display shows the the display. Bosch logo and then the first heating method in the selection list. Example in the picture: Hot air Eco . at 195°C. -
Page 16: Quickly
Operate device Fast preheating Start with the start/stop button l. The time on the display shows how long the The Fast Preheat function allows you to shorten the appliance has been in operation. heat-up time for some heating methods. Suitable heating methods for rapid preheating are: <... -
Page 17: Time Functions
Time functions After a few seconds the value is accepted, or twice OTime functions on field s tip. The display shows the duration under Function and Temperature or Mode. Your device has several time functions. Ti j df unc ti es Start with the start/stop button l. -
Page 18: End
Time functions Set kitchen timer Before the start again on the field s tip. The display shows the end in focus in white. The alarm clock runs in parallel with the other settings. Set the end time to a later time with the control You can set it at any time, even when the device is ring. -
Page 19: Child Lock
Child lock aChild lock QBasic settings To prevent children from accidentally switching Various settings are available to operate your device Child lock Bas isi ns t el li ngen on the device or changing settings, it is equipped optimally and easily. You can now change these settings with a child lock. -
Page 20: Basic Settings
Sabbath Setting fSabbath Setting Brand logo Indications* Do not display. Fan run-on time The Sabbath setting allows you to set a cooking time of Recommended* Sabbath in t el li ng up to 74 hours. The dishes in the oven stay warm without Minimal having to switch them on or off. -
Page 21: Cleaning
Cleaning dCleaning Windows of the Hot soapy water: door Clean with a cleaning cloth and dry with a soft cloth. When properly maintained and cleaned, your appliance Do not use stainless steel scrapers or Don't get it will continue to look good and function properly for a long scouring pads. -
Page 22: Keeping The Device Clean
Cleaning function Cleaning function To belong Hot soapy water: Soak and clean with a cleaning cloth or brush. Clean the cooking compartment with the "oven cleaning" In case of heavy soiling, use a stainless steel Cleaning function cleaning function. scouring pad. You can choose three cleaning modes. -
Page 23: Setting The Cleaning Function
Cleaning function Clues When cleaning is finished, a signal sounds. The display You can also clean the supplied enamelled shows the time 00m 00s. Switch the device on with the ■ accessories when using the cleaning function. Grids on/off buttonÿ from. cannot be cleaned. -
Page 24: Racks
racks Hanging racks pracks The racks only fit left or right. With both racks, make sure that the bent rods are at the front. When properly maintained and cleaned, your stretch you appliance will continue to look good and function Insert the rack first in the middle of the rear bus , properly for a long time to come. -
Page 25: Removing The Door Guard
appliance door When opening and closing the appliance door, the Open the appliance door completely. Close ■ hinges move and can become jammed. Do not both locking levers again (Fig. "). reach the hinges with your hands. Remove appliance door Press the appliance door completely open in the direction of the appliance. -
Page 26: Removing And Installing Door Windows
appliance door Removing and installing door windows Insertion into the device When installing the center pane, make sure that the To make them easier to clean, you can remove the glass arrow is located at the top right of the pane and from the appliance door. -
Page 27: What To Do In Case Of Malfunctions
What to do in case of malfunctions? Fix faults yourself 3What to do in case of malfunctions? You can often easily remedy technical faults on the device yourself. Malfunctions are often caused by a trifle. Before What to do at jst or ingen? If a dish does not turn out optimally, you will find contacting the many tips and instructions for preparation at the end... -
Page 28: Space
customer service Tip: You can set a duration to prevent the appliance 4customer service from switching off unintentionally, e.g. during very long cooking times. The appliance heats up until the set time has elapsed. When your device needs to be repaired, our service Ser vic edi ens t department is there for you. -
Page 29: Dishes
Dishes Set dish pDishes You will be completely guided through the setting process of your chosen dish. The “AutoPilot” function allows you to prepare a wide Dishes variety of dishes. The device chooses most settings Tap the % field. independently for you. The first dish is in focus in white on the display. -
Page 30: Tested For You In Our Cooking Studio
Tested for you in our cooking studio. By preparing the dishes at the same time, you can save up to JFor you in our cooking studio 45 percent energy. Place the shapes next to each other or tested. staggered one above the other in the interior space. To belong Here you will find a variety of dishes and the Make sure that you always use suitable accessories and that... - Page 31 Tested for you in our cooking studio. Heating methods used: % Top and bottom heat ■ < 4D hot air $ pizza mode ■ ■ Dish slide-in Accessories/shapes confuse Tempera- Duration in min. height ming culture in °C method Pastry in molds Cake, simple 150-170 55-70...
- Page 32 Tested for you in our cooking studio. Dish slide-in Accessories/shapes confuse Tempera- Duration in min. height ming culture in °C method 200-220 30-45 Dough of e.g. profiteroles Baking tray < 160-180 20-30 Plunderdough pastry Baking tray Cookies 150-160** 25-40 spritz Baking tray <...
- Page 33 Tested for you in our cooking studio. Bread and rolls Frozen products Do not use frozen foods heavily icy. Remove the ice Your appliance offers numerous heating methods for from the dish. baking bread and rolls. In the setting tables you will find optimal settings for many dishes.
- Page 34 Tested for you in our cooking studio. Dish slide-in accessories confuse Tempera- grillst Duration in min. height ming culture in °C method < Mixed bread, 1.5 kg 210-220* 10-15 Universal pan or rectangular shape 180-190 40-50 < 210-220* 10-15 Wholemeal bread, 1 kg universal pan 180-190 40-50...
- Page 35 Tested for you in our cooking studio. Frozen products The setting values apply to products that are placed in the unheated interior. This way you can save up to 20 Do not use frozen foods heavily icy. Remove the ice percent energy.
-
Page 36: Poultry
Tested for you in our cooking studio. Casserole and soufflé a flat, wide shape. In a narrow, high form, the dishes take longer and darken at the top. Your appliance offers numerous heating methods for baking casseroles and soufflés. In the setting tables you will find optimal settings for many dishes. - Page 37 Tested for you in our cooking studio. Roasting in molds Recommended setting values Only use molds that are suitable for the oven. Check In the table you will find the optimal heating method for whether the mold fits into the interior space. the poultry.
-
Page 38: Meat
Tested for you in our cooking studio. Dish slide-in Accessories/shapes grill- confuse Tempera- Duration in min. height ming culture in °C position method 200-220 10-20 Chicken sticks, nuggets, frozen universal pan 200-220 70-90 Poularde, 1.5 kg Schedule Duck & Goose 180-200 90-110 Duck, 2 kg... - Page 39 Tested for you in our cooking studio. Meat can also become crispy in a closed roasting pan. setting ranges indicated. Try it with the lower values Use a roasting pan with a glass lid for this and set a first. If necessary, set the oven higher next time. higher temperature.
-
Page 40: Fish
Tested for you in our cooking studio. Dish slide-in Accessories/shapes grill- confuse Tempera- Duration in min. height ming culture in °C position method Veal Roast veal, 1.5 kg Veal 160-170 100-120 open shape shank, 1.5 kg 200-210 100-110 open shape Lamb 170-190 50-70... - Page 41 Tested for you in our cooking studio. Roasting and steaming in a mould Recommended setting values Only use molds that are suitable for oven operation. In the table you will find the optimal heating method for Check whether the mold fits into the interior space. fish dishes.
-
Page 42: Vegetables And Side Dishes
Tested for you in our cooking studio. push in the stop with the chamfered side towards the Vegetables and side dishes appliance door. Here you will find information for preparing grilled baking paper vegetables, potatoes and frozen potato products. Only use baking paper that is suitable for the selected Remove unused accessories from the cooking compartment. - Page 43 Tested for you in our cooking studio. Eco heating methods Casserole or roasting pan Carefully insert the universal pan or baking tray as far Hot air Eco and top and bottom heat Eco are intelligent as it will go, with the chamfered side facing the heating methods for healthy cooking of meat, fish and appliance door.
- Page 44 Tested for you in our cooking studio. Dish slide-in Accessories/shapes confuse Tempera- Duration in min. height ming culture in °C method puff pastry 170-190 25-50 Baking tray 200-220 35-45 Firedough pastries, e.g. profiteroles Baking tray 140-160 15-30 Biscuits Baking tray 140-150 25-40 spritz...
- Page 45 Tested for you in our cooking studio. Forms Fry the meat on the hob until very hot and long enough on all sides, including the ends. Immediately put it in the Use a flat shape, eg a porcelain or glass serving preheated mould.
-
Page 46: Drying
Tested for you in our cooking studio. To dry Turn fruit and vegetables with a lot of moisture several times. Release the dried food from the paper immediately With 4D hot air you can dry excellently. In this type of after drying. -
Page 47: Proving Dough
Tested for you in our cooking studio. End canning on a cold or wet surface, otherwise they could snap. Cover the preserving bottles to protect them from Fruit drafts. Only remove clamps when the glasses are cold. After some time, bubbles rise at short intervals. Switch off the appliance as soon as all the preserving bottles form bubbles. -
Page 48: Defrosting
Tested for you in our cooking studio. defrost Tip: Flat frozen or portioned pieces thaw faster than if they were frozen as a block. The defrost heating method is suitable for defrosting frozen fruit, vegetables and pastries. It is best to thaw poultry, meat and fish in the refrigerator. -
Page 49: Dishes
Tested for you in our cooking studio. Test dishes Clues The setting values apply to products that are placed ■ These tables are made for research institutes to in the unheated interior. Observe the preheating facilitate checking and testing of the device. instructions in the tables. - Page 52 * 9001404999* 9001404999 980702...