Bosch BFL554MS0 User Manual And Installation Instructions
Hide thumbs
Also See for BFL554MS0:
- Manual (24 pages) ,
- Instruction manual (24 pages) ,
- User manual and installation instructions (44 pages)

Related Manuals for Bosch BFL554MS0


Summary of Contents for Bosch BFL554MS0
- Page 1 Microwave Oven BFL554MS0 User manual and installation instructions [en] [ar] دليل المستخدم وتعليمات التركيب...
-
Page 2: Table Of Contents
en Safety Only use this appliance: Table of contents ¡ To prepare meals and drinks. ¡ Under supervision. Never leave the appli- ance unattended when cooking for short USER MANUAL periods. ¡ In private households and in enclosed Safety .............. 2 spaces in a domestic environment. - Page 3 Safety en When the cooking compartment is hot, any al- If the insulation of the power cord is dam- coholic vapours inside may catch fire. aged, this is dangerous. ▶ Only use small quantities of drinks with a ▶ Never let the power cord come into contact high alcohol content in food.
-
Page 4: Safety
en Safety ▶ Do not leave food heating unattended in The accessible parts of the appliance become containers made of plastic, paper or other hot during operation. combustible materials. ▶ Never touch these hot parts. ▶ Never set the microwave power too high or ▶... -
Page 5: Preventing Material Damage
Preventing material damage en ▶ Always keep the cooking compartment, WARNING ‒ Risk of electric shock! door and door stop clean. The appliance uses a high voltage. Microwave energy may escape if the cooking ▶ Never remove the casing. compartment door is damaged. ▶... -
Page 6: Environmental Protection And Saving En- Ergy
en Environmental protection and saving energy 3 Environmental protection and saving energy 3.1 Disposing of packaging The packaging materials are environmentally compat- ible and can be recycled. Sort the individual components by type and dispose ▶ of them separately. 3.2 Saving energy If you follow these instructions, your appliance will use less power. -
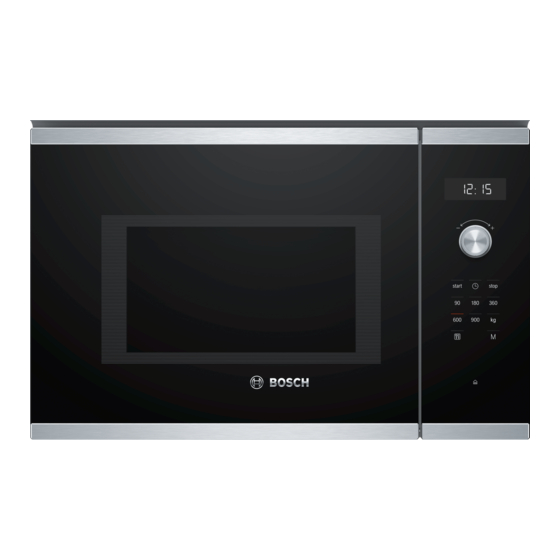
Page 7: Familiarising Yourself With Your Appliance
Familiarising yourself with your appliance en 4 Familiarising yourself with your appliance 4.1 Control panel You can use the control panel to configure all functions of your appliance and to obtain information about the operating status. Note: On certain models, specific details such as col- our and shape may differ from those pictured. -
Page 8: Before Using For The First Time
en Before using for the first time ¡ If the appliance is switched off for an extended period of time, the appliance door opens with a time delay. 4.2 Types of heating Here you can find an overview of the types of heating. You can find recommendations on using the types of heating. Symbol Name 90–900... -
Page 9: Basic Operation
Basic operation en 6 Basic operation Not microwave-safe 6.1 Microwave power settings This is where you can find an overview of the different Cookware and accessor- Reason microwave power settings and when to use them. Metal cookware Metal does not allow mi- Microwave power crowaves to pass setting in watts... -
Page 10: Memory
en Memory Follow the safety instructions. → Page 3 6.5 Changing the cooking time Read the safety instructions and the section on how You can change the cooking time at any time. to prevent material damage. → Page 5 Use the rotary selector to set the required duration. ▶... -
Page 11: Programmes
Programmes en Press twice or open the door and press 8.3 Cancelling the operation ▶ once. 8.4 Defrosting with the automatic programmes You can use the four defrosting programmes to defrost meat, poultry and bread. Programme Food Cookware Weight range in kg Minced meat Open 0.20–1.00 Pieces of meat... -
Page 12: Basic Settings
en Basic settings 9 Basic settings You can configure the appliance to meet your needs. 9.3 Setting the time Note: After connecting the appliance to the power or 9.1 Changing basic settings following a power cut, a signal sounds and several zeros are shown on the display. It may take a few Requirement: The appliance is switched off. -
Page 13: Troubleshooting
Troubleshooting en Only use oven cleaner when the cooking compart- Read the information on cleaning products. ment is cold. → Page 12 Clean the control panel using a microfibre cloth or a Tip: To eliminate unpleasant odours, heat up a cup soft, damp cloth. of water with a few drops of lemon juice for 1 to Dry with a soft cloth. -
Page 14: Customer Service
en Troubleshooting If the power cord of this appliance is damaged, it turer's Customer Service or a similarly qualified per- ▶ must be replaced by the manufacturer, the manufac- son in order to prevent any risk. 11.1 Malfunctions Fault Cause and troubleshooting The appliance is not working. - Page 15 Disposal en 12 Disposal Find out here how to dispose of old appliances cor- This appliance is labelled in accord- rectly. ance with European Directive 2012/19/EU concerning used elec- 12.1 Disposing of old appliance trical and electronic appliances (waste electrical and electronic equip- Valuable raw materials can be reused by recycling.
- Page 16 en How it works Delicate parts, such as the legs and wings of Issue chicken or fatty outer layers of roasts, can be After defrosting, poultry or ¡ Set a lower microwave covered with small pieces of aluminium foil. The foil meat should not be de- power setting.
-
Page 17: How It Works
How it works en Food Weight in g Microwave power Cooking time in mins setting in W Vegetables, e.g. peas 10–15 Fruit, e.g. raspberries 7–10 Fruit, e.g. raspberries 1. 180 1. 8 2. 90 2. 5–10 Butter, defrosting 1. 180 1. 1 2. 90 2. - Page 18 en How it works Heating frozen food in the microwave Observe the recommended settings for using the microwave to heat frozen food. Food Weight in g Microwave power Cooking time in mins setting in W Set menu, plated meal, ready meal with 2–3 300–400 8–11 components Soup...
-
Page 19: Installation Instructions
Installation instructions en 14.5 Test dishes These overviews have been produced for test institutes to facilitate appliance testing in accordance with EN 60350-1:2013 or IEC 60350-1:2011 and EN 60705:2012, IEC 60705:2010. Cooking with the microwave Recommended settings for cooking with the microwave. Food Microwave power Cooking time in mins Note:... - Page 20 en Installation instructions ▶ If the power cord is too short, contact Cus- 15.5 Installation dimensions in the tall unit tomer Service. Observe the installation dimensions and the safety ▶ Only use adapters approved by the manu- clearances in a tall unit. facturer.
- Page 21 Installation instructions en Note: Do not trap or kink the power cable. Insert the appliance into the unit and move it to the right. Screw the appliance in until the appliance is cent- rally aligned. Check the clearance to the adjacent appliances. The clearance to the adjacent appliances must be at least 3 mm.
- Page 22 ar األمان :ال تستخدم الجهاز إال فهرس المحتويات ¡ ومشروبات مأكوالت لتحضير ¡ دون المدة قصيرة الطهي عمليات متابعة يجب اإلشراف تحت .انقطاع دليل المستخدم ¡ ّ المنزل ي المحيط من المغلقة األماكن وفي الخاص المنزل في 4000 ¡ ............... األمان...
- Page 23 األمانar ً الرطوبة التي تتوغل في الجهاز قد تسبب صدم ة !تحذير ‒ خطر اإلصابة باكتواءات .كهربائية األجزاء التي يمكن الوصول إليها تسخن أثناء ال تستخدم أجهزة تنظيف بالضغط العالي أو ◀ .التشغيل .أجهزة تنظيف بالبخار، كي تن ظ ّف الجهاز .ال تلمس أبدا األجزاء الساخنة ◀...
- Page 24 ar األمان ال تستخدم الجهاز لتدفئة األحذية، أكياس ◀ .قد يشتعل زيت الطعام الذرة والحبوب، اإلسفنجات، فوط التنظيف ال تقم أبدا بتسخين زيت الطعام وحده ◀ .األقمشة الرطبة وما شابهها .باستخدام الميكروويف اقتصر على استخدام الجهاز في إعداد ◀ .األطعمة والمشروبات !تحذير ‒ خطر...
- Page 25 تجنب األضرار الماديةar تتسرب طاقة الميكروويف عند استخدام أجهزة قد تتسرب طاقة الميكروويف في حالة تلف .غير مزودة بغطاء جسم الجهاز .باب حيز الطهي .ال تقم بإزالة غطاء الجسم أب د ًا ال تستخدم الجهاز أبدا إذا كان باب حيز ◀...
- Page 26 ar التع ر ّف التع ر ّف نطاق االستعمال اضبط كل وظائف جهازك واحصل على معلوما ت ٍ حول .حالة التشغيل عبر لوحة االستعمال يمكن أن تختلف التفاصيل الواردة في الصورة :مالحظة .حسب نوع الجهاز، من قبيل اللون والشكل .فتح الباب األوتوماتيكي مفتاح...
- Page 27 قبل أول استخدامar أنواع التسخين .يمكنك االطالع هنا على نظرة عامة حول أنواع التسخين. وسوف تحصل على توصيات بخصوص استخدام أنواع التسخين االستخدام االسم الرمز .إذابة تجمد األطعمة والسوائل أو طهيها أو تسخينها الميكروويف 90-900 الماء المتكثف مروحة التبريد يظهر ماء متكثف في حيز الطهي وعلى باب الجهاز عند .يتم...
- Page 28 ar الذاكرة .ابدأ التشغيل مناسب للميكروويف :افحص اإلناء عدة مرات السبب األواني والكماليات إذا كان اإلناء بار د ًا أو في درجة حرارة آمنة للمسك – فهذه المواد تسمح بنفاذ إناء مصنوع من مواد .باليد، فإنه مناسب للميكروويف موجات الميكروويف. ولن مقاومة...
- Page 29 البرامجar تشغيل الذاكرة . اضغط على . تضيء لمبة البيان فوق يمكنك بدء تشغيل البرنامج المخزن بمنتهى البساطة. ضع .اضبط قدرة ميكروويف المرغوبة باستخدام األزرار .الوجبة في الجهاز وأغلق باب الجهاز . اضغط على تضيء لمبة البيان فوق الزر ويظهر في شاشة العرض .دقيقة...
- Page 30 ar أوضاع الضبط األساسية وتحتاج قطع اللحم الكبيرة فترة تهدئة أطول من اترك الطعام المذاب عنه التجمد يهدأ لمدة من القطع الصغيرة. بالنسبة للدجاج يمكنك إخراج األجزاء .دقيقة أخرى حتى تتعادل درجة الحرارة دقائق إلى .الداخلية بعد فترة التهدئة ويمكنك مواصلة تحضير الطعام حتى إذا كان هناك .جزء...
- Page 31 التنظيف والعنايةar التنظيف والعناية ن ظ ّف جهازك واعتني به بدقة، كي يظل قاد ر ًا على أداء للتخلص من الروائح غير المستحبة، قم بتسخين :نصيحة .وظيفته لمدة طويلة فنجان ماء يحتوي على قطرتين من عصير الليمون بأقصى قدرة ميكروويف لمدة من دقيقة إلى مواد...
- Page 32 ar التغلب على االختالالت تعزيز التنظيف 10.8 امسح بقايا الطعام المحترقة باستخدام فوطة تنظيف .رطبة ومحلول صابوني ساخن ت ُمثل وظيفة تعزيز التنظيف بدي ال ً سري ع ًا لتنظيف حيز قم بتنظيف الكماليات بمحلول صابوني ساخن وفوطة الطهي من حين آلخر. تقوم وظيفة تعزيز التنظيف بترطيب .تنظيف...
- Page 33 التخلصar السبب والتغلب على األعطال العطل .تم وضع كمية طعام في الجهاز أكبر من ذي قبل يسخن الطعام بصورة أبطأ من ذي .قبل .اضبط مدة أطول ◀ .استخدم ضعف الوقت مع ضعف الكمية .األطعمة أبرد من ذي قبل .اقلب الطعام أو قم بتقليبه بين الحين واآلخر ◀...
- Page 34 ar هكذا يتم األمر هكذا يتم األمر تجد هنا أوضاع الضبط المناسبة وكذلك أفضل الكماليات النصيحة الهدف واألواني لتحضير الوجبات المختلفة. وقد قمنا بمواءمة ينبغي أن يكون الطعام غير ¡ آلخر حين من الطعام بتقليب قم .التوصيات بما يتناسب مع جهازك بشكل مثالي معرض...
- Page 35 هكذا يتم األمرar إزابة التجمد باستخدام الميكروويف .احرص على مراعاة توصيات الضبط الخاصة بإذابة تجمد األطعمة المجمدة باستخدام الميكروويف المدة بالدقائق قدرة الميكروويف بالواط الوزن بالجرام الطعام ،لحم بقري، لحم بتلو، لحم دسم، قطع كاملة - بعظم ودون عظم 1000 ،لحم...
- Page 36 ar هكذا يتم األمر التسخين 14.4 !تنبيه تالمس المعدن مع جدار حيز الطهي قد ي ُولد شرر ي ُلحق .يمكنك تسخين األطعمة باستخدام جهازك .الضرر بالجهاز ويؤدي إلى كسر زجاج الباب الداخلي تسخين األطعمة يجب أال تقل المسافة بين المعدن – مثل الملعقة ◀...
- Page 37 دليل التركيبar التسخين باستخدام الميكروويف .احرص على مراعاة توصيات الضبط الخاصة بالتسخين باستخدام الميكروويف المدة بالدقائق قدرة الميكروويف بالواط الكمية الطعام - مل المشروبات - مل المشروبات حوالي مل طعام ال ر ُضع، مثل زجاجة الحليب حوالي مل طعام ال ر ُضع، مثل زجاجة الحليب مل...
- Page 38 ar دليل التركيب ،إذا لم يعد الوصول إلى القابس ممك ن ًا بعد التركيب ◀ فيجب أن يتوافر في موقع التركيب تجهيزة فصل لجميع مم. يجب أن األقطاب بفجوة تالمس ال تقل عن .تضمن عملية التركيب الحماية من حدوث تالمس مجموعة التجهيزات الموردة 15.3 بعد...
- Page 39 دليل التركيبar استمر في ربط الجهاز حتى تتم محاذاة الجهاز في تطابق المسافة من الحافة السفلية القيمة :مالحظة .المنتصف .للوح التوصيل إلى أرضية وحدة التركيب .اربط لوح التوصيل على الخزانة المرتفعة .المحددة ي ُراعى أثناء ذلك القيمة .افحص المسافة من األجهزة المجاورة تركيب...
- Page 40 Expert advice for your Bosch home appliances, help with problems or a repair from Bosch experts. Find out everything about the many ways Bosch can support you: www.bosch-home.com/service Contact data of all countries are listed in the attached service directory.