Table of Contents

Related Manuals for Siemens WM14UR00NL


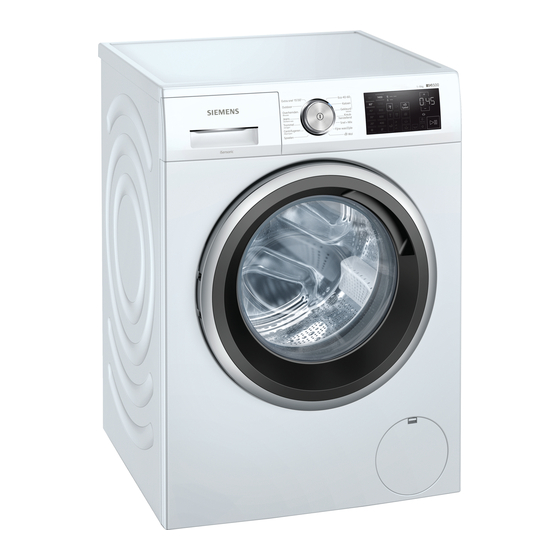
Summary of Contents for Siemens WM14UR00NL
- Page 1 Washing machine WM14UR00NL User manual and installation instructions Register your product on My Siemens and discover exclusive services and offers. siemens-home.bsh-group.com/welcome The future moving in. Siemens Home Appliances...
-
Page 2: Table Of Contents
Table of contents 1 Safety..........4 10 Before using for the first time ....35 1.1 General instructions ....4 10.1 Washing cycle without washing good start ........35 1.2 Destination of the device rate ........4 11 Laundry........ 36 1.3 Restriction of users .. - Page 3 15 Basic Settings ....45 15.1 Overview of the basic settings ........45 15.2 Changing basic settings..45 16 Cleaning and maintenance..46 16.1 Tips for maintenance of the unit ........46 16.2 Cleaning the drum ....46 16.3 Cleaning the detergent drawer ........
-
Page 4: Safety
NL Safety 1 Safety Observe the following safety instructions. 1.1 General instructions s Read this manual carefully. s Keep the operating instructions and product information for later use or for subsequent owners. s Do not connect the device in case of transport damage. 1.2 Destination of the device Only use the device: s to wash machine-safe textiles and wool for hand washing... -
Page 5: Safe Installation
Safety NL 1.4 Secure installation Observe the safety regulations when installing the device. WARNING ‒ Risk of electric shock! Improper installations are dangerous. ▶ Only connect and use the device in accordance with the information on the type plate. ▶ Only connect the device to a mains supply with alternating current via a properly installed earthing socket. - Page 6 NL Safety ▶ If the power cord is too short, contact customer service. ▶ Only use adapters approved by the manufacturer. WARNING ‒ Risk of injury! The high weight of the device can cause injuries when lifted. ▶ Do not lift the device alone. If this appliance is installed improperly in a washer-dryer column, the installed appliance may fall down.
-
Page 7: Safer Use
Safety NL If the appliance is moved by protruding parts, such as the loading door, the parts can break off. ▶ Do not move the appliance by protruding parts. CAUTION ‒ Risk of cutting! Sharp edges on the device can lead to cuts if touched. ▶... - Page 8 NL Safety ▶ In the case of discarded appliances, remove the mains plug from the socket, then cut the mains cable and damage the lock of the appliance door so that the appliance door no longer closes. WARNING ‒ Risk of suffocation! Children can inhale or swallow small parts and choke.
-
Page 9: Safe Cleaning And Maintenance
Safety NL CAUTION ‒ Risk of burns! The glass of the appliance door gets hot when washing at high temperatures. ▶ Do not touch the hot appliance door. ▶ Keep children away from the hot appliance door. CAUTION ‒ Risk of burns! The soap gets hot when washing at high temperatures. - Page 10 NL Safety ▶ If the power cord of this appliance is damaged, it must be replaced by the manufacturer, its service agent or a similarly qualified person in order to avoid a hazard. Penetrating moisture can cause a shock. ▶ Do not use a steam cleaner, high-pressure cleaner, hoses or nozzles to clean the appliance.
-
Page 11: Avoiding Material Damage
Avoid material damage NL Make sure that the length of the ▶ 2 Material damage thread on the connection to the avoid water tap is at least 10 mm. observe this instruction to avoid Water pressure that is too low or too high can property damage and damage to the interfere with the appliance function. -
Page 12: Environmental Protection And Saving
NL Environmental protection and saving Direct contact with the device ▶ Reduce washing temperature for remove all detergent residue, lightly and normally soiled laundry. spray mist or residue. a At low temperatures, it consumes low energy device. For light to normal soiling, lower temperatures Environmental protection and than those stated on the care label... -
Page 13: Energy Saving Mode
Set up and connect NL 3.3 Energy Saving Mode LOOK OUT! Objects that remain in the drum and If you do not operate the device for a that are not intended for use with the longer period of time, the device device can lead to material and device automatically switches to energy- damage. -
Page 14: Package Contents
NL Set up and connect 4.2 Package contents After unpacking, check all parts for transport damage and the complete ness of the delivery. WARNING Washing machine Risk of electric shock! Accompanying documents The device contains live parts. Touching live parts is dangerous. Water supply hose cover caps Do not use the appliance without... -
Page 15: Removing Transport Locks
Set up and connect NL LOOK OUT! installation site To demand If the appliance is installed in areas on a wall no snakes with a risk of frost or outdoors, frozen between wall and residual water can damage the device clamping appliance and frozen hoses can man. -
Page 16: Connecting The Device
NL Set up and connect Loosen and remove all bolts of the Install the 4 cover caps. 4 transport locks with a SW13 open-end wrench Push the 4 cover caps down. Pull the mains connection cable out of the holder. 4.5 Connecting device Connect water supply hose Note Remove the 4 sleeves. -
Page 17: Adjusting The Device
Set up and connect NL Connect the water inlet hose to the Remark: Observe the pumping appliance. heights. The maximum pumping height wears 100 cm. The connection position tie with a hose clamp (24-40 mm) bore gene. Drain in a the water drainage Connect the water inlet hose to the feeding hose with... -
Page 18: Connecting The Appliance Electrically
NL Set up and connect Loosen the lock nuts with a SW17 Tighten the lock nuts against the open-end wrench. housing with an open-ended wrench SW17 hand-tight. To adjust the appliance, turn the Hold the appliance foot while appliance feet. Check the horizontal doing so and do not adjust the adjustment of the appliance with a height. -
Page 19: Getting To Know Your Device
Getting to know your device NL 5 Getting to know your device 5.1 Device Here you will find an overview of the components of your device. Depending on the device type, details in the picture may differ, e.g. the color and the shape. Transport protections Service valve and pump →... -
Page 20: Detergent Drawer
NL Getting to know your device 5.2 Detergent drawer Dosing aid for liquid detergent → "Dosing aid for liquid place detergent", Page 41 Detergent dispenser II: s Detergent for the main used to be, s softener s Bleach s Stain salt Compartment : s fabric softener s Liquid starch... -
Page 21: Operating Logic
Getting to know your device NL 5.4 Operating logic LOOK OUT! Violent action on the display can cause damage. No strong pressure on the display ▶ exercise. Do not use pointed or sharp front ▶ cast on the display. -
Page 22: Display
NL Display 6 Display The display shows the current setting values, options or instructions. song lyrics. Example display indication name Description Indication 0:40 Program duration / Approximate expected program time or remaining time of program time remaining. the program Finished in time The program end has been recorded and the remaining hours are displayed. - Page 23 Display NL name Description Indication Energy consumption for the set Energy consumption programme. : lower energy consumption : higher energy consumption Water consumption for the set water consumption programme. : lower water consumption : higher water consumption Signal Basic setting Key signal Basic setting Basic setting...
-
Page 24: Buttons
NL Tests 7 Keys The selection of the program settings depends on the program set. The selection options for each program are shown in the front view → "Programs", Page 27. Knob Description Choice (Start/Pause) s start Start, cancel or pause a programme. s Cancel s pause Speed... - Page 25 Tests NL Knob Description Choice 3 sec (Children s activate Activate or deactivate the child lock. security 3 sec.) s deactivate Secure the control panels against accidental operation. If the childproof lock has been activated and the appliance has been switched off, the childproof lock remains activated.
- Page 26 NL Tests Knob Description Choice s Save (memory) If you press the button for approx. 3 s Set up seconds, you save your individual program settings. → "Save program settings", Page 41 Briefly press the button to set your program with individual program settings.
-
Page 27: Programs
Programs NL – Speed max. spin speed 1400 1400 rental (rpm) max. temperature (°C) 90 max. load (kg) - Page 28 NL Programs – Speed max. spin speed 1400 rental (rpm) – max. temperature (°C) max. load (kg)
- Page 29 Programs NL – Speed max. spin speed 1200 1400 rental (rpm) max. temperature (°C) max. load (kg)
- Page 30 NL Programs – – – – – – – – – – – – – Speed max. spin speed 1400 1400 rental (rpm) – – max. temperature (°C) 40 max. load (kg)
- Page 31 Programs NL – – – – – – Speed max. spin speed 1200 1200 rental (rpm) – max. temperature (°C) 40 max. load (kg)
- Page 32 NL Programs – – – Speed max. spin speed rental (rpm) max. temperature (°C) max. load (kg)
- Page 33 Programs NL – Speed max. spin speed rental (rpm) max. temperature (°C) 60 max. load (kg)
- Page 34 NL Programs – – – Speed max. spin speed 1200 rental (rpm) max. temperature (°C) 40 max. load (kg)
-
Page 35: Accessories
accessories NL 9 Accessories Use only original accessories. These are adapted to the device. Usage Order number Cold water or Aquastop WZ10131 Extension water supply water supply hose feeding hose lengthen (2.50 m). The device higher WZWP20W Booster with drawer so that it is easily filled can be emptied. -
Page 36: Laundry
NL laundry Press Pull out the detergent drawer. (Start/Pause) to start the to start the program. a The display shows the remaining program duration. Start the first wash cycle or on press to turn off the device. → "Ministry in essence", Page 40 1 Laundry Place the powder detergent in... -
Page 37: Sorting The Laundry
laundry NL – Tie together long drawstrings – Type of fabric/fibres and cords with fixed ends in Wash laundry of the same hoods or trousers type of fabric and fiber – Remove curtain rollers and lead together. laces or use a laundry net –... -
Page 38: Care Instructions On Care Labels
NL Detergent and laundry care product Degree of pollution Contamination Examples normal Contaminants or light s T-shirts, shirts or spots are visible blouses are sweaty, or have been worn several times s Towels or bedding- good, which has been used for up to a week Contaminants or stains Tea towels, baby wash or strong... -
Page 39: Detergent Recommendation
Detergent and laundry care product NL 12.1 Detergent Recommendation Textile Program- Temperature Laundry detergent Complete detergent boil-proof white Cotton from cold to 90°C with optical white linen or cotton textiles cherry Detergent sun- Fur laundry from Cotton from cold to 60°C of bleach and linen or cotton optical brighteners... -
Page 40: The Ministry At Its Core
NL The Ministry in essence Pollution light normal strong 55ml 80ml Water hardness: soft / medium 40 ml 55ml 80ml 105 ml Water hardness: hard / very hard 13.2 Set program The dosage amounts can be found on the manufacturer's packaging. Set the program selector to the s Adjust dosing amounts desired programme. -
Page 41: Saving Program Settings
The Ministry in essence NL Open the door. 13.4 Save program settings You can save your individual program settings as favourites. Requirements s A program is set. s The program settings are adjusted. Press for about 3 s. ▶ Press to recall the stored program. -
Page 42: Using The Dosing Aid For Liquid
NL The Ministry in essence Press the insert down and take out 13.7 Using the dosing aid for the detergent drawer. liquid detergent know You can use a dosing aid in the detergent drawer to dose liquid detergent. Pull out the detergent drawer. Push the dosing aid forward. -
Page 43: Starting The Program
The Ministry in essence NL s Use the dosing aid for liquid Press Do not use gel-type detergents, The appliance pauses and checks powder detergents, switched on whether it is possible to add or prewash or ready-in time. remove laundry. Note the program status. -
Page 44: Switching Off The Appliance
NL Child lock 1 4 Child lock Remove the laundry from the appliance. Secure your device against unintentional operation via the control elements. 14.1 Activating child lock 3 sec to press. Approx. 3s on ▶ a The controls are blocked. a The childproof lock remains in effect even after the switching of the device activated. -
Page 45: Basic Settings
Basic settings NL 1 5 Basic Settings You can set up your device according to your needs. 15.1 Overview of the basic settings Here you will find an overview of the basic settings of the device. Symbol Description Basic setting Where the ling Signal... -
Page 46: Cleaning And Maintenance
NL Cleaning and maintenance Run the program Drum ▶ 6 Cleaning and maintenance cleaning without laundry. loves Use a powder detergent. clean and maintain your appliance 16.3 Cleaning the detergent carefully to ensure that it continues to drawer work properly for a long time. Remark: Take the information on the 16.1 Tips for maintaining topic of safety →... -
Page 47: Descaling
Cleaning and maintenance NL 16.4 Descaling Clean and dry the detergent drawer and the insert with water and a brush. LOOK OUT! The use of unsuitable descaling agents, e.g. for coffee machines, can damage the device. For this device, use only ▶... - Page 48 NL Cleaning and maintenance Remove the service cover. CAUTION - Chance of burns! The soapy water gets hot when washing at high temperatures. Do not touch the hot soapy water. ▶ Pull off the sealing cap to allow the wash water to flow into the collection container.
-
Page 49: Water Drain Hose On The Si- Fon Cleaning
Cleaning and maintenance NL Fit the pump cover and tighten it Cleaning the drain pump as far as it will go. Remark: Take the information on the topic of safety → Page 4 and avoid material damage → Page 11 take care of your device 90°... -
Page 50: Clean The Sieve In The Water Supply
NL Cleaning and maintenance Loosen the hose clamp and carefully 16.7 Clean the strainer in the pull off the water drain hose. water supply. Empty the water inlet hose Close the water tap. Set a schedule, but not Rinse , Spin or pump down. - Page 51 Cleaning and maintenance NL Clean the sieve with a small brush. Detach the hose at the back of the device. Connect the water inlet hose and Remove the sieve with pliers. check for leaks. Clean the sieve with a small brush. Cleaning the strainer on the device Remark: Take the information on the topic of safety →...
- Page 52 NL Cleaning and maintenance Connect the hose and check for leaks.
-
Page 53: Troubleshooting
Troubleshooting NL 1 7 Troubleshooting You can remedy minor faults on the device yourself. Before contacting customer service, please refer to the troubleshooting information. This way you avoid unnecessary costs. WARNING Risk of electric shock! Improper repairs are dangerous. Only qualified personnel may carry out repairs on the device ▶... - Page 54 NL Troubleshooting Cause and Troubleshooting Malfunction "E:36 / -25 / -26" Drain pump is clogged. → " Cleaning the drain pump", page 47 ▶ Water pressure is low. No solution possible. The strainers in the water supply are clogged. Clean the strainers in the water supply → Page 50. ▶...
- Page 55 Troubleshooting NL Cause and Troubleshooting Malfunction All other error codes. Malfunction Please contact customer service. ▶ → "Service", Page 64 Device not working. Mains plug of the power cable is not plugged in. Connect the appliance to the mains. ▶ Fuse is defective.
- Page 56 NL Troubleshooting Cause and Troubleshooting Malfunction Drain pipe or water drain hose is kinked or Washing water is not pumped out. pinched. Make sure that the drain pipe and water drain ▶ feed hose is not kinked or pinched. Drain pump is clogged. →...
- Page 57 Troubleshooting NL Cause and Troubleshooting Malfunction The program sequence is electronically optimized. This The program duration can lead to changes in the program duration. changes during the wash cycle. No error - no action required. ▶ The imbalance control system eliminates the imbalance by distributing the laundry several times.
- Page 58 NL Troubleshooting Cause and Troubleshooting Malfunction strong foam Detergent dosage is too high. ming. Immediate measure: mix a tablespoon of fabric softener ▶ ter with 0.5 l of water and pour this mixture into the left compartment (not for outdoor, sportswear and down textiles).
- Page 59 Troubleshooting NL Cause and Troubleshooting Malfunction Loud noise during The appliance is not leveled properly. Adjusting the device centrifugation. ▶ Device feet are not fixed. Secure the device feet. Setting the appli- ▶ raat Transport protections have not been removed. Remove transport locks ▶...
- Page 60 NL Troubleshooting Cause and Troubleshooting Malfunction Spin result is Make sure that the drain pipe and water drain ▶ not to satisfaction- feed hose is not kinked or pinched. ness. The laundry is The unbalance detection system has aborted the spin too wet / too damp.
- Page 61 Troubleshooting NL Cause and Troubleshooting Malfunction Odor has formed in Humidity and detergent residue can stimulate the appliance bacterial growth. → " Cleaning the drum", page 46 ▶ Pine tree. When not using the appliance, leave the door ▶ and detergent drawer open so that the residual water can dry up.
-
Page 62: Transporting, Storing And Drain
NL Transport, storage and disposal Unplug the appliance from the 17.1 Emergency release mains. unlock door Drain remaining soap. → "Clean the drain pump", Required: The drain pump is empty. → Page 47 Page 47 Disassemble the hoses. Running water can 1. -
Page 63: Restart Device Use
Transport, storage and disposal NL Fit all bolts of the 4 transport locks 18.3 Recommissioning the and tighten them slightly. device Remove the transport locks ▶ run. 18.4 Disposal of your old appliance Environmentally friendly disposal means that valuable raw materials can be reused. -
Page 64: Customer Service
NL customer service 19.1 Product number (E no.) chemical equipment (waste electrical and electronic and production number equipment - WEEE). (FD) The directive sets the framework for the take- The product number (E-Nr.) and the back valid in the EU production number (FD) can be found and disposal of old on the type plate of the device. -
Page 65: Consumption Values
Consumption values NL 0 Consumption values The following information is provided in accordance with the EU Ecodesign Regulation. The specified values for other programs asEco 40-60 are only guide values and have been determined in accordance with the applicable standard EN60456. pole. - Page 66 NL Technical data Maximum load 9.0 kg thing 220 - 240V, mains voltage 50 Hz 10 A Minimum input installation fuse Rated power 2300W gene Recorded Ver- s Off state: 0.10W to be allowed to s non-disabled caved in position: 0.50 W s Minimum: water pressure 100 kPa...
- Page 68 BSH Hausgeräte GmbH Carl-Wery-Straße 34 81739 Munich GERMANY www.siemens-home.bsh-group.com Manufactured by BSH Hausgeräte GmbH under the trademark license of Siemens AG * 9001641817* 9001641817 (010329)