
Related Manuals for Philips D250


Summary of Contents for Philips D250
- Page 1 Always there to help you Register your product and get support at www.philips.com/support D250 D255 Question? Contact Philips Extended user documentation...
-
Page 3: Table Of Contents
Contents Switch between uppercase and lowercase 1 Important safety instructions 7 Phonebook View the phonebook 2 Your phone Search a record What is in the box Call from the phonebook Overview of the phone Access the phonebook during a call Overview of the base station Add a record Edit a record... - Page 4 12 Privacy mode 13 Services Select the recall duration Dial mode Auto clock 14 Technical data 15 Notice Declaration of conformity Compliance with EMF Disposal of your old product and battery 33 16 Frequently asked questions 17 Appendix Text and number input tables...
-
Page 5: Important Safety Instructions
1 Important safety • be installed near the equipment and shall be easily instructions accessible. • Handsfree activation could suddenly increase the the handset is not too close to your ear. • Power requirements calls when the power fails. An alternative has to be •... -
Page 6: Your Phone
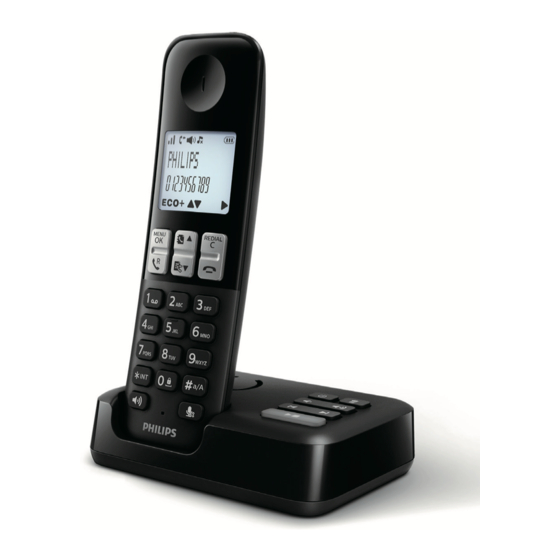
2 Your phone Congratulations on your purchase and welcome to Philips! Power adapter** offers, register your product at www.philips. com/welcome. What is in the box Line cord* 2 x AAA rechargeable batteries** Handset** Guarantee Base station (D250) Short user manual... -
Page 9: Get Started
3 Get started Caution • Make sure that you have read the safety instructions in the 'Important safety instructions' section before you connect and install your handset. Connect the base station Warning Connect each end of the power adapter • •... -
Page 10: Install The Supplied Batteries
Install the supplied batteries (country dependent) MENU/OK. Set the country/language MENU/OK » Note • country. Then you can set the date and time. Select MENU/OK > [Phone setup] > [Language], then press MENU/OK to MENU/OK Caution • » • Use only the supplied batteries. •... -
Page 12: Check The Signal Strength
Icon Descriptions REDIAL/C to read. When the handset is off the base ECO+ The ECO+ mode is activated. When the handset is on the base Check the signal strength The number of bars indicates you hear an alert tone. the connection status between The battery is low and needs the handset and base station. -
Page 13: Calls
4 Calls Note • The talk time of your current call is displayed on the call timer. • Note the phone close to the base station. • When the power fails, the phone cannot access Answer a call • when you are in a call 10). -
Page 14: Adjust The Earpiece/Speaker Volume
Adjust the earpiece/speaker Answer a second call volume Note • This service is network dependent. a call. » The earpiece/speaker volume is When there is a periodical beep to notify you adjusted and the phone is back to the call screen. to answer the call. -
Page 15: Intercom And Conference Calls
5 Intercom and Select a handset, then press MENU/OK to conference calls » Wait for the other side to answer your call. on the selected handset. » The intercom is established. An intercom call is a call to another handset that shares the same base station. - Page 16 Note • handset if [Services] > [Conference] is set to [Auto]. During the conference call to put the external call » The external call is put on hold. MENU/OK to establish the Note • other handset remains connected to the external call.
-
Page 17: Text And Numbers
6 Text and numbers You can enter text and numbers for handset name, phonebook records, and other menu items. Enter text and numbers alphanumeric key to enter the selected character. REDIAL/C to delete a character. REDIAL/C to delete all to move to add a space. -
Page 18: Phonebook
7 Phonebook Scroll the contact list or press MENU/OK > [Phonebook] > [View] to access the This phone has a phonebook that stores up to phonebook list. 50 records. You can access the phonebook from the base station. Each record can have a name phonebook list. -
Page 19: Add A Record
Add a record Delete a record Note MENU/OK. • Select [Phonebook] > [Delete], then press MENU/OK records to add new ones. Select a contact, then press MENU/OK to • number will overwrite the old number. » the handset. MENU/OK. MENU/OK Select [Phonebook] >... -
Page 20: Call Log
8 Call log Select the call list type MENU/OK. Select [Services] > [Call list type], then press MENU/OK Select an option, then press MENU/OK to includes the name and number of the caller, call time and date. This feature is available if you your service provider. -
Page 21: Delete A Call Record
Delete a call record » Select a record, then press MENU/OK to Select [Delete], then press MENU/OK to » the handset.. MENU/OK » The record is deleted. Delete all call records » MENU/OK to enter the options menu. Select [Delete all], then press MENU/OK »... -
Page 22: Redial List
9 Redial list Select a record, then press MENU/OK to Select [Delete], then press MENU/OK to The redial list stores the call history of dialed » calls. It includes the names and/or numbers you the handset.. have called. This phone can store up to 10 redial MENU/OK records. -
Page 23: Phone Settings
10 Phone settings Set the docking tone place the handset on the base station or own phone. MENU/OK. Select [Phone setup] > [Sounds] > [Docking tone], then press MENU/OK to Sound settings Select [On]/[Off], then press MENU/OK Set the handset's ringtone volume »... -
Page 26: Announcements
Select [Record also]or [Answer only], or MENU/OK > [Answ. Machine]. then press MENU/OK Select [Announcement], then press Select [Use default], then press MENU/ MENU/OK Select [Answer only] or [Record also], » then press MENU/OK the handset. Select [Record], then press MENU/OK to MENU/OK »... -
Page 27: Set The Ring Delay
From the handset Note • • then MENU/OK MENU/OK > [Answ. Machine] > • [Play], then press MENU/OK » Set the ring delay REDIAL/C • You can set the number of times the phone MENU/OK to enter the options • menu. - Page 28 Activate/deactivate the remote access Note • You can allow or block remote access to the automatically if no key is pressed for 8 seconds. or MENU/OK > [Answ. Machine] Remote access commands Select [Remote access], then press MENU/OK Function Select [Activate]/[Deactivate], then press MENU/OK »...
-
Page 29: Privacy Mode
12 Privacy mode Select a number from the list, then press MENU/OK Edit the number, then press MENU/OK to You can access the privacy mode menu to » Change the outgoing call block PIN/ Block outgoing calls passcode MENU/OK. Select [Privacy mode], then press MENU/ as overseas calls or undesirable hotlines by maximum for each set of numbers. - Page 30 Activate/deactivate the blacklist MENU/OK. Select [Privacy mode], then press MENU/ press MENU/OK Select [Call block] > [Block mode] > [On]/[Off], then press MENU/OK to » Add blacklist numbers MENU/OK. Select [Privacy mode], then press MENU/ press MENU/OK Select [Call block] > [Block number], then press MENU/OK Enter the number, then press MENU/OK »...
-
Page 31: Services
13 Services Network type Note The phone supports a number of features that • This is a country dependent feature. It only applies to models with network type support. Call list type MENU/OK. Select [Services] > [Network type], then press MENU/OK. Select a network type, then press MENU/ »... -
Page 32: Select The Recall Duration
Select a dial mode, then press MENU/OK Note » • To enter a pause, press and hold • • Note The feature is unavailable if the dialed number starts with * and #. • If your phone is in pulse dial mode, press Select the recall duration Make sure that the recall time is set correctly Auto clock... - Page 33 on the base station for Note 10 seconds. • Note • Restore default settings REDIAL/C to make corrections. Then press MENU/OK MENU/OK. Select [Services] > [Reset], then press » MENU/OK a handset number to the handset. » the handset. MENU/OK Note »...
-
Page 34: Technical Data
14 Technical data • • • • • • Redial list with 10 entries • • • DTMF Battery • Power adapter • Power consumption • Weight and dimensions (D250) • • • Weight and dimensions (D255) • • •... -
Page 35: Notice
Directive 2014/53/EU. You can Declaration of Conformity on www.philips.com/ support. This symbol on a product means that the Use GAP standard product is covered by European Directive compliance 2012/19/EU. - Page 36 Your system consists of materials which can be recycled and reused if disassembled by equipment.
-
Page 37: Frequently Asked Questions
16 Frequently • asked questions contacts with a damp cloth. I cannot change the settings of my voice mail, what do I do? No signal bar is displayed on the screen. service provider but not the phone itself. • to the base station. •... - Page 38 Characters * and # respectively appear as small ‘n’ and small ‘o’ in the LCD display. This is normal Note • If the above solutions do not help, disconnect the power supply from both the handset and base station.
-
Page 39: Appendix
17 Appendix Text and number input tables French/ German/ Italian/Turkish/ Slovenian/Croatian/Lithuanian/Estonian/ … French/ German/ Italian/Turkish/ … m n o 6 ñ ó ô õ ö ò …... - Page 40 p q r s...
- Page 41 2021 © MMD Hong Kong Holding Limited. All rights reserved. Speci cations are subject to change without notice. Philips and the Philips Shield Emblem are registered trademarks of Koninklijke Philips N.V. and are used under license. This product has been manufactured by and is sold under the responsibility of MMD Hong Kong Holding Limited or one of its a liates, and MMD Hong Kong Holding Limited is the warrantor in relation to this product.