
Related Manuals for JVC KD-X172


Summary of Contents for JVC KD-X172
- Page 1 ENGLISH ไทย KD-X172 DIGITAL MEDIA RECEIVER INSTRUCTION MANUAL ตั ว รั บ สื ่ อ ดิ จ ิ ต อล คู ม ื อ การใช ง าน B5A-3097-10 [M]...
-
Page 2: Table Of Contents
Contents Before Use ....................3 How to read this manual • The displays and faceplates shown in this manual are examples used to Basics ......................4 provide clear explanations of the operations. For this reason, they may Getting Started ..................5 be different from the actual displays or faceplates. -
Page 3: Before Use
Before Use IMPORTANT • Depending on the types of cars, the antenna will automatically extend when you turn on the unit with the antenna control wire connected • To ensure proper use, please read through this manual before using this (page 18). -
Page 4: Basics
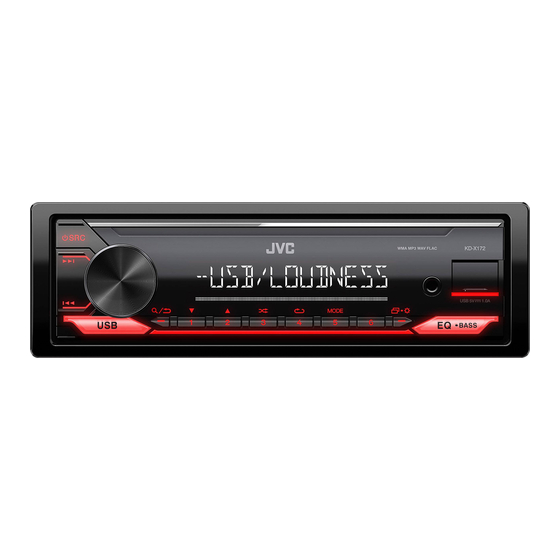
Basics Faceplate Remote control (RM-RK52) Volume knob Display window* Remote sensor (Do not expose to bright sunlight.) Pull out the insulation sheet when using for the first time. Detach button * Only for illustration purpose. How to replace the battery Attach Detach How to reset... -
Page 5: Getting Started
For details on how to update the firmware, visit Turn the volume knob to select [DATE SET], then press the knob. <http://www.jvc.net/cs/car/>. Turn the volume knob to make the settings, then press the knob. Set the date in the order of “Day”... -
Page 6: Radio
Radio Getting Started [CLOCK] [TIME SYNC] [ON]: The clock time is automatically set using the Clock Time (CT) data in FM Radio Data System signal. ; [OFF]: Cancels. [CLOCK DISPLAY] [ON]: The clock time is shown on the display even when the unit is turned off. - Page 7 Radio Select a stored station [SSM] [SSM 01–06]/[SSM 07–12]/[SSM 13–18]: Automatically presets up to 18 stations for FM. “SSM” stops flashing when the first 6 stations are stored. Select Press one of the number buttons (1 to 6). [SSM 07–12]/[SSM 13–18] to store the following 12 stations. (or) Press [LOCAL SEEK]...
-
Page 8: Usb
Radio PTY code Connect a USB device [NEWS], [AFFAIRS], [INFO], [SPORT], [EDUCATE], [DRAMA], [CULTURE], [SCIENCE], [VARIED], [POP M] (music), [ROCK M] (music), [EASY M] (music), [LIGHT M] (music), [CLASSICS], USB input terminal [OTHER M] (music), [WEATHER], [FINANCE], [CHILDREN], [SOCIAL], [RELIGION], [PHONE IN], [TRAVEL], [LEISURE], [JAZZ], [COUNTRY], [NATION M] (music), [OLDIES], [FOLK M] (music), [DOCUMENT] USB device... - Page 9 Quick search On the faceplate If you have many files, you can search through them quickly. Press 4 B repeatedly. Repeat play Press [TRACK REPEAT]/[FOLDER REPEAT]/[ALL REPEAT]: Turn the volume knob to select a folder/list, then press the knob. MP3/WMA/WAV/FLAC file Turn the volume knob quickly to browse through the list quickly.
-
Page 10: Aux
Audio Settings You can listen to music from a portable audio player via the auxiliary input jack. Preparation: Select [ON] for [BUILT-IN AUX] in [SOURCE SELECT]. (Page 5) Start listening Connect a portable audio player (commercially available). Select a preset equalizer directly 3.5 mm stereo mini plug with “L”... - Page 11 Audio Settings Other settings [PRO EQ] Adjusts your own sound settings for each source. • The settings are stored to [USER] in [PRESET EQ]. Press and hold • The settings made may affect the current settings of [EASY EQ]. Turn the volume knob to select an item (see the following table), then 1 [BASS]/[MIDDLE]/[TREBLE]: Select a sound tone.
- Page 12 Audio Settings Speaker output settings [SUBWOOFER [ON]: Turns on the subwoofer output. ; [OFF]: Cancels. [SPK/PRE OUT] SET]*3 Select the output setting for the speakers [SPK/PRE OUT], based on the speaker [SUBWOOFER [FRQ THROUGH]: All signals are sent to the subwoofer. ; connection method.
-
Page 13: Display Settings
Display Settings Zone identification for brightness settings [BRIGHTNESS] Sets the brightness for day and night separately. 1 [DAY]/[NIGHT]: Select day or night. 2 Select a zone. (See the illustration on the left column.) 3 [LEVEL 00] to [LEVEL 31]: Set the brightness level. [TEXT SCROLL]*2 [SCROLL ONCE]: Scrolls the display information once. -
Page 14: References
For: – Latest firmware updates and latest compatible item list Station name/Program type Radio text Radio text+ – Any other latest information Radio text+ song title/Radio text+ artist Frequency Clock Visit <www.jvc.net/cs/car/>. back to the beginning For MP3/WMA/WAV/FLAC files: Playable files Song title/Artist Album title/Artist Folder name File name •... -
Page 15: Troubleshooting
Troubleshooting Symptom Remedy Symptom Remedy Sound cannot be heard. • Adjust the volume to the optimum level. “CANNOT PLAY” flashes and/ • Check whether the connected device is compatible with • Check the cords and connections. or connected device cannot this unit and ensure the files are in supported formats. -
Page 16: Installation/Connection
Installation/Connection Basic procedure This section is for the professional installer. Remove the key from the ignition switch, then disconnect the For safety’s sake, leave wiring and mounting to professionals. Consult the terminal of the car battery. car audio dealer. Connect the wires properly. See “Wiring connection”... - Page 17 Installation/Connection Installing the unit (in-dash mounting) Installing the unit (without mounting sleeve) Remove the mounting sleeve and trim plate from the unit. Align the holes in the unit (on both sides) with the vehicle mounting bracket and secure the unit with screws (commercially available). Use only the specified screws.
- Page 18 Wiring connection IMPORTANT Signal cord (not supplied) We recommend installing the unit with a commercially available JVC Amplifier*1 custom wiring harness specific for your car and leave this job to Rear/subwoofer output professionals for your safety. Consult your car audio dealer.
-
Page 19: Specifications
Specifications FM Frequency Range 87.5 MHz — 108.0 MHz (50 kHz step) MP3 Decode Compliant with MPEG-1/2 Audio Layer-3 Usable Sensitivity (S/N = 26 dB) 8.2 dBf (0.71 μV/75 Ω) WMA Decode Compliant with Windows Media Audio Quieting Sensitivity 17.2 dBf (2.0 μV/75 Ω) WAV Decode Linear-PCM (DIN S/N = 46 dB) - Page 20 สารบั ญ ก่ อ นการใช้ ง าน .......................3 วิ ธ ี ก ารอ่ า นคู ่ ม ื อ เล่ ม นี ้ • จอแสดงผล และแผงจอภาพที ่ แ สดงในคู ม ื อ นี ้ เ ป น ตั ว อย า งที ่ ใ ช อ ธิ บ ายการทํ า งานให ช ั ด เจน ด ว ยเหตุ ผ ลนี ้ เบื...
-
Page 21: ก่ อ นการใช้ ง าน
ก่ อ นการใช้ ง าน ข้ อ มู ล สํ า คั ญ • เสาอากาศจะยื ด ออกอั ต โนมั ต ิ เ มื ่ อ เป ด เครื ่ อ งที ่ เ ชื ่ อ มต อ กั บ สายควบคุ ม เสาอากาศ (หน า 18) ตามประเภทของ รถยนต... -
Page 22: เบื ้ อ งต้ น
เบื ้ อ งต้ น แผงหน้ า ปั ด รี โ มทคอนโทรล (RM-RK52) ปุ ม ปรั บ ระดั บ เสี ย ง หน า จอแสดงผล รี โ มทเซ็ น เซอร (อย า วางให ถ ู ก แสงแดดจั ด ) ดึ... -
Page 23: การเริ ่ ม ใช้ ง าน
[YES] [NO] ดู ร ายละเอี ย ดการอั พ เดตเฟ ร ม แวร ไ ด จ าก <http://www.jvc.net/cs/car/> เพื ่ อ กํ า หนดวั น ที ่ หมุ น ปุ่ มปรั บ ระดั บ เสี ย งเพื ่ อ เลื อ ก... -
Page 24: วิ ท ย
วิ ท ยุ การเริ ่ ม ใช้ ง าน [CLOCK] : เวลาของนาฬ ก าจะถู ก ตั ้ ง ค า โดยใช ข อ มู ล เวลานาฬ ก า (CT) ในสั ญ ญาณ [TIME SYNC] [ON] ระบบข อ มู ล วิ ท ยุ FM ; : ยกเลิ... - Page 25 วิ ท ยุ การเลื อ กสถานี ท ี ่ บ ั น ทึ ก ไว้ : สามารถตั ้ ง ค า ล ว งหน า โดยอั ต โนมั ต ิ [SSM] [SSM 01–06] [SSM 07–12] [SSM 13–18] ได ถ ึ ง 18 สถานี ส ํ า หรั บ FM “SSM” จะหยุ ด กะพริ บ เมื ่ อ บั น ทึ ก 6 สถานี แ รก เลื อ ก กดหมายเลขใดหมายเลขหนึ...
-
Page 26: Usb
วิ ท ยุ รหั ส PTY การเชื ่ อ มต่ อ อุ ป กรณ์ USB [NEWS] [AFFAIRS] [INFO] [SPORT] [EDUCATE] [DRAMA] [CULTURE] [SCIENCE] [VARIED] (เพลง), (เพลง), (เพลง), (เพลง), [POP M] [ROCK M] [EASY M] [LIGHT M] [CLASSICS] [OTHER M] ช อ งสั ญ ญาณเข า USB (เพลง), [WEATHER] [FINANCE]... - Page 27 การค้ น หาแบบรวดเร็ ว เพื ่ อ บนแผงหน้ า ปั ด หากมี ห ลายไฟล สามารถค น หาได อ ย า งรวดเร็ ว เล น ซํ ้ า กด ซํ ้ า ๆ กด [TRACK REPEAT] [FOLDER REPEAT] [ALL REPEAT] หมุ น ปุ่ มปรั บ ระดั บ เสี ย งเพื ่ อ เลื อ กโฟลเดอร์ / รายการ จากนั ้ น ให้ ก ดปุ่ มนี ้ ไฟล...
-
Page 28: Aux
การตั ้ ง ค่ า ระบบเสี ย ง คุ ณ สามารถฟ ง เพลงจากเครื ่ อ งเล น เพลงแบบพกพาผ า นทางช อ งต อ อิ น พุ ต เสริ ม ได การเตรี ย มการ: เลื อ ก สํ า หรั บ ใน... -
Page 29: การตั ้ ง ค่ า เสี ย ง
การตั ้ ง ค่ า เสี ย ง การตั ้ ง ค่ า อื ่ น ๆ ปรั บ การตั ้ ง ค า เสี ย งของคุ ณ เองสํ า หรั บ แต ล ะแหล ง [PRO EQ] • การตั ้ ง ค า จะถู ก จั ด เก็ บ ไปยั ง ใน... - Page 30 การตั ้ ง ค่ า เสี ย ง : เป ด สั ญ ญาณซั บ วู ฟ เฟอร ; : ยกเลิ ก การตั ้ ง ค่ า สั ญ ญาณออกของลํ า โพง [SUBWOOFER [ON] [OFF] [SPK/PRE OUT] SET]*3 เลื อ กการตั ้ ง ค า สั ญ ญาณออกสํ า หรั บ ลํ า โพง ตามวิ...
-
Page 31: ค่ า การแสดงผล
ค่ า การแสดงผล การระบุ โ ซนสํ า หรั บ ปรั บ ความสว า ง ตั ้ ง ค า ความสว า งสํ า หรั บ กลางวั น และกลางคื น แยกกั น [BRIGHTNESS] : เลื อ กกลางวั น หรื อ กลางคื น 1 [DAY] [NIGHT] เลื... -
Page 32: เอกสารอ้ า งอิ ง
แม ว า ไฟล เ สี ย งจะเป น ไปตามมาตรฐานที ่ ร ะบุ ไ ว ใ นรายการข า งต น แต อ าจไม ส ามารถเล น ได ทั ้ ง นี ้ ข ึ ้ น อยู ก ั บ ประเภทหรื อ สภาวะของสื ่ อ หรื อ อุ ป กรณ • ดู ร ายละเอี ย ดและหมายเลขเกี ่ ย วกั บ ไฟล เ สี ย งได จ าก <www.jvc.net/cs/car/audiofile/> เกี ่ ย วกั บ อุ ป กรณ์ USB •... -
Page 33: การแก้ ไ ขปั ญ หาเบื ้ อ งต้ น
การแก้ ไ ขปั ญ หาเบื ้ อ งต้ น อาการ วิ ธ ี ก ารแก้ ไ ข อาการ วิ ธ ี ก ารแก้ ไ ข ไม ไ ด ย ิ น เสี ย ง • ปรั บ เสี ย งให อ ยู ใ นระดั บ ที ่ พ อเหมาะ ข... -
Page 34: การติ ด ตั ้ ง /การเชื ่ อ มต่ อ
การติ ด ตั ้ ง /การเชื ่ อ มต่ อ ขั ้ น ตอนพื ้ น ฐาน ส ว นนี ้ ส ํ า หรั บ ช า งติ ด ตั ้ ง มื อ อาชี พ ถอดกุ ญ แจออกจากสวิ ต ช์ จ ุ ด ระเบิ ด จากนั ้ น ปลดขั ้ ว ต่ อ ของแบตเตอรี... - Page 35 การติ ด ตั ้ ง /การเชื ่ อ มต่ อ การติ ด ตั ้ ง เครื ่ อ ง (การยึ ด เข้ า กั บ ช่ อ งหน้ า ปั ด ) การติ ด ตั ้ ง เครื ่ อ ง (โดยไม่ ใ ช้ ป ลอกยึ ด ) ถอดเหล็...
- Page 36 แนะนํ า ให ต ิ ด ตั ้ ง เครื ่ อ งด ว ยชุ ด สายไฟเฉพาะที ่ ก ํ า หนดซึ ่ ง มี จ ํ า หน า ยสํ า หรั บ สั ญ ญาณเสี ย งออกด า นหลั ง / ของ JVC รถยนต ข องคุ ณ และให ผ ู เ ชี ่ ย วชาญเป น ผู ด ํ า เนิ น การเพื ่ อ ความปลอดภั ย ของคุ ณ...
-
Page 37: ข้ อ มู ล จํ า เพาะ
ข้ อ มู ล จํ า เพาะ FM ช ว งความถี ่ 87.5 MHz — 108.0 MHz (ขั ้ น ละ 50 kHz) ถอดรหั ส MP3 สอดคล อ งกั บ มาตรฐาน MPEG-1/2 Audio Layer-3 ความไวใช ง าน (S/N = 26 dB) 8.2 dBf (0.71 μV/75 Ω) ถอดรหั... - Page 38 SOFTWARE LICENSE AGREEMENT Article 4 Right pertaining to the Licensed Software Any and all copyrights and other rights pertaining to the Licensed Software and related documents The software embedded in the Product (hereinafter the "Licensed Software") provided by Licensor is shall belong to the Licensor or the original holder of the right who granted to the Licensor the license or copyrighted to or sublicensable by the Licensor, and this Agreement provides for the terms and conditions sublicense for the Licensed Software (hereinafter the "Original Rightholder"), and the User shall not be...
- Page 39 Important Notice concerning the Software Article 9 Destruction of the Licensed Software If this Agreement is terminated pursuant to the provision of Article 8, the User shall destroy the libFLAC Licensed Software, any related documents and copies thereof within two (2) weeks from such date of termination.
- Page 40 ﺗﻮﺿﻴﺤﺎﺕ 5.78 ﻣﮕﺎ ﻫﺮﺗﺰ — 0.801 ﻣﮕﺎ ﻫﺮﺗﺰ ﺣﻮﺯﻩ ﻓﺮﻛﺎﻧﺲ MPEG-1/2 Audio Layer-3 ﺳﺎﺯﮔﺎﺭ ﺑﺎ MP3 ﺭﻣﺰﮔﺸﺎﻳﯽ ()ﮔﺎﻡ 05 ﻛﻴﻠﻮﻫﺮﺗﺰی Windows Media Audio ﺳﺎﺯﮔﺎﺭ ﺑﺎ WMA ﺭﻣﺰﮔﺸﺎﻳﯽ ﺣﺴﺎﺳﻴﺖ ﻗﺎﺑﻞ ﺍﺳﺘﻔﺎﺩﻩ ( 2.8 )17.0 ﻣﻴﻜﺮﻭ ﻭﻟﺖ/57 ﺍﻫﻢdBf ﺧﻄﯽPCM WAV ﺭﻣﺰﮔﺸﺎﻳﯽ (...
- Page 41 ﺍﺗﺼﺎﻝ ﺳﻴﻢ ﻛﺸﯽ (ﺳﻴﻢ ﺳﻴﮕﻨﺎﻝ )ﻋﺮﺿﻪ ﻧﻤﯽ ﺷﻮﺩ ﻣﻬﻢ 1* JVC ﺁﻣﭙﻠﯽ ﻓﺎﻳﺮ ﺧﺮﻭﺟﯽ ﻋﻘﺐ/ﺳﺎﺏ ﻭﻭﻓﺮ ﻣﺎ ﭘﻴﺸﻨﻬﺎﺩ ﻣﯽ ﻛﻨﻴﻢ ﺩﺳﺘﮕﺎﻩ ﺭﺍ ﺑﺎ ﻳﮏ ﺩﺳﺘﻪ ﺳﻴﻢ ﺳﻔﺎﺭﺷﯽ ﻣﺨﺼﻮﺹ ﺧﻮﺩﺭﻭی ﺧﻮﺩ ﻛﻪ ﺩﺭ ﺑﺎﺯﺍﺭ ﻣﻮﺟﻮﺩ ﺍﺳﺖ ﻧﺼﺐ ﻛﻨﻴﺪ ﻭ ﺑﺮﺍی ﺍﻳﻤﻨﯽ...
- Page 42 ﻧﺼﺐ/ﺍﺗﺼﺎﻝ (ﻧﺼﺐ ﺩﺳﺘﮕﺎﻩ )ﺑﺪﻭﻥ ﻏﻼﻑ ﻧﺼﺐ (ﻧﺼﺐ ﺩﺳﺘﮕﺎﻩ )ﻧﺼﺐ ﻛﺮﺩﻥ ﺩﺭ ﺩﺍﺷﺒﻮﺭﺩ .ﻣﺤﻞ ﻧﺼﺐ ﺭﺍ ﺟﺪﺍ ﻛﺮﺩﻩ ﻭ ﺻﻔﺤﻪ ﺑﺮﺵ ﺭﺍ ﺍﺯ ﺩﺳﺘﮕﺎﻩ ﺟﺪﺍ ﻛﻨﻴﺪ ﺳﻮﺭﺍﺥ ﻫﺎی ﻣﻮﺟﻮﺩ ﺩﺭ ﺩﺳﺘﮕﺎﻩ )ﺩﺭ ﻫﺮ ﺩﻭ ﺳﻤﺖ( ﺭﺍ ﺑﺎ ﻗﻼﺏ ﺍﺗﺼﺎﻝ ﻣﺎﺷﻴﻦ ﺗﺮﺍﺯ ﻛﺮﺩﻩ ﻭ ﺩﺳﺘﮕﺎﻩ ﺭﺍ ﺑﺎ .ﻛﻤﮏ...
- Page 43 ﻧﺼﺐ/ﺍﺗﺼﺎﻝ ﺩﺳﺘﻮﺭ ﻛﺎﺭﻫﺎ ﺍﺻﻠﻰ .ﺍﻳﻦ ﺑﺨﺶ ﻣﺮﺑﻮﻁ ﺑﻪ ﻧﺼﺎﺏ ﺣﺮﻓﻪ ﺍی ﻣﯽ ﺷﻮﺩ .ﺑﺎﺗﺮی ﺧﻮﺩﺭﻭ ﺭﺍ ﻗﻄﻊ ﻛﻨﻴﺪ ﻛﻠﻴﺪ ﺭﺍ ﺍﺯ ﺳﻮﺋﻴﭻ ﺍﺳﺘﺎﺭﺕ ﺟﺪﺍ ﻛﺮﺩﻩ، ﺳﭙﺲ ﺗﺮﻣﻴﻨﺎﻝ ﺑﻪ ﻣﻨﻈﻮﺭ ﺭﻋﺎﻳﺖ ﺍﻳﻤﻨﯽ، ﻛﺎﺭ ﺳﻴﻢ ﻛﺸﯽ ﻭ ﻧﺼﺐ ﺭﺍ ﺑﻪ ﺍﻓﺮﺍﺩ ﺣﺮﻓﻪ ﺍی ﺑﺴﭙﺎﺭﻳﺪ. ﺑﺎ ﻓﺮﻭﺷﻨﺪﻩ ﺿﺒﻂ ﺻﻮﺕ .ﺧﻮﺩﺭﻭ...
- Page 44 ﻋﻴﺐ ﻳﺎﺑﻲ ﻧﺤﻮﻩ ﺗﻌﻤﻴﺮ ﻋﻮﺍﺭﺽ ﻧﺤﻮﻩ ﺗﻌﻤﻴﺮ ﻋﻮﺍﺭﺽ .ﺻﺪﺍﻳﯽ ﺑﮕﻮﺵ ﻧﻤﯽ ﺭﺳﺪ • ﺑﺮﺭﺳﯽ ﻛﻨﻴﺪ ﻛﻪ ﺩﺳﺘﮕﺎﻩ ﻣﺘﺼﻞ ﺑﺎ ﺍﻳﻦ ﺩﺳﺘﮕﺎﻩ ﺳﺎﺯﮔﺎﺭ “CANNOT PLAY” ﻋﺒﺎﺭﺕ .• ﺍﻧﺪﺍﺯﻩ ﺻﺪﺍ ﺭﺍ ﺑﺮ ﺭﻭ ﻣﻴﺰﺍﻥ ﺑﻬﻴﻨﻪ ﺁﻥ ﺗﻨﻈﻴﻢ ﻧﻤﺎﻳﻴﺪ ﺍﺳﺖ ﻳﺎ ﺧﻴﺮ ﻭ ﻣﻄﻤﺌﻦ ﺷﻮﻳﺪ ﻛﻪ ﺩﺳﺘﮕﺎﻩ ﻓﺮﻣﺖ ﺍﻳﻦ ﻓﺎﻳﻞ ﭼﺸﻤﮏ...
- Page 45 :(FM ﻫﺎی ﺭﺍﺩﻳﻮ – ﺳﺎﻳﺮ ﺍﻃﻼﻋﺎﺕ ﺟﺪﻳﺪ ﺭﺍﺩﻳﻮ +ﺭﺍﺩﻳﻮ ﻣﺘﻦ ﺭﺍﺩﻳﻮ ﻣﺘﻦ ﻧﺎﻡ ﺍﻳﺴﺘﮕﺎﻩ/ﻧﻮﻉ ﺑﺮﻧﺎﻣﻪ .< ﻣﺮﺍﺟﻌﻪ ﻧﻤﺎﻳﻴﺪwww.jvc.net/cs/car/> ﺑﻪ ﺳﺎﻋﺖ ﻓﺮﻛﺎﻧﺲ ﻣﺘﻦ+ ﻋﻨﻮﺍﻥ ﺁﻫﻨﮓ/ﺭﺍﺩﻳﻮ ﻣﺘﻦ+ ﻫﻨﺮﻣﻨﺪ ﺑﺎﺯﮔﺸﺖ ﺑﻪ ﺍﻭﻝ ﻓﺎﻳﻞ ﻫﺎی ﻗﺎﺑﻞ ﺍﺟﺮﺍ :USB • ﻓﺎﻳﻞ ﺻﻮﺗﯽ ﻗﺎﺑﻞ ﭘﺨﺶ ﺑﺮﺍی ﺩﺳﺘﮕﺎﻩ ﻫﺎی ﺣﺎﻓﻈﻪ ﺍﻧﺒﻮﻩ...
- Page 46 ﺗﻨﻈﻴﻤﺎﺕ ﻧﻤﺎﻳﺶ ﺗﻌﻴﻴﻦ ﻗﺴﻤﺖ ﺑﺮﺍی ﺗﻨﻈﻴﻤﺎﺕ ﺭﻭﺷﻨﺎﻳﻲ .ﻣﯽ ﺗﻮﺍﻧﻴﺪ ﺭﻭﺷﻨﺎﻳﯽ ﺭﺍ ﺑﻪ ﻃﻮﺭ ﺟﺪﺍﮔﺎﻧﻪ ﺑﺮﺍی ﺭﻭﺯ ﻭ ﺷﺐ ﺗﻨﻈﻴﻢ ﻛﻨﻴﺪ [BRIGHTNESS] .[: ﺭﻭﺯ ﻳﺎ ﺷﺐ ﺭﺍ ﺍﻧﺘﺨﺎﺏ ﻛﻨﻴﺪNIGHT]/[DAY] 1 (.2 ﻗﺴﻤﺘﯽ ﺭﺍ ﺍﻧﺘﺨﺎﺏ ﻛﻨﻴﺪ. )ﺑﻪ ﺗﺼﻮﻳﺮ ﺳﺘﻮﻥ ﺳﻤﺖ ﺭﺍﺳﺖ ﺭﺟﻮﻉ ﻛﻨﻴﺪ .[: ﺳﻄﺢ...
- Page 47 ﺗﻨﻈﻴﻤﺎﺕ ﺻﺪﺍ ﺗﻨﻈﻴﻤﺎﺕ ﺧﺮﻭﺟﯽ ﺑﻠﻨﺪﮔﻮ .[: ﻟﻐﻮ ﻣﻰ ﺷﻮﺩOFF] [: ﺧﺮﻭﺟﯽ ﺳﺎﺏ ﻭﻭﻓﺮ ﺭﺍ ﺭﻭﺷﻦ ﻣﯽ ﻛﻨﺪ. ؛ON] [SPK/PRE OUT] 3*[SUBWOOFER SET] [: ﻫﻤﻴﻪ ﺳﻴﻨﮕﺎﻟﻬﺎ ﺍﺯ ﻃﺮﻳﻖ ﺳﺎﺏ ﻭﻭﻓﺮ ﺍﺭﺳﺎﻝ ﻣﯽ ﺷﻮﻧﺪ. ؛FRQ THROUGH] [، ﺍﻧﺘﺨﺎﺏSPK/PRE OUT] ﺑﺎ ﺗﻮﺟﻪ ﺑﻪ ﻧﻮﻉ ﺍﺗﺼﺎﻝ ﺑﻠﻨﺪﮔﻮﻫﺎ، ﺗﻨﻈﻴﻤﺎﺕ ﺧﺮﻭﺟﯽ ﺭﺍ ﺑﺮﺍی ﺑﻠﻨﺪﮔﻮﻫﺎ 1*[SUBWOOFER LPF] [: ﺳﻴﮕﻨﺎﻝ...
- Page 48 ﺗﻨﻈﻴﻤﺎﺕ ﺻﺪﺍ ﺳﺎﻳﺮ ﺗﻨﻈﻴﻤﺎﺕ .ﺗﻨﻈﻴﻤﺎﺕ ﺻﺪﺍی ﺧﻮﺩ ﺭﺍ ﺑﺮﺍی ﻫﺮﻳﮏ ﺍﺯ ﻣﻨﺒﻊ ﻫﺎ ﺗﻨﻈﻴﻢ ﻣﯽ ﻛﻨﺪ [PRO EQ] .[ ﺫﺧﻴﺮﻩ ﻣﯽ ﺷﻮﺩPRESET EQ] [ ﺩﺭUSER] • ﺗﻨﻈﻴﻤﺎﺕ ﺑﻪ ﻧﺎﻡ .ﺭﺍ ﻓﺸﺎﺭ ﺩﺍﺩﻩ ﻭ ﻧﮕﻪ ﺩﺍﺭﻳﺪ [ ﺗﺄﺛﻴﺮEASY EQ] • ﻣﻤﻜﻦ ﺍﺳﺖ ﺗﻨﻈﻴﻤﺎﺕ ﺍﻧﺠﺎﻡ ﺷﺪﻩ ﺑﺮ ﺗﻨﻈﻴﻤﺎﺕ ﻓﻌﻠﯽ .ﺑﮕﺬﺍﺭﺩ...
- Page 49 ﺗﻨﻈﻴﻤﺎﺕ ﺻﺪﺍ ﺑﺎ ﻓﻴﺶ ﻭﺭﻭﺩی ﻛﻤﻜﯽ ﻣﯽ ﺗﻮﺍﻧﻴﺪ ﺑﻪ ﺁﻫﻨﮓ ﻫﺎی ﺭﻭی ﻳﮏ ﺩﺳﺘﮕﺎﻩ ﭘﺨﺶ ﻛﻨﻨﺪﻩ ﺻﻮﺗﯽ ﻗﺎﺑﻞ ﺣﻤﻞ ﮔﻮﺵ .ﺩﻫﻴﺪ :ﺁﻣﺎﺩﻩ ﺳﺎﺯ ﻫﺎ (5 [ ﺭﺍ ﺍﻧﺘﺨﺎﺏ ﻛﻨﻴﺪ. )ﺻﻔﺤﻪON] [ ﮔﺰﻳﻨﻪSOURCE SELECT] [ ﺩﺭBUILT-IN AUX] ﺑﺮﺍی ﺷﺮﻭﻉ ﺑﻪ ﮔﻮﺵ ﻛﺮﺩﻥ ﻛﻨﻴﺪ .ﻳﮏ...
- Page 50 ﺟﺴﺘﺠﻮی ﺳﺮﻳﻊ ﺭﻭی ﺻﻔﺤﻪ ﺟﻠﻮﻳﯽ ﺑﻪ .ﺍﮔﺮ ﺗﻌﺪﺍﺩ ﻓﺎﻳﻞ ﻫﺎی ﺷﻤﺎ ﺑﺴﻴﺎﺭ ﺯﻳﺎﺩ ﺍﺳﺖ، ﻣﯽ ﺗﻮﺍﻧﻴﺪ ﺩﺭ ﺑﻴﻦ ﺁﻧﻬﺎ ﺑﻪ ﺳﺮﻋﺖ ﺟﺴﺘﺠﻮ ﻛﻨﻴﺪ ﺗﻜﺮﺍﺭ ﭘﺨﺶ . 4 ﺭﺍ ﺑﻄﻮﺭ ﻣﻜﺮﺭ ﻓﺸﺎﺭ ﺩﻫﻴﺪB :[ALL REPEAT]/[FOLDER REPEAT]/[TRACK REPEAT] .ﺭﺍ ﻓﺸﺎﺭ ﺩﻫﻴﺪ FLAC/WAV/WMA/MP3 ﻓﺎﻳﻞ ﻫﺎی .ﺟﻬﺖ...
- Page 51 ﺭﺍﺩﻳﻮ PTY ﻛﺪ USB ﻭﺻﻞ ﻛﺮﺩﻥ ﺩﺳﺘﮕﺎﻩ ،[SCIENCE] ،[CULTURE] ،[DRAMA] ،[EDUCATE] ،[SPORT] ،[INFO] ،[AFFAIRS] ،[NEWS] ،[EASY M] ([، )ﻣﻮﺯﻳﻚROCK M] ([، )ﻣﻮﺯﻳﻚPOP M] ([، )ﻣﻮﺯﻳﻚVARIED] USB ﺗﺮﻣﻴﻨﺎﻝ ﻭﺭﻭﺩ ،[FINANCE] ،[WEATHER] ،[OTHER M] ([، )ﻣﻮﺯﻳﻚCLASSICS] ،[LIGHT M] ()ﻣﻮﺯﻳﻚ ،[COUNTRY] ،[JAZZ] ،[LEISURE] ،[TRAVEL] ،[PHONE IN] ،[RELIGION] ،[SOCIAL] ،[CHILDREN] USB ﺩﺳﺘﮕﺎﻩ...
- Page 52 ﺭﺍﺩﻳﻮ ﻳﮏ ﺍﻳﺴﺘﮕﺎﻩ ﺫﺧﻴﺮﻩ ﺷﺪﻩ ﺭﺍ ﺍﻧﺘﺨﺎﺏ ﻛﻨﻴﺪ [: ﺣﺪﺍﻛﺜﺮ 81 ﺍﻳﺴﺘﮕﺎﻩ ﺭﺍﺩﻳﻮﻳﯽSSM 13–18]/[SSM 07–12]/[SSM 01–06] [SSM] ﺍﺯ ﭘﻴﺶ ﺗﻨﻈﻴﻢ ﻣﯽ ﻛﻨﺪ. ﻭﻗﺘﯽ 6 ﺍﻳﺴﺘﮕﺎﻩFM ﺭﺍ ﺑﻪ ﻃﻮﺭ ﺧﻮﺩﻛﺎﺭ ﺩﺭ ﻣﻮﺝ .ﻳﻜﯽ ﺍﺯ ﺩﻛﻤﻪ ﻫﺎی ﺷﻤﺎﺭﻩ ﺩﺍﺭ )1 ﺗﺎ 6( ﺭﺍ ﻓﺸﺎﺭ ﺩﻫﻴﺪ “...
- Page 53 ﺭﺍﺩﻳﻮ ﺷﺮﻭﻉ ﺑﻜﺎﺭ [CLOCK] ( ﺩﺭCT) [: ﺳﺎﻋﺖ ﺑﻪ ﻃﻮﺭ ﺧﻮﺩﻛﺎﺭ ﺑﺎ ﺍﺳﺘﻔﺎﺩﻩ ﺍﺯ ﺩﺍﺩﻩ ﻫﺎی ﺳﺎﻋﺖON] [TIME SYNC] ( ﺗﻨﻈﻴﻢ ﻣﯽFM )ﺳﻴﺴﺘﻢ ﺩﺍﺩﻩ ﻫﺎی ﺭﺍﺩﻳﻮFM Radio Data System ﺳﻴﮕﻨﺎﻝ .[: ﻟﻐﻮ ﻣﻰ ﺷﻮﺩOFF] ﺷﻮﺩ. ؛ [: ﺣﺘﯽ ﺯﻣﺎﻧﻴﻜﻪ ﺩﺳﺘﮕﺎﻩ ﺧﺎﻣﻮﺵ ﺍﺳﺖ، ﺳﺎﻋﺖ ﻧﻤﺎﻳﺶ ﺩﺍﺩﻩ ﻣﯽON] [CLOCK DISPLAY] .[: ﻟﻐﻮ...
- Page 54 .()ﺍﺭﺗﻘﺎ ﻓﻌﺎﻝ ﻧﻴﺴﺖ .ﭘﻴﭻ ﻣﻴﺰﺍﻥ ﺻﺪﺍ ﺭﺍ ﺑﭽﺮﺧﺎﻧﻴﺪ ﺗﺎ ﺗﻨﻈﻴﻤﺎﺕ ﺍﻧﺠﺎﻡ ﺷﻮﻧﺪ ﻭ ﺳﭙﺲ ﭘﻴﭻ ﺭﺍ ﻓﺸﺎﺭ ﺩﻫﻴﺪ ﺑﺮﺍی ﺍﻃﻼﻉ ﺍﺯ ﺟﺰﺋﻴﺎﺕ ﺩﺭﺑﺎﺭﻩ ﺑﻪ ﺭﻭﺯ ﺭﺳﺎﻧﯽ ﻣﻴﺎﻥ ﺍﻓﺰﺍﺭ، ﺑﻪ .< ﻣﺮﺍﺟﻌﻪ ﻛﻨﻴﺪhttp://www.jvc.net/cs/car/> .”ﺳﺎﻝ“ ﺗﻨﻈﻴﻢ ﻛﻨﻴﺪ “ﺗﺎﺭﻳﺦ ﺭﺍ ﺩﺭ ﻗﺎﻟﺐ ”ﺭﻭﺯ...
- Page 55 ﻧﻜﺎﺕ ﺍﻭﻟﻴﻪ ﺻﻔﺤﻪ ﺟﻠﻮﻳﯽ (RM-RK52) ﻛﻨﺘﺮﻝ ﺍﺯ ﺭﺍﻩ ﺩﻭﺭ ﺩﻛﻤﻪ ﻭﻟﻮﻡ *ﭘﻨﺠﺮﻩ ﻧﻤﺎﻳﺶ (.ﺳﻨﺴﻮﺭ ﺍﺯ ﺭﺍﻩ ﺩﻭﺭ )ﺩﺭ ﺑﺮﺍﺑﺮ ﻧﻮﺭ ﺧﻮﺭﺷﻴﺪ ﻗﺮﺍﺭ ﻧﺪﻫﻴﺪ ﺩﺭ ﺻﻮﺭﺕ ﺍﺳﺘﻔﺎﺩﻩ ﺑﺮﺍی ﺍﻭﻟﻴﻦ ﺑﺎﺭ، ﻭﺭﻕ ﻋﺎﻳﻖ ﺭﺍ .ﺑﻴﺮﻭﻥ ﺑﻴﺎﻭﺭﻳﺪ ﺩﻛﻤﻪ ﺟﺪﺍﺳﺎﺯی .* ﻓﻘﻂ ﺟﻬﺖ ﺗﺸﺮﻳﺢ ﻧﺤﻮﻩ...
- Page 56 ﻗﺒﻞ ﺍﺯ ﺍﺳﺘﻔﺎﺩﻩ ﻣﻬﻢ • ﺑﺴﺘﻪ ﺑﻪ ﻧﻮﻉ ﺧﻮﺩﺭﻭﻫﺎ، ﻭﻗﺘﯽ ﺩﺳﺘﮕﺎﻩ ﺭﺍ ﺭﻭﺷﻦ ﻛﻨﻴﺪ ﻭ ﺳﻴﻢ ﻛﻨﺘﺮﻝ ﺁﻧﺘﻦ ﻣﺘﺼﻞ ﺑﺎﺷﺪ، ﺁﻧﺘﻦ ﺑﻪ ﻃﻮﺭ ﺧﻮﺩﻛﺎﺭ ﺑﺎﺯ ﺧﻮﺍﻫﺪ ﺷﺪ )ﺻﻔﺤﻪ 81(. ﻭﻗﺘﯽ ﺩﺭ ﻣﻜﺎﻧﯽ ﺑﺎ ﺳﻘﻒ ﻛﻮﺗﺎﻩ ﭘﺎﺭک ﻣﯽ ﻛﻨﻴﺪ، ﺩﺳﺘﮕﺎﻩ ﺭﺍ ﺧﺎﻣﻮﺵ •...
- Page 57 ﻓﻬﺮﺳﺖ ﻣﻄﺎﻟﺐ 3 ................ﻗﺒﻞ ﺍﺯ ﺍﺳﺘﻔﺎﺩﻩ ﭼﻄﻮﺭ ﺍﻳﻦ ﺩﻓﺘﺮﭼﻪ ﺭﺍﻫﻨﻤﺎ ﺭﺍ ﺑﺎﻳﺪ ﺧﻮﺍﻧﺪ • ﻧﻤﺎﻳﺸﮕﺮﻫﺎ ﻭ ﺟﻠﻮﻗﺎﺏ ﻫﺎﻳﯽ ﻛﻪ ﺩﺭ ﺍﻳﻦ ﺩﻓﺘﺮﭼﻪ ﺭﺍﻫﻨﻤﺎ ﻧﻤﺎﻳﺶ ﺩﺍﺩﻩ ﺷﺪﻩ ﺍﻧﺪ ﺑﺮﺍی ﺗﻮﺿﻴﺢ ﺷﻔﺎﻑ ﺍﺯ 4 ................... ﻧﻜﺎﺕ ﺍﻭﻟﻴﻪ ﻋﻤﻠﻴﺎﺕ ﻣﯽ ﺑﺎﺷﻨﺪ. ﺑﻪ ﻫﻤﻴﻦ ﻋﻠﺖ، ﻣﻤﻜﻦ ﺍﺳﺖ ﻇﺎﻫﺮ ﺁﻧﻬﺎ ﺑﺎ ﻧﻤﺎﻳﺸﮕﺮﻫﺎ ﻳﺎ ﺟﻠﻮﻗﺎﺏ ﻫﺎی ﺍﺻﻠﯽ 5 ...................
- Page 58 ﺍﻟﻤﻮﺍﺻﻔﺎﺕ 5.78 ﻣﻴﺠﺎﻫﺮﺗﺰ — 0.801 ﻣﻴﺠﺎﻫﺮﺗﺰ ﻧﻄﺎﻕ ﺍﻟﺘﺮﺩﺩ MPEG-1/2 Audio Layer-3 ﻣﺘﻮﺍﻓﻖ ﻣﻊ MP3 ﻓﻚ ﺷﻔﺮﺓ ()05 ﻛﻴﻠﻮ ﻫﺮﺗﺰ ﻟﻠﺨﻄﻮﺓ Windows Media Audio ﻣﺘﻮﺍﻓﻖ ﻣﻊ WMA ﻓﻚ ﺷﻔﺮﺓ ( 2.8 )17.0 ﻣﻴﻜﺮﻭ ﻓﻮﻟﺖ/ 57 ﺍﻭﻡdBf ﺍﻟﺤﺴﺎﺳﻴﺔ ﺍﻟﻘﺎﺑﻠﺔ ﻟﻼﺳﺘﺨﺪﺍﻡ ﺧﻄﻲPCM WAV ﻓﻚ...
- Page 59 ﺍﻟﺘﺮﻛﻴﺐ/ﺍﻟﺘﻮﺻﻴﻞ ﺗﻮﺻﻴﻞ ﺍﻷﺳﻼﻙ (ﻛﺎﺑﻞ ﺍﻹﺷﺎﺭﺓ )ﻏﻴﺮ ﻣﺮﻓﻘﺔ ﻫﺎﻡ ﺍﻟﺨﺮﺝ ﺍﻟﺨﻠﻔﻲ/ﺧﺮﺝ 1*JVC ﻣﻀﺨﻢ ﻧﻨﺼﺢ ﺑﺘﺮﻛﻴﺐ ﺍﻟﺠﻬﺎﺯ ﻣﻊ ﺿﻔﻴﺮﺓ ﺍﺳﻼﻙ ﻛﻬﺮﺑﺎﺋﻴﺔ ﺧﺎﺻﺔ ﺍﻟﺼﺒﻮﻭﻓﺮ ﻣﺘﻮﻓﺮﺓ ﺗﺠﺎﺭﻳﺎ ﻣﺨﺼﺼﺔ ﻟﺴﻴﺎﺭﺗﻚ ﻭﺇﻳﻜﺎﻝ ﻫﺬﻩ ﺍﻟﻤﻬﻤﺔ ﻟﻠﻤﺨﺘﺼﻴﻴﻦ ﻭﺫﻟﻚ ﻟﻀﻤﺎﻥ ﺳﻼﻣﺘﻚ. ﺍﺳﺘﺸﻴﺮ ﺑﺎﺋﻊ ﺃﺟﻬﺰﺓ .ﺍﻟﺼﻮﺗﻴﺎﺕ ﺍﻟﺨﺎﺻﺔ ﺑﺎﻟﺴﻴﺎﺭﺍﺕ ﺍﻟﻘﺮﻳﺐ ﻣﻨﻚ...
- Page 60 ﺍﻟﺘﺮﻛﻴﺐ/ﺍﻟﺘﻮﺻﻴﻞ (ﺗﺮﻛﻴﺐ ﺍﻟﻮﺣﺪﺓ )ﺑﺪﻭﻥ ﺇﻃﺎﺭ ﺍﻟﺘﺮﻛﻴﺐ (ﺗﺮﻛﻴﺐ ﺍﻟﻮﺣﺪﺓ )ﺩﺍﺧﻞ ﺗﺎﺑﻠﻮ ﺍﻟﺴﻴﺎﺭﺓ .ﺍﻧﺰﻉ ﺇﻃﺎﺭ ﺍﻟﺘﺮﻛﻴﺐ ﻭﻟﻮﺣﺔ ﺍﻟﺘﻬﻴﺌﺔ ﻣﻦ ﺍﻟﻮﺣﺪﺓ ﻗﻢ ﺑﻤﺤﺎﺫﺍﺓ ﺍﻟﺘﺠﺎﻭﻳﻒ ﺍﻟﻤﻮﺟﻮﺩﺓ ﻓﻲ ﺍﻟﺠﻬﺎﺯ )ﻓﻲ ﻛﻼ ﺍﻟﺠﺎﻧﺒﻴﻦ( ﻣﻊ ﺭﻑ ﺍﻟﺘﺮﻛﻴﺐ ﺑﺎﻟﺴﻴﺎﺭﺓ ﻭﻗﻢ ﺑﺘﺜﺒﻴﺖ ﺍﻟﺠﻬﺎﺯ ﺑﺎﺳﺘﺨﺪﺍﻡ ﺍﻟﺒﺮﺍﻏﻲ )ﺍﻟﻤﺘﻮﻓﺮﺓ .(ﻓﻲ ﺍﻟﺴﻮﻕ ﺍﺳﺘﺨﺪﻡ ﺍﻟﺒﺮﺍﻏﻲ ﺍﻟﻤﺤﺪﺩﺓ ﻓﻘﻂ. ﻓﻘﺪ ﻳﺴﺒﺐ ﺍﺳﺘﺨﺪﺍﻡ ﺍﻟﺒﺮﺍﻏﻲ ﻏﻴﺮ ﺍﻟﺼﺤﻴﺤﺔ ﺗﻠﻔ ﹰ ﺎ .ﻟﻠﺠﻬﺎﺯ...
- Page 61 ﺍﻟﺘﺮﻛﻴﺐ/ﺍﻟﺘﻮﺻﻴﻞ ﺍﻹﺟﺮﺍﺀ ﺍﻷﺳﺎﺳﻲ .ﻫﺬﺍ ﺍﻟﻘﺴﻢ ﻫﻮ ﻟﻠﻤﺸﺒﺖ ﺍﻟﻤﺤﺘﺮﻑ ﻣﻦ ﺑﻄﺎﺭﻳﺔ ﺍﻧﺰﻉ ﺍﻟﻤﻔﺘﺎﺡ ﻣﻦ ﻣﻔﺘﺎﺡ ﺍﻹﺷﻌﺎﻝ، ﺛﻢ ﺍﻓﺼﻞ ﺍﻟﻄﺮﻑ ﻟﺪﻭﺍﻋﻲ ﺍﻟﺴﻼﻣﺔ، ﺍﺗﺮﻙ ﻣﻬﻤﺔ ﺗﻮﺻﻴﻞ ﺍﻷﺳﻼﻙ ﻭﺍﻟﺘﺮﻛﻴﺐ ﻟﻠﻔﻨﻴﻴﻦ ﺍﻟﻤﺨﺘﺼﻴﻦ. ﺍﺳﺘﺸﻴﺮ ﺑﺎﺋﻊ .ﺍﻟﺴﻴﺎﺭﺓ .ﺃﺟﻬﺰﺓ ﺍﻟﺼﻮﺗﻴﺎﺕ ﺍﻟﺨﺎﺻﺔ ﺑﺎﻟﺴﻴﺎﺭﺍﺕ .ﺗﻮﺻﻴﻞ ﺍﻷﺳﻼﻙ ﺑﺸﻜﻞ ﺻﺤﻴﺢ ﺗﺤﺬﻳﺮ .18 ﺭﺍﺟﻊ “ﺗﻮﺻﻴﻞ ﺍﻷﺳﻼﻙ” ﻋﻠﻰ ﺻﻔﺤﺔ .•...
- Page 62 ﺍﻟﺒﺤﺚ ﻋﻦ ﺍﻻﻋﻄﺎﻝ ﻭﺍﻻﺻﻼﺡ ﻣﻌﺎﻟﺠﺔ ﺍﻷﻋﻄﺎﻝ ﺍﻻﻋﺮﺍﺽ ﻣﻌﺎﻟﺠﺔ ﺍﻷﻋﻄﺎﻝ ﺍﻻﻋﺮﺍﺽ • ﺗﺤﻘﻖ ﻣﺎ ﺇﺫﺍ ﻛﺎﻥ ﺍﻟﺠﻬﺎﺯ ﺍﻟﻤﻮﺻﻞ ﻣﺘﻮﺍﻓﻘ ﹰ ﺎ ﻣﻊ ﺗﻮﻣﺾ ﺭﺳﺎﻟﺔ • ﺍﺿﺒﻂ ﻣﺴﺘﻮﻯ ﻗﻮﺓ ﺍﻟﺼﻮﺕ ﻋﻠﻰ ﺍﻓﻀﻞ ﻣﺴﺘﻮﻯ .ﻻ ﻳﻤﻜﻦ ﺳﻤﺎﻉ ﺍﻟﺼﻮﺕ ﻫﺬﻩ ﺍﻟﻮﺣﺪﺓ ﻭﺗﺄﻛﺪ ﻣﻦ ﺃﻥ ﺍﻟﻤﻠﻔﺎﺕ ﺑﺘﻨﺴﻴﻘﺎﺕ “...
- Page 63 ﺍﺳﻢ ﺍﻟﻤﺼﺪﺭ .ﺍﻋﺘﻤﺎﺩ ﹰ ﺍ ﻋﻠﻰ ﺃﻧﻮﺍﻉ ﺃﻭ ﺣﺎﻻﺕ ﺍﻟﻮﺳﻂ ﺃﻭ ﺍﻟﺠﻬﺎﺯ • ﻟﻠﺤﺼﻮﻝ ﻋﻠﻰ ﻣﻌﻠﻮﻣﺎﺕ ﻣﻔﺼﻠﺔ ﻭﻣﻼﺣﻈﺎﺕ ﺑﺨﺼﻮﺹ ﻣﻠﻔﺎﺕ ﺍﻟﺼﻮﺕ ﺍﻟﻘﺎﺑﻠﺔ .<www.jvc.net/cs/car/audiofile/> ﻟﻠﺘﺸﻐﻴﻞ، ﻗﻢ ﺑﺰﻳﺎﺭﺓ USB ﺣﻮﻝ ﺃﺟﻬﺰﺓ .USB ﻋﻦ ﻃﺮﻳﻖ ﻣﺠﻤﻊ ﻣﺮﻛﺰﻱUSB • ﻻ ﻳﻤﻜﻨﻚ ﺗﻮﺻﻴﻞ ﺟﻬﺎﺯ...
- Page 64 ﺇﻋﺪﺍﺩﺍﺕ ﺍﻟﺸﺎﺷﺔ ﺗﺤﺪﻳﺪ ﻣﻨﻄﻘﺔ ﻹﻋﺪﺍﺩﺍﺕ ﺍﻟﺴﻄﻮﻉ .ﺍﺿﺒﻂ ﺍﻟﺴﻄﻮﻉ ﻟﻠﻨﻬﺎﺭ ﻭﺍﻟﻠﻴﻞ ﺑﺼﻮﺭﺓ ﻣﻨﻔﺼﻠﺔ [BRIGHTNESS] .[: ﻳﺤﺪﺩ ﺍﻟﻨﻬﺎﺭ ﺃﻭ ﺍﻟﻠﻴﻞNIGHT]/[DAY] 1 (.2 ﺍﺧﺘﺮ ﻣﻨﻄﻘﺔ. )ﺭﺍﺟﻊ ﺍﻟﺸﻜﻞ ﺍﻟﺘﻮﺿﻴﺤﻲ ﻋﻠﻰ ﺍﻟﻌﻤﻮﺩ ﺍﻻﻳﻤﻦ .[: ﻳﻀﺒﻂ ﻣﺴﺘﻮﻯ ﺍﻟﺴﻄﻮﻉLEVEL 31] [ ﺇﻟﻰLEVEL 00] 3 [: ﻳﻤﺮﺭ ﺍﻟﻤﻌﻠﻮﻣﺎﺕ ﺍﻟﻤﻌﺮﻭﺿﺔ ﻣﺮﺓ ﻭﺍﺣﺪﺓ. ؛SCROLL ONCE] 2*[TEXT SCROLL] [: ﻳﻜﺮﺭ...
- Page 65 ﺇﻋﺪﺍﺩﺍﺕ ﺍﻟﺼﻮﺕ ﺇﻋﺪﺍﺩﺍﺕ ﺧﺮﺝ ﺍﻟﺴﻤﺎﻋﺔ .[: ﺍﻟﻐﺎﺀOFF] [: ﻳﻘﻮﻡ ﺑﺘﺸﻐﻴﻞ ﺧﺮﺝ ﺍﻟﺼﺒﻮﻭﻓﺮ. ؛ON] 3* [SUBWOOFER SET] [SPK/PRE OUT] [: ﻳﺘﻢ ﺇﺭﺳﺎﻝ ﻛﻞ ﺍﻹﺷﺎﺭﺍﺕ ﺇﻟﻰ ﺍﻟﺼﺒﻮﻭﻓﺮ. ؛FRQ THROUGH] .[، ﺍﻋﺘﻤﺎﺩﺍ ﻋﻠﻰ ﻃﺮﻳﻘﺔ ﺗﻮﺻﻴﻞ ﺍﻟﺴﻤﺎﻋﺔSPK/PRE OUT] ﺍﺧﺘﺮ ﺇﻋﺪﺍﺩ ﺍﻟﺨﺮﺝ ﻟﻠﺴﻤﺎﻋﺎﺕ 1* [SUBWOOFER LPF] [: ﺗ...
- Page 66 ﺇﻋﺪﺍﺩﺍﺕ ﺍﻟﺼﻮﺕ ﺇﻋﺪﺍﺩﺍﺕ ﺃﺧﺮﻯ .ﻳﻀﺒﻂ ﺍﻋﺪﺍﺩﺍﺕ ﺍﻟﺼﻮﺕ ﺍﻟﺨﺎﺻﺔ ﺑﻚ ﻟﻜﻞ ﻣﺼﺪﺭ [PRO EQ] .[PRESET EQ] [ ﻓﻲ ﺍﻟﻮﺿﻊUSER] • ﺗﻢ ﺗﺨﺰﻳﻦ ﺍﻹﻋﺪﺍﺩ ﻟﻠﺒﻨﺪ ﺍﺿﻐﻂ ﻣﻊ ﺍﻻﺳﺘﻤﺮﺍﺭ ﻋﻠﻰ .[EASY EQ] • ﺍﻹﻋﺪﺍﺩﺍﺕ ﺍﻟﺘﻲ ﺗﻢ ﺗﻨﻔﻴﺬﻫﺎ ﻗﺪ ﺗﺆﺛﺮ ﻋﻠﻰ ﺇﻋﺪﺍﺩﺍﺕ ﺃﺩﺭ ﻗﺮﺹ ﻣﺴﺘﻮﻯ ﺍﻟﺼﻮﺕ ﻟﺘﺤﺪﻳﺪ ﺑﻨﺪ )ﺭﺍﺟﻊ ﺍﻟﺠﺪﻭﻝ ﺍﻟﺘﺎﻟﻲ(، ﺛﻢ ﺍﺿﻐﻂ .[: ﺍﺧﺘﺮ...
- Page 67 ﺇﻋﺪﺍﺩﺍﺕ ﺍﻟﺼﻮﺕ .ﻳﻤﻜﻦ ﺍﻻﺳﺘﻤﺎﻉ ﺍﻟﻰ ﺍﻟﻤﻮﺳﻴﻘﻰ ﻣﻦ ﻣﺸﻐﻞ ﺻﻮﺕ ﻣﺤﻤﻮﻝ ﻋﺒﺮ ﻣﻘﺒﺲ ﺍﻟﻤﺪﺧﻞ ﺍﻻﺿﺎﻓﻲ :ﺍﻟﺘﺤﻀﻴﺮ (5 [. )ﺻﻔﺤﺔSOURCE SELECT] [ ﻓﻲBUILT-IN AUX] [ ﻟـON] ﺑﺪﺀ ﺍﻻﺳﺘﻤﺎﻉ .(ﺍﻻﺗﺼﺎﻝ ﺑﺠﻬﺎﺯ ﻣﺸﻐﻞ ﺍﻟﺼﻮﺕ ﺍﻟﻤﺤﻤﻮﻝ )ﻣﺘﺎﺡ ﻟﻠﺸﺮﺍﺀ ﺣﺪﺩ ﺟﻬﺎﺯ ﻣﻌﺎﺩﻝ ﺍﻟﻀﺒﻂ ﺍﻟﻤﺴﺒﻖ ﻣﺒﺎﺷﺮﺓ ﻗﺎﺑﺲ ﺻﻐﻴﺮ ﻟﻠﺼﻮﺕ ﺍﻟﻤﺠﺴﻢ 5.3 ﻣﻢ ﻣﻊ .ﺑﺘﻜﺮﺍﺭ...
- Page 68 ﺑﺤﺚ ﺳﺮﻳﻊ ﻋﻠﻰ ﻏﻄﺎﺀ ﺍﻟﺤﻤﺎﻳﺔ ﺇﻟﻰ .ﺇﺫﺍ ﻛﺎﻧﺖ ﻟﺪﻳﻚ ﺍﻟﻜﺜﻴﺮ ﻣﻦ ﺍﻟﻤﻠﻔﺎﺕ، ﻳﻤﻜﻦ ﺍﻟﺒﺤﺚ ﺧﻼﻟﻬﺎ ﺑﺴﺮﻋﺔ . 4 ﺑﺘﻜﺮﺍﺭB ﺍﺿﻐﻂ ﺗﻜﺮﺍﺭ ﺍﻟﺘﺸﻐﻴﻞ ﺍﺿﻐﻂ :[ALL REPEAT]/[FOLDER REPEAT]/[TRACK REPEAT] .ﺍﺩﺭ ﻣﻘﺒﺾ ﻣﺴﺘﻮﻯ ﺍﻟﺼﻮﺕ ﻻﺧﺘﻴﺎﺭ ﻣﺠﻠﺪ/ﻗﺎﺋﻤﺔ، ﺛﻢ ﺍﺿﻐﻂ ﺍﻟﻤﻘﺒﺾ FLAC/WAV/WMA/MP3 ﻣﻠﻒ .ﺃﺩﺭ ﻗﺮﺹ ﻣﺴﺘﻮﻯ ﺍﻟﺼﻮﺕ ﺑﺴﺮﻋﺔ ﻟﺘﺼﻔﺢ ﺍﻟﻘﺎﺋﻤﺔ ﺑﺴﺮﻋﺔ ....
- Page 69 ﺍﻟﺮﺍﺩﻳﻮ PTY ﺭﻣﺰ USB ﺗﻮﺻﻴﻞ ﺟﻬﺎﺯ ،[CULTURE] ،[DRAMA] ،[EDUCATE] ،[SPORT] ،[INFO] ،[AFFAIRS] ،[NEWS] ،[ROCK M] ([، )ﻣﻮﺳﻴﻘﻰPOP M] ([، )ﻣﻮﺳﻴﻘﻰVARIED] ،[SCIENCE] USB ﻃﺮﻑ ﺗﻮﺻﻴﻞ ﺇﺩﺧﺎﻝ ،[CLASSICS] ،[LIGHT M] ([، )ﻣﻮﺳﻴﻘﻰEASY M] ()ﻣﻮﺳﻴﻘﻰ ،[SOCIAL] ،[CHILDREN] ،[FINANCE] ،[WEATHER] ،[OTHER M] ()ﻣﻮﺳﻴﻘﻰ ،[COUNTRY] ،[JAZZ] ،[LEISURE] ،[TRAVEL] ،[PHONE IN] ،[RELIGION] USB ﺟﻬﺎﺯ...
- Page 70 ﺍﻟﺮﺍﺩﻳﻮ ﺍﺧﺘﺮ ﻣﺤﻄﺔ ﻣﺨﺰﻧﺔ [: ﻳﺠﺮﻱ ﺿﺒ ﻄ ﹰ ﺎ ﻣﺴﺒﻘ ﹰ ﺎSSM 13–18]/[SSM 07–12]/[SSM 01–06] [SSM] . ﻳﺘﻮﻗﻒ ﻭﻣﻴﺾFM ﺃﻭﺗﻮﻣﺎﺗﻴﻜﻴ ﹰ ﺎ ﻟﻤﺎ ﻳﺼﻞ ﺇﻟﻰ 81 ﻣﺤﻄﺔ ﻟﻤﻮﺟﺔ .(6 ﺍﺿﻐﻂ ﻭﺍﺣﺪ ﻣﻦ ﺃﺯﺭﺍﺭ ﺍﻷﺭﻗﺎﻡ ﺍﻟﺘﺎﻟﻴﺔ )ﻣﻦ 1 ﺇﻟﻰ [SSM 13–18]/[SSM 07–12] “ ﻓﻮﺭ ﺗﺨﺰﻳﻦ ﺃﻭﻝ 6 ﻣﺤﻄﺎﺕ. ﺣﺪﺩSSM” ()ﺃﻭ...
- Page 71 ﺍﻟﺮﺍﺩﻳﻮ ﺍﻟﺸﺮﻭﻉ ﻓﻲ ﺍﻟﻌﻤﻞ [CLOCK] Clock Time [: ﻳ ﹸ ﻀﺒﻂ ﻭﻗﺖ ﺍﻟﺴﺎﻋﺔ ﺗﻠﻘﺎﺋﻴ ﹰ ﺎ ﺑﺎﺳﺘﺨﺪﺍﻡ ﺑﻴﺎﻧﺎﺕON] [TIME SYNC] . ؛FM Radio Data System ( ﺍﻟﻤﻮﺟﻮﺩ ﻓﻲ ﺇﺷﺎﺭﺓ ﻧﻈﺎﻡ ﺑﻴﺎﻧﺎﺕ ﺭﺍﺩﻳﻮCT) .[: ﺍﻟﻐﺎﺀOFF] [: ﻳﺘﻢ ﻋﺮﺽ ﻭﻗﺖ ﺍﻟﺴﺎﻋﺔ ﻋﻠﻰ ﺍﻟﺸﺎﺷﺔ ﺣﺘﻰ ﻋﻨﺪﻣﺎ ﺗﻜﻮﻥON] [CLOCK DISPLAY] .[: ﺍﻟﻐﺎﺀOFF] ﺍﻟﻮﺣﺪﺓ...
- Page 72 .(ﻣﻨﺸﻄﺔ ﻟﻀﺒﻂ ﺍﻟﺘﺎﺭﻳﺦ ﻟﻠﺤﺼﻮﻝ ﻋﻠﻰ ﺗﻔﺎﺻﻴﻞ ﺣﻮﻝ ﻛﻴﻔﻴﺔ ﺗﺤﺪﻳﺚ ﺍﻟﺒﺮﻧﺎﻣﺞ ﺍﻟﺜﺎﺑﺖ، ﻗﻢ .[، ﺛﻢ ﺍﺿﻐﻂ ﻋﻠﻰ ﺍﻟﻘﺮﺹDATE SET] ﺃﺩﺭ ﻗﺮﺹ ﻣﺴﺘﻮﻯ ﺍﻟﺼﻮﺕ ﻟﺘﺤﺪﻳﺪ .<http://www.jvc.net/cs/car/> ﺑﺰﻳﺎﺭﺓ .ﺃﺩﺭ ﻗﺮﺹ ﻣﺴﺘﻮﻯ ﺍﻟﺼﻮﺕ ﻟﺘﺤﺪﻳﺪ ﺍﻹﻋﺪﺍﺩﺍﺕ، ﺛﻢ ﺍﺿﻐﻂ ﻋﻠﻰ ﺍﻟﻘﺮﺹ .”“ﺳﻨﺔ ”ﺍﺿﺒﻂ ﺍﻟﺘﺎﺭﻳﺦ ﺑﺎﻟﺘﺮﺗﻴﺐ “ﻳﻮﻡ...
- Page 73 ﺃ ﹶ ﺳﺎﺳ ﹺ ﻴ ﹼ ﺎﺕ (RM-RK52) ﻭﺣﺪﺓ ﺍﻟﺘﺤﻜﻢ ﻋﻦ ﺑﻌﺪ ﻭﺍﺟﻬﺔ ﺍﻟﺠﻬﺎﺯ *ﻧﺎﻓﺬﺓ ﺍﻟﻌﺮﺽ ﻗﺮﺹ ﻣﺴﺘﻮﻯ ﺍﻟﺼﻮﺕ ﺣﺴﺎﺱ ﺍﻟﺘﺤﻜﻢ ﻋﻦ ﺑﻌﺪ (.)ﺗﺠﻨﺐ ﺍﻟﺘﻌﺮﻳﺾ ﻟﻀﻮﺀ ﺍﻟﺸﻤﺲ ﺍﻟﺴﺎﻃﻊ ﻗﻢ ﺑﺴﺤﺐ ﻏﻄﺎﺀ ﻋﺎﺯﻝ ﺍﻟﻜﻬﺮﺑﺎﺀ ﻋﻨﺪ ﺍﻻﺳﺘﺨﺪﺍﻡ .ﻷﻭﻝ ﻣﺮﺓ ﺯﺭ ﺍﻟﻔﺼﻞ .* ﻓﻘﻂ ﻟﻐﺮﺽ ﺍﻟﺘﻮﺿﻴﺢ ﻛﻴﻒ...
- Page 74 ﻗﺒﻞ ﺍﻻﺳﺘﺨﺪﺍﻡ ﻫﺎﻡ • ﻭﻓﻘﺎ ﻷﻧﻮﺍﻉ ﺍﻟﺴﻴﺎﺭﺍﺕ، ﺳﻴﺘﻢ ﺗﻤﺪﻳﺪ ﺍﻟﻬﻮﺍﺋﻲ ﺗﻠﻘﺎﺋﻴﺎ ﻋﻨﺪ ﺗﺸﻐﻴﻞ ﺍﻟﺠﻬﺎﺯ ﻋﻨﺪﻣﺎ ﻳﻜﻮﻥ ﺳﻠﻚ ﺍﻟﺘﺤﻜﻢ ﺑﺎﻟﻬﻮﺍﺋﻲ ﻣﻮﺻﻮﻻ )ﺻﻔﺤﺔ 81(. ﺍﻃﻔﺊ ﺍﻟﺠﻬﺎﺯ ﻋﻨﺪ ﺻﻒ ﺍﻟﺴﻴﺎﺭﺓ ﻓﻲ ﻣﻨﻄﻘﺔ • ﻟﻀﻤﺎﻥ ﺍﻻﺳﺘﺨﺪﻟﻢ ﺍﻟﻤﻨﺎﺳﺐ، ﻳﺮﺟﻰ ﻗﺮﺍﺀﺓ ﻫﺬﺍ ﺍﻟﺪﻟﻴﻞ ﺑﺘﻤﻌﻦ ﻗﺒﻞ ﺍﺳﺘﺨﺪﺍﻡ ﻫﺬﺍ ﺍﻟﻤﻨﺘﺞ. ﻣﻦ .ﺳﻘﻔﻬﺎ...
- Page 75 ﺍﻟﻤﺤﺘﻮﻳﺎﺕ 3 ................ﻗﺒﻞ ﺍﻻﺳﺘﺨﺪﺍﻡ ﻛﻴﻒ ﺗﻘﺮﺃ ﻫﺬﺍ ﺍﻟﺪﻟﻴﻞ 4 ................... ﺃ ﹶ ﺳﺎﺳ ﹺ ﻴ ﹼ ﺎﺕ • ﺍﻟﺸﺎﺷﺎﺕ ﻭﻭﺍﺟﻬﺎﺕ ﺍﻟﺠﻬﺎﺯ ﺍﻟﻤﻌﺮﻭﺿﺔ ﻓﻲ ﻫﺬﺍ ﺍﻟﺪﻟﻴﻞ ﻫﻲ ﻣﺠﺮﺩ ﺃﻣﺜﻠﺔ ﺗﺴﺘﺨﺪﻡ ﻟﺘﻘﺪﻳﻢ ﺷﺮﻭﺣﺎﺕ ﻭﺍﺿﺤﺔ ﻟﻌﻤﻠﻴﺎﺕ ﺍﻟﺘﺸﻐﻴﻞ. ﻭﻟﻬﺬﺍ ﺍﻟﺴﺒﺐ، ﻗﺪ ﺗﺨﺘﻠﻒ ﻋﻦ ﺍﻟﺸﺎﺷﺎﺕ ﺍﻭ ﻭﺍﺟﻬﺎﺕ 5 ...............
- Page 76 ﻋﺮﺑﻲ ﻓﺎﺭﺳﻰ KD-X172 ﺟﻬﺎﺯ ﺍﺳﺘﻘﺒﺎﻝ ﺍﻟﻮﺳﺎﺋﻂ ﺍﻟﺮﻗﻤﻴﺔ ﺩﻟﻴﻞ ﺍﻟﺘﻌﻠﻴﻤﺎﺕ ﮔﻴﺮﻧﺪﻩ ﺭﺳﺎﻧﻪ ﺩﻳﺠﻴﺘﺎﻝ ﺭﺍﻫﻨﻤﺎی ﺍﺳﺘﻔﺎﺩﻩ © 2019 JVCKENWOOD Corporation 0719DTSMDTJEIN...