Table of Contents
Advertisement
Quick Links
Advertisement
Table of Contents

Related Manuals for Bosch HBA574B 0Z Series


Summary of Contents for Bosch HBA574B 0Z Series
- Page 1 Oven HBA574B.0Z [en] User manual and installation instructions...
-
Page 2: Table Of Contents
en Safety ¡ Follow the safety instructions and warnings. Table of contents ¡ Keep the instruction manual and the product information safe for future refer- ence or for the next owner. USER MANUAL ¡ Check the appliance after unpacking it. Do not connect the appliance if it has been Safety .............. - Page 3 Safety en ▶ Never store combustible objects in the Hot steam may escape when you open the cooking compartment. appliance door. Whether or not you can see ▶ Never open the appliance door if there is steam depends on its temperature. smoke inside.
-
Page 4: Preventing Material Damage
en Preventing material damage ▶ Never operate an appliance with a cracked 1.6 Cleaning function or fractured surface. Follow these safety instructions when using ▶ Never pull on the power cord to unplug the the cleaning function. appliance. Always unplug the appliance at WARNING ‒ Risk of fire! the mains. -
Page 5: Environmental Protection And Saving Energy
Environmental protection and saving energy en When the cooking compartment is hot, any water in- Fruit juice dripping from the baking tray leaves stains side it will create steam. The change in temperature that cannot be removed. may cause damage. When baking very juicy fruit flans, do not pack too ▶... -
Page 6: Familiarising Yourself With Your Appliance
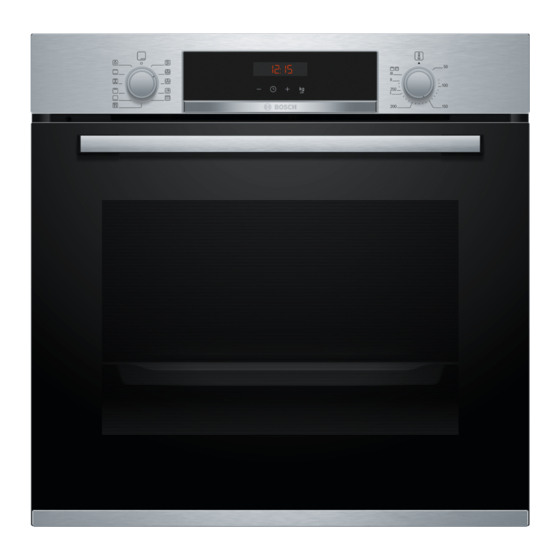
en Familiarising yourself with your appliance 4 Familiarising yourself with your appliance Familiarise yourself with the parts of your appliance. Buttons and display The buttons are touch-sensitive surfaces. To se- 4.1 Controls lect a function, simply press lightly on the relev- ant field. You can use the control panel to configure all functions The display shows symbols for active functions of your appliance and to obtain information about the... - Page 7 Familiarising yourself with your appliance en Symbol Type of heating What it's used for/how it works Gentle hot air Cook selected dishes gently on one level without preheating. The fan distributes the heat from the ring-shaped heating element in the back wall evenly around the cooking compartment.
-
Page 8: Accessories
en Accessories When you are preheating the appliance, the optimal Lighting time to place your food in the cooking compartment is The oven light lights up the cooking compartment. when the symbol first goes out. With most types of heating and functions, the lighting Notes lights up during operation. -
Page 9: Before Using For The First Time
You will find a comprehensive range of products for your appliance in our brochures and online: www.bosch-home.com Accessories vary from one appliance to another. When Baking tray Slide the tray, e.g. the universal pan, purchasing accessories, always quote the exact E.g. -
Page 10: Basic Operation
en Basic operation Keep the room ventilated while the appliance is Switch off the appliance after the specified cooking heating. time. Set the type of heating and temperature. Wait until the cooking compartment has cooled → "Basic operation", Page 10 down. Clean the smooth surfaces with soapy water and a Type of heat- 3D hot air ... -
Page 11: Time-Setting Options
Time-setting options en 9 Time-setting options Your appliance has different time-setting options, with Cancelling the timer which you can control its operation. You can cancel the timer duration at any time. Requirement: is highlighted on the display. 9.1 Overview of the time-setting options Use the button to reset the timer duration to zero. -
Page 12: Programme
en Programme Requirements Cancelling the end time ¡ The type of heating and temperature or setting are You can delete the set end at any time. set. is highlighted on the display. Requirement: ¡ A cooking time is set. Reset the end time to the current time plus the set ▶... - Page 13 Programme en No. Food Cookware Weight setting Add liquid Shelf Information posi- tions Roasting dish with Turkey breast Cover the Do not sear the meat 02 Turkey breast Whole, seasoned glass lid weight bottom of the beforehand roasting dish and add up to 250 g ve- getables if you wish...
-
Page 14: Childproof Lock
en Childproof lock Always place the cookware into the cooking com- The display shows the calculated cooking time. ‒ partment while it is cold. The cooking time cannot be changed. For some programmes, the button can be ‒ used to delay the end. 10.4 Setting a programme → "Setting the end time", Page 11 The appliance selects the optimal type of heating, tem-... -
Page 15: Cleaning And Servicing
Cleaning and servicing en Display Basic setting Selection Childproof lock can be adjusted = no = yes = yes, with locked door Interior lighting during operation = no = yes Cooling fan run-on time = short = medium = long = extra-long ... - Page 16 en Cleaning and servicing Appliance front Surface Suitable cleaning agents Notes Stainless steel ¡ Hot soapy water To prevent corrosion, remove any limescale, grease, starch or albu- ¡ Special stainless steel min (e.g. egg white) stains on stainless steel fronts immediately. Apply a thin layer of the stainless steel cleaning product with a soft cleaning products cloth.
-
Page 17: Pyrolytic Self-Cleaning
Pyrolytic self-cleaning en Before using the appliance, remove the worst of the ▶ Clean the appliance using hot soapy water and a food residues and remnants from the cooking com- dish cloth. partment, heating elements and accessories. For some surfaces, you can use alternative ‒... -
Page 18: Cleaning Aid
en Cleaning aid Wipe off any ash that has been left behind in the a Once the cleaning function has ended, an audible cooking compartment and around the appliance signal sounds and the display shows the duration door with a damp cloth. as zero. -
Page 19: Appliance Door
Appliance door en Pull the whole rail to the front and remove it. ¡ For both rails, ensure that the curved rods are at the front. First, push the rail into the middle of the rear socket until the rail rests against the cooking compartment wall, and then push this back ... - Page 20 en Appliance door Close the appliance door fully . Grab hold of the Close the locking levers on the left- and right-hand appliance door with both hands (on the left and hinges. right) and pull it upwards and out . a The locking levers are closed.
- Page 21 Appliance door en Set the front pane down on a level surface with the Push the left- and right-hand retainer downwards door handle facing down. until the intermediate pane is clamped . Press the intermediate pane against the appliance with one hand while pushing the left- and right-hand retainers upwards.
-
Page 22: Troubleshooting
en Troubleshooting 18 Troubleshooting You can rectify minor faults on your appliance yourself. WARNING ‒ Risk of electric shock! Read the troubleshooting information before contacting Incorrect repairs are dangerous. after-sales service. This will avoid unnecessary costs. Repairs to the appliance should only be carried out ▶... -
Page 23: Disposal
Disposal en Place a tea towel in the cooking compartment to 18.2 Replacing the oven light bulb prevent damage. If the light in the cooking compartment fails, change Turn the glass cover anti-clockwise to remove it . the oven light bulb. Pull out the halogen bulb without turning it ... -
Page 24: How It Works
en How it works 20.1 Product number (E-Nr.) and production number (FD) You can find the product number (E-Nr.) and the pro- duction number (FD) on the appliance's rating plate. Make a note of your appliance's details and the Cus- You will see the rating plate with these numbers if you tomer Service telephone number to find them again open the appliance door. - Page 25 How it works en WARNING ‒ Risk of injury! WARNING ‒ Risk of scalding! If hot glass cookware is placed on a wet or cold sur- Very hot steam may escape when the lid is opened face, the glass may shatter. after cooking. Steam may not be visible, depending on Place hot glass ovenware on a dry mat after cook- the temperature.
- Page 26 en How it works Cover the containers with foil, e. g. with cling film. 21.5 Yoghurt Place the containers on the cooking compartment You can use your appliance to make your own yoghurt. floor. Set the appliance according to the recommended Preparing yoghurt setting.
-
Page 27: Installation Instructions
Installation instructions en Food Accessories/cookware Shelf pos- Type of Temperature in Cook- ition heating °C ing time in mins Small cakes, 2 levels Universal pan 3 + 1 25-35 Baking tray Small cakes, 3 levels Universal pan 5 + 3 + 1 25–35 Baking tray Hot water sponge cake Springform cake tin,... - Page 28 en Installation instructions ¡ To ventilate the appliance, the intermediate floors ¡ Dimensions of the figures in mm. must have a ventilation cut-out. ¡ If the tall unit has another back panel in addition to 22.2 Appliance dimensions the element back panels, this must be removed. You will find the dimensions of the appliance here ¡...
- Page 29 Installation instructions en isolating switch must be integrated into the perman- 22.7 Installing the appliance ent electrical installation in accordance with the in- Slide the appliance all the way in and centre it. stallation regulations. Electrically connecting an appliance without a protective contact plug Note: Only a licensed professional may connect the ap- pliance.
- Page 32 Expert advice for your Bosch home appliances, help with problems or a repair from Bosch experts. Find out everything about the many ways Bosch can support you: www.bosch-home.com/service Contact data of all countries are listed in the attached service directory.