Dell OptiPlex 7080 Micro Service Manual
Hide thumbs
Also See for OptiPlex 7080 Micro:
- Install manual (7 pages) ,
- Setup and specifications manual (39 pages)

Related Manuals for Dell OptiPlex 7080 Micro


Summary of Contents for Dell OptiPlex 7080 Micro
- Page 1 OptiPlex 7080 Micro Service Manual Regulatory Model: D14U Regulatory Type: D14U001/D14U003 May 2020 Rev. A00...
- Page 2 A WARNING indicates a potential for property damage, personal injury, or death. © 2020 Dell Inc. or its subsidiaries. All rights reserved. Dell, EMC, and other trademarks are trademarks of Dell Inc. or its subsidiaries. Other trademarks may be trademarks of their respective owners.
-
Page 3: Table Of Contents
Contents 1 Working on your computer......................5 Safety instructions................................5 Before working inside your computer........................... 5 Safety precautions................................6 Electrostatic discharge—ESD protection........................6 ESD field service kit ................................ 7 After working inside your computer..........................7 2 Technology and components......................9 USB features..................................9 USB Type-C..................................10 HDMI 1.4.................................... - Page 4 System board..................................46 Removing the system board............................46 Installing the system board............................48 5 Troubleshooting......................... 51 Dell SupportAssist Pre-boot System Performance Check diagnostics................ 51 Running the SupportAssist Pre-Boot System Performance Check................ 51 Diagnostic LED behavior..............................51 Diagnostic error messages..............................53 System error messages..............................55 WiFi power cycle.................................
-
Page 5: Working On Your Computer
You should only perform troubleshooting and repairs as authorized or directed by the Dell technical assistance team. Damage due to servicing that is not authorized by Dell is not covered by your warranty. See the safety instructions that is shipped with the product or at www.dell.com/regulatory_compliance. -
Page 6: Safety Precautions
Due to the increased density of semiconductors used in recent Dell products, the sensitivity to static damage is now higher than in previous Dell products. For this reason, some previously approved methods of handling parts are no longer applicable. -
Page 7: Esd Field Service Kit
It is recommended that all field service technicians use the traditional wired ESD grounding wrist strap and protective anti-static mat at all times when servicing Dell products. In addition, it is critical that technicians keep sensitive parts separate from all insulator parts while performing service and that they use anti-static bags for transporting sensitive components. - Page 8 5. Turn on your computer. Working on your computer...
-
Page 9: Technology And Components
Technology and components This chapter details the technology and components available in the system. Topics: • USB features • USB Type-C • HDMI 1.4 USB features Universal Serial Bus, or USB, was introduced in 1996. It dramatically simplified the connection between host computers and peripheral devices like mice, keyboards, external drivers, and printers. -
Page 10: Usb Type-C
• USB 3.0/USB 3.1 Gen 1 utilizes the bidirectional data interface, rather than USB 2.0's half-duplex arrangement. This gives a 10-fold increase in theoretical bandwidth. With today's ever increasing demands placed on data transfers with high-definition video content, terabyte storage devices, high megapixel count digital cameras etc., USB 2.0 may not be fast enough. - Page 11 Alternate Mode USB Type-C is a new connector standard that is very small. It is about a third the size of an old USB Type-A plug. This is a single connector standard that every device should be able to use. USB Type-C ports can support a variety of different protocols using “alternate modes,”...
-
Page 12: Hdmi 1.4
3. DisplayPort 1.4 – compatible with existing DisplayPort monitors, devices and cables 4. USB Power Delivery - Up to 130W on supported computers Key Features of Thunderbolt 3 over USB Type-C 1. Thunderbolt, USB, DisplayPort and power on USB Type-C on a single cable (features vary between different products) 2. - Page 13 • HDMI supports communication between the video source (such as a DVD player) and the DTV, enabling new functionality. Technology and components...
-
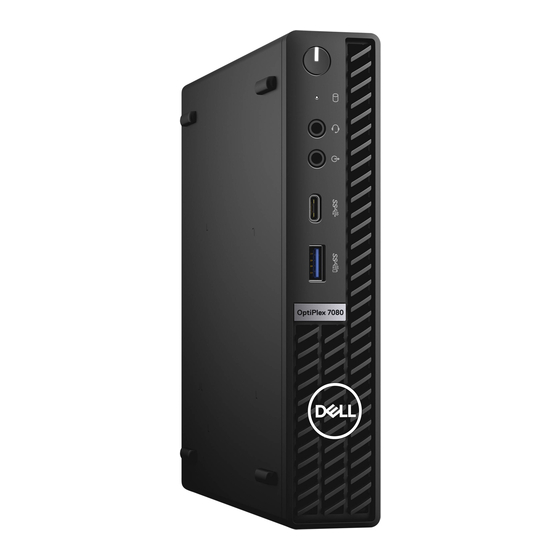
Page 14: Major Components Of Your System
Major components of your system... - Page 15 Major components of your system Major components of your system...
- Page 16 13. Hard drive assembly NOTE: Dell provides a list of components and their part numbers for the original system configuration purchased. These parts are available according to warranty coverages purchased by the customer. Contact your Dell sales representative for purchase options.
-
Page 17: Disassembly And Reassembly
Disassembly and reassembly Side cover Removing the side cover Prerequisites 1. Follow the procedure in before working inside your computer. NOTE: Ensure that you remove the security cable from the security-cable slot (if applicable). About this task The following images indicate the location of the side cover and provide a visual representation of the removal procedure. Disassembly and reassembly... -
Page 18: Installing The Side Cover
Steps 1. Loosen the thumbscrew (6x32) that secures the side cover to the system. 2. Slide the side cover towards the front of the system and lift the cover. Installing the side cover Prerequisites If you are replacing a component, remove the existing component before performing the installation procedure. About this task The following image indicates the location of the side cover and provides a visual representation of the installation procedure. - Page 19 Steps 1. Align the side cover with the grooves on the chassis. Disassembly and reassembly...
-
Page 20: Front Bezel
2. Slide the side cover towards the back of the system to install it. 3. Tighten the thumbscrew (6x32) to secure the side cover to the system. Next steps 1. Follow the procedure in after working inside your computer. Front bezel Removing the front bezel Prerequisites 1. -
Page 21: Installing The Front Bezel
Installing the front bezel Prerequisites If you are replacing a component, remove the existing component before performing the installation procedure. About this task The following image indicates the location of the front bezel and provides a visual representation of the installation procedure. Steps 1. -
Page 22: Hard-Drive Assembly
Hard-drive assembly Removing the hard-drive assembly Prerequisites 1. Follow the procedure in before working inside your computer. 2. Remove the side cover. 3. Remove the front bezel. About this task The following images indicate the location of the hard-drive assembly and provide a visual representation of the removal procedure. Steps 1. -
Page 23: Removing The Hard-Drive Bracket
NOTE: Note the orientation of the hard drive so that you can replace it correctly. Removing the hard-drive bracket Prerequisites 1. Follow the procedure in before working inside your computer. 2. Remove the side cover. 3. Remove the front bezel. 4. -
Page 24: Installing The 2.5 In. Hard-Drive Assembly
About this task The following image indicates the location of the hard-drive bracket and provides a visual representation of the installation procedure. Steps 1. Place the hard-drive into the bracket. 2. Align and insert the pins on the drive bracket with the slots on the drive. NOTE: Note the orientation of the hard-drive so that you can replace it correctly. -
Page 25: Solid-State Drive
Steps 1. Insert the hard-drive assembly into the slot on the system. 2. Slide the hard-drive assembly towards the connector in the system board until the release tabs clicks into place. Next steps 1. Install the front bezel. 2. Install the side cover. -
Page 26: Installing The M.2 2230 Pcie Solid-State Drive
4. Remove the hard-drive assembly. About this task The following images indicate the location of the solid-state drive and provide a visual representation of the removal procedure. Steps 1. Remove the screw (M2x3.5) that secures the solid-state drive to the system board. 2. -
Page 27: Removing The M.2 2280 Pcie Solid-State Drive
Steps 1. Align the notch on the solid-state drive with the tab on the solid-state drive connector on the system board. 2. Insert the solid-state drive at a 45-degree angle into the solid-state drive connector. 3. Replace the screw (M2x3.5) that secures the M.2 2230 PCIe solid-state drive to the system board. Next steps 1. -
Page 28: Installing The M.2 2280 Pcie Solid-State Drive
Steps 1. Remove the screw (M2x3.5) that secures the solid-state drive to the system board. 2. Slide and lift the solid-state drive off the system board. Installing the M.2 2280 PCIe solid-state drive Prerequisites If you are replacing a component, remove the existing component before performing the installation procedure. About this task The following image indicates the location of the solid-state drive and provides a visual representation of the installation procedure. -
Page 29: Wlan Card
Steps 1. Align the notch on the solid-state drive with the tab on the solid-state drive connector on the system board. 2. Insert the solid-state drive at a 45-degree angle into the solid-state drive connector. 3. Replace the screw (M2x3.5) that secures the M.2 2280 PCIe solid-state drive to the system board. Next steps 1. -
Page 30: Installing The Wlan Card
Steps 1. Remove the (M2x3.5) screw that secures the WLAN card bracket to the system board. 2. Slide and lift the WLAN card bracket away from the WLAN card. 3. Disconnect the antenna cables from the WLAN card. 4. Slide and remove the WLAN card from the connector on the system board. Installing the WLAN card Prerequisites If you are replacing a component, remove the existing component before performing the installation procedure. - Page 31 Steps 1. Connect the antenna cables to the WLAN card. The following table provides the antenna-cable color scheme for the WLAN card of your computer. Table 2. Antenna-cable color scheme Connectors on the wireless card Antenna-cable color Main (white triangle) White Auxiliary (black triangle) Black...
-
Page 32: Fan Assembly
Fan assembly Removing the fan assembly Prerequisites 1. Follow the procedure in before working inside your computer. 2. Remove the side cover. 3. Remove the front bezel. About this task The following images indicate the location of the fan assembly and provide a visual representation of the removal procedure. Disassembly and reassembly... -
Page 33: Installing The Fan Assembly
Steps 1. Unroute the speaker cable from the routing guide on the fan assembly. 2. Press the blue tabs on both sides of the fan, and slide to lift the fan to release it from the system. 3. Turn the fan assembly over. 4. - Page 34 Disassembly and reassembly...
-
Page 35: Heat Sink
Steps 1. Connect the fan cable to the connector on the system board. 2. Turn the fan assembly over. 3. Press the release tab on the fan assembly and place it on the system until it clicks into place. 4. Route the speaker cable through the routing guides on the fan assembly. Next steps 1. -
Page 36: Installing The Heat Sink
2. Remove the side cover. 3. Remove the front bezel. 4. Remove the assembly. About this task The following images indicate the location of the heat sink and provide a visual representation of the removal procedure. Steps 1. Loosen the three captive screws that secure the heat sink to the system. NOTE: Loosen the screw in the sequential order (1,2,3) as printed on the heat sink. - Page 37 About this task The following image indicates the location of the heat sink and provides a visual representation of the installation procedure. Steps 1. Align the screws of the heat sink with the holders on the system board and place the heat sink on the processor. 2.
-
Page 38: Coin-Cell Battery
Coin-cell battery Removing the coin-cell battery Prerequisites 1. Follow the procedure in before working inside your computer. 2. Remove the side cover. 3. Remove the front bezel. NOTE: Removing the coin-cell battery resets the BIOS setup program settings to default. It is recommended that you note the BIOS setup program settings before removing the coin-cell battery. -
Page 39: Memory Modules
Steps 1. Insert the coin cell battery with the "+" sign facing up and slide it under the securing tabs at the positive side of the connector. 2. Press the battery into the connector until it locks into place. Next steps 1. -
Page 40: Installing The Memory Modules
Steps 1. Pull the securing clips from the memory module until the memory module pops up. 2. Slide and remove the memory module from the memory-module slot. Installing the memory modules Prerequisites If you are replacing a component, remove the existing component before performing the installation procedure. About this task The following image indicates the location of the memory modules and provides a visual representation of the installation procedure. -
Page 41: Speaker
Steps 1. Align the notch on the memory module with the tab on the memory-module slot. 2. Slide the memory module firmly into the slot at an angle and press the memory module down until it clicks into place. NOTE: If you do not hear the click, remove the memory module and reinstall it. -
Page 42: Installing The Speaker
Steps 1. Disconnect the speaker cable from the system board. 2. Press the release tab and lift the speaker along with the cable from the system board. Installing the speaker Prerequisites If you are replacing a component, remove the existing component before performing the installation procedure. About this task The following image indicates the location of the speaker and provides a visual representation of the installation procedure. -
Page 43: Processor
Steps 1. Align and insert the speaker into the slot and press it until the release tab clicks. 2. Connect the speaker cable to the system board. Next steps 1. Install the assembly. 2. Install the front bezel. 3. Install the side cover. -
Page 44: Installing The Processor
Steps 1. Press down and push the release lever away from the processor to release it from the securing tab. 2. Lift the lever upward to lift the processor cover. CAUTION: When removing the processor, do not touch any of the pins inside the socket or allow any objects to fall on the pins in the socket. - Page 45 Steps 1. Align the pin-1 corner of the processor with the pin 1 corner of the processor socket, and then place the processor in the processor socket. NOTE: The pin-1 corner of the processor has a triangle that aligns with the triangle on the pin-1 corner on the processor socket.
-
Page 46: System Board
System board Removing the system board Prerequisites 1. Follow the procedure in before working inside your computer. 2. Remove the side cover. 3. Remove the front bezel. 4. Remove the hard drive assembly. 5. Remove the solid-state drive. 6. Remove the WLAN card. - Page 47 Disassembly and reassembly...
-
Page 48: Installing The System Board
Steps 1. Remove the screw (6-32) that secures the hard drive caddy support to the system board. 2. Lift the hard drive caddy support away from the system board. 3. Remove the three (M3x4) screws and three (6-32) screws that secure the system board to the chassis. 4. - Page 49 Disassembly and reassembly...
- Page 50 Steps 1. Align and lower the system board into the system until the connectors at the back of the system board align with the slots on the chassis, and the screw holes on the system board align with the standoffs on the system. 2.
-
Page 51: Troubleshooting
About this task The SupportAssist diagnostics (also known as system diagnostics) performs a complete check of your hardware. The Dell SupportAssist Pre-boot System Performance Check diagnostics is embedded with the BIOS and is launched by the BIOS internally. The embedded system diagnostics provides a set of options for particular devices or device groups allowing you to: •... - Page 52 Table 3. Diagnostic LED behavior(continued) Blinking pattern Amber White Problem description Suggested resolution CPU failure • Run the Intel CPU diagnostics tools. • If problem persists, replace the system board. System board failure (included • Flash latest BIOS version BIOS corruption or ROM error) •...
-
Page 53: Diagnostic Error Messages
One or more memory modules may be faulty or improperly seated. Reinstall the memory modules or, if necessary, replace them. DISK C: FAILED INITIALIZATION The hard drive failed initialization. Run the hard drive tests in Dell Diagnostics. DRIVE NOT READY The operation requires a hard drive in the bay before it can continue. - Page 54 Description computer from an optical drive. Then, shut down the computer, reinstall the hard drive, and restart the computer. If the problem persists, try another drive. Run the Hard Disk Drive tests in Dell Diagnostics. HARD-DISK DRIVE FAILURE The hard drive does not respond to commands from the computer.
-
Page 55: System Error Messages
The operating system cannot find a specific track on the hard drive. SHUTDOWN FAILURE A chip on the system board may be malfunctioning. Run the System Set tests in Dell Diagnostics. If the message reappears, Contact Dell. TIME-OF-DAY CLOCK LOST POWER System configuration settings are corrupted. Connect your computer to an electrical outlet to charge the battery. -
Page 56: Wifi Power Cycle
Table 5. System error messages(continued) System message Description help in resolving this problem, please note this checkpoint and contact Dell Technical Support CMOS checksum error RTC is reset, BIOS Setup default has been loaded. CPU fan failure CPU fan has failed. -
Page 57: Getting Help
About this task Dell provides several online and telephone-based support and service options. Availability varies by country and product, and some services may not be available in your area. To contact Dell for sales, technical support, or customer service issues: Steps 1.