Table of Contents
Advertisement
Quick Links
Advertisement
Table of Contents

Related Manuals for Electrolux EB3SL90KCN


Summary of Contents for Electrolux EB3SL90KCN
- Page 1 EB3SL90KCN EB3SL90KSP EB3SL9KCN EB3SL9KSP Microwave combi-oven User Manual...
-
Page 2: Table Of Contents
15. GUARANTEE ....................37 WE’RE THINKING OF YOU Thank you for purchasing an Electrolux appliance. You’ve chosen a product that brings with it decades of professional experience and innovation. Ingenious and stylish, it has been designed with you in mind. So whenever you use it, you can be safe in the knowledge that you’ll get great results every time. -
Page 3: Safety Information
ENGLISH SAFETY INFORMATION Before the installation and use of the appliance, carefully read the supplied instructions. The manufacturer is not responsible for any injuries or damages that are the result of incorrect installation or usage. Always keep the instructions in a safe and accessible location for future reference. - Page 4 Always use oven gloves to remove or put in • accessories or ovenware. Before carrying out any maintenance, disconnect the • appliance from the power supply. Ensure that the appliance is disconnected from the • mains. Do not use a steam cleaner to clean the appliance.
-
Page 5: Safety Instructions
ENGLISH The appliance is intended for heating food and • beverages. Drying of food or clothing and heating of warming pads, slippers, sponges, damp cloth and similar may lead to risk of injury, ignition or fire. If smoke is emitted, switch off or unplug the appliance •... - Page 6 • Always use a correctly installed • Be careful when you open the shockproof socket. appliance door while the appliance is • Do not use multi-plug adapters and in operation. Hot air can release. extension cables. • Do not operate the appliance with wet •...
- Page 7 ENGLISH closed furniture panel and cause • Do not spill cold water or other liquids subsequent damage to the appliance, on the glassware because a sudden the housing unit or the floor. Do not temperature drop may cause close the furniture panel until the immediate breakage of the glass.
-
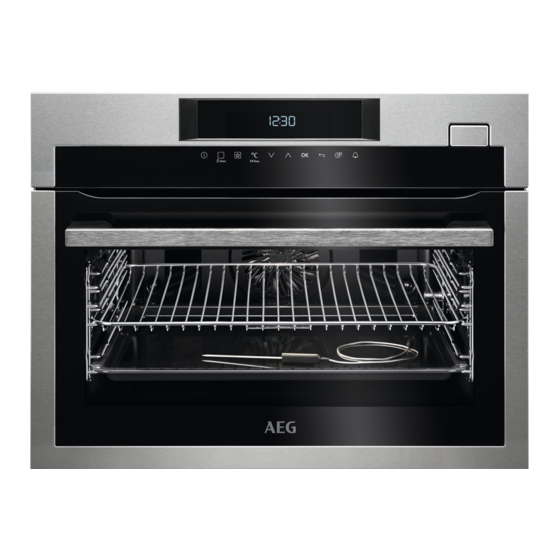
Page 8: Product Description
• Disconnect the appliance from the • Remove the door catch to prevent mains supply. children or pets from becoming • Cut off the mains electrical cable trapped in the appliance. close to the appliance and dispose of 3. PRODUCT DESCRIPTION 3.1 General overview... -
Page 9: Control Panel
ENGLISH Glass baking tray 4. CONTROL PANEL 4.1 Electronic programmer Use the sensor fields to operate the appliance. Sensor Function Comment field Display Shows the current settings of the appliance. ON / OFF To activate and deactivate the appliance. Heating Func‐ Touch the sensor field once to choose a heat‐... - Page 10 Sensor Function Comment field Up key To move up in the menu. OK / Microwave To confirm the selection or settings. To activate Quick Start the Microwave function. You can use it when the appliance is deactivated. Back key To go back one level in the menu.
-
Page 11: Before First Use
ENGLISH Symbol Function Heat + Hold The function is active. 5. BEFORE FIRST USE 5.2 First Connection WARNING! Refer to Safety chapters. When you connect the oven to the mains or after the power cut, you have to set 5.1 Initial Cleaning the language, the display contrast, the display brightness and the time of the Remove all accessories and removable... - Page 12 Symbol / Menu Description Symbol / Menu Description item item When ON, the dis‐ Resets all settings to play shows the cur‐ factory settings. Time Indication Factory Settings rent time when you deactivate the appli‐ 6.3 Heating Functions ance.
- Page 13 ENGLISH Heating func‐ Application Heating func‐ Application tion tion To prepare tender, For dishes such as succulent roasts. lasagna or potato gratin. Also to grati‐ Slow Cooking Au Gratin nate and brown. This function can be used for defrosting 6.5 Setting a heating function frozen foods, such as Defrost 1.
-
Page 14: Clock Functions
2. Press to turn on the Quick Start To turns off the Microwave function. function, press Each press of adds 30 seconds to the Duration time. If you press or open the You can change the door, the function stops. To... -
Page 15: Automatic Programmes
ENGLISH 7.2 Setting the clock functions 5. Press any symbol to stop the signal. 7.3 Heat + Hold Before you use the functions: Duration, End Conditions for the function: Time, you must set a heating function and temperature • The set temperature is more than 80 first. -
Page 16: Additional Functions
All accessories have small indentations at the bottom of the right and left edges to increase safety. Always make sure that these indentations are at the rear of the oven. The indentations are also anti-tip devices. The high rim around the shelf prevents cookware from slipping of the shelf. - Page 17 ENGLISH 6. Enter the name of the programme. When you turn off the oven, The first letter flashes. the function also turns off. 7. Press to change the letter. 10.4 Set + Go 8. Press The next letter flashes. The function lets you set a heating 9.
-
Page 18: Hints And Tips
• Night brightness - when the oven is – if the oven os turned off and you turned off, the brightness of the set the function: Minute Minder. display is lower between 10 PM and 6 When the function ends, the display goes back to the night •... - Page 19 ENGLISH 11.3 Microwave suitable cookware and materials For the microwave use only suitable cookware and materials. Use below table as a reference. Cookware / Material Microwave function Microwave Combi function Defrost‐ Heating, Cooking Ovenproof glass and porcelain with no metal components, e.g. heat- proof glass Non-ovenproof glass and porcelain without any silver, gold, platinum or...
- Page 20 11.4 Advice for special heating position. After half of the warming time switch their places. functions of the oven 11.5 Baking Keep Warm • Use the lower temperature the first The function allows you to keep food time. warm. The temperature is set •...
- Page 21 ENGLISH Baking in tins Food Temperature Time (min) Shelf posi‐ (°C) tion Ring cake or brioche 160 - 170 50 - 60 Madeira cake / Fruit cakes 150 - 170 70 - 90 Fatless sponge cake / Fat‐ 160 - 180 25 - 40 less sponge cake Flan base - shortcrust pas‐...
- Page 22 Food Temperature Time (min) Shelf posi‐ (°C) tion 10 - 20 Flat bread Swiss flaky pastry tarts 190 - 210 35 - 50 1) Preheat the oven. Biscuits Food Temperature Time (min) Shelf posi‐ (°C) tion Short pastry biscuits...
- Page 23 ENGLISH Food Temperature Time (min) Shelf position (°C) Potato gratin 180 - 200 40 - 50 1) Preheat the oven. 11.9 Multilevel Baking Use the function: True Fan Cooking. Biscuits / small cakes / pastries / rolls Food Temperature (°C) Time (min) Shelf position Short pastry biscuits...
- Page 24 Food Quantity Searing Temperature Shelf Time (min) each side (°C) position (min) Roast beef me‐ 1000 - 1500 80 - 90 180 - 240 dium Veal Food Quantity Searing Temperature Shelf po‐ Time (min) each side (°C) sition (min) Filet rosé...
- Page 25 ENGLISH Food Quantity (g) Tempera‐ Time (min) Shelf posi‐ ture (°C) tion Meat loaf 750 - 1000 180 - 200 45 - 60 Knuckle of pork (pre- 750 - 1000 170 - 190 90 - 120 cooked) Beef Food Quantity Tempera‐...
- Page 26 Poultry Food Quantity (g) Tempera‐ Time (min) Shelf posi‐ ture (°C) tion Chicken, spring chicken 1000 - 1500 190 - 210 45 - 75 Chicken half per 400 - 500 200 - 220 35 - 50 Poultry pieces per 200 - 250...
- Page 27 ENGLISH 11.14 Turbo Grilling Food Tempera‐ Time (min) Turn after Shelf posi‐ Tray posi‐ ture (°C) (min) tion tion Chicken 180 - 200 50 - 60 25 - 30 (900 - 1000 Stuffed rol‐ 180 - 200 90 - 95 led pork roast (2000 Pasta bake...
- Page 28 Food Quantity Defrosting Further de‐ Comments time (min) frosting time (min) Poultry 1 kg 100 - 140 20 - 30 Put the chicken on an upturned saucer in a big plate. Turn half‐ way through. Meat 1 kg 100 - 140 20 - 30 Turn halfway through.
- Page 29 ENGLISH Food Temperature (°C) Cooking time until Continue to cook simmering (min) at 100 °C (min) Kohlrabi / Peas / 160 - 170 50 - 60 15 - 20 Asparagus 1) Leave standing in the oven after it is deactivated. 11.18 Drying the door and let it cool down for one night to complete the drying.
- Page 30 11.20 Microwave cooking Tips for the Microwave Cooking/Defrost‐ Possible cause Remedy ing results The food is too dry. The power was too high. Next time select a lower power and The time was too long. a longer time. The food is still not The time was too short.
- Page 31 ENGLISH Defrosting cakes / pastries Food Power Time (min) Standing time (Watts) (min) Yeast cake (1 piece) 2 - 3 15 - 20 Cheesecake (1 piece) 2 - 4 15 - 20 Dry cake (e.g. Pound cake) 2 - 4 15 - 20 (1 piece) Bread (1 kg)
- Page 32 Cooking Food Power Time (min) Standing time (Watts) (min) Whole fish (0.5 kg) 8 - 10 2 - 5 Fish fillets (0.5 kg) 4 - 7 2 - 5 Vegetables, fresh (0.5 kg + 5 - 15 50 ml of water) Vegetables, frozen (0.5 kg...
-
Page 33: Care And Cleaning
ENGLISH Food Ovenware Pow‐ Tem‐ Time Shelf Standing pera‐ (min) posi‐ time (min) (Watt ture tion (°C) Hamburger Crostino plate on bot‐ frozen (2 x tom glass. Max. 4 90 g) min / preheat at 700 Watt, turn 1 x Pizza frozen Crostino plate on bot‐... -
Page 34: Troubleshooting
Clean all accessories after each use and 1. Turn off the oven. let them dry. Use a soft cloth with warm Wait until the oven is cooled down. water and a cleaning agent. 2. Disconnect the oven from the mains. - Page 35 ENGLISH Problem Possible cause Remedy The oven does not heat The oven is deactivated. Activate the oven. The oven does not heat The clock is not set. Set the clock. The oven does not heat The necessary settings are Make sure that the settings not set.
-
Page 36: Energy Efficiency
Problem Possible cause Remedy The appliance is activated The demo mode is activa‐ Refer to "Basic Settings" in and does not heat up. The ted. "Daily use" chapter. fan does not operate. The display shows "Demo". 13.2 Service data plate is on the front frame of the oven cavity. -
Page 37: Guarantee
ENGLISH GUARANTEE Customer Service Centres Point of Service Industriestrasse 10 Le Trési 6 Via Violino 11 5506 Mägenwil 1028 Préverenges 6928 Manno Morgenstrasse 131 3018 Bern Zürcherstrasse 204E 9000 St. Gallen Seetalstrasse 11 6020 Emmenbrücke Schlossstrasse 1 4133 Pratteln Comercialstrasse 19 7000 Chur Spare parts service Industriestrasse 10, guarantee covers the costs of materials,... - Page 38 www.electrolux.com...
- Page 39 ENGLISH...
- Page 40 www.electrolux.com/shop...