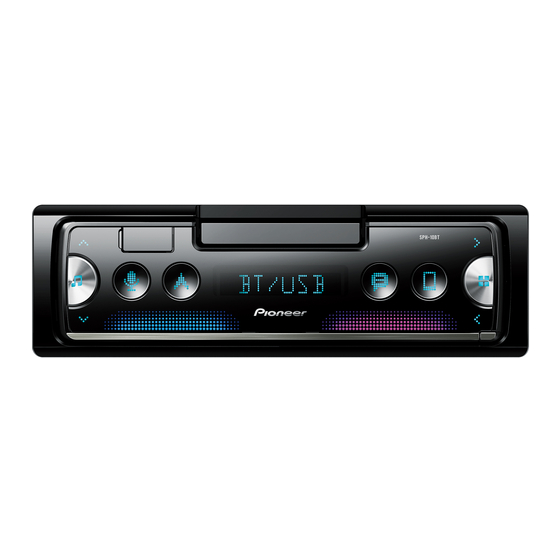
Pioneer SPH-10BT Operation Manual
Smartphone receiver
Hide thumbs
Also See for SPH-10BT:
- Installation manual (33 pages) ,
- System firmware update instructions (7 pages) ,
- Firmware update instructions (6 pages)
Advertisement
Table of Contents
Advertisement
Table of Contents

Related Manuals for Pioneer SPH-10BT


Summary of Contents for Pioneer SPH-10BT
- Page 1 SMARTPHONE RECEIVER SPH-10BT Operation Manual...
-
Page 2: Table Of Contents
Table of Contents Getting Started ..................3 Radio ....................... 12 USB/iPhone.................... 13 Bluetooth ....................14 Using Pioneer Smart Sync/APP............17 Parking Sensor ..................20 Settings ....................20 FUNCTION settings ................21 AUDIO settings ..................22 SYSTEM settings ..................23 ILLUMINATION settings................ 25 P.SENSOR settings ................. -
Page 3: Getting Started
Getting Started Basic operation SPH-10BT USB port Application launch Smartphone holder Display window Source (music)/Off Detach button Navigation Phone Message Voice recognition Frequently used operations Purpose Operation Turn on the power* Press to turn on the power. Press and hold to turn off the power. - Page 4 Detaching the front panel Detach the front panel to prevent theft. Remove any cables and devices attached to the front panel and turn off the unit before detaching it. Detach Attach Important • Avoid subjecting the front panel to excessive shock. •...
- Page 5 • Make sure that nothing affects the operation of the air bags or vehicle operating systems, safety feature or hazard lamps. • PIONEER IS NOT RESPONSIBLE AND DISCLAIMS LIABILITY FOR ANY DAMAGES CAUSED THROUGH USE OF THE PRODUCT OR VEHICLE.
- Page 6 CAUTION Make sure that the line can be seen when the holder is pulled up vertically. Attach the front panel to the unit (page 4). Adjusting the smartphone holder horizontally Slide the holder while the holder is in a horizontal position. - 6 -...
- Page 7 NOTE Detach the smartphone from the device while adjusting the holder. Pull up the holder. Attaching the smartphone to the holder CAUTION • Depending on the shape of the smartphone, smartphone case or cover, it may not be attachable to the holder.
- Page 8 Slide the lower arms position to avoid hitting the lower arm and smartphone buttons against each other. NOTES • Make sure that the smartphone is held properly on the holder. • When the smartphone buttons come in contact with the upper or lower arms, adjust the smartphone’s position or turn the smartphone upside down.
- Page 9 Adjusting the smartphone holder Adjusting the holder angle The holder angle range: Downward 45° to upward 100° WARNING Do not set the holder where it may (i) interfere with vehicle panels or switches or (ii) impair the driver’s performance. Turning the smartphone holder from a horizontal to a vertical position Rotate the smartphone holder 90°...
- Page 10 CAUTION Be careful to not drop the smartphone when the smartphone is attached to the holder while rotating. Detaching the smartphone from the holder Pull out the smartphone while pushing up the upper arm with the smartphone. CAUTION • Be careful to not drop the smartphone. •...
- Page 11 Attach the front panel to the unit (page 4). INITIAL settings Press and hold until the unit turns off. Press and hold to display the main menu. Press to select [INITIAL], then press to confirm. Press to select an option, then press to confirm.
-
Page 12: Radio
Menu Item Description RESET Select [YES] to initialize the unit settings. The unit will be restarted automatically. [YES], [NO] Radio The tuner frequencies on this unit are allocated for use in Western Europe, Asia, the Middle East, Africa and Oceania. Use in other areas may result in poor reception. The RDS (radio data system) function only works in areas that broadcast RDS signals for FM stations. -
Page 13: Usb/Iphone
To store stations manually This function is only available on Pioneer Smart Sync (page 17). For details, see the application's help section. Using PTY functions The unit searches for a station by PTY (program type) information. Press and hold during FM reception. -
Page 14: Bluetooth
NOTE If you use an AOA connection, [APP CTL] needs to be set to [WIRED] in the SYSTEM settings (page 24). Operations You can make various adjustments in Pioneer Smart Sync (page 17). Purpose Operation Select a folder*1 Press... - Page 15 • Be sure to park your vehicle in a safe place and apply the parking brake before operation. To make a phone call This function is only available on Pioneer Smart Sync (page 17). For details, see the application's help section.
- Page 16 Purpose Operation Reject an incoming call Press and hold when a call is received. Adjust the volume of the caller’s Press during the call. voice (When private mode is on, this function is not available.) Voice recognition This function is only available when an iPhone/Android device equipped with voice recognition is connected to the unit via Bluetooth.
-
Page 17: Using Pioneer Smart Sync/App
For details on what operations are available on the application, see the application’s help section. NOTE The APP source is not available when a Pioneer Smart Sync connection is not made. WARNING Do not attempt to operate the application while driving. Make sure to pull off the road and park your vehicle in a safe location before attempting to use the controls on the application. - Page 18 – Controlling your connected Bluetooth device Extending the functions of the unit by using the application The following functions, which are unavailable on the unit alone, are available by making a Pioneer Smart Sync connection. Menu Item (example) Description Using a navigation application You can specify and start the navigation application installed on your device.
- Page 19 • The 31 Band EQ setting is converted into 13 bands when a music source from this product is engaged. It is recommended to enter the search term "Pioneer Smart Sync" in the search field to search for the application.
-
Page 20: Parking Sensor
NOTES • If Pioneer Smart Sync has not been installed on your iPhone/Android device yet, a message that prompts you to install the application will appear on your iPhone/Android device. • When you connect a mobile device other than an iPhone/Android device, it may not operate correctly depending on your mobile device. -
Page 21: Function Settings
NOTE The setting operation from this unit is not available when Pioneer Smart Sync is connected. Press and hold to display the main menu. Press to select one of the categories below, then press to confirm. • FUNCTION settings (page 21) •... -
Page 22: Audio Settings
Select the preset equalizer curve. [NATURAL], [VOCAL], [APP EQ]*, • You can only customise the equalizer curve by [CUSTOM1], [CUSTOM2], [FLAT], Pioneer Smart Sync (page 17). [VIVID], [DYNAMIC] * [APP EQ] is displayed when the preset equalizer curve that is not available in the unit has been set from Pioneer Smart Sync. -
Page 23: System Settings
[ENGLISH], [РУССКИЙ] Select the language to display the text information from a compressed audio file. CLOCK [12H], [24H] Set the clock. • This setting is not available when a Pioneer Smart Sync connection is made. - 23 - - 23 -... - Page 24 Menu Item Description BEEP [Y], [N] A beep can be heard when any button is pushed. Select [N] to disable this function. AUTO PI [Y], [N] Search for a different station with the same programming, even if using a preset station. PW SAVE* [Y], [N] Reduce the battery power consumption.
-
Page 25: Illumination Settings
The available sources differ depending on the setting value. Please set [APP CTL] according to the table for the source you want to use. For details on Pioneer Smart Sync connection, see page 17. When Pioneer Smart Sync connection is NOT performed... -
Page 26: P.sensor Settings
P.SENSOR settings This setting functions by connecting the parking sensor (sold separately). Menu Item Description SENSOR [Y], [N] Select the parking sensor function on or off. VOLUME Adjust the parking sensor warning volume. OUTPUT [L+R], [LEFT], [RIGHT] Select the output of parking sensor warning sound. -
Page 27: Additional Information
– Turn the ignition switch OFF and back Troubleshooting to ON again. If the message remains, contact your dealer or an authorized Pioneer Service Station for assistance. The display automatically returns to the normal display. NO XXXX (NO TITLE, for example) →... - Page 28 – Disconnect the cable from the iPhone. Once the iPhone’s main menu is displayed, reconnect the iPhone and CNCT APP reset it. → Pioneer Smart Sync connection is not made. ERROR-23 → USB device was not formatted properly. – Make a connection with Pioneer Smart Sync (page 17).
- Page 29 CAUTION accelerator pedal. • Pioneer cannot guarantee compatibility • Depending on the USB storage device, with all USB mass storage devices, and the following problems may occur. assumes no responsibility for any loss of –...
- Page 30 .flac, .fla • Audiobook, Podcast: Compatible Sampling frequency 8/11.025/12/16/22.05/ CAUTION 24/32/44.1/48/96 kHz Pioneer accepts no responsibility for data Quantization bit rate 8/16/24 bit lost on the iPhone, even if that data is lost Channel mode 1/2 ch while this unit is used.
- Page 31 Bluetooth Compressed word mark and logos are audio file registered trademarks owned by Bluetooth SIG, Inc. and any use of such marks by PIONEER CORPORATION is under license. Other trademarks and trade names are those of their respective owners. iTunes Apple and iTunes are trademarks of Apple Inc., registered in the U.S.
- Page 32 software without specific prior written Google™, Google Play, Android permission. Google, Google Play and Android are THIS SOFTWARE IS PROVIDED BY THE trademarks of Google LLC. COPYRIGHT HOLDERS AND T-Kernel 2.0 CONTRIBUTORS “AS IS” AND ANY EXPRESS This product uses the source code of T- OR IMPLIED WARRANTIES, INCLUDING, BUT Kernel 2.0 under T-License 2.0 granted by NOT LIMITED TO, THE IMPLIED...
- Page 33 Audio WMA decoding format: Ver. 7, 8, 9, 9.1, 9.2 (2 ch audio) Maximum power output: AAC decoding format: MPEG-4 AAC (iTunes • 50 W × 4 ch/4 Ω (for no subwoofer) encoded only) (Ver. 10.6 and earlier) • 50 W × 2 ch/4 Ω + 70 W × 1 ch/2 Ω FLAC decoding format: v1.2.1 (Free (for subwoofer) Lossless Audio Codec)
- Page 34 NOTE Specifications and the design are subject to modifications without notice. - 34 -...
- Page 35 © 2018 PIONEER CORPORATION. All rights reserved. <CRB5160-A> EW...