
Related Manuals for Sony STR-DH790


Summary of Contents for Sony STR-DH790
- Page 1 Multi Channel Connection and Preparation AV Receiver Playback Menu/Other Functions Operating Instructions Troubleshooting/ Specifications STR-DH790...
- Page 2 Refer to ÉTATS-UNIS. NON APPLICABLE AU these numbers whenever you call upon your CANADA, Y COMPRIS LA PROVINCE DE Sony dealer regarding this product. QUÉBEC. Model No. STR-DH790 For the customers in the USA Serial No.
- Page 3 12) Use only with the cart, stand, tripod, CAUTION bracket, or table specified by the You are cautioned that any changes or manufacturer, or sold with the apparatus. modifications not expressly approved in this When a cart is used, use caution when manual could void your authority to operate moving the cart/apparatus combination to this equipment.
- Page 4 Europe should be sent to the manufacturer’s authorized For the customers in Europe representative, Sony Belgium, bijkantoor van Sony Europe Limited, Da Vincilaan 7-D1, 1935 Disposal of waste batteries Zaventem, Belgium. and electrical and electronic equipment (applicable in the...
-
Page 5: Table Of Contents
Table of Contents Troubleshooting/ Specifications Supplied Items .......... 6 Troubleshooting ........47 Main Features of the Receiver ....7 Precautions ..........54 Parts and Controls ........8 Specifications ..........55 On Copyrights ..........57 Connection and On BLUETOOTH Communication ... 58 Preparation Supported Playable Formats ....59 Index ............ -
Page 6: Supplied Items
URL or use the QR code reader function to access the site. • Calibration microphone (1) • Startup Guide (1) For the customers in Europe http://rd1.sony.net/help/ha/ Explains how to connect the 5.1.2-channel strdh79/h_eu/ speaker system, perform initial settings and listen to connected devices. -
Page 7: Main Features Of The Receiver
Main Features of the Receiver Compatible with the latest object-based audio formats Dolby TrueHD, DTS-HD Master Audio, and the object-based audio formats (Dolby Atmos and DTS:X) are supported (only when devices are connected via HDMI cables). You can experience surround sound for 360 degrees. Compatible with high quality 4K video formats* •... -
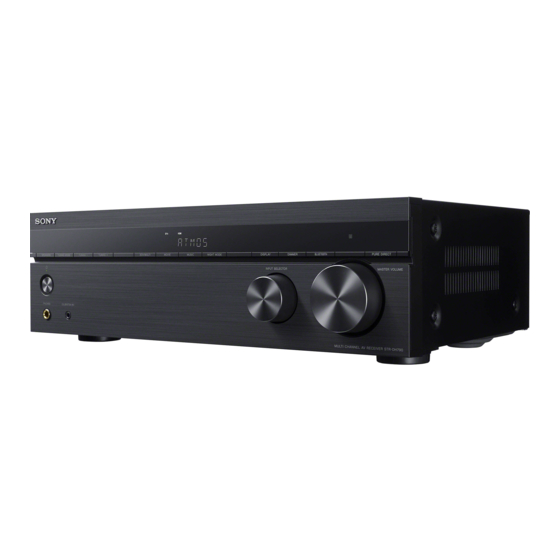
Page 8: Parts And Controls
Parts and Controls Receiver front panel (power) SPEAKERS (page 46) Turns the receiver on or sets it to the Switches the speaker system. standby mode. Note Power indicator No sound is output from the speakers when you select “OFF SPEAKERS”. -
Page 9: Receiver
– Headphones are connected. – [Direct] is being used and an analog input is selected. • The receiver may play signals at a lower sampling frequency than the actual sampling frequency of the input signals, depending on the audio format. ... - Page 10 Indicators on the display panel Speaker system indicator (page 46) FM stereo broadcast Input indicator Preset station number (The number Lights up to indicate the current input. will change according to the preset station you select.) Digital signals are input through the ...
- Page 11 Receiver rear panel POWER SUPPLY port For power supply only. HDMI IN/OUT jacks (page 24, 25, 26, 27, 28, 29) All of the HDMI IN/OUT jacks on the receiver support HDCP 2.2. HDCP 2.2 is newly enhanced copyright protection technology that is used to protect content such as 4K movies.
-
Page 12: Remote Control
Input buttons Remote control BLUETOOTH, MEDIA BOX, BD/DVD, SAT/CATV, GAME, SA-CD/CD, TV, FM Selects the input channel connected to the device you want to use. When you press any of the input buttons, the receiver turns on. Note When you press BLUETOOTH, the receiver turns on only if “BT POWER”... -
Page 13: R03 (Size Aaa) Batteries
DIMMER Note Adjusts the brightness of the display • The above explanation is intended to serve as panel. examples. • Depending on the model of your connected DISPLAY device, some functions explained in this section Displays information on the display may not work with the supplied remote control. -
Page 14: Connection And Preparation
Connection and Preparation 1: Deciding on the Speaker System Decide on the speaker system you want to set up according to the number of speakers and subwoofers that you are using. The illustration and table below indicate the types of speakers that can be connected to the receiver and the general positions for placing the speakers. - Page 15 Abbreviations used in Speaker type Function of each speaker illustrations Surround Dolby Atmos Produces sounds from the top middle left/right enabled left speaker channels and reflects these sounds off the ceiling. Enables playing back sounds of Dolby Atmos 3D movies Surround Dolby Atmos without the need to install ceiling speakers.
-
Page 16: 2: Setting/Connecting Speakers
2: Setting/Connecting Speakers Set up the speakers and subwoofers in a room using the layout you prefer for your speaker system and connect them to the receiver. The speaker layout drawings on page 17 and subsequent pages provide the ideal layout examples. You do not have to set up the speakers and subwoofers in exactly the same way as the layout examples. - Page 17 5.1-channel speaker system To fully enjoy theater-like multi-channel surround sound, you need five speakers (two front speakers, a center speaker, and two surround speakers) and a subwoofer. 30˚ 100˚ – 120˚ Speaker cable (not supplied) Monaural audio cable (not supplied)
- Page 18 7.1-channel speaker system using surround back speakers You can enjoy high-fidelity reproduction of recorded sound from DVD or Blu-ray Disc software in 6.1-channel or 7.1-channel format. 30˚ 100˚ – 120˚ Same angle Speaker cable (not supplied) Monaural audio cable (not supplied) If you connect only one surround back speaker, place it directly behind the listening position and connect it to the L (+/–) terminals.
- Page 19 5.1.2-channel speaker system using top middle speakers You can enjoy vertical sound effects by connecting additional two top middle speakers. 30˚ 100˚ – 120˚ 65˚ 80˚ 100˚ Speaker cable (not supplied) Monaural audio cable (not supplied)
- Page 20 5.1.2-channel speaker system using front Dolby Atmos enabled speakers You can enjoy vertical sound effects by connecting additional two front Dolby Atmos enabled speakers. 30˚ 100˚ – 120˚ Speaker cable (not supplied) Monaural audio cable (not supplied)
- Page 21 5.1-channel speaker system with Front B speakers You can enjoy the audio in another location by connecting additional Front B speakers. Room with the receiver installed Another location 30˚ 100˚ – 120˚ Front B speakers Front A speakers (in another location) Speaker cable (not supplied) Monaural audio cable (not supplied)
- Page 22 5.1-channel speaker system with Bi-Amplifier connection When the front speakers are Bi-wire speakers, which are equipped with separate terminals for high-frequency sounds (tweeter) and low-frequency sounds (woofer), you can make the bi-amplifier connection. Connect each pair of terminals for tweeter and woofer to this receiver as illustrated below.
- Page 23 Note Make sure that metal fittings of Hi/Lo attached to the speakers have been removed from the speakers to avoid receiver malfunction. 2.1-channel speaker system If you select [Front Surround] for the sound field setting, you can enjoy surround effects equivalent to that of a 5.1-channel speaker system using only the two front speakers.
-
Page 24: 3: Connecting A Tv
About HDMI features • Sony recommends that you use an HDMI cable made by Sony or another HDMI-authorized cable. Be sure to use a High Speed HDMI Cable with Ethernet. For video signals that require a high bandwidth such as 4K/60p 4:4:4, 4:2:2 and 4K/60p 4:2:0 10 bit etc., be sure to use a Premium High Speed HDMI Cable with Ethernet, which supports bandwidths up to 18 Gbps. - Page 25 • All of the digital audio jacks are compatible with 32 kHz, 44.1 kHz, 48 kHz, and 96 kHz sampling frequencies. • When connecting a TV to the receiver via the TV IN jacks of the receiver, set the sound output jack of the TV to “Fixed”...
- Page 26 If the eARC- or ARC-compatible HDMI jack on the 4K TV is not compatible with HDCP 2.2 4K content copyright is protected by HDCP 2.2. To enjoy 4K content, connect the HDMI jack on the receiver to the HDCP 2.2-compatible HDMI jack on the TV using an HDMI cable.
- Page 27 Connecting a TV not compatible with 4K If the HDMI jack on the TV is compatible with eARC or ARC Both eARC and ARC are functions that send TV digital sound to audio-visual devices through an HDMI cable. If the TV’s HDMI input jack is labeled “eARC” or “ARC,” this TV is compatible with the eARC or ARC function.
- Page 28 If the HDMI jack on the TV is not compatible with eARC or ARC Both eARC and ARC are functions that send TV digital sound to audio-visual devices through an HDMI cable. If the TV’s HDMI input jack is not labeled “eARC” and/or “ARC,” this TV is not compatible with the eARC or ARC function.
-
Page 29: 4: Connecting Audio-Visual Devices
4: Connecting Audio-Visual Devices For notes when connecting audio-visual devices to the HDMI jacks on the receiver, see “About HDMI features” (page 24). Connecting devices with HDMI jacks Ultra HD Blu-ray Disc™ player, Blu-ray Disc™ player, DVD player Media box Audio/Video Audio/Video signals... - Page 30 Connecting devices with analog audio jacks and coaxial digital audio jack Audio Video Audio Video signals signals signals signals Blu-ray Disc™ Cable box or player, DVD satellite box player To the TV’s VIDEO To the TV’s input jack VIDEO input jack Recommended connection Alternative connection Super Audio CD player, CD player,...
-
Page 31: 5: Connecting The Fm Antenna (Aerial)
5: Connecting the FM 6: Turning on the Antenna (aerial) Receiver and Performing Easy Setup Turn on the receiver and a TV to perform the initial settings in accordance with the instructions on the Easy Setup screen displayed on the TV. ... - Page 32 Turn the TV on, and then 2. Selecting the language switch the input of the TV to the input to which the You can select the language of messages receiver is connected. on the screen. Press / to select your Press ...
-
Page 33: Calibration Microphone
• Depending on the characteristics of the When a subwoofer is subwoofer you are using, the setup distance value may be different from the actual position. connected, turn on the subwoofer and turn up the Connect the supplied volume. calibration microphone to Adjust and set the subwoofer as CALIBRATION MIC jack. - Page 34 Press , then press / to select When the measurement is the speaker pattern, and then successfully completed, press press / to select When [Front High/Top/Dolby Speakers] is displayed, press [Save&Exit], and then press then press / to select a speaker type, and then press The measurement results are saved Example: For 5.1-channel speaker...
-
Page 35: 7: Setting For Hdmi
• If your TV has a similar menu for eARC or ARC, also check the relevant settings on the TV when 7: Setting for HDMI you select “ON” for “EARC” on the receiver. For details, refer to the operating instructions of the Perform this setting when the receiver is connected to a TV or audio-visual devices using an HDMI cable. -
Page 36: Playback
Start playback on the connected device. Playback Playing Back Sound and To enjoy the sound and image of a connected device without turning on the Images on Connected TV receiver, set “STBY.THRU” to “ON” in the “<HDMI>” menu. and/or Audio-Visual ... -
Page 37: Playing Back Sound On A Bluetooth Device
The receiver is Select “STR-DH790” on the searching for a Flashes slowly BLUETOOTH device to BLUETOOTH device display. connect If “STR-DH790” is not displayed, BLUETOOTH pairing Flashes quickly repeat this process from step 1. BLUETOOTH When the BLUETOOTH connection is connection is... - Page 38 Adjust the volume. Adjust the volume. Adjust the volume of the BLUETOOTH Adjust the volume of the BLUETOOTH device first. If the volume level is still device first. If the volume level is still too low, press +/– to adjust the too low, press ...
-
Page 39: Selecting Sound Effects
2 Press and hold MUSIC and press Selecting Sound Effects (power) on the receiver. (power) MUSIC Selecting a sound field You can select a sound field according to your speaker configuration, the audio “S.F. CLEAR” appears on the display content, or your individual preferences. - Page 40 Reproduces full surround effects with only two front Front Surround FRT SUR. speakers using Sony’s virtual signal processing technology. Reproduces a clear enhanced sound from your MUSIC Audio Enhancer ENHANCER portable audio device.
- Page 41 • Dolby Atmos is decoded as Dolby TrueHD or Dolby Digital Plus when a sound field other than [Multi Ch Stereo], [Auto Format Decoding], or [Dolby Surround] is selected. Relations between sound fields and speaker outputs The list below shows which speaker outputs sound when a certain sound field is selected. 2-channel content Surround Display...
- Page 42 Multi-channel content Surround Display Front Center Surround Height Button Sound field back Subwoofer panel speakers speaker speakers speaker speakers 2ch Stereo 2CH ST. – – – – – Multi Ch Stereo MULTI ST. 2CH/ ...
-
Page 43: Menu/Other Functions
Home menu items Menu/Other Functions Menu Description Select to display video from Watch Operating Menu on the the connected device. Select to listen to sound from TV Screen Listen the built-in FM tuner or the connected device. Select to re-run the [Easy You can display the menu on the TV screen Easy Setup Setup] to make the basic... -
Page 44: Selecting The Speaker Pattern
Selecting the speaker pattern You can also select the speaker pattern you want according to your speaker installation without performing the [Easy Setup]. AMP MENU Press AMP MENU. Press / and to select “<SPKR>” – “PATTERN”. Press / to select the speaker pattern, and then press Press / to select “HEIGHT”, and then press Press / to select a speaker type, and then press Front high speakers, top middle speakers, and Dolby Atmos enabled speakers are referred to collectively... - Page 45 Front Surround Surround Surround Speaker Center Height left/right left/right back left back right Subwoofer pattern speaker speakers* speaker speaker speaker speaker “3.1” “3.0” ...
-
Page 46: Switching The Front Speakers
Switching the front Reverting to the Factory speakers Default Settings When two front speaker systems are You can clear all memorized settings and connected to the receiver, you can select restore the receiver to the factory default the front speaker system you want to settings by the following procedure. -
Page 47: Troubleshooting/Specifications
“OFF” in the “<HDMI>” menu. If the problem persists after doing all of the • Make sure the TV supports the System above, consult your nearest Sony dealer. Audio Control function. Set the speaker setting of the TV (BRAVIA) to “Audio System”. - Page 48 • If sound is still not output or if sound is Audio interrupted, connect the optical digital audio cable (not supplied) and set on the receiver “<HDMI>” – “CTRL.HDMI” – “CTRL No sound or only a very low level of OFF”.
- Page 49 No sound or only a very low level of • The HDMI settings of some playback sound is heard from specific devices need to be configured. Refer to speakers. the operating instructions supplied with each device. • Connect a pair of headphones to the PHONES jack to verify that sound is •...
- Page 50 • If connected to devices other than those input. manufactured by Sony that support the Control for HDMI function, set “<HDMI>” – The left and right sound is “CTRL.HDMI” – “CTRL ON”.
- Page 51 • Be sure to use a High Speed HDMI Cable No image is output from the TV screen when the receiver is in standby mode. with Ethernet when you view images or listen to sound, especially for 1080p, • When the receiver enters standby mode, Deep Color (Deep Colour), 4K or 3D the image from the last HDMI device transmission.
- Page 52 • Place the FM wire antenna (aerial) near a • Erase the pairing registration information window. of the BLUETOOTH device on the BLUETOOTH device and perform the • Position the FM wire antenna (aerial) as pairing operation again. horizontally as possible. The sound skips or fluctuates, or the You cannot tune to radio stations.
- Page 53 (mains lead) and turn on the receiver. If the one surround back speaker, please problem persists, consult your nearest connect it to the SURROUND BACK/ Sony dealer. HEIGHT L terminals. “USB FAIL” appears on the display – Only one height speaker is detected.
-
Page 54: Precautions
[Error 35: FL], [Error 35: FR], Precautions [Error 35: SL], [Error 35: SR], [Error 35: FC], [Error 35: SW], [Error 35: SBL], [Error 35: SBR], [Error 35: SB], [Error 35: HTL], On safety [Error 35: HTR] Should any solid object or liquid fall into The speaker pattern configuration does not the cabinet, unplug the receiver and have it match calibration result, or the noise level... -
Page 55: Specifications
• Do not place the receiver near device Specifications such as a TV, VCR, or tape deck. (If the receiver is being used in combination with a TV, VCR, or tape deck, and is AUDIO POWER SPECIFICATIONS placed too close to that device, noise may result, and picture quality may suffer. - Page 56 Output (Analog) Compatible BLUETOOTH profiles SUBWOOFER A2DP 1.2 (Advanced Audio Distribution Voltage: 2 V/1 kilohm Profile) AVRCP 1.6 (Audio Video Remote Control Equalizer Profile) Gain levels ±10 dB, 1 dB step Supported Codecs , AAC INPUT SHORT (with sound field and equalizer Transmission range (A2DP) bypassed) 20 Hz –...
-
Page 57: On Copyrights
Multimedia Interface, and the HDMI Logo are trademarks or registered trademarks of HDMI Licensing Administrator, Inc. in the United States and other countries. “BRAVIA” is a trademark of Sony Corporation. “PlayStation” is a registered trademark of Sony Computer Entertainment Inc. WALKMAN® and WALKMAN® logo are registered trademarks of Sony Corporation. -
Page 58: On Bluetooth Communication
• When a person, metal object, wall or communication using BLUETOOTH technology. other obstruction is between the devices • Sony shall not be held liable in any way for damages or other loss resulting from with a BLUETOOTH connection information leaks during communication using •... -
Page 59: Supported Playable Formats
Supported Playable Formats Supported digital audio formats The digital audio formats that this receiver can decode depend on the digital audio output jacks of the connected device. This receiver supports the following audio formats. Maximum number of Connection with the Digital audio format decoded channels receiver... -
Page 60: Index
Index Deep Color (Deep Colour) 24 Default settings Numerics Receiver 46 Sound fields 39 2.1-channel 23 Direct 40 2ch Stereo 40 Display panel 10 4K 25 Dolby Atmos enabled speakers 20 5.1.2-channel 19 Dolby Surround 40 5.1-channel 17 7.1-channel 18 eARC 7 Easy Setup 31 ARC 7... - Page 61 Neural-X 40 NIGHT MODE 8 OPTIONS 43 Pairing 37 Power consumption 56 PURE DIRECT 9 Receiver Display panel 10 Front panel 8 Rear panel 11 Remote control 12 Reset Receiver 46 Sound fields 39 Sound effects 39 Sound field 39 Speaker Cable 16 Pattern 44...
- Page 64 ©2018 Sony Corporation Printed in Malaysia 4-726-905-13(1)