Table of Contents

Related Manuals for LG F7100


Summary of Contents for LG F7100
- Page 1 ENGLISH ISSUE 1.0 P/N : MMBB0125706 PRINTED IN KOREA GPRS Phone USER’S MANUAL MODEL : F7100 Please read this manual carefully before operating your mobile phone. Retain it for future reference. • • • • • • • •...
- Page 2 ENGLISH GPRS Phone USER’S MANUAL MODEL: F7100 Please read this manual carefully before operating your mobile phone. Retain it for future reference.
- Page 3 Introduction Congratulations on your purchase of the advanced and compact F7100 cellular phone, designed to operate with the latest digital mobile communication technology. This user’s guide contains important information on the use and operation of this phone. Please read all the information carefully for optimal performance and to prevent any damage to or misuse of the phone.
- Page 4 For Your Safety Warning Mobile Phones must be Do not hold the phone in switched off at all times in your hand while driving. an aircraft. Do not use your phone near For your safety, use ONLY petrol stations, fuel depots, specified ORIGINAL chemical plants or blasting batteries and chargers.
- Page 5 For Your Safety Caution Switch off the phone in any Emergency call may not be area where required by special available under all cellular regulations. For example, do networks. Therefore, you not use your phone in hospitals should never depend solely on or it may affect sensitive the phone for emergency calls.
- Page 6 Exposure to radio frequency energy Radio wave exposure and Specific Absorption Rate (SAR) information This mobile phone model F7100 has been designed to comply with applicable safety requirement for exposure to radio waves. This requirement is based on scientific guidelines that include safety margins designed to assure this safety of all persons, regardless of age and health.
- Page 7 Guidelines Product care and maintenance Warning: Use only batteries, charger and accessories approved for use with this particular phone model. The use of any other types may invalidate any approval or warranty applying to the phone, and may be dangerous. •...
- Page 8 • Do not use the phone if the antenna is damaged. If a damaged antenna contacts skin, it may cause a slight burn. Please contact an LG Authorized Service Center to replace the damaged antenna. • The label of the phone contains important information for customer support purposes.
- Page 9 Guidelines • Some hearing aids might be disturbed by mobile phones. • Minor interference may affect TVs, radios, PCs, etc. • Do not bend, scratch, or expose to static electricity. Road safety Check the laws and regulations on the use of mobile phones in the areas when you drive.
- Page 10 Unlike other battery systems, there is no memory effect that could compromise the battery’s performance. • Use only LG batteries and chargers. LG chargers are designed to maximize the battery life. • Do not disassemble or short-circuit the battery pack.
-
Page 11: Table Of Contents
Contents ................For your phone • Front of the Phone ..............13 • Rear of the Phone ..............15 ................Key Description ..............Display Information • On-Screen Icons ............... 17 ................Getting Started • Inserting the SIM Card .............. 19 •... - Page 12 Contents • Info service [Menu 1-6] ............. 42 • Templates [Menu 1-7] ............... 44 • Settings [Menu 1-8] ..............45 ..............Call register [Menu 2] • Missed calls [Menu 2-1] ............47 • Received calls [Menu 2-2] ............47 • Dialled calls [Menu 2-3] ............47 •...
- Page 13 Contents ..............Organiser [Menu 6] • Scheduler [Menu 6-1] ............... 70 • Phonebook [Menu 6-2] ............. 71 • Calendar setting [Menu 6-3] ............. 78 ..............Fun & Tools [Menu 7] • Games [Menu 7-1] ..............79 • My folder [Menu 7-2] ..............79 •...
-
Page 14: For Your Phone
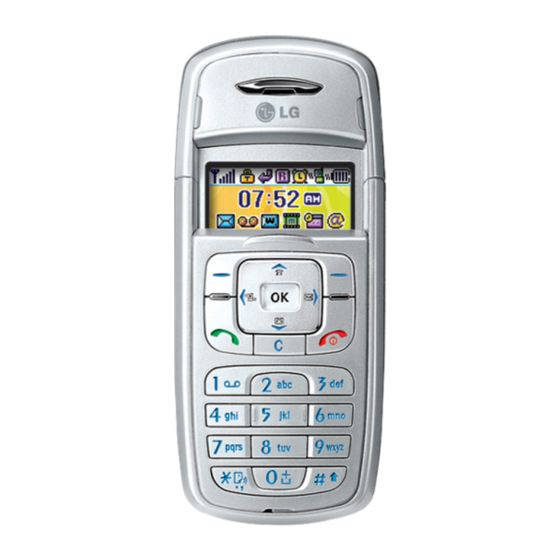
For your phone Front of the Phone 1. Earpiece 2. Display icons • Top: Signal strength, battery level and various function • Bottom: Soft key indications 3. Alpha numeric keys • In standby mode: Input numbers to Menu Names dial. Hold down 0 –... - Page 15 For your phone 1. Navigation key • In standby mode: U Briefly: Name list of Phonebook D Briefly: List of Voice memo Hold down: Activate Voice memo Briefly: List of Messages Briefly: List of Profiles Hold down: Activate Vibrate mode •...
-
Page 16: Rear Of The Phone
For your phone Rear of the Phone Battery Lock Handstrap Hole SIM Card Socket Battery Battery Terminals Cable Connector Battery Charging Connector... -
Page 17: Key Description
Key Description Letter Keys Each key can be used for several symbols. There are shown below. ❈ You can see this letter keys only in ABC or abc mode. Description . , / ? ! - : ' " 1 A B C 2 Ä... -
Page 18: Display Information
Display Information The screen displays several icons. There are described below. On-Screen Icons Icon/Indicator Description Tells you the strength of the network signal. Call is connected. You can use GPRS service. Shows that you are using a roaming service. Line 1/2 is in use for outgoing calls – if you subscribe to the Two Line Service. - Page 19 Display Information Icon/Indicator Description Indicates the General answering phone feature is activated. Indicates the Meeting answering phone feature is activated. Indicates the Driving answering phone feature is activated. Indicates the user-defined 1 answering phone feature is activated. Indicates the user-defined 2 answering phone feature is activated.
-
Page 20: Getting Started
Getting Started 1. Inserting the SIM Card 1. With the back of the phone, press the latch up and hold it. Lift the battery away as shown. 2. Slide the SIM card into the slot, under the silvery holders, with the golden connectors facing downward. - Page 21 Getting Started SIM Card • When you register as a subscriber with a network operator, you can get a SIM (Subscriber Identity Module) card. The SIM card contains a computer chip that keeps track of your phone number, the services included in your subscription and your phone book information among other things.
-
Page 22: Charging The Battery
Getting Started 2. Charging the Battery To connect the travel adapter to the phone, you must have installed the battery. 1. Ensure the battery is fully charged before using the phone. 2. With the arrow facing you as shown in the diagram push the plug on the battery adapter into the socket on the bottom of the phone until it clicks into place. -
Page 23: Disconnecting The Charger
Getting Started Warning • Unplug the power cord and charger during lightning storms to avoid electric shock or fire. • Make sure that no sharp-edged items such as animal teeth, nails, come into contact with the battery. There is a risk of this causing a fire. •... -
Page 24: Making And Answering Calls
Making and Answering Calls Making a call 1. Key in phone number including the area code. If you want to delete number, press C. 2. Press S to call the number. 3. Press E to end the call. International Calls 1. -
Page 25: In Call Menu
In call Menu The menu displayed on the handset screen during a call is different to the default main menu reached from the idle screen, and the options are described here. 1 During a call 1-1 Putting a Call on Hold When a call is made or answered, press the S [Send] to place it on hold. - Page 26 In call Menu If Call Waiting is on, you can put the first call on hold and answer the second, by pressing S [Send] or by selecting < [Answer], then Hold & Answer. You can end the current call and answer the waiting call by selecting <...
-
Page 27: Multiparty Or Conference Calls
In call Menu 2 Multiparty or Conference Calls The multiparty or conference service provides you with the ability to have a simultaneous conversation with more than one caller, if your network service provider supports this feature. A multiparty call can only be set up when you have one active call and one call on hold, both calls having been answered. - Page 28 In call Menu 2-5 Adding Calls to the Multiparty Call To join an active call to the held multiparty call, select <[Options] then Multiparty/Join all. 2-6 Displaying Callers in a Multiparty Call To scroll though the numbers of the callers who make up a multiparty call on the handset screen, press D and U keys.
-
Page 29: Access Codes
Access Codes You can use the access codes described in this section to avoid unauthorized use of your phone. The access codes (except PUK and PUK2 codes) can be changed by using [Menu 4-5-5]. PIN code (4 to 8 digits) The PIN (Personal Identification Number) code protects your SIM card against unauthorized use. -
Page 30: Security Code (4 To 8 Digits)
Access Codes Security code (4 to 8 digits) The security code protects the unauthorized use of your phone. It is usually supplied with the phone. This code is required to delete all phone entries and to activate “Reset settings” menu. The default number is “0000”. -
Page 31: Menu Tree
Menu Tree 1. Messages 2. Call register 1.1 Write short message 2.1 Missed calls 1.2 Write multimedia 2.2 Received calls message 2.3 Dialled calls 1.3 Inbox 2.4 All calls 1.4 Outbox 2.5 Delete recent calls 2.5.1 Missed calls 1.5 Voice mail 2.5.2 Received calls 1.5.1 Listen to voice mail 2.5.3 Dialled calls... - Page 32 Menu Tree 4. Settings 5. Salah 4.1 Alarm clock 5.1 Qiblah direction 4.2 Date & Time 5.2 View Azan 4.2.1 Set date 5.3 Azan settings 4.2.2 Date format 5.3.1 Azan on/off 4.2.3 Set time 5.3.2 Calculation methods 4.2.4 Time format 5.3.3 Juristic methods 4.2.5 Daylight saving 5.3.4 Azan time display...
- Page 33 Menu Tree 7. Fun & Tool 8. Internet 7.1 Games 8.1 Home 7.2 My folder 8.2 Bookmarks 7.2.1 Pictures 8.3 Push messages 7.2.2 Sounds 8.4 Profiles 7.3 Melody composer 8.5 Goto URL 7.4 Calculator 8.6 Cache settings 7.5 Unit converter 8.7 Security certification 7.6 World time 8.8 Reset profiles...
-
Page 34: Messages [Menu 1]
Messages [Menu 1] This menu includes functions related to SMS (Short Message Service), MMS (Multimedia Message Service), voice mail, as well as the network’s service messages. Write short message [Menu 1-1] You can write and edit text message, checking the number of message pages. - Page 35 Messages • Text templates You can use Text templates already set in the phone. • Phonebook You can add phone numbers or e-mail addresses in Phonebook. • Business card You can add your contact information to the message. Options • Send Sends text messages.
-
Page 36: Write Multimedia Message [Menu 1-2]
Messages • T9 languages Select a T9 input mode. • Exit If you press Exit while writing a message, you can end the writing message and back to the Message menu. The message you have written is not saved. Write multimedia message [Menu 1-2] You can write and edit multimedia messages, checking message size. - Page 37 Messages • Save You can save multimedia messages in the outbox or as templates. • Add slide You can add a slide before or after current slide. • Move to slide You can move to previous or next slide. • Delete slide You can delete current slides.
- Page 38 Messages How to Use T9 T9 allows you to input text quickly. In T9, you only need to press the key with the corresponding letter once. This is based on a built-in dictionary to which you can also add new words. •...
- Page 39 Messages Alternatively: Press * key and select insert symbols. Select the desired character and press Select. 2. When you have finished writing a word, check whether the word is correct. If the word is correct: Press 0 and write the next word. If the word is not correct: Search by U , D (Previous and Next word).
-
Page 40: Inbox [Menu 1-3]
Messages Inbox [Menu 1-3] You will be alerted when you have received messages. They will be stored in Inbox. In Inbox, you can identify each message by icons. For detail, see the icon directive. Icon directive ] Multimedia message ] Short message ] SIM message ] Read ] Notified multimedia message... - Page 41 Messages Forward You can forward the selected message to another party. Return call You can call back to the sender. Delete You can delete the current message. Extract You can extract picture, sound and text. They will be saved in My folder or Phonebook.
-
Page 42: Outbox [Menu 1-4]
Messages Outbox [Menu 1-4] You can see sent and unsent messages here. For sent message, you can see the delivery status. The browsing is same as that for the inbox message. Icon directive ] Sent ] Unsent ] Delivery confirmed ] SMS sent ❇... -
Page 43: Voice Mail [Menu 1-5]
Messages Voice mail [Menu 1-5] You can receive the voicemail if this feature is supported by your network service provider. When a new voicemail is arrived, the symbol will be displayed on the screen. Please check with your network service provider for details of their service in order to configure the phone accordingly. - Page 44 Messages Read [Menu 1-6-1] 1. When you have received an info service message and select Read to view the message,it will be displayed on the screen. You can read another message by scrolling L , R or < [Next]. 2. The message will be shown until another message is reached. Receive [Menu 1-6-2] •...
-
Page 45: Templates [Menu 1-7]
Messages Topics [Menu 1-6-5] (Dependent to network and subscription) • Add new You can add Info service message numbers in the Phone memory with its nickname. • View list You can see Info service message numbers which you added. If you press <... -
Page 46: Settings [Menu 1-8]
Messages Business card [Menu 1-7-3] You can make your business card. Key in Name, Phone number, Fax number and Email. Settings [Menu 1-8] Short message [Menu 1-8-1] • Message types Text, Voice, Fax, Natl. paging, X.400, E-mail, ERMES Usually, the type of message is set to Text. You can convert your text into alternative formats. - Page 47 Messages Multimedia message [Menu 1-8-2] • Validity period This network service allows you to set how long your text messages will be stored at the message centre. • Delivery report If it is set to Yes in this menu, you can check whether your message is sent successfully.
-
Page 48: Call Register [Menu 2]
Call register [Menu 2] Missed calls [Menu 2-1] This menu shows recently missed numbers. You can call these numbers, save and view the date and the time. Received calls [Menu 2-2] This menu shows recently received numbers. You can call these numbers, save and view the date and the time. - Page 49 Call register Call duration [Menu 2-6-1] This function allows you to view the duration of your Last Call, All Calls, Received calls and Dialled calls in hours, minutes and seconds. You can also reset the call timers. 1. Press < [Menu] in standby mode. 2.
- Page 50 Call register Settings [Menu 2-6-3] (SIM Dependent) • Set tariff You can set the currency type and the unit price. Contact your service providers to obtain charging unit prices. To select the currency or unit in this menu, you need the PIN2 code. If you want to input , £, $ symbol, clear all currency strings and then press * key.
-
Page 51: Gprs Information [Menu 2-7]
Call register GPRS information [Menu 2-7] You can check the amount of data transferred over the network through GPRS. In addition, you can view how much time you are online. Call duration [Menu 2-7-1] You can check the duration of Last call and All calls and you can also Reset all the call timers. -
Page 52: Profiles [Menu 3]
Profiles [Menu 3] In this menu, you can adjust and customize the phone tones for different events and environments. 1. Press < [Menu] in standby mode. 2. Press 3 for direct access or use U and D. 3. You can also enter this menu directly by pressing L key in standby mode. - Page 53 Profiles Activate [Menu 3-x-1] Activates the selected Profile. Personalise [Menu 3-x-2] Each has the submenus as shown below except for Vibrate only. Call alert type Allows to select alert type such as Ring, Vibrate, etc. for the incoming for adjusting environment. Ring tone Allows to set the ring tone for adjusting environment.
- Page 54 Profiles Auto answer This function will be activated only when your phone is connected to the headset. • Off : The phone will not answer automatically. • After 5 secs: After 5 seconds, the phone will answer automatically. • After 10 secs: After 10 seconds, the phone will answer automatically.
-
Page 55: Settings [Menu 4]
Settings [Menu 4] You can set the following menus for your convenience and preferences. 1. Press < [Menu] in standby mode. 2. Press 4 for direct access to enter Settings. Alarm clock [Menu 4-1] You can set up to 5 alarm clocks to go off at a specified time. 1. -
Page 56: Phone Settings [Menu 4-3]
Settings Daylight saving [Menu 4-2-5] • On You can apply summer time on your phone directly, press < [Select]. • Define summer You can set a specified period for summer time by typing the date exactly. • Off You can cancel the daylight saving set. Phone settings [Menu 4-3] You can set functions relating to the phone. -
Page 57: Call Settings [Menu 4-4]
Settings • Greeting note If you select On, you can edit the text which is displayed in standby mode. • Backlight You can set the light-up duration of the Internal display. • LCD contrast You can set the brightness of LCD by pressing L , R. •... - Page 58 Settings • All voice calls Diverts voice calls unconditionally. • If busy Diverts voice calls when the phone is in use. • If no reply Diverts voice calls which you do not answer. • If out of reach Diverts voice calls when the phone is switched off or out of coverage.
- Page 59 Settings - Cancel Deactivate the corresponding service. - View status View the status of the corresponding service. Answer mode [Menu 4-4-2] • Slide open If you select this menu, you can receive an incoming call by sliding open the keypad. •...
- Page 60 Settings Call waiting [Menu 4-4-4] (network dependent) • Activate If you select Activate, you can accept a waiting (receiving) call. • Cancel If you select Cancel, you cannot recognize the waiting (receiving) call. • View status Shows the status of Call waiting. Sound alert [Menu 4-4-5] •...
-
Page 61: Security Settings [Menu 4-5]
Settings • Off Your phone will not make any attempts to redial when the original call has not connected. Closed user group [Menu 4-4-8] (network dependent) Restricts usage of the phone with numbers that belong to certain user groups. When this function is used, every outgoing call is associated with a group index. - Page 62 Settings 1. Select PIN code request in the security settings menu, and then press < [Select]. 2. Set On/Off. 3. If you want to change the setting, you need to enter PIN code when you switch on the phone. 4. If you enter wrong PIN code more than 3 times, the phone will lock out.
- Page 63 Settings Note • To deactivate key lock, you should press < [Unlock] then press * key or slide the keypad down. Call barring [Menu 4-5-4] The Call barring service prevents your phone from making or receiving certain category of calls. This function requires the call barring password.
- Page 64 Settings Each all barring menu has following submenus: • Activate Allows to request the network to set call restriction on. • Cancel Set the selected call restriction off. • View status Check if the calls are barred or not. Fixed dial number [Menu 4-5-5] (SIM dependent) You can restrict your outgoing calls to selected phone numbers.
-
Page 65: Network Settings [Menu 4-6]
Settings Network settings [Menu 4-6] You can select a network which will be registered either automatically or manually. Usually, the network selection is set to Automatic. Automatic [Menu 4-6-1] If you select Automatic mode, the phone will automatically search for and select a network for you. -
Page 66: Salah [Menu 5]
Salah [Menu 5] This menu informs the direction of Makkah (Qiblah) for a prayer. If you set the each sub menu manually, you can recognise the direction conveniently wherever you are. 1. Press < [Menu] in standby mode. 2. Press 5 for direct access for use and to enter Salah. Note •... -
Page 67: View Azan [Menu 5-2]
Salah Options • Set as wallpaper You can select Qiblah direction as wallpaper in standby display. • Calibrate In this Menu, you can get a right direction by calculating wherever you are. 1. Press < [Select]. 2. The message, ‘Your phone should remain flat for right direction’ is appeared in the display screen. - Page 68 Salah Calculation methods [Menu 5-3-2] There are five different calculation methods to calculate the Fajr and Isha prayer timings. You should choose one of calculation methods according to your Region. For details, see the table as follows. Juristic methods [Menu 5-3-3] In this menu, you can choose the Juristic method between Standard and Hanafi.
-
Page 69: City Setting [Menu 5-4]
Salah Azan time display [Menu 5-3-4] • On/Off If you select On, you can see the Azan timetable in standby display. Selection of Azan times [Menu 5-3-5] 1. Scroll to highlight each Azan clock, press < [On/Off]. 2. You select more than one among Fajr, Shuruq, Dhuhr, Asr, Maghrib and Isha, then press >... - Page 70 Salah Manual set • Edit name You can type a city name that you want to see the Azan time. • Latitude & longitude You can set a city with calculating a latitude & Latitude & longitude a longitude by typing a number manually. See the inner supplement to check Longitude &...
-
Page 71: Organiser [Menu 6]
Organiser [Menu 6] Scheduler [Menu 6-1] When you enter this menu a Calendar will show up. On top of the screen there are sections for date. Also on bottom of the screen there are sections for icons (schedule, memo). Whenever you change the date, the calendar will be updated according to the date. -
Page 72: Phonebook [Menu 6-2]
Organiser View [Menu 6-1-2] Shows the note for the chosen day. Use U , D to browse through the note lists. If you set alarm for the note, Alarm watch is displayed. At that time, if you press < [Select], you can see the note in detail. Press <... - Page 73 Organiser 4. Instant searching is available by inputting the initial letter of the name or number you want to search. 5. If you want to edit, delete, copy an entry, or to add the voice to one, select < [Options]. The following menu will be displayed. •...
- Page 74 Organiser 3. Select the memory you want to save: SIM or Phone. If set to Phone, you need to select which number you want as Main number. a. Press < [Select] to input a name. b. Press < [OK], then you can input a number. c.
- Page 75 Organiser Caller groups [Menu 6-2-3] You can list up to 20 members per one group. There are 7 groups you can make lists to. 1. In standby mode, press > [Names]. 2. Scroll to Caller groups item then press <[Select], and every Group list will be displayed.
- Page 76 Organiser Speed dials [Menu 6-2-4] You can assign any of the keys, 2 to 9 with a Name list entry. You can call directly by pressing this key for 2-3 seconds. 1. Open the phonebook first by pressing > [Names] in standby mode.
- Page 77 Organiser Settings [Menu 6-2-6] 1. Press > [Names] in standby mode. 2. Scroll to Settings, then press < [Select]. • Set memory Scroll to highlight Set memory, then press < [Select]. - If you select Variable, when adding entry, the phone will ask where to store.
- Page 78 Organiser The submenus • Keep original When copying, Original Dial Number is kept. • Delete original When copying, Original Dial Number will be erased. Delete all [Menu 6-2-8] You can delete all entries in SIM, Phone, and Voice. This function requires Security code except for voice.
-
Page 79: Calendar Setting [Menu 6-3]
Organiser • Memory status This feature allows you to see how many free and in-use are in your phonebook. 1. Open the phonebook first by pressing > [Names] in standby mode. Select Information by pressing < [Select]. 2. Scroll to Memory status, then press < [Select]. •... -
Page 80: Fun & Tools [Menu 7]
Fun & Tools [Menu 7] Games [Menu 7-1] The phone offers you the games to play with. Note • The control keys are different depending on a game. However, each one has an introduction to explain the main control keys. The rest ones are as follows. [Common Key Function] <... -
Page 81: Melody Composer [Menu 7-3]
Fun & Tools • Set as Wallpaper / Set as ring tone You can set downloaded sounds or pictures as Ring tone or wallpaper. • Delete You can delete each downloaded content. • Delete all You can delete all downloaded contents except for Sounds. Melody composer [Menu 7-3] You can compose a ring tone melody which you want. -
Page 82: Unit Converter [Menu 7-5]
Fun & Tools 7. If you press * key, you can input a minus number. In addition, if you press # key, you can input a decimal number. 8. To end Calculator, press > [Back]. Unit converter [Menu 7-5] This converts any measurement into a unit you want. There are 4 types that can be converted into units: Length, Area, Weight, and Volume. -
Page 83: Answering Phone [Menu 7-8]
Fun & Tools View list [Menu 7-7-2] The phone shows voice memo list. You can Playback and Delete the recorded voice memo. Answering phone [Menu 7-8] Allow you to set your phone into automatic answering mode for adjusting environment. Answering off [Menu 7-8-1] Allow you to inactivate the answering phone mode. - Page 84 Fun & Tools Recorded messages [Menu 7-8-7] It shows the list of recorded messages including recorder’s name and recorded time at the bottom of the screen. • Play You can listen the recorded voice messages. • Delete You can delete the listened voice messages. •...
-
Page 85: Java [Menu 7-9]
Fun & Tools • After 5 rings After 5 rings your phone will be activated to answering phone mode. Java [Menu 7-9] Applications [Menu 7-9-1] Java Menu Options Scroll to an application and select Options. 1. Open: Launches the selected MIDlet. 2. -
Page 86: Internet [Menu 8]
Internet [Menu 8] The phone supports services based on Wireless Application Protocol (WAP). You can access services supported by your network. The services menu allows you to get the information such as news, weather reports, and flight times. Home [Menu 8-1] Connect to a homepage. -
Page 87: Profiles [Menu 8-4]
Internet Profiles [Menu 8-4] You can make up to 10 profiles and activate only one out of them. Scroll to the desired profile and press < to access available options. • Activate You can activate the profile you want. • Settings You can edit and change WAP settings of the selected profile. - Page 88 Internet Call speed : The speed of your data connection; 9600 or 14400. Linger time : You need to enter timeout period.After entering that, the WAP navigation service will be unavailable if any data is not input or transferred. - GPRS settings The service settings are only available when GPRS is chosen as a bearer service.
-
Page 89: Goto Url [Menu 8-5]
Internet • Rename Edit the Profile Name. • Delete Delete the Profile. • Add new You can add a new profile manually. • Email server - Connect Connect to the E-mail server that you configured. - Edit address Edit the E-mail address. Goto URL [Menu 8-5] You can directly connect to the site you want. -
Page 90: Security Certification [Menu 8-7]
Internet Security certification [Menu 8-7] A list of the available certificates is shown. Reset profiles [Menu 8-8] You can reset profiles to return to original settings. Browser version [Menu 8-9] The WAP Browser version is displayed. -
Page 91: On Browsing Menu
On browsing menu If you are on line, you can view the following menus. I Home Refer to [Menu 8-1]. I Reload Reloads the current page. I Bookmarks See [Menu 8-2]. I Save as bookmark You can save a site as bookmark. I Messages During Wap connection, you can see the Short messages. -
Page 92: Sim Service [Menu 9]
SIM service [Menu 9] Your service provider can offer special application through SIM card, such as home banking, stock market, etc. If you are registered for one of these services, the service name will appear at the end of the main menu. -
Page 93: Accessories
You can connect your phone to PC to exchange the data between them. Note • Always use genuine LG accessories. • Failure to do this may invalidate your warranty. • Accessories may be different in different regions; please check with our regional service company or agent for further... -
Page 94: Technical Data
Technical Data General Product name : F7100 System : GSM 900 / DCS 1800 Ambient Temperatures Max : +55°C Min : -10°C... - Page 95 Suppliers Details Name LG Electronics Inc Address LG Electronics Inc. LG Kang-nam Tower 679, Yoksam-dong, Kangnam-gu, Seoul, Korea Product Details Product Name E- SM 900 / GSM 1800 Dual Band Terminal Equipment Model Name F7100 Trade Name Applicable Standards Details R&TTE Directive 1999/5/EC...
- Page 96 Memo...
- Page 97 Memo...
- Page 98 Memo...
- Page 99 Memo...
- Page 100 City list The following city list indicates the Latitude & Longitude and Greenwich Mean Time (GMT) to set City setting [Menu 5-2]. ❈ E: East, W: West, S: South, N: North Continent Country/City Latitude Longitude Time Zone Continent Country/City Latitude Longitude Time Zone Africa Algeria Kakamega...
- Page 101 Continent Country/City Latitude Longitude Time Zone Continent Country/City Latitude Longitude Time Zone Ritchie GMT +2 Sidi Ifni Sidi Kacem Rustenburg GMT +2 Saldanha GMT +2 Sidi Slimane Sekuruwe GMT +2 Tanger Soweto GMT +2 Tan-tan Springbok GMT +2 Taza Stanger GMT +2 Taroudant Strand...
- Page 102 Continent Country/City Latitude Longitude Time Zone Continent Country/City Latitude Longitude Time Zone Tabriz GMT +3.5 George Town 100E GMT +8 Taft GMT +3.5 Ipoh 101E GMT +8 Torbat-Heydarieh GMT +3.5 Johor Bahru 103E GMT +8 Yazd GMT +3.5 Kota Kinabalu 116E GMT +8 Zanjan...
- Page 103 Continent Country/City Latitude Longitude Time Zone Continent Country/City Latitude Longitude Time Zone Jizan GMT +3 Gumushane GMT +2 Khamis Mushait GMT +3 Hakkari GMT +2 Khobar GMT +3 Hatay GMT +2 Madinah GMT +3 Icel GMT +2 Makkah GMT +3 Igdir GMT +2 Najran...
- Page 104 How to Calibrate Before using Calibrate, you must set City setting [Menu 5-2]. For futher details, see page 66 in the User’s Manual. 1. In standby mode, press < ➝ 5 ➝ 1 to enter Direction indicator. 2. Press < [Options] and then select Calibrate.