
Related Manuals for Brother P-Touch 2450DX


Summary of Contents for Brother P-Touch 2450DX
- Page 1 2450DX USER’S GUIDE • Read this User’s Guide before you start using your P-touch. • Keep this User’s Guide in a handy place for future reference. www.p-touch.com...
- Page 2 You no longer have to worry about urgent tasks that require professional printing. In the office, the factory, the lab and the home, the quality and performance of the P-touch 2450DX makes it an extremely practical machine. Finally, as you may want to refer to this User’s Guide occasionally, we suggest that you keep it in a handy place.
-
Page 3: Table Of Contents
AC ADAPTER ... 4 TAPE CASSETTE ... 5 CONNECTING THE P-TOUCH TO A COMPUTER ... 6 INSTALLING THE SOFTWARE & PRINTER DRIVER ... 7 READING THE USER’S GUIDE... 32 USING P-TOUCH EDITOR 3.2 ... 33 USING P-TOUCH QUICK EDITOR ... 36 UNINSTALLING THE SOFTWARE &... - Page 4 SIZE & WIDTH FUNCTIONS... 76 STYLE FUNCTION ... 79 UNDERLINE FUNCTION ... 82 FRAME FUNCTION... 83 TAPE MARGIN FUNCTION ... 84 HORIZONTAL ALIGNMENT FUNCTION ... 85 MIRROR PRINTING FUNCTION... 86 LENGTH FUNCTION ... 88 BAR CODE FUNCTION ... 89 AUTO CUT FUNCTION... 92 PRINT KEY ...
-
Page 5: Getting Started
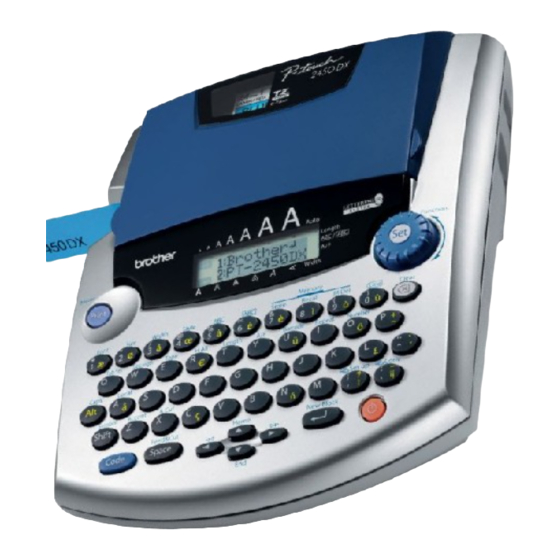
Getting Started GENERAL DESCRIPTION TOP VIEW Keyboard BOTTOM VIEW Tape compartment cover AC adapter connector USB port Navigation dial LCD display Tape exit slot Battery compartment cover... -
Page 6: General Precautions
KEYBOARD & LCD DISPLAY GENERAL PRECAUTIONS Use only Brother TZ tapes with this machine. Do not use tapes that do not have the mark. Do not pull on the tape being fed from the P-touch. This may damage the tape cassette. -
Page 7: Batteries
Do not expose the machine to high temperatures or high humidity. Never leave it on the dashboard or in the back of your car. Do not leave any rubber or vinyl on the machine for an extended period of time. Doing so may cause staining. -
Page 8: Ac Adapter
The AC adapter (model H/H1) allows you to use this machine wherever there is an electrical outlet. To connect the AC adapter: 1 Insert the plug on the adapter cord into the connector marked DC IN 9.5V on the right side of the machine. -
Page 9: Tape Cassette
A single TZ tape cassette is supplied with this unit. However, since TZ tape cassettes are avail- able for this machine in a wide variety of colours and sizes, it is possible to make distinctive colour-coded and stylised labels. In addition, this machine has been designed to allow you to change the tape cassettes quickly and easily. -
Page 10: Connecting The P-Touch To A Computer
P-touch is connected to the computer or turned on. Follow the installation procedure on pages 7 through 31 to install the P-touch Editor software and the printer driver, and connect the P-touch to the computer when you are instructed to do so. -
Page 11: Installing The Software & Printer Driver
In order to provide even more illustration and layout features to the label-making possibilities available with your P-touch, two applications are available on the enclosed CD-ROM: P-touch Editor 3.2 and P-touch Quick Editor. With either applications, the printer driver must also be installed in order to print labels from the P-touch. - Page 12 (Driver). (With Win- ® dows XP, a message appears, inform- ing you that the printer driver has passed Brother’s own compatibility tests and that “Continue Anyway” should be clicked if a warning mes- sage appears. Click “OK”.) ®...
- Page 13 4 Carefully read the contents of the “Wel- come” dialog box, and then click “Next” to continue. The “User Information” dialog box appears. 5 Type the necessary information into the appropriate boxes (If the information has already been registered in Windows automatically appear.), “Next“.
- Page 14 •For a Typical or Compact installation Selecting “Typical” or “Compact”, then clicking “Next” immediately starts installa- tion. Typical: All of the basic options (P-touch Editor 3.2, Clip art, Auto Format templates, Help and fonts) are installed. Compact: Only P-touch Editor 3.2 is installed.
- Page 15 Click “OK“. The first Driver Setup dialog box appears, informing you that the PT-2450DX printer driver will be installed. Continue with the procedure in INSTALLING THE USB PRINTER DRIVER on page 15.
- Page 16 (Driver). (With Win- ® dows XP, a message appears, informing you that the printer driver has passed Brother’s own compatibility tests and that “Continue Anyway” should be clicked if a warning message appears. Click “OK”.) ® Wizard for installing...
- Page 17 4 Carefully read the contents of the “Wel- come” dialog box, and then click “Next” to continue. The “User Information” dialog box appears. 5 Type the necessary information into the appropriate boxes (If the information has already been registered in Windows automatically appear.), “Next“.
- Page 18 The first Driver Setup dialog box appears, informing you that the PT-2450DX printer driver will be installed. Continue with the procedure in INSTALLING THE USB PRINTER DRIVER on page 15. If the printer driver is already installed, click “No”. A dialog box appears explaining that installation is finished.
- Page 19 With Plug-and-Play, new devices connected to the system are detected, and their drivers are automatically installed. If the P-touch 2450DX is to be connected through the USB port, its driver will be installed with Plug-and-Play. Be sure to read the installation instructions described below before installing the printer driver supplied on the CD-ROM.
- Page 20 With Windows ® Windows appears, informing you that the printer driver has passed Brother’s own com- patibility tests and that “Continue Any- way” should be pressed if a warning message appears. Click “OK”. 1 A dialog box appears, informing you that the PT-2450DX printer driver will be installed.
- Page 21 Hardware Wizard has finished installing the software for the PT-2450DX. Click “Finish”. If a “Driver Setup” dialog box appears, indicating that the printer driver has been installed, click “Finish”. 6 A dialog box appears, indicating that the installation is finished.
- Page 22 4 Click the lower button (Driver). ® Windows appears, informing you that the printer driver has passed Brother’s own com- patibility tests and that “Continue Any- way” should be pressed if a warning message appears. Click “OK”. 5 A “Driver Setup” dialog box appears, allow- ing you to select whether to replace, add or delete the PT-2450DX printer driver.
- Page 23 Windows to a P-touch 2450DX with a different serial number. If “Add Brother PT-2450DX.” is selected, a new printer driver is added. With a USB connection on Windows new printer. Select this option when connecting and using multiple P-touch 2450DX with the same computer.
- Page 24 PT-2450DX. Click “Finish”. 0 A Driver Setup dialog box appears, indicat- ing that the printer driver has been installed. Select “Yes, restart immediately”, click “Fin- ish” to restart the computer, and then remove the CD-ROM from the computer.
- Page 25 On a Macintosh Computer The Mac version of the software is for a Macintosh with an English operating system. If the software is installed on a Macintosh with an operating system in a different language, the soft- ware may not run properly. BEFORE INSTALLATION Check that your system configuration meets the following requirements.
- Page 26 7 Select the installation method. •For a basic installation Clicking “Install” immediately starts install- ing all options. The PT-2450DX Printer Driver will also be installed automatically. About 20 MB of available hard-disk space is needed to begin installation. In order to install all options, about 100 MB of available hard-disk space is needed.
- Page 27 With Mac OS X 10.1 to 10.2.4 1 With the P-touch and the Macintosh turned off, connect the P-touch to the computer using the enclosed USB interface cable as described on page 6. Be sure to leave the P-touch turned off. 2 Turn on the Macintosh.
- Page 28 8 The “Choose Product Components” dialog box appears. Select the installation method. •For a typical installation Click “Next” to immediately start installing all options. About 20 MB of available hard-disk space is needed to begin installation. In order to install all options, about 100 MB of available hard-disk space is needed.
- Page 29 0 A dialog box appears, allowing you to check the installation. Check that the installation will be performed as desired, and then click “Install”. A After P-touch Editor is installed, a dialog box appears, indicating that the installation is fin- ished.
- Page 30 5 Double-click the P-touch Quick Editor Installer icon in the folder that appears. The installer starts up. 6 Select the installation method. •For a basic installation Clicking “Install” immediately starts install- ing the most basic options. About 20 MB of available hard-disk space is needed to begin installation.
- Page 31 4 Double-click the Mac OS X folder to open it. 5 Double-click the P-touch Quick Editor folder to open it. 6 Double-click the P-touch Quick Editor Installer icon in the folder that appears. 7 The installer starts up, and then the Introduc- tion dialog box appears.
- Page 32 Click “Done”, and then restart the computer. INSTALLING THE PRINTER DRIVER (MAC OS X 10.1 TO 10.2.4) 1 With the P-touch and the Macintosh turned off, connect the P-touch to the computer using the enclosed USB interface cable as described on page 6. Be sure to leave the P-touch turned off.
- Page 33 4 Double-click the Mac OS X folder to open it. 5 Double-click the Driver Installer icon in the folder that appears. 6 The installer starts up, and then a dialog box appears, stating that the administrator pass- word is required in order to install software. Click 7 The Authenticate dialog box appears.
- Page 34 A If you agree, click “Agree”. A dialog box appears, allowing you to select the volume where the printer driver will be installed. If “Disagree” is clicked, the installation will be cancelled. B Select the desired volume, and then click “Continue”.
- Page 35 SELECTING THE PT-2450DX AS THE PRINTER With Mac OS 8.6 to 9.X: 1 Turn on the P-touch 2450DX. 2 Pull down the Apple menu and select “Chooser” to display the Chooser window. 3 In the list on the left, click the PT-2450DX icon.
-
Page 36: Reading The User's Guide
READING THE USER’S GUIDE The P-touch Editor User’s Guide can be viewed either by inserting the CD-ROM into the drive each time you wish to refer to it or by installing it onto your computer so that it is quickly available at any time. -
Page 37: Using P-Touch Editor 3.2
USING P-TOUCH EDITOR 3.2 P-touch Editor 3.2 makes it easy for anyone to design and print more complex labels for almost any need imaginable. STARTING UP P-TOUCH EDITOR 3.2 On a computer running Windows 1 Click “Start” in the taskbar to display the Start menu. 2 Point to “Programs”. - Page 38 The cursor flashes in the layout area to indi- cate that you can now type in text. ® 2000 and XP and Macintosh are the same unless When the P-touch 2450DX is selected as the printer: ® 2000 and XP and Macintosh are the same unless ®...
- Page 39 3 Use the computer keyboard to type in the text. 4 To create a new line of text, press the key- board’s Enter key. With P-touch Editor 3.2, text is always typed in using the insert mode. The overwrite mode cannot be used to type in text.
-
Page 40: Using P-Touch Quick Editor
USING P-TOUCH QUICK EDITOR P-touch Quick Editor enables you to design a simple label layout quickly and easily. In addi- tion to the various functions available through the buttons in the toolbar, right-clicking (Win- ® dows ) or holding down the Control key and clicking (Macintosh) in the label view displays a pop-up menu containing more commands. - Page 41 SPECIFYING A LABEL SIZE Before entering text, the label size must be set. A selection of preset layout sizes is available for a variety of needs. Although the screens shown in the following explanations are for Windows and Me, the operations for Windows specifically mentioned.
- Page 42 ® (Windows only) To specify the shortcut keys used to import text, right-click in the label view (or text box), and then click [Options] in the menu that appears. In the Options dialog box that appears, select the desired shortcut keys for importing text. USING THE TEXT HISTORY LIST The 10 most recently printed texts are automatically stored for future use.
- Page 43 VIEWING THE TEXT Layouts that are too long to fit in the screen can be scrolled by clicking the Arrange button ) to view the left, the center, then the right side of the layout with each click of the button. If the label view (or text box) has been moved away from the tool bar, it will be docked before scrolling.
-
Page 44: Uninstalling The Software & Printer Driver
UNINSTALLING THE PRINTER DRIVER Uninstall the PT-2450DX printer driver from a PC as described below. 1 Turn off the P-touch 2450DX, and then disconnect it from the computer. 2 Insert the enclosed CD-ROM into the com- puter’s CD-ROM drive. A dialog box auto- matically appears, allowing you to select the language of the Installer. - Page 45 4 Click the lower button (Driver). ® Windows appears, informing you that the printer driver has passed Brother’s own com- patibility tests and that “Continue Any- way” should be pressed if a warning message appears. Click “OK”. 5 A Driver Setup dialog box appears, allowing you to select whether to replace, add or delete the PT-2450DX printer driver.
- Page 46 Uninstall the P-touch Editor 3.2 software, the P-touch Quick Editor software or the PT-2450DX printer driver from a Macintosh as described below. Before deleting the printer driver, be sure that the P-touch is turned off and disconnected from the computer.
- Page 47 5 Check that “PT-2450DX” does not appear in the Printer List. If it is listed, select it, and then click “Delete” to delete it. 6 Quit Print Center. 7 In the Library folder, open the Printers folder, and then open the Brother folder. 8 Drag the following to the Trash icon. •PT2450DXPDE.plugin...
-
Page 48: Attaching Labels
LAMINATED TAPE The enclosed stick enables you to easily remove the backing from labels printed on laminated tapes. 1 Hold the tape in your left hand, with the printed surface facing up, and hold the stick in your right hand. 2 Pass the tape halfway through the long narrow hole in the stick. - Page 49 INSTANT-LETTERING TAPE (RUB-ON TRANSFERS) Instant-lettering tape is used to transfer your text onto paper. After printing the text onto instant-lettering tape and cutting off the label, position the label with its non-printed side fac- ing up on a sheet of paper. By simply rubbing the instant lettering tape’s non-printed side with the enclosed stick, you can transfer the text directly onto the paper.
- Page 50 Do not move the iron while pressing, otherwise the label may move out of the desired position. Press the iron straight down onto the cloth. After the backing tape has been removed, the transferred label may appear glossy. In addition, some white spots may have appeared on the label if it was touched while the backing tape was peeled off.
- Page 51 FABRIC TAPE Fabric tape is used to attach a piece of fabric printed with your text onto garments using an iron. After printing the text onto fabric tape and cutting off the label using scissors, place the label on an ironed garment at the location where you wish to attach it in such a way that the printed text can be read correctly.
-
Page 52: Print Head & Rollers
PRINT HEAD & ROLLERS Occasionally, specks of dust or dirt become attached to the machine’s print head and rollers. This is particularly likely when you are using the unit outdoors or in a very dusty environment. If a section of the print head is covered with dust, a blank horizontal streak may appear through the label text. -
Page 53: For Your Information
For Your Information The power key ( o ) is located in the lower-right corner of the keyboard. If batteries have been installed or the machine has been plugged in using the optional AC adapter, the previous ses- sion’s information is displayed when the machine is turned on. This feature allows you to stop work on a label, turn off the machine, and return to it later without having to re-enter the text. - Page 54 RIGHT CURSOR KEY To move the cursor one character to the right: Press w once. If the cursor is at the end of a line when this key is pressed, the cursor moves to the beginning of the next line. To move the cursor several characters to the right: Hold down w until the cursor moves to the desired position.
-
Page 55: Navigation Dial
The navigation dial in the upper-right corner of the keyboard provides a quick way to access many of the P-touch functions and to select from the various settings. Refer to the description of each function for a detailed explanation on how to use the navigation dial. To select a function or setting: Rotate + either clockwise or anti/counterclockwise until the desired function or set- ting is displayed. - Page 56 ALT KEY To type in characters printed in colour on the right-hand side of the keys: 1 Press a once to enter Alt mode. The Alt indicator on the left side of the display comes 2 To type in a character written in colour in the lower-right corner of the key, press the key of the desired character.
- Page 57 EXAMPLE To type in “%”: Hold down s and press The Caps mode is similar to holding down uously. To type in many uppercase letters: 1 Hold down c and press comes on. 2 Press the keys of the desired letters or symbols. 3 To exit Caps mode, hold down c and press .
-
Page 58: Space Key
The Space key ( _ ) lets you add blank spaces between characters in your text. It is differ- ent from the right cursor key ( w ), which just moves the cursor without adding blank spaces. To add a space: Press _. -
Page 59: New Block Function
Tape widths 6 mm 9 mm 12 mm 18 mm 24 mm The return key can also be used to select an item from a list (e.g., add a symbol or accented character to the text) or to apply a selected setting. Some questions asking you to confirm a command may appear on the LCD display, especially when the function that you have chosen will delete or affect files. -
Page 60: Tab Function
EXAMPLE To add a new block: Hold down This function allows you to separate sections of a line of text by adding tabs. This enables you to create perfectly aligned columns without having to type in several spaces. All tabs have the same length and are measured from either the beginning of the line or the previous tab if there is more than one. - Page 61 To add a tab to the text: Hold down c and press Q once. The tab mark ( cate the position of the tab. If the text in front of a tab extends past the point where the next section of text should start, the text will instead start at the following tab position.
-
Page 62: Delete Key
The delete key ( * ) allows you to remove characters to the left of the cursor’s current posi- tion. It differs from the left cursor key ( f ), which only moves the cursor without deleting any characters. The delete key can also be used to quit most functions and return to the previous display with- out changing the text. -
Page 63: Clear Function
2 Hold down c and press 0 once. Each time 0 is pressed while c is held down, one line of text is deleted. EXAMPLE To delete “012-345-6789”: Hold down When clearing the display before entering new text, the Clear function can be used to choose whether all of the text is erased and all format functions (Font, Size, Width, Style, Underline, Frame, Tape margin, Alignment, Tab length, Mirror printing, and Length) are returned to their default settings, or whether just the text is erased. - Page 64 EXAMPLE To clear the text and formats: Hold down Rotate (OR press MAT is flashing. Press (OR press To delete just the text: 1 Hold down c and press *. 2 Rotate + (OR press h or e) until TEXT ONLY is selected (flashing). To return to the text without erasing anything, press *.
- Page 65 EXAMPLE To clear just the text: Hold down Rotate (OR press flashing. Press (OR press and press ) until TEXT ONLY is Caps Caps Caps Caps...
-
Page 66: Composite Character Keys
COMPOSITE CHARACTER KEYS This machine can display and print composite characters, which consist of a letter and a dia- critical mark. The diacritical marks available are ˆ, ¨, ´, ` and Several composite characters can be found on the key tops. Characters such as ü, ç, and ñ can be entered using a. -
Page 67: Accent Function
Press E. The Accent function can also be used to add accented characters to your text. Many of these characters can also be found on the keys and typed in using a (refer to page 51), or they can be entered using the composite character keys (refer to page 62). The accented characters are grouped according to the uppercase or lowercase letter that they are combined with. -
Page 68: Symbol Function
To type an uppercase letter, hold down s (OR hold down c and press a to turn on Caps mode) before pressing the letter key. 3 Press + (OR press r). The accented character is added to the text. To type in a series of accented characters, hold down c before pressing + (OR r). - Page 69 The following symbols are available: Group The use of the CE mark is strictly governed by one or more European Council directives. Ensure that any labels you produce which use this mark conform with the relevant directives. To type in a symbol: 1 Rotate + until 19/21 SYMBOL is displayed, and then press + (OR hold down c and press s).
-
Page 70: Auto Format Function
Press (OR press AUTO FORMAT FUNCTION The Auto format function makes creating labels quick and easy. After simply selecting one of the various pre-formatted layouts and typing text into each of its fields, the overall style of the label can easily be changed by selecting one of the 7 available style formats, and then the label is ready to be printed. - Page 71 To print a label using the selected layout: 9 Rotate + (OR press h or e) until PRINT appears below MENU. 0 Press + (OR press r) to print the label, then automatically cut it off. The message “COPIES 1/ 1” appears in the display while the label is being printed. To change the text entered in the layout: A Rotate + (OR press h or e) until CONTINUE appears below MENU.
- Page 72 Type in “2001 Sales Report”, and then press (OR press To change the character style of the label: Rotate (OR press CHNGE STL? is displayed. Press (OR press Rotate (OR press GANT is displayed. Press (OR press To print the label: Press (OR press ) until...
- Page 73 REFERENCE REFERENCE Layout name VCR VHS-1 VCR VHS-2 VCR 8mm-1 VCR 8mm-2 VCR VHSC-1 VCR VHSC-2 AUDIO-1 AUDIO-2 AUDIO-3 DAT-1 DAT-2 MINI DISK1 MINI DISK2 NAME PLATE ADDRESS EQUIPMENT SLIDE PRICE SALE PRICE Tape width × label length 11 SYMBOL? 18 mm ×...
- Page 74 Layout name ORGANISER1 ORGANISER2 FILE LONG FILE LONGV FILE SHORT DISK3.5” miniDV1 miniDV2 FREE FORM1 FREE FORM1 FREE FORM1 FREE FORM1 FREE FORM2 FREE FORM2 FREE FORM2 FREE FORM2 1 VCR VHS-1 2 VCR VHS-2 4 VCR 8mm-2 Tape width × label length 24 mm ×...
- Page 75 6 VCR VHSC-2 8 AUDIO-2 10 AUDIO-3 12 DAT-1 14 MINI DISK1 16 NAME PLATE 18 ADDRESS 20 EQUIPMENT 22 SLIDE 25 SALE PRICE 7 AUDIO-1 9 AUDIO-2 11 AUDIO-3 13 DAT-2 15 MINI DISK2 17 NAME PLATE 19 ADDRESS 21 EQUIPMENT 23 PRICE 26 SALE PRICE...
- Page 76 27 ORGANISER1 29 FILE LONG 30 FILE LONG 31 FILE LONGV 32 FILE LONGV 33 FILE SHORT 35 FILE SHORT 37 DISK3.5” 39 miniDV1 41 FREE FORM1 28 ORGANISER2 34 FILE SHORT 36 FILE SHORT 38 DISK3.5” 40 miniDV2 42 FREE FORM1...
- Page 77 43 FREE FORM1 45 FREE FORM2 47 FREE FORM2 CHAR.STYLE setting ORIGINAL ITALIC DYNAMIC ARTISTIC FORMAL ELEGANT 44 FREE FORM1 46 FREE FORM2 48 FREE FORM2 Sample Font setting Layout default FONT 8 FONT 4 FONT 2 FONT 3 Style setting Layout default ITALIC SOLID...
-
Page 78: Local Format Function
CHAR.STYLE setting NATURAL LOCAL FORMAT FUNCTION The Local format function allows you to emphasise a block of the text by printing it with a font, size, width, style, underline or frame setting that is different from the rest of the text. To use the Local format function: 1 Press f, w, h ferent format. -
Page 79: Font Function
Press , rotate played. Press With the Font function, you can choose one of eight fonts for your text. The following font settings are available: (HELSINKI) (BELGIUM) The default font setting is FONT 1. To change the font setting: 1 Rotate + until 01/21 FONT (or 01/06 FONT for local formatting) is displayed, and then press + to display the current font setting. -
Page 80: Size & Width Functions
EXAMPLE To select the FONT 2 font setting: While holding down and keep While still holding down until FONT 2 is displayed. Release SIZE & WIDTH FUNCTIONS The character size can be adjusted using both the Size and Width functions. Since the charac- ter size that can be used depends on the width of the tape, the following table shows the char- acter sizes that can be used with each tape width. - Page 81 With the AUTO size setting, the machine compares your text with the width of the installed tape and automatically adjusts the characters to the largest possible size. However, seven other point sizes are also available, and each can be printed with any of the three width settings. Width set- Size ting...
- Page 82 With the AUTO setting selected and 12-mm-, 18-mm- or 24-mm-wide tape installed, text consisting of just one line of only uppercase letters (and no accented characters) will be printed with a character size slightly larger than the maximum possible (29 points for 12-mm-wide tape, 48 points for 18-mm-wide tape, and 62 points for 24-mm- wide tape).
-
Page 83: Style Function
EXAMPLE To select the WIDE width setting: While holding down and keep While still holding down until WIDE is displayed. Release You can choose from eleven different character styles to apply to your text. Characters printed using the smaller sizes may be difficult to read if certain style settings (e.g., I+SHAD) are selected. - Page 84 3 Release c to apply the selected style setting to the text. The current style setting is shown by the style indicator at the bottom of the display. EXAMPLE To select the I+SHAD style setting: While holding down and keep While still holding down until I+SHAD is displayed.
- Page 85 Font setting NORMAL FONT 7 FONT 8 Font setting I+BOLD FONT 1 FONT 2 FONT 3 FONT 4 FONT 5 FONT 6 FONT 7 FONT 8 Style setting BOLD OUTLINE Style setting I+OUTL I+SOLID SOLID SHADOW I+SHAD VERT ITALIC...
-
Page 86: Underline Function
UNDERLINE FUNCTION You can emphasise your text by underlining it or striking it out. The default underline setting is OFF. When the Underline function is set to any setting other than OFF, the ABC/ indicator on the right side of the display comes on. UNDL To change the underline setting: 1 Rotate + until 05/21 UNDERLINE (or 05/06 UNDERLINE for local formatting) is dis-... -
Page 87: Frame Function
With the Frame function, you can choose from various frames and highlights to design a more decorative or emphasised label. The default setting is FRAME OFF; however, 15 other settings are also available. Refer to Ref- erence at the end of this section for samples of the available settings. When any setting other than FRAME OFF is selected, the ABC/ of the display comes on. -
Page 88: Tape Margin Function
REFERENCE REFERENCE TAPE MARGIN FUNCTION The Tape margin function allows you to adjust the size of the margins on the left and right sides of your text. The default tape margin setting is FULL; however, three other settings are also available. FULL (24 mm margins) NONE (4 mm margins) When a setting other than FULL is selected, extra tape is fed out before printing starts. -
Page 89: Horizontal Alignment Function
1 While holding down c, press E once, and keep c held down to display the current tape margin setting. 2 While still holding down c, continue pressing E until the desired tape margin setting is displayed. 3 Release c to apply the selected tape margin setting to the entire text. EXAMPLE To select the HALF tape margin setting: While holding down... -
Page 90: Mirror Printing Function
To change the horizontal alignment setting: 1 Rotate + until 11/21 ALIGNMENT is displayed, and then press current horizontal alignment setting. 2 Rotate + until the desired horizontal alignment setting is displayed, and then press + to apply it to the entire text. 1 While holding down c, press R once, and keep c held down to display the current horizontal alignment setting. - Page 91 The default mirror printing setting is OFF. To turn on or off the mirror printing setting: 1 Rotate + until 17/21 MIRROR is displayed, and then press + to display the current mirror printing setting. 2 Rotate + until the desired mirror printing setting is displayed, and then press + to apply it to the entire text.
-
Page 92: Length Function
Although the length of the printed label automatically adjusts to fit the length of the entered text, there may be times when you will want to make a label with a specific length. The Length function allows you to set the label length between 4.0 cm and 30.0 cm. The default length setting is OFF. -
Page 93: Bar Code Function
While still holding down until ON is displayed. Release Press until 12.0cm is displayed. Press The Bar code function, which enables bar codes to be printed as part of labels, is one of this machine’s most advanced features. This section will explain how to enter a bar code into your text. It is not intended as a comprehensive introduction to the concept of barcoding. - Page 94 It is recommended that bar codes be printed with the Tape margin function set to FULL and the bar code WIDTH parameter set to LARGE; otherwise, the bar codes may be dif- ficult to read. To use the Bar code function: 1 Rotate + until 14/21 BAR CODE is displayed, and then press + (OR hold down c and press U once).
- Page 95 The following special characters can only be entered when entering bar code types EAN 128 or CODE 128. Value Special character < > A Press + (OR press r) to add the selected special character to the bar code data. To add the bar code to your text: B Press + (OR press r).
-
Page 96: Auto Cut Function
Press Press is displayed. Press Press Press Press The Auto cut function allows you to set whether or not the machine will automatically cut off each label after it is printed. Turn on the Auto cut function before starting to print in order to cut off the labels automatically after printing them. -
Page 97: Print Key
1 Rotate +until 18/21 AUTO CUT is displayed, and then press + to display the cur- rent auto cut setting. 2 Rotate + until the desired auto cut setting is displayed, and then press + to apply it. 1 While holding down c, press X once, and keep c held down to display the current auto cut setting. -
Page 98: Feed & Cut Function
EXAMPLE To print a label and cut it off: Press once FEED & CUT FUNCTION The Feed & Cut function is used to feed out 24 mm of tape and automatically cut it off, for example after printing with the Auto cut function set to OFF or when printing has been inter- rupted. - Page 99 To use the Numbering function: 1 Rotate + until 16/21 NUMBER is displayed, and then press + (OR hold down c and press O once). The message “START?” appears in the display. To cancel the Numbering function at any time, hold down c and press O (or press just * ).
- Page 100 Rotate (OR press ing, and then press Press (OR press Rotate (OR press Press (OR press Caps Caps ) until “1” is flash- (OR press ) until 3 is displayed. Caps Caps Caps Caps...
-
Page 101: Repeat Printing Function
REPEAT PRINTING FUNCTION This function allows you to print up to 99 copies of the same text. To use the Repeat printing function: 1 Rotate + until 15/21 REPEAT is displayed, and then press + (OR hold down c and press I). The message “COPIES” appears in the display. To cancel the Repeat printing function, hold down c and press I (or press just * ). -
Page 102: Currency Conversion Function
Press (OR press Caps Caps CURRENCY CONVERSION FUNCTION With the easy-to-use Currency conversion function, euros are automatically converted to or from any currency that you select, and the two prices are added to your text. Simply set up the function by selecting which currency you wish to convert and how you want the prices to appear, and then you can quickly create labels containing prices in both euros and one other currency. - Page 103 The following currency settings are available: CHF (Swiss franc), DKK (Danish krone), GBP (British pound), NOK (Norwegian krone), SEK (Swedish krona), AUD (Australian dollar), CAD (Canadian dollar), HKD (Hong Kong dollar), USD (US dollar), ANY1 (in the format X.XXX,XX), ANY2 (in the format X,XXX.XX) 3 Press + (OR press r).
- Page 104 4 Press r. The value is converted and values in both currencies are added to the text at the cursor’s current position. The currency values are added to the text using the formats shown below. Currency ANY1 ANY2 Format X’XXX.XX SwF X’XXX.XX DKK X.XXX,XX £X,XXX.XX...
-
Page 105: Memory Functions
You can use the memory to store your most frequently used text files. The text remains in the memory, along with its formatting, even after all characters are removed from the display using the Clear function (holding down c and pressing * ). When each file is stored, it is given a number to make recalling it easier. - Page 106 RECALLING TEXT To recall a text file: 1 Do either of the following: • Rotate + until 08/21 until RECALL is displayed, and then press +. • Hold down c and press 8. The message “RECALL” appears in the display with the file number and beginning of the most recently stored or recalled text.
- Page 107 To see other parts of the selected text file, press f or w. To display the text stored under other file numbers, rotate + (OR press h or 3 Press + (OR press r). The message “OK TO CLEAR?” appears. To go back and select a different text file, press *.
- Page 108 Rotate (OR press number 1 is displayed. Press To delete the text stored under file number 4: Hold down Rotate (OR press number 4 is displayed. Press Press ) until file and press ) until file Caps Caps Caps Caps Caps Caps...
-
Page 109: Troubleshooting
Problem 1. The display stays blank after you have turned on the machine. 2. The machine does not print or the printed characters are blurred. 3. The text files that you stored in the mem- ory are no longer there. 4. -
Page 110: Error Message List
Error Message 1 BAR CODE This message appears if a bar code PER BLOCK! has already been added to the block when you try to use the Bar code function. 4 DIGIT This message appears when less than MIN.! the minimum four digits are entered as bar code data. - Page 111 Error Message COOLING This message appears when the print DOWN head is used extensively (for exam- ple, when printing multiple copies of a large amount of text). CUTTER This message appears if the tape cut- ERROR! ter is closed when you try to print or feed the tape.
- Page 112 Error Message LENGTH • This message appears if the text is LIMIT! longer than 1 metre when you try to print. • This message appears if the Length function is used to set a label length that is less than 4.0 cm or more than 30.0 cm.
- Page 113 Error Message SET 18mm! This message appears if an 18-mm- wide tape cassette is not installed when an Auto Format layout for an 18-mm- wide tape is selected. SET 12mm! This message appears if a 12-mm-wide tape cassette is not installed when an Auto Format layout for a 12-mm-wide tape is selected.
-
Page 114: Specifications
HARDWARE Input Device: Keyboard - 51 keys 10 characters × 2 lines (semi-graphical) LCD: 20 indicators (including Alt and Caps) Print Tape: Pressure-sensitive, Adhesive-based 8 metres long Five widths available: Power Supply: Eight AA alkaline batteries (AM3, LR6) or AC adapter (model H/H1) Auto power-off if no key is pressed for 5 minutes Print Head:... -
Page 115: Accessories
Supplies Obtain tape cassettes from your nearest authorised dealer. Use only Brother TZ tapes with this machine. Brother cannot be held responsible for trouble caused by the use of unauthorised supplies. Do not use tapes that do not have mark. Tape supply may differ by country. - Page 116 Stock No. TZ-441 Black characters on red adhesive TZ-541 Black characters on blue adhesive TZ-641 Black characters on yellow adhesive TZ-741 Black characters on green adhesive 12-mm-wide laminated tapes TZ-131 Black characters on clear adhesive TZ-132 Red characters on clear adhesive TZ-133 Blue characters on clear adhesive TZ-135...
- Page 117 Stock No. TZ-721 Black characters on green adhesive TZ-A25 Black characters on grey adhesive TZ-M21 Black characters on clear (mat) adhesive 6-mm-wide laminated tapes TZ-111 Black characters on clear adhesive TZ-211 Black characters on white adhesive TZ-315 White characters on black adhesive TZ-611 Black characters on yellow adhesive 24-mm-wide non-laminated tapes...
- Page 118 Strong adhesive tapes Stock No. TZ-S241 18 mm strong adhesive tape (black characters on white adhesive) TZ-S231 12 mm strong adhesive tape (black characters on white adhesive) TZ-S221 9 mm strong adhesive tape (black characters on white adhesive) TZ-S211 6 mm strong adhesive tape (black characters on white adhesive) TZ-S251 24 mm strong adhesive tape (black characters on white adhesive) TZ-S151...
-
Page 119: Index
AC adapter... 4 accented characters ... 63 adding new lines... 54 spaces ... 54 tabs ... 56 aligning... 85 Alt key ... 52 automatic formatting ... 66 backing label ... 44 batteries ... 3 Caps mode... 53 cleaning machine ... 3 print head... - Page 120 P-touch Editor (Mac)... 21 P-touch Editor (PC) ... 7 P-touch Quick Editor (Mac) ... 25 P-touch Quick Editor (PC) ... 11 USB printer driver (Mac)... 28 USB printer driver (PC) ... 15 spaces ... 54 specifications ... 110 storing... 101 style ... 79 symbols...
- Page 121 Printed in China LN1900001...