
Related Manuals for AEG BEK435220M


Summary of Contents for AEG BEK435220M
- Page 1 BEK435220M User Manual Oven Notice d'utilisation Four Benutzerinformation Backofen Istruzioni per l’uso Forno Manual de instrucciones Horno USER MANUAL...
-
Page 2: Table Of Contents
FOR PERFECT RESULTS Thank you for choosing this AEG product. We have created it to give you impeccable performance for many years, with innovative technologies that help make life simpler – features you might not find on ordinary appliances. Please spend a few minutes reading to get the very best from it. - Page 3 for any injuries or damage that are the result of incorrect installation or usage. Always keep the instructions in a safe and accessible location for future reference. 1.1 Children and vulnerable people safety This appliance can be used by children aged from 8 years •...
-
Page 4: Safety Instructions
Do not use the appliance before installing it in the built-in • structure. Do not use a steam cleaner to clean the appliance. • Do not use harsh abrasive cleaners or sharp metal scrapers • to clean the glass door since they can scratch the surface, which may result in shattering of the glass. - Page 5 • Make sure that the parameters on the • Be careful when you open the appliance rating plate are compatible with the door while the appliance is in operation. electrical ratings of the mains power Hot air can release. supply. •...
-
Page 6: Product Description
2.4 Care and cleaning These lamps are intended to withstand extreme physical conditions in household appliances, such as temperature, WARNING! vibration, humidity, or are intended to Risk of injury, fire, or damage to signal information about the operational the appliance. status of the appliance. -
Page 7: Control Panel
3.2 Accessories For cakes and biscuits. Grill- / Roasting pan Wire shelf To bake and roast or as a pan to collect fat. For cookware, cake tins, roasts. Baking tray 4. CONTROL PANEL 4.1 Retractable knobs To use the appliance press the knob. The knob comes out. -
Page 8: Before First Use
5. BEFORE FIRST USE WARNING! Refer to Safety chapters. 5.1 Before first use The oven can emit an odour and smoke during preheating. Make sure that the room is ventilated. Step 1 Step 2 Step 3 Set the clock Clean the oven Preheat the empty oven Remove all accessories and re‐... -
Page 9: Clock Functions
Heating func‐ Application Heating func‐ Application tion tion To bake cakes with crispy bot‐ To roast large meat joints or tom and to preserve food. poultry with bones on one shelf position. To make gratins and to Bottom Heat Turbo Grilling brown. -
Page 10: Using The Accessories
How to change: Time of Day Step 1 - press repeatedly. - starts to flash. Step 2 - press to set the time. After approximately 5 sec., the flashing stops and the display shows the time. - press repeatedly to change the time of day. - starts to flash. -
Page 11: Additional Functions
Wire shelf: Push the shelf between the guide bars of the shelf support. Baking tray / Deep pan: Push the tray between the guide bars of the shelf support. Wire shelf, Baking tray / Deep pan: Push the tray between the guide bars of the shelf support and the wire shelf on the guide bars above. - Page 12 10.1 Cooking recommendations The temperature and cooking times in the tables are guidelines only. They depend on the recipes and the quality and quantity of the ingredients used. Your oven may bake or roast differently to the oven you had before. The tables below show recommended set‐ tings for temperature, cooking time and shelf position for specific types of the food.
- Page 13 10.5 Baking on one shelf level BAK‐ ING IN TINS (°C) (min) Flan base - short True Fan Cooking 170 - 180 10 - 25 pastry, preheat the empty oven Flan base - True Fan Cooking 150 - 170 20 - 25 sponge cake mix‐...
- Page 14 CAKES / PASTRIES / BREADS (°C) (min) Fruit flans (made of yeast 35 - 55 dough / sponge cake mix‐ ture), use a deep pan Yeast cakes with delicate 160 - 180 40 - 80 toppings (e.g. quark, cream, custard) Christstollen 160 - 180 50 - 70...
- Page 15 10.7 Multilevel Baking Use the baking trays. Use the function: True Fan Cooking. CAKES / PASTRIES (°C) (min) 2 positions Cream puffs / Eclairs, pre‐ 160 - 180 25 - 45 1 / 4 heat the empty oven Dry streusel cake 150 - 160 30 - 45 1 / 4...
- Page 16 BEEF (°C) (min) Pot roast 1 - 1.5 kg Conventional Cook‐ 120 - 150 Roast beef or fillet, rare, per cm of thickness Turbo Grilling 190 - 200 5 - 6 preheat the empty oven Roast beef or fillet, medi‐ per cm of thickness Turbo Grilling 180 - 190...
- Page 17 LAMB Use the function: Turbo Grilling. (kg) (°C) (min) Lamb leg / Roast lamb 1 - 1.5 150 - 170 100 - 120 Lamb saddle 1 - 1.5 160 - 180 40 - 60 GAME Use the function: Conventional Cooking. (kg) (°C) (min)
- Page 18 FISH (STEAMED) Use the function: Conventional Cooking. (kg) (°C) (min) Whole fish 1 - 1.5 210 - 220 40 - 60 10.10 Crispy baking with: Pizza Function PIZZA PIZZA Preheat the empty oven before cook‐ ing. Use the first shelf position. Use the second shelf position.
- Page 19 GRILL Use the function: Grill (°C) (min) (min) 1st side 2nd side Roast beef 210 - 230 30 - 40 30 - 40 Beef fillet 20 - 30 20 - 30 Pork loin 210 - 230 30 - 40 30 - 40 Veal loin 210 - 230 30 - 40...
- Page 20 10.13 Defrost For large portions of food place an upturned empty plate on the bottom of the oven cavity. Remove the food packaging and put the food Put the food in a deep dish and set it on top on a plate. of the plate inside the oven.
- Page 21 VEG‐ VEGETA‐ ETABLES (min) (min) BLES (°C) Cooking Continue to Beans 60 - 70 6 - 8 time until cook at simmering 100 °C Peppers 60 - 70 5 - 6 Vegetables for soup 60 - 70 5 - 6 Carrots 50 - 60 5 - 10...
- Page 22 (°C) (min) Bread sticks, 0.5 kg in total 190 - 200 50 - 60 Baked scallops in shells 180 - 200 30 - 40 Whole fish in salt, 0.3 - 0.5 kg 190 - 200 45 - 50 Whole fish in parchment, 0.3 - 0.5 kg 190 - 200 50 - 60 Amaretti (20;...
-
Page 23: Care And Cleaning
MULTILEVEL BAKING. Biscuits (°C) (min) Short bread / Pastry strips True Fan Cooking 25 - 45 1 / 4 Small cakes, 20 per tray, pre‐ True Fan Cooking 23 - 40 1 / 4 heat the empty oven Fatless sponge cake True Fan Cooking 35 - 50 1 / 4... - Page 24 Clean all accessories after each use and let them dry. Use a soft cloth with warm water and a mild detergent. Do not clean the accessories in a dishwasher. Do not clean the non-stick accessories using abrasive cleaner or sharp-edged objects. Accessories 11.2 How to remove: Shelf supports Remove the shelf supports to clean the oven.
-
Page 25: Troubleshooting
11.4 How to remove and install: 11.5 How to replace: Lamp The number of glass panels is different for WARNING! different models. Risk of electric shock. The lamp can be hot. CAUTION! Carefully handle the glass, especially around the edges of the front panel. -
Page 26: Energy Efficiency
Serial number (S.N.) ......... 13. ENERGY EFFICIENCY 13.1 Product Information and Product Information Sheet* Supplier's name Model identification BEK435220M 944188023 Energy Efficiency Index 81.2 Energy efficiency class Energy consumption with a standard load, conventional mode 0.99 kWh/cycle Energy consumption with a standard load, fan-forced mode 0.69 kWh/cycle... - Page 27 Keep food warm Moist Fan Baking Choose the lowest possible temperature Function designed to save energy during setting to use residual heat and keep a meal cooking. warm. 14. ENVIRONMENTAL CONCERNS appliances marked with the symbol with Recycle materials with the symbol .
-
Page 28: Information Sur La Sécurité
POUR DES RÉSULTATS PARFAITS Merci d'avoir choisi ce produit AEG. Nous l'avons conçu pour vous offrir des performances irréprochables pendant longtemps, avec des technologies innovantes qui simplifient la vie : autant de caractéristiques que vous ne trouverez peut-être pas sur des appareils ordinaires. - Page 29 responsable des blessures et dégâts résultant d'une mauvaise installation ou utilisation. Conservez toujours les instructions dans un lieu sûr et accessible pour vous y référer ultérieurement. 1.1 Sécurité des enfants et des personnes vulnérables Cet appareil peut être utilisé par des enfants âgés d'au •...
-
Page 30: Consignes De Sécurité
Avant d'effectuer une opération de maintenance, • débranchez l'appareil de la prise secteur. AVERTISSEMENT : Assurez-vous que l'appareil est éteint • et débranché avant de remplacer l'éclairage afin d'éviter tout risque de choc électrique. N'utilisez pas l'appareil avant de l'avoir installé dans la •... - Page 31 Assurez-vous que la prise secteur est accessible après l'installation. Largeur de l’arrière de l’ap‐ 559 mm • Si la prise secteur est détachée, ne pareil branchez pas la fiche secteur. Profondeur de l'appareil 567 mm • Ne tirez pas sur le câble secteur pour débrancher l'appareil.
- Page 32 2.4 Entretien et Nettoyage • Ne laissez pas des étincelles ou des flammes nues entrer en contact avec l'appareil lorsque vous ouvrez la porte. AVERTISSEMENT! • Ne placez pas de produits inflammables Risque de blessure, d'incendie ou d'éléments imbibés de produits ou de dommages matériels sur inflammables à...
-
Page 33: Description De L'appareil
2.7 Mise au rebut • Coupez le câble d'alimentation au ras de l'appareil et mettez-le au rebut. • Retirez le dispositif de verrouillage du AVERTISSEMENT! hublot pour empêcher les enfants et les Risque de blessure ou animaux de s'enfermer dans l'appareil. d'asphyxie. -
Page 34: Bandeau De Commande
4. BANDEAU DE COMMANDE 4.1 Manettes rétractables Pour utiliser l'appareil, appuyez sur la manette. La manette sort alors de son logement. 4.2 Touches sensitives Pour régler l'heure. Pour régler une fonction de l'horloge. Pour régler l'heure. 4.3 Affichage A. Fonctions de l’horloge B. -
Page 35: Utilisation Quotidienne
Retirez les supports de grille Réglez la température maxima‐ Appuyez sur : amovibles et tous les accessoi‐ le pour la fonction : - appuyez pour régler res du four. Durée : 1 h Nettoyez le four et les acces‐ l’heure. Appuyez sur : Réglez la température maxima‐... -
Page 36: Fonctions De L'horloge
Pendant la cuisson, la porte du four doit Durant certaines fonctions, rester fermée pour éviter d'interrompre la l'éclairage s'éteint fonction et pour un fonctionnement avec la automatiquement lorsque le four meilleure efficacité énergétique possible. atteint une température Pour obtenir des instructions de cuisson, inférieure à... -
Page 37: Utilisation Des Accessoires
Comment régler : Durée Étape 3 - appuyez pour régler la durée. L'affichage indique : - clignote lorsque la durée définie est écoulée. Le signal sonore retentit et le four s'éteint. Étape 4 Appuyez sur n'importe quelle touche pour arrêter le signal sonore. Étape 5 Tournez la manette sur la position Arrêt. -
Page 38: Fonctions Supplémentaires
Grille métallique: Poussez la grille entre les barres de guidage des supports de grille. Plateau de cuisson /Lèchefrite: Poussez le plateau entre les rails du support de grille. Grille métallique, Plateau de cuisson /Lèchef‐ rite: Poussez le plateau entre les rails du support de grille et glissez la grille métallique entre les rails se trouvant juste au-dessus. - Page 39 10.1 Recommandations de cuisson Les températures et temps de cuisson se trouvant dans les tableaux ne sont indiqués qu'à titre indicatif. Ils va‐ rient en fonction des recettes ainsi que de la qualité et de la quantité des ingrédients utilisés. Votre four peut cuire les aliments d'une manière complètement différente de celle de votre ancien four.
- Page 40 10.5 Cuisson sur un seul niveau CUIS‐ SON DANS (°C) (min) DES MOULES Fond de tarte - pâ‐ Chaleur tournante 170 - 180 10 - 25 te brisée, pré‐ chauffer le four à vide Fond de tarte - Chaleur tournante 150 - 170 20 - 25 mélange de génoi‐...
- Page 41 GÂTEAUX / PÂTISSERIES / (°C) (min) PAINS Pain tressé / Pain en for‐ 170 - 190 30 - 40 me de couronne Flans aux fruits (à base de 35 - 55 pâte levée/mélange de gé‐ noise), utilisez un plat à rôtir Gâteaux à...
- Page 42 (°C) (min) Lasagne Chauffage Haut/ Bas 180 - 200 25 - 40 Poisson gratiné Chauffage Haut/ Bas 180 - 200 30 - 60 Légumes farcis Chaleur tournante 160 - 170 30 - 60 Pâtisseries sucrées Chauffage Haut/ Bas 180 - 200 40 - 60 Cuisson des pâtes Chauffage Haut/ Bas...
- Page 43 Vous pouvez cuire de gros rôtis directement Faites rôtir la viande et le poisson par dans le plat à rôtir ou sur la grille métallique morceaux d'au moins 1 kg. en plaçant le plat à rôtir en dessous. Arrosez les morceaux de viande avec leur Pour éviter que les graisses de cuisson ne propre jus de cuisson plusieurs fois durant la brûlent, versez un peu d'eau dans le plat à...
- Page 44 VEAU Utilisez la fonction : Turbo gril. (kg) (°C) (min) Rôti de veau 160 - 180 90 - 120 Jarret de veau 1.5 - 2 160 - 180 120 - 150 AGNEAU Utilisez la fonction : Turbo gril. (kg) (°C) (min) Gigot d’agneau / Rôti 1 - 1.5...
- Page 45 VOLAILLE Utilisez la fonction : Turbo gril. (kg) (°C) (min) Volaille, portions 0,2 - 0,25 chacun 200 - 220 30 - 50 Poulet, demi 0,4 - 0,5 chacun 190 - 210 35 - 50 Poulet, poularde 1 - 1.5 190 - 210 50 - 70 Canard 1.5 - 2...
- Page 46 PIZZA PIZZA Avant la cuisson, faites préchauffer Avant la cuisson, faites préchauffer votre four vide. votre four vide. Utilisez le deuxième niveau de la gril‐ Utilisez le deuxième niveau de la gril‐ (°C) (min) (°C) (min) Pizza, croûte fi‐ 200 - 230 15 - 20 Pierogi 180 - 200...
- Page 47 10.12 Plats surgelés DÉCONGÉLATION Utilisez la fonction : Chaleur tournante. (°C) (min) Pizza, surgelée 200 - 220 15 - 25 Pizza épaisse, surgelée 190 - 210 20 - 25 Pizza, fraîche 210 - 230 13 - 25 Bouchées de pizza, surgelées 180 - 200 15 - 30 Frites, fines...
- Page 48 (kg) (min) (min) Temps de décon‐ Temps de décon‐ gélation gélation supplé‐ mentaire Viande 100 - 140 20 - 30 Retournez à la moitié du temps. Truite 0,15 25 - 35 10 - 15 Fraises 30 - 40 10 - 20 Beurre 0,25 30 - 40...
- Page 49 Pour une plaque, utilisez le troisième niveau de la grille. Pour deux plaques, utilisez les premier et LÉ‐ quatrième niveaux de la grille. GUMES (min) (min) Cuisson jus‐ Continuez la qu'à ce que cuisson à la prépara‐ 100 °C LÉGUMES tion com‐...
- Page 50 (°C) (min) Gressins, 0,5 kg au total 190 - 200 50 - 60 Coquilles Saint-Jacques cuites au four 180 - 200 30 - 40 Poisson entier en sel, 0,3 - 0,5 kg 190 - 200 45 - 50 Poisson entier en papier sulfurisé, 0,3 - 0,5 kg 190 - 200 50 - 60 Amaretti (20 ;...
-
Page 51: Entretien Et Nettoyage
CUISSON SUR UN SEUL NIVEAU. Biscuits/Gâteaux secs Utilisez le troisième niveau de la grille. (°C) (min) Petits gâteaux, 20 par plateau, Chaleur tournante 20 - 35 préchauffer le four à vide Petits gâteaux, 20 par plateau, Chauffage Haut/ Bas 20 - 30 préchauffer le four à... - Page 52 11.1 Remarques concernant l'entretien Nettoyez la façade du four avec un chiffon doux, de l’eau tiède et un détergent doux. Utilisez une solution de nettoyage pour nettoyer les surfaces métalliques. Nettoyez les taches avec un détergent doux. Agents nettoy‐ ants Nettoyez la cavité...
- Page 53 Étape 1 Éteignez le four et attendez qu’il soit froid pour le nettoyer. Retirez les supports de grille. Étape 2 Saisissez les coins de la grille Tirez-la vers l'avant en surmontant la pression du ressort et sortez-la des deux supports. Le gril se replie.
-
Page 54: Dépannage
Numéro de série (S.N.) ......... 13. RENDEMENT ÉNERGÉTIQUE 13.1 Informations produit et Fiche d’informations produit* Nom du fournisseur Identification du modèle BEK435220M 944188023 Index d'efficacité énergétique 81.2 Classe d’efficacité énergétique Consommation d'énergie avec charge standard et mode tradition‐ 0.99 kWh/cycle Consommation d'énergie avec charge standard et mode air pulsé... - Page 55 * Pour l’Union européenne conformément aux Règlements UE 65/2014 et 66/2014. Pour la République de Biélorussie conformément à STB 2478-2017, Annexe G ; STB 2477-2017, Annexes A et Pour l’Ukraine conformément à 568/32020. La classe d’efficacité énergétique n’est pas applicable pour la Russie. EN 60350-1 - Appareils de cuisson domestiques électriques - Partie 1 : Plages, fours, fours à...
-
Page 56: Sicherheitshinweise
FÜR PERFEKTE ERGEBNISSE Danke, dass Sie sich für dieses AEG Produkt entschieden haben. Wir haben es geschaffen, damit Sie viele Jahre von seiner ausgezeichneten Leistung und den innovativen Technologien, die Ihnen das Leben erleichtern, profitieren können. Es ist mit Funktionen ausgestattet, die in gewöhnlichen Geräten nicht vorhanden sind. Nehmen Sie sich ein paar Minuten Zeit zum Lesen, um seine Vorzüge kennen zu lernen. - Page 57 Schäden infolge nicht ordnungsgemäßer Montage oder Verwendung übernimmt der Hersteller keine Haftung. Bewahren Sie die Anleitung zum Nachschlagen an einem sicheren und zugänglichen Ort auf. 1.1 Sicherheit von Kindern und schutzbedürftigen Personen Das Gerät kann von Kindern ab 8 Jahren und Personen mit •...
-
Page 58: Sicherheitsanweisungen
Ziehen Sie bitte vor jeder Wartungsmaßnahme den • Netzstecker aus der Steckdose. WARNUNG: Vergewissern Sie sich, dass das Gerät • ausgeschaltet ist, bevor Sie die Lampe austauschen, um einen Stromschlag zu vermeiden. Verwenden Sie das Gerät nicht, bevor es in den •... - Page 59 nicht ohne Werkzeug entfernt werden können. Höhe der Gerätevordersei‐ 594 mm • Stecken Sie den Netzstecker erst nach Abschluss der Montage in die Steckdose. Höhe der Geräterückseite 576 mm Stellen Sie sicher, dass der Netzstecker nach der Montage noch zugänglich ist. Breite der Gerätevordersei‐...
- Page 60 2.4 Reinigung und Pflege • Öffnen Sie die Gerätetür vorsichtig. Bei der Verwendung von Zutaten, die Alkohol enthalten, kann ein Alkohol-Luftgemisch WARNUNG! entstehen. Verletzungs-, Brandgefahr sowie • Achten Sie beim Öffnen der Tür darauf, Risiko von Schäden am Gerät. dass keine Funken oder offenen Flammen in das Gerät gelangen.
-
Page 61: Gerätebeschreibung
2.7 Entsorgung • Schneiden Sie das Netzkabel in der Nähe des Geräts ab, und entsorgen Sie es. • Entfernen Sie das Türschloss, um zu WARNUNG! verhindern, dass sich Kinder oder Verletzungs- und Haustiere im Gerät einschließen. Erstickungsgefahr. • Trennen Sie das Gerät von der Stromversorgung. -
Page 62: Bedienfeld
4. BEDIENFELD 4.1 Versenkbare Knöpfe Drücken Sie zum Benutzen des Geräts den Knopf. Der Knopf kommt dann heraus. 4.2 Sensorfelder/Tasten Einstellen der Zeit. Einstellen einer Uhrfunktion. Einstellen der Zeit. 4.3 Display A. Uhrfunktionen B. Timer 5. VOR DER ERSTEN INBETRIEBNAHME WARNUNG! Siehe Kapitel Sicherheitshinweise. -
Page 63: Täglicher Gebrauch
Nehmen Sie die Zubehörteile Stellen Sie die Höchsttempera‐ Drücken Sie: und die herausnehmbaren Ein‐ tur für folgende Funktion ein: - zum Einstellen der hängegitter aus dem Ofen. Stunde drücken. Drücken Sie: Feuchten Sie ein weiches Tuch Dauer: 1 Std. mit warmem Wasser und etwas Stellen Sie die Höchsttempera‐... -
Page 64: Uhrfunktionen
Anforderungen an die umweltgerechte Gestaltung EU 65/2014 und EU 66/2014 Ofenfunktion Anwendung verwendet. Tests gemäß EN 60350-1. Zum Braten großer Fleischstü‐ Die Backofentür sollte während des cke oder von Geflügel mit Kno‐ Garvorgangs geschlossen bleiben, damit die chen auf einer Ebene. Zum Gra‐ Heißluftgrillen Funktion nicht unterbrochen wird. -
Page 65: Verwendung Des Zubehörs
Einstellung: Dauer Schritt 3 - zum Einstellen der Dauer drücken. Im Display wird folgendes angezeigt: - blinkt, wenn die eingestellte Zeit abgelaufen ist. Der Signalton ertönt und der Backofen wird ausgeschaltet. Schritt 4 Drücken Sie eine beliebige Taste, um das Signal abzustellen. Schritt 5 Drehen Sie die Knöpfe in die Position Aus. -
Page 66: Zusatzfunktionen
Kombirost: Schieben Sie den Kombirost zwischen die Füh‐ rungsschienen der Einhängegitter. Backblech /Auflaufpfanne: Schieben Sie das Blech zwischen die Führungs‐ stäbe der Einhängegitter. Kombirost, Backblech /Auflaufpfanne: Schieben Sie das Backblech zwischen die Füh‐ rungsstäbe der Einhängegitter und dem Kombirost auf die Führungsstäbe darüber. 9. - Page 67 10.1 Garempfehlungen Die Temperaturen und Garzeiten in den Tabellen sind nur Richtwerte. Sie sind abhängig von den Rezepten, der Qualität und der Menge der verwendeten Zutaten. Ihr Backofen backt oder brät unter Umständen anders als Ihr früherer Backofen. Die Tabellen unten enthalten die empfohlenen Einstellungen für Temperatur, Gardauer und Einschubebene für die einzelnen Speisen.
- Page 68 10.5 Backen auf einer Einschubebene BA‐ CKEN IN FOR‐ (°C) (Min.) Tortenboden aus Heißluft 170 - 180 10 - 25 Mürbeteig, Heizen Sie den leeren Backofen vor Tortenboden aus Heißluft 150 - 170 20 - 25 Rührteig Gugelhupf / Bri‐ Heißluft 150 - 160 50 - 70...
- Page 69 KUCHEN/ GEBÄCK/BROTE (°C) (Min.) Obstkuchen (mit Hefeteig/ 35 - 55 Rührteig), verwenden Sie ein tiefes Blech Hefekuchen mit empfindli‐ 160 - 180 40 - 80 chen Belägen (z.B. Quark, Sahne, Pudding) Christstollen 160 - 180 50 - 70 Nutzen Sie die dritte Einschubebene. KLEINGEBÄCK (°C) (Min.)
- Page 70 10.7 Backen auf mehreren Ebenen Benutzen Sie die Backbleche. Verwenden Sie die Funktion Heißluft. KUCHEN/ GEBÄCK (°C) (Min.) 2 Ebenen Windbeutel / Eclairs, Hei‐ 160 - 180 25 - 45 1 / 4 zen Sie den leeren Back‐ ofen vor Streuselkuchen, trocken 150 - 160 30 - 45...
- Page 71 RINDFLEISCH (°C) (Min.) Schmorfleisch 1 - 1,5 kg Ober-/Unterhitze 120 - 150 Roastbeef/Filet, blutig, je cm Dicke Heißluftgrillen 190 - 200 5 - 6 Heizen Sie den leeren Backofen vor Roastbeef/Filet, rosa, je cm Dicke Heißluftgrillen 180 - 190 6 - 8 Heizen Sie den leeren Backofen vor Roastbeef/Filet, durch,...
- Page 72 LAMM Verwenden Sie die Funktion Heißluftgrillen. (kg) (°C) (Min.) Lammkeule / Lammbraten 1 - 1.5 150 - 170 100 - 120 Lammrücken 1 - 1.5 160 - 180 40 - 60 WILD Verwenden Sie die Funktion Ober-/Unterhitze. (kg) (°C) (Min.) Rücken / Hasenkeule, Hei‐...
- Page 73 FISCH, GEDÄMPFT Verwenden Sie die Funktion Ober-/Unterhitze. (kg) (°C) (Min.) Fisch 1 - 1.5 210 - 220 40 - 60 10.10 Knusprige Backwaren mitPizzastufe PIZZA PIZZA Heizen Sie den leeren Backofen vor dem Garen vor. Nutzen Sie die erste Einschubebene. Nutzen Sie die zweite Einschubebe‐...
- Page 74 GRILL Verwenden Sie die Funktion: Grill (°C) (Min.) (Min.) Erste Seite Zweite Seite Roastbeef 210 - 230 30 - 40 30 - 40 Rinderfilet 20 - 30 20 - 30 Schweinelende 210 - 230 30 - 40 30 - 40 Kalbsrücken 210 - 230 30 - 40...
- Page 75 10.13 Auftauen umgedrehten Teller auf den Garraumboden. Legen Sie die Speise in eine tiefe Schüssel Nehmen Sie die Lebensmittel aus der und stellen Sie sie auf den Teller im Verpackung und legen Sie sie auf einen Backofen. Entfernen Sie bei Bedarf die Teller.
- Page 76 ausschalten, öffnen und am besten über Nacht auskühlen lassen. Nutzen Sie für 1 Blech die dritte STEIN‐ Einschubebene. OBST (Min.) (Min.) Gardauer bis Kochen Sie Für 2 Bleche verwenden Sie die erste und zum Köcheln weiter bei vierte Einschubebene. 100 °C Pfirsiche / Quit‐...
- Page 77 (°C) (Min.) Grissini, 0,5 kg insgesamt 190 - 200 50 - 60 Jakobsmuscheln in der Schale gebacken 180 - 200 30 - 40 Fisch in Salzkruste, 0,3 - 0,5 kg 190 - 200 45 - 50 Fisch in Pergamentpapier, 0,3 - 0,5 kg 190 - 200 50 - 60 Amaretti (20;...
-
Page 78: Reinigung Und Pflege
BACKEN AUF EINER EINSCHUBEBENE. Plätzchen Nutzen Sie die dritte Einschubebene. (°C) (Min.) Törtchen, 20 pro Blech, Heizen Heißluft 20 - 35 Sie den leeren Backofen vor Törtchen, 20 pro Blech, Heizen Ober-/Unterhitze 20 - 30 Sie den leeren Backofen vor BACKEN AUF MEHREREN EBENEN. - Page 79 11.1 Hinweise zur Reinigung Feuchten Sie ein weiches Tuch mit warmem Wasser und etwas mildem Reinigungsmittel an, und reinigen Sie damit die Vorderseite des Backofens. Reinigen Sie die Metalloberflächen mit einer Reinigungslösung. Reinigen Sie Flecken mit einem milden Reinigungsmittel. Reinigungsmittel Reinigen Sie den Garraum nach jedem Gebrauch.
- Page 80 Schritt 1 Schalten Sie den Backofen aus und war‐ ten Sie, bis er abgekühlt ist, um ihn zu reinigen. Entfernen Sie die Einhängegitter. Schritt 2 Fassen Sie die Ecken des Grills. Ziehen Sie ihn gegen die Federkraft nach vorne und aus beiden Halterungen heraus. Der Grill klappt nach unten.
-
Page 81: Fehlersuche
Wir empfehlen, hier folgende Daten zu notieren: Modell (MOD.) ......... Produktnummer (PNC) ......... Seriennummer (S.N.) ......... 13. ENERGIEEFFIZIENZ 13.1 Produktinformationen und Produktdatenblatt* Herstellername Modellidentifikation BEK435220M 944188023 Energieeffizienzindex 81.2 Energieeffizienzklasse Energieverbrauch bei Standardbeladung, Ober-/Unterhitze 0.99 kWh/Programm Energieverbrauch bei Standardbeladung, Umluft 0.69 kWh/Programm Anzahl der Garräume Wärmequelle Strom Fassungsvermögen... - Page 82 * Für die Europäische Union gemäß EU-Richtlinien 65/2014 und 66/2014. Für die Republik Weißrussland gemäß STB 2478-2017, Anhang G; STB 2477-2017, Anlagen A und B. Für die Ukraine gemäß 568/32020. Die Energieeffizienzklasse gilt nicht für Russland. EN 60350-1 - Elektrische Kochgeräte für den Hausgebrauch - Teil 1: Herde, Backöfen, Dampfgarer und Grillgerä‐ te - Verfahren zur Messung der Gebrauchseigenschaften.
-
Page 83: Informazioni Di Sicurezza
PER RISULTATI PERFETTI Grazie per aver scelto di acquistare questo prodotto AEG. Lo abbiamo creato per fornirvi prestazioni impeccabili per molti anni, grazie a tecnologie innovative che vi semplificheranno la vita - funzioni che non troverete sulle normali apparecchiature. Vi invitiamo di dedicare qualche minuto alla lettura per sapere come trarre il massimo dal vostro elettrodomestico. - Page 84 di eventuali lesioni o danni derivanti da un'installazione o un uso scorretti. Conservare sempre le istruzioni in un luogo sicuro e accessibile per poterle consultare in futuro. 1.1 Sicurezza di bambini e persone vulnerabili Questa apparecchiatura può essere usata da bambini a •...
-
Page 85: Istruzioni Di Sicurezza
AVVERTENZA: Assicurarsi che l’apparecchiatura sia • spenta prima di sostituire la lampadina per evitare la possibilità di scosse elettriche. Non usare l'apparecchiatura prima di installarla nella • struttura a incasso. Non usare una pulitrice a vapore per pulire • l'apparecchiatura. Non utilizzare detergenti abrasivi o raschietti di metallo per •... - Page 86 Verificare che la spina di alimentazione rimanga accessibile dopo l'installazione. Larghezza della parte po‐ 559 mm • Nel caso in cui la spina di corrente sia steriore dell'apparecchiatu‐ allentata, non collegarla alla presa. • Non tirare il cavo di alimentazione per Profondità...
- Page 87 2.4 Pulizia e cura alcol può causare una miscela di alcol e aria. • Evitare la presenza di scintille o fiamme AVVERTENZA! aperte vicino all'apparecchiatura quando Vi è il rischio di lesioni, incendio si apre la porta. o danni all'apparecchiatura. •...
-
Page 88: Descrizione Del Prodotto
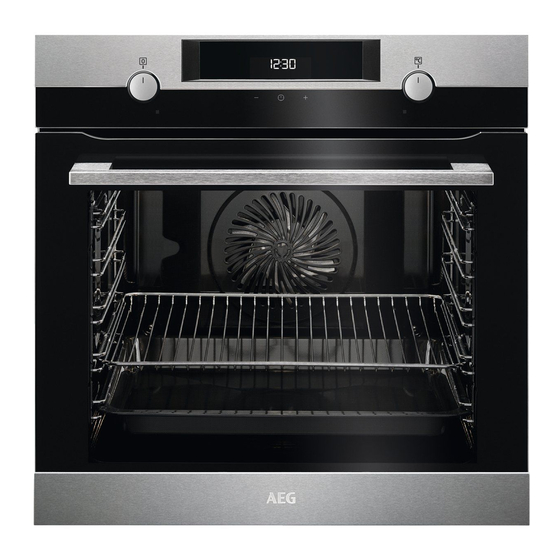
2.7 Smaltimento • Tagliare il cavo elettrico dell'apparecchiatura e smaltirlo. • Togliere il blocco porta per evitare che AVVERTENZA! bambini o animali restino intrappolati Rischio di lesioni o nell'apparecchiatura. soffocamento. • Staccare la spina dall'alimentazione elettrica. 3. DESCRIZIONE DEL PRODOTTO 3.1 Panoramica Pannello di controllo Manopola di regolazione delle funzioni di... -
Page 89: Pannello Dei Comandi
4. PANNELLO DEI COMANDI 4.1 Manopola incassabile Per utilizzare l'apparecchiatura, premere la manopola. La manopola fuoriesce. 4.2 Campo sensore / Pulsante Per impostare l'ora. Per impostare una funzione orologio. Per impostare l'ora. 4.3 Display A. Funzioni dell’orologio B. Timer 5. PRIMA DI UTILIZZARE L'ELETTRODOMESTICO AVVERTENZA! Fare riferimento ai capitoli sulla sicurezza. -
Page 90: Utilizzo Quotidiano
Togliere gli accessori e i sup‐ Impostare la temperatura mas‐ Premere: porti ripiano amovibili dal forno. sima.per la funzione: - premere per imposta‐ Pulire il forno e gli accessori Tempo: 1 h. con un panno morbido imbevu‐ re l’ora. Premere: Impostare la temperatura mas‐... -
Page 91: Funzioni Del Timer
ecodesign conformemente alla normativa EU 65/2014 e EU 66/2014. Test conformemente Funzione cot‐ Applicazione alla norma EN 60350-1. tura La porta del forno dovrebbe essere chiusa in Per tostare grandi pezzi di carne fase di cottura, di modo che la funzione non o pollame con le ossa in una po‐... -
Page 92: Utilizzo Degli Accessori
Come impostare: Durata Fase 2 - premere ripetutamente. - inizia a lampeggiare. Fase 3 - premere per impostare la durata. Il display mostra: - lampeggia al termine del tempo impostato. Il segnale suona e il forno si spegne. Fase 4 Premete un tasto qualsiasi per disattivare il segnale. -
Page 93: Funzioni Aggiuntive
Griglia: Spingere il ripiano fra le guide del supporto. Lamiera dolci /Leccarda: Spingere la lamiera tra le guide del supporto ripia‐ Griglia, Lamiera dolci /Leccarda: Spingere il vassoio tra le guide del supporto ripia‐ no e il ripiano a filo sulle guide sovrastanti. 9. - Page 94 10.1 Consigli di cottura La temperatura ed i tempi di cottura specificati nelle tabella sono valori indicativi. Possono variare in base alle ricette, alla qualità e alla quantità degli ingredienti utilizzati. Il vostro nuovo forno può cuocere o arrostire in modo differente rispetto al forno posseduto in precedenza. Le seguenti tabelle mostrano le impostazioni consigliate per temperatura, tempo di cottura e ripiano griglia per deter‐...
- Page 95 10.5 Cottura su un solo livello ripiano COT‐ TURA IN (°C) (min) STAMPI Base per flan – pa‐ Cottura ventilata 170 - 180 10 - 25 sta frolla, preriscal‐ dare il forno vuoto Base per flan - im‐ Cottura ventilata 150 - 170 20 - 25 pasto per torte lie‐...
- Page 96 TORTE / DOLCI / PANE (°C) (min) Torte di frutta (realizzati 35 - 55 con pasta lievitata/pasta frolla), utilizzare una lec‐ carda Ciambelle lievitate guarni‐ 160 - 180 40 - 80 te (ad es. con formaggio morbido, panna, crema) Christstollen 160 - 180 50 - 70 Utilizzare la posizione del terzo ripiano.
- Page 97 (°C) (min) Dolci al forno Cottura convenzionale 180 - 200 40 - 60 Pasta al forno Cottura convenzionale 180 - 200 45 - 60 10.7 Cottura multilivello Usare le piastre. Utilizzare la funzione: Cottura ventilata. TORTE/ DOLCI (°C) (min) 2 posizioni Bignè...
- Page 98 10.9 Cottura arrosto Arrostire la carne e il pesce in pezzi di grandi dimensioni (1 kg o più). Utilizzare la posizione del primo ripiano. Ungere diverse volte i pezzi di carne con il proprio sugo durante l'arrostimento. MANZO (°C) (min.) Arrosto misto 1 - 1,5 kg Cottura convenzio‐...
- Page 99 VITELLO Utilizzare la funzione: Turbo Grill. (kg) (°C) (min.) Arrosto di vitello 160 - 180 90 - 120 Stinco di vitello 1.5 - 2 160 - 180 120 - 150 AGNELLO Utilizzare la funzione: Turbo Grill. (kg) (°C) (min.) Coscia d'agnello / Arrosto 1 - 1.5 150 - 170 100 - 120...
- Page 100 POLLAME Utilizzare la funzione: Turbo Grill. (kg) (°C) (min.) Pollame, porzioni 0,2 - 0,25 ciascuno 200 - 220 30 - 50 Mezzo pollo 0,4 - 0,5 ciascuno 190 - 210 35 - 50 Pollo, pollastra 1 - 1.5 190 - 210 50 - 70 Anatra 1.5 - 2...
- Page 101 IMPOSTAZIONE IMPOSTAZIONE Preriscaldare il forno vuoto prima di Preriscaldare il forno vuoto prima di iniziare a utilizzarlo. iniziare a utilizzarlo. Utilizzare la posizione del secondo Utilizzare la posizione del secondo ripiano. ripiano. (°C) (min.) (°C) (min.) Pizza, sottile, 200 - 230 15 - 20 Pierogi 180 - 200...
- Page 102 10.12 Cibi congelati SBRINAMENTO Utilizzare la funzione: Cottura ventilata. (°C) (min.) Pizza surgelata 200 - 220 15 - 25 Pizza Americana surgelata 190 - 210 20 - 25 Pizza fredda 210 - 230 13 - 25 Pizzette surgelate 180 - 200 15 - 30 Patatine fritte sottili 200 - 220...
- Page 103 (kg) (min) (min) Tempo di scon‐ Ulteriore tempo gelamento di sbrinamento Fragole 30 - 40 10 - 20 Burro 0,25 30 - 40 10 - 15 Panna 2 x 0,2 80 - 100 10 - 15 Frustare la crema quan‐ do ancora leggermente congelata in alcune zo‐...
- Page 104 porta e lasciare raffreddare per una notte per completare l'essiccazione. Per 1 vassoio usare la terza posizione VERDURE ripiano. (°C) (ore) Per 2 vassoi usare la prima e quarta Erbette 40 - 50 2 - 3 posizione ripiano. Impostare la temperatura a 60 - 70 °C. VERDURE (°C) (ore)
- Page 105 (°C) (min.) Gratin di mele 190 - 200 50 - 60 Muffin al cioccolato (20; 0,5 kg in totale) 160 - 170 35 - 45 10.18 Informazioni per gli istituti di prova Test conformemente a: EN 60350, IEC 60350. COTTURA SU UN LIVELLO Cottura in stampi (°C) (min) Pan di Spagna senza grassi...
-
Page 106: Pulizia E Cura
COTTURA MULTILIVELLO. Biscotti (°C) (min) Frollini al burro / Strisce di pa‐ Cottura ventilata 25 - 45 1 / 4 Dolcetti, 20 per lamiera dolci, Cottura ventilata 23 - 40 1 / 4 preriscaldare il forno vuoto Pan di Spagna senza grassi Cottura ventilata 35 - 50 1 / 4... - Page 107 Pulire la cavità dopo ogni utilizzo. L'accumulo di grasso o di altri residui potrebbe causare un incendio. Non lasciare le vivande nel forno per più di 20 minuti. Asciugare la cavità con un panno mor‐ bido dopo ogni uso. Uso quotidiano Pulire tutti gli accessori dopo ogni uso e lasciarli asciugare.
- Page 108 Fase 1 Spegnere il forno e attendere che sia freddo per pulirlo. Rimuovere i supporti ripiano. Fase 2 Tirarlo in avanti contro la molla a pres‐ sione ed estrarlo dai due supporti. La gri‐ glia si piega. Fase 3 Pulire la parte superiore del forno con acqua tiepida, un panno morbido e de‐...
-
Page 109: Risoluzione Dei Problemi
......... 13. EFFICIENZA ENERGETICA 13.1 Informazioni sul prodotto e Scheda informativa sul prodotto* Nome fornitore Identificativo modello BEK435220M 944188023 Indice di efficienza energetica 81.2 Classe di efficienza energetica Consumo di energia con un carico standard, in modalità tradiziona‐ 0.99 kWh/ciclo Consumo di energia con un carico standard, in modalità... - Page 110 * Per l'Unione europea secondo i regolamenti UE 65/2014 e 66/2014. Per la Repubblica di Bielorussia ai sensi di STB 2478-2017, appendice G; STB 2477-2017, allegati A e B. Per l'Ucraina secondo 568/32020. La classe di efficienza energetica non è applicabile alla Russia. EN 60350-1 - Apparecchiature elettriche per la cottura per uso domestico - Parte 1: Cucine, forni, forni a vapore e grill - Metodi per la misura delle prestazioni.
-
Page 111: Información Sobre Seguridad
PARA OBTENER RESULTADOS PERFECTOS Gracias por escoger este producto AEG. Este artículo ha sido creado para ofrecer un rendimiento impecable durante muchos años, con innovadoras tecnologías que facilitarán su vida y prestaciones que probablemente no encuentre en electrodomésticos corrientes. Por favor, dedique algunos minutos a la lectura para disfrutar de todas sus ventajas. - Page 112 responsable de lesiones o daños producidos como resultado de una instalación o un uso incorrectos. Conserve siempre estas instrucciones en lugar seguro y accesible para futuras consultas. 1.1 Seguridad de niños y personas vulnerables Este aparato puede ser utilizado por niños de 8 años en •...
-
Page 113: Instrucciones De Seguridad
ADVERTENCIA: Asegúrese de que el aparato está • desconectado antes de reemplazar la lámpara con el fin de impedir que se produzca una descarga eléctrica. No utilice el aparato antes de instalarlo en la estructura • empotrada. No utilice un limpiador a vapor para limpiar el aparato. •... - Page 114 • Si la toma de corriente está floja, no conecte el enchufe. Fondo empotrado del apa‐ 546 mm • No desconecte el aparato tirando del rato cable de conexión a la red. Tire siempre Fondo con la puerta abier‐ 1027 mm del enchufe.
- Page 115 inflamables dentro, cerca o encima del • Cambie inmediatamente los paneles de aparato. cristal de la puerta que estén dañados. Póngase en contacto con el servicio ADVERTENCIA! técnico autorizado. Podría dañar el aparato. • Limpie periódicamente el aparato para evitar el deterioro del material de la •...
-
Page 116: Descripción Del Producto
3. DESCRIPCIÓN DEL PRODUCTO 3.1 Descripción general Panel de control Mando de las funciones de cocción Piloto/símbolo de alimentación Pantalla Mando de en control (de la temperatura) Indicador/símbolo de temperatura Resistencia Bombilla Ventilador Carril lateral, extraíble Posiciones de los estantes 3.2 Accesorios Para bizcochos y galletas. -
Page 117: Antes Del Primer Uso
4.2 Sensores / botones Para ajustar la hora. Para ajustar una función de reloj. Para ajustar la hora. 4.3 Pantalla A. Funciones del reloj B. Temporizador 5. ANTES DEL PRIMER USO ADVERTENCIA! Consulte los capítulos sobre seguridad. 5.1 Antes del primer uso El horno puede emitir olores y humos durante el precalentamiento. -
Page 118: Uso Diario
6. USO DIARIO ADVERTENCIA! Función de Aplicación Consulte los capítulos sobre cocción seguridad. Para descongelar alimentos 6.1 Cómo configurar: Función de (verdura y fruta). El tiempo de descongelación depende de la cocción Descongelar cantidad y tamaño de los ali‐ mentos congelados. Paso 1 Gire el mando del horno para seleccio‐... -
Page 119: Funciones Del Reloj
7. FUNCIONES DEL RELOJ 7.1 Funciones del reloj función de reloj Aplicación Ajustar, modificar o comprobar la hora. Hora Programar la duración del funcionamiento del horno. Duración Para configurar una cuenta atrás. Esta función no influye en el funciona‐ miento del horno. Puede ajustar esta función cualquier momento, incluso Avisador si el horno está... -
Page 120: Uso De Los Accesorios
Cómo configurar: Avisador Paso 4 Gire los mandos a la posición de apagado. Instrucciones para cancelar: Funciones del reloj Paso 1 - pulse repetidamente hasta que el símbolo de la función de reloj empiece a parpadear. Paso 2 Mantenga pulsada: La función de reloj se apaga después de unos segundos. -
Page 121: Funciones Adicionales
Parrilla, Bandeja /Bandeja honda: Posicione la bandeja entre las guías del carril de apoyo y la parrilla en las guías de encima. 9. FUNCIONES ADICIONALES 9.1 Ventilador de enfriamiento superficies del horno. Una vez apagado el horno, el ventilador sigue funcionando hasta Cuando el horno funciona, el ventilador de enfriarlo totalmente. - Page 122 10.4 Consejos para hornear Resultado Posible causa Solución La base de la tarta no se ha La parrilla no está en una posición Coloque la tarta en un nivel más bajo. horneado lo suficiente. correcta. La tarta se hunde y se queda La temperatura del horno es dema‐...
- Page 123 TARTAS / PASTAS / PANES (°C) (min) Pastel de azúcar 150 - 160 20 - 40 Tarta de frutas (sobre masa con levadura / bizco‐ 35 - 55 cho), utilice una bandeja honda Tarta de fruta sobre masa quebrada 160 - 170 40 - 80 Precaliente el horno vacío.
- Page 124 GALLETAS (°C) (min) Pastas de hojaldre, precaliente Aire caliente 170 - 180 20 - 30 el horno vacío Galletas de masa de levadura Aire caliente 150 - 160 20 - 40 Mostachones de almendra Aire caliente 100 - 120 30 - 50 Galletas de clara de huevo / Aire caliente 80 - 100...
- Page 125 GALLE‐ TAS/PASTELI‐ (°C) (min) 2 posiciones 3 posiciones LLOS/PASTAS/ BOLLOS Rollitos 20 - 30 1 / 4 Galletas de masa 150 - 160 20 - 40 1 / 4 1 / 3 / 5 quebrada Galletas de masa 160 - 170 25 - 40 1 / 4 batida esponjosa...
- Page 126 CARNE DE RES (°C) (min) Rosbif o filete, muy he‐ por cm de grosor Grill Turbo 170 - 180 8 - 10 cho, precaliente el horno vacío CERDO Use la función: Grill Turbo. (kg) (°C) (min) Paletilla / Cuello / Jamón 1 - 1.5 160 - 180 90 - 120...
- Page 127 CORDERO Use la función: Grill Turbo. (kg) (°C) (min) Pata de cordero / Cordero 1 - 1.5 150 - 170 100 - 120 asado Silla de cordero 1 - 1.5 160 - 180 40 - 60 CARNE DE CAZA Use la función: Cocción convencional. (kg) (°C) (min)
- Page 128 PESCADO (AL VAPOR) Use la función: Cocción convencional. (kg) (°C) (min) Pescado entero 1 - 1.5 210 - 220 40 - 60 10.10 Horneado crujiente con:Función pizza PIZZA PIZZA Precaliente el horno vacío antes de cocinar. Use el primer nivel. Use el segundo nivel.
- Page 129 GRILL Use la función: Grill (°C) (min) (min) 1ª cara 2ª cara Redondo al horno 210 - 230 30 - 40 30 - 40 Solomillo de res 20 - 30 20 - 30 Lomo de cerdo 210 - 230 30 - 40 30 - 40 Lomo de ternera 210 - 230...
- Page 130 10.13 Descongelar Para grandes porciones de comida, coloque un plato vacío del revés sobre la base en el Extraiga el alimento del envase y colóquelo interior del horno. Coloque la comida en un en un plato. plato hondo y sobre el plato del interior del horno.
- Page 131 Para obtener mejores resultados, pare el horno a la mitad del tiempo de secado, abra la puerta y déjelo enfriar, a ser posible FRUTA durante una noche para terminar el secado. DE HUESO (min) (min) Para 1 bandeja, use el tercer nivel. Cocer hasta Continuar la que empie‐...
- Page 132 10.17 Horneado húmedo + ventil. Para obtener el mejor resultado, siga las recomendaciones de la tabla siguiente. (°C) (min) Bastoncillos de pan, 0,5 kg en total 190 - 200 50 - 60 Vieiras en su concha 180 - 200 30 - 40 Pescado entero en sal, 0,3 - 0,5 kg 190 - 200 45 - 50...
- Page 133 HORNEADO EN UN NIVEL. Galletas Use el tercer nivel. (°C) (min) Mantecados / Masa quebrada Aire caliente 25 - 40 Mantecados / Masa quebrada, Cocción convencional 20 - 30 precaliente el horno vacío Pastelillos, 20 unidades por ban‐ Aire caliente 20 - 35 deja, precaliente el horno vacío Pastelillos, 20 unidades por ban‐...
-
Page 134: Mantenimiento Y Limpieza
11. MANTENIMIENTO Y LIMPIEZA ADVERTENCIA! Consulte los capítulos sobre seguridad. 11.1 Notas sobre la limpieza Limpie la parte delantera del horno con un paño suave humedecido en agua templada y ja‐ bón suave. Utilice un producto de limpieza para limpiar las superficies metálicas. Limpie las manchas con un detergente suave. - Page 135 Paso 3 Tire del extremo trasero del carril de apoyo para despegarlo de la pared la‐ teral y sáquelo. Paso 4 Coloque los carriles apoyo en el or‐ den inverso. 11.3 Cómo quitar: Grill ADVERTENCIA! Existe riesgo de quemaduras. Paso 1 Apague el horno y espere a que esté...
-
Page 136: Solución De Problemas
Es conveniente que anote los datos aquí: Modelo (MOD.) ......... Número de producto (PNC) ......... Número de serie (S.N.) ......... 13. EFICACIA ENERGÉTICA 13.1 Información del producto y Hoja de información del producto* Nombre del proveedor Identificación del modelo BEK435220M 944188023 ESPAÑOL... - Page 137 Índice de eficiencia energética 81.2 Clase de eficiencia energética Consumo de energía con carga estándar, modo convencional 0.99 kWh/ciclo Consumo de energía con carga estándar, modo con ventilador 0.69 kWh/ciclo Número de cavidades Fuente de calor Electricidad Volumen 71 l Tipo de horno Horno empotrado Masa...
- Page 138 de aparatos eléctricos y electrónicos. No domésticos. Lleve el producto a su centro de deseche los aparatos marcados con el reciclaje local o póngase en contacto con su oficina municipal. símbolo junto con los residuos ESPAÑOL...
- Page 140 www.aeg.com/shop...