Table of Contents
Advertisement
Available languages
Available languages
Quick Links
Advertisement
Chapters
Table of Contents

Related Manuals for Haier HW80-BP16636


Summary of Contents for Haier HW80-BP16636
- Page 1 User manual Washing machine HW80-BP16636...
- Page 2 Thank you for purchasing a Haier Product. Please read these instructions carefully before using this appliance. The instructions con- tain important information which will help you get the best out of the appliance and ensure safe and proper installation, use and maintenance.
-
Page 3: Table Of Contents
1-Safety information ......................... 4 2-Product description ........................7 3-Control panel ..........................8 4-Programmes ..........................11 5-Consumption ..........................12 6-Daily use ............................13 7-Eco-friendly washing ........................18 8-Care and cleaning ........................19 9-Troubleshooting ...........................22 10-Installation ...........................25 11-Technical data ..........................29 12-Customer service ........................31... -
Page 4: 1-Safety Information
1-Safety information Before switching on the appliance for the fi rst time read the follow- ing safety hints!: WARNING! Before fi rst use Make sure there is no transport damage. Make sure all transport bolts are removed. Remove all packaging and keep out of children´s reach. Handle the appliance always with at least two persons because it is heavy. - Page 5 1-Safety information WARNING! Daily use Do not remove or insert the plug in the presence of flammable Do not hot wash foam rubber or sponge-like materials. Do not wash any laundry which is polluted with fl our. Do not open detergent drawer during any wash cycle. Do not touch the door during the washing process, it gets hot.
- Page 6 1-Safety information WARNING! Installation Install or use the appliance only where the temperature is above 5 °C. Do not place the appliance directly on a carpet, or close to a wall or furniture. Do not install the appliance in direct sunlight or in the near of heat sources(e.g.
-
Page 7: 2-Product Description
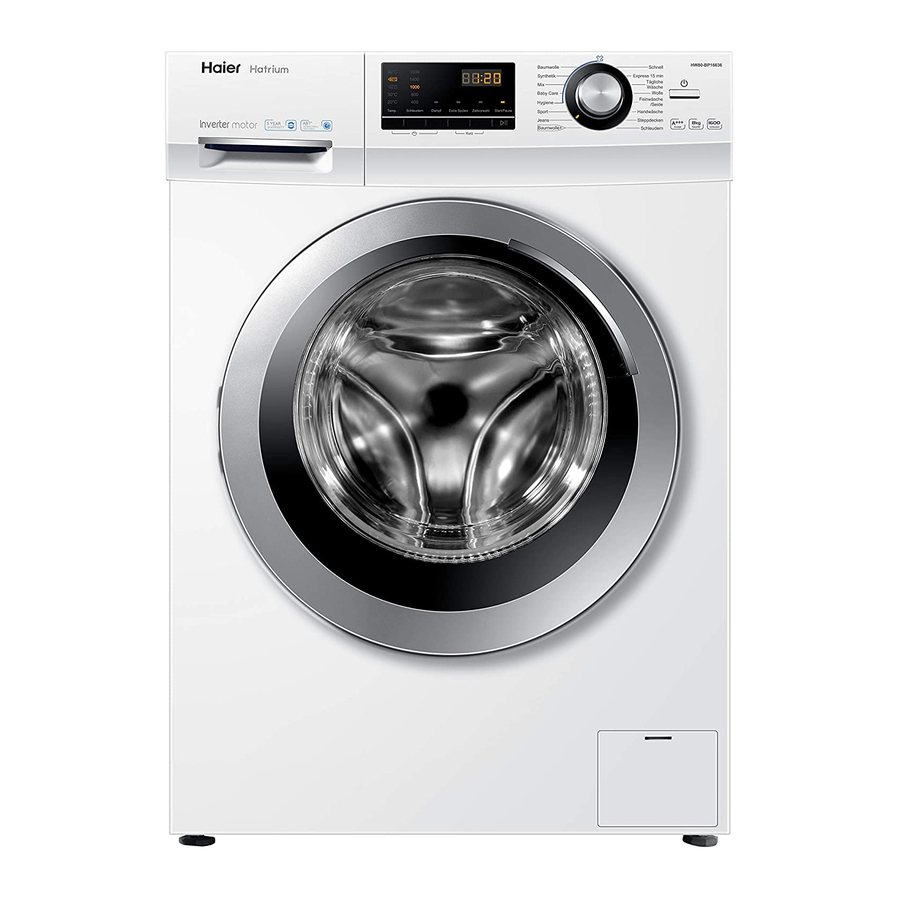
2-Product description Note: 2.1 Picture of appliance Front (Fig. 2-1): Rear side (Fig. 2-2): Baumwolle Schnell HW80-BP14636 HW90-BP14636 BLDC motor Fast Cotton Synthetik Express 15 min Tägliche Synthetic Express 15 min Wäsche Daily Wash Baby Care Wolle Baby Care Feinwäsche Hygiene /Seide Hygienic... -
Page 8: 3-Control Panel
3-Control panel Fast Cotton Synthetic Express 15 min Daily Wash Baby Care Delicate/Silk Hygienic Sport Hand Wash Steam rinse Speed Delay Jeans Bedding Cotton+ Spin Energy Capacity Speed Speed up 1 “On/Off “ button 3 Display 5 Function buttons 2 Programme selector 4 Detergent /Softener drawer 6 “Delay”... - Page 9 -in case of only one option- the LED switches off . Note: Factory settings To get best results in each programme Haier has well defi ned specifi c default settings. If there is no special requirement default settings are recommended.
- Page 10 3-Control panel If “Temp.” button is pushed the “Steam” function will be deactivated.You can activate “Steam” function only before to start any programme. You cannot activate Steam “Steam” function while the appliance is already ex- ecuting a programme. 3.5.4 Function button“Extra rinse“ 3-10 Press this button (Fig.
-
Page 11: 4-Programmes
4-Programmes Detergent compartment for: Water inlet only, no deter- gent Detergent • Softener or care product Yes, Optional, º Max. load Temperature Function Preset spin speed in rpm in kg in °C selectable range 1 Fibre type Programme HW80 • º •... -
Page 12: 5-Consumption
5-Consumption The indicated consumption values may accordingly diff er to local conditions. Temper- Max. load Energy Water Washing time Spin ature in h:min drying in °C in kg in kWh in L perfor- mance HW80 HW80 Programme in % HW80 HW80 40°C 40°C... -
Page 13: 6-Daily Use
6-Daily use 6.1 Power supply Connect the washing machine to a power supply (220V to 240V~/50Hz; Fig. 6-1). Please refer also to section INSTALLATION. 6.2 Water connection Before connecting check the cleanliness and clar- ity of the water inlet. Tun on the tap (Fig.6-2). Note: Tightness Before use check for leakage in the joints between the tap and the inlet hose by turning on the tap. - Page 14 6-Daily use Care chart Washing Washable up to 95°C Washable up to 60°C Washable up to 60°C normal process normal process mild process Washable up to 40°C Washable up to 40°C Washable up to 40°C normal process mild process very mild process Washable up to 30°C Washable up to 30°C Washable up to 30°C...
- Page 15 6-Daily use 6.5 Selecting detergent Washing effi ciency and performance is determined by used detergent quality. Use only machine wash approved detergent. If needed use specifi c detergents, e.g. for synthetic and woolen fabric. Mind always detergent manufacturer recommendations. Do not use dry cleaning agents such as trichloroethylene and similar products. Choose the best detergent Kind of detergent Universal...
- Page 16 6-Daily use 6.6 Adding detergent 1. Slide out the detergent drawer. 2. Put the required chemicals into corresponding compartments (Fig. 6-4) 3. Push back the drawer gently. Note: Remove detergent residues before next wash cycle from the detergent drawer. Do not overuse detergent or softener. Please follow the instruction on the detergent package.
- Page 17 6-Daily use 6.10 Start wash programme Press “Start/Pause“ button (Fig. 6-8) to start. The Start/Pause LED of the „Start/Pause“ button stops fl ashing and lights up continuously Appliance operates according to present settings. Changes are only possible by cancelling the programme. 6.11 Interrupt - cancel wash programme To interrupt a running programme press gently “Start/Pause“.
-
Page 18: 7-Eco-Friendly Washing
7-Eco-friendly washing Environmentally responsible use To achieve best use of energy, water, detergent and time you should use the recom- mended maximum load size. Do not overload (hand width clearance above laundry). For slightly soiled laundry select the Quick Wash programme. Apply exact dosages of each washing agent. -
Page 19: 8-Care And Cleaning
8-Care and cleaning 8.1 Cleaning the detergent drawer Take always care there are no detergent residues. Clean the drawer regularly (Fig. 8-1): 1. Pull out the drawer until it stops. 2. Press the release button and remove the drawer. 3. Flush the drawer with water until it is clean and insert the drawer back in the appliance. - Page 20 8-Care and cleaning 8.5 Long periods of disuse If the appliance is left idle for a longer period: 1. Pull out the electrical plug (Fig. 8-6). 2. Turn off water supply (Fig. 8-7). 3. Open the door to prevent formation of moisture and odours.
- Page 21 8-Care and cleaning 9. Clean carefully pump fi lter, e.g. using running water 8-14 8-15 (Fig. 8-14). 10. Refi x it thoroughly (Fig. 8-15). 11. Close service fl ap. CAUTION! Pump fi lter sealing has to be clean and unhurt. If the lid is not full tightened, water can escape.
-
Page 22: 9-Troubleshooting
9-Troubleshooting Many occuring problems could be solved by yourself without specifi c expertise. In case of a problem please check all shown possibilities and follow below instructions before you contact an after sales service. See CUSTOMER SERVICE. WARNING! Before maintenance, deactivate the appliance and disconnect the mains plug from the mains socket. - Page 23 9-Troubleshooting Problem Cause Solution • Temperature sensor - error.. • Contact the After sales service.. • Heating error • Contact the After sales service.. • Motor - error.. • Contact the After sales service.. or •...
- Page 24 9-Troubleshooting Problem Cause Solution Excessive foam fl oats • Detergent is not a appropriate. • Check detergent recommen- drum and/or deter- dations. gent drawer. • Excessive use of detergent. • Reduce amount of detergent. Automatic adjust- • Washing programme duration will •...
-
Page 25: 10-Installation
10-Installation 10.1 Preparation Take the appliance out of the packaging. Remove all packaging material including polystyrene base, keep them out of childrens reach. While opening the package, water drops may be seen on plastic bag and port- hole. This normal phenomenon results from water tests in the factory. Note: Packaging disposal Keep all packaging materials out of children´s reach and dispose them in an environ- mentally friendly manner. - Page 26 10-Installation 10.5 Aligning the appliance 10-7 Adjust all feet (Fig. 10-7) to achieve a complete level position. This will minimize vibrations and thus noise during use. It will also reduce wear and tear. We recommend to use a spirit level for adjustment. Floor should be as stable and fl...
- Page 27 10-Installation 10.5.3 Drain hose to sink connection 10-8 The junction must lie above the siphon A spigot connection is usually closed by a pad (A). That must be removed to prevent any disfunc- tion (Fig. 10-8). Secure the drain hose with a clamp. CAUTION! The drain hose should not be submerged in water and should be securely fixed and leak-free.
- Page 28 10-Installation 10.7 Electrical Connection 10-11 Before each connection check if: power supply, socket and fusing are appropriate to the rating plate. the power socket is earthed and no multi-plug or extension are used. the power plug and socket are strictly according. Only UK: The UK plug meets BS1363A standard.
-
Page 29: 11-Technical Data
11-Technical data 11.1 Product fi che according to regulation EU No. 1061/2010 Suppliers name or trade mark Haier Supplier´s model identifi er HW80-BP16636 Rated capacity (kg) Energy effi ciency class A+++ Energy consumption per year (AE in kWh/year) Energy consumption of standard cotton programme 60°C, full load 0.54... - Page 30 11-Technical data 11.2 Additional technical data HW80-BP16636 Dimension (HxWxD in mm) 850x595x600 Voltage in V 220-240 V~/50Hz Current in A Max power in W 1950 Water pressure in MPa 0.03≤P ≤1 Netto weight in kg 11.3 Standards and Directives This product meets the requirements of all applicable EC directives with the correspon-...
-
Page 31: 12-Customer Service
If you cannot fi nd a solution there, please contact your local dealer or the Service & Support area at www.haier.com where you can fi nd telephone numbers and FAQs and where you can activate the service claim. To contact our Service, ensure that you have the following data available. - Page 33 Manuel d’utilisation Lave-linge HW80-BP16636...
- Page 34 Nous vous remercions d'avoir acheté un produit Haier. Veuillez lire attentivement ces instructions avant d'utiliser l'appareil. Ces instructions sont des informations utiles vous permettant de mieux exploiter cet appareil, et vous assurer une installation, une utilisation et un entretien sécurisés et adéquats.
- Page 35 1-Consignes de sécurité ......................4 2-Description du produit ......................7 3-Panneau de commande ......................8 4-Programmes ..........................11 5-Consommation ........................12 6-Utilisation quotidienne ......................13 7-Lavage écologique ......................... 18 8-Entretien et nettoyage ......................19 9-Dépannage ..........................22 10-Installation ..........................25 11-Informations techniques ....................
-
Page 36: 1-Consignes De Sécurité
1-Consignes de sécurité Avant de mettre l'appareil en marche pour la première fois, veuillez lire les consignes de sécurité ci-après ! Avertissement ! Avant la première utilisation ▶ Vérifiez qu'il n'existe aucun dommage lié au transport. ▶ Retirez tous les boulons de transport. ▶... - Page 37 1-Consignes de sécurité Avertissement ! Utilisation quotidienne ▶ Évitez de retirer ou d'insérer la fiche en présence de gaz inflam- mables ▶ Évitez de laver des matériaux en caoutchouc ou en éponge à des températures élevées. ▶ Évitez de laver tout linge sali par la farine. ▶...
- Page 38 1-Consignes de sécurité AVERTISSEMENT ! Installation ▶ Installez ou utilisez l'appareil uniquement dans des endroits où la température est supérieure à 5 °C. ▶ Évitez de placer l'appareil directement sur un tapis ou près d'un mur ou d'un meuble. ▶ N'installez pas l'appareil en direction des rayons solaires ou à proximité...
-
Page 39: 2-Description Du Produit
2-Description du produit Remarque : En raison des modifications techniques et des divers modèles, les illustrations des cha- pitres suivants peuvent être différentes de votre modèle. 2.1 Description de l’appareil Partie avant (Fig. 2-1) : Côté arrière (Fig. 2-2) : HW80-BP14636 Baumwolle Schnell HW90-BP14636 BLDC motor Synthetik Express 15 min Tägliche... -
Page 40: 3-Panneau De Commande
3-Panneau de commande 6 Touche du "retardateur" 1 Bouton "Marche / Arrêt" 3 Écran 7 Bouton « Départ/ 2 Sélecteur de programme 4 Tiroir à lessive/adoucissant Pause » 5 Boutons de fonction Remarque : Signal sonore Le signal sonore retentit dans les cas suivants : ▶... - Page 41 LED s’éteignent. Remarque : Paramètres d'usine Pour garantir des résultats optimaux dans chaque programme, Haier a défini avec précision les paramètres par défaut. En l’absence d’indications particulières, nous vous recommandons d'utiliser les paramètres par défaut.
- Page 42 3-Panneau de commande Si vous appuyez sur le bouton « Temp. », la fonction « Vapeur » sera désactivée. Vous pouvez activer la fonction « Vapeur » uniquement avant de démarrer un Vapeur programme. Vous ne pouvez pas activer la fonction « Vapeur » lorsque l'appareil exécute déjà un pro- gramme.
- Page 43 4-Programmes Compartiment à détergent pour : Arrivée d’eau uniquement, pas de lessive Détergent Adoucissant ou produit • Oui, En option, º d’entretien Charge max. Température Fonction Vitesse de rotation prédéfinie en kg en °C en tr/min plage sélecti- Programme HW80 onnable 1 Type de fibre •...
-
Page 44: 4-Programmes
5-Consommation Les valeurs de consommation indiquées ici peuvent varier en fonction des conditions lo- cales. Tempéra- Charge max. Énergie Durée du Efficacité ture lavage d’esso- en °C en kg en kWh en L en h : min rage en % HW80 HW80 HW80 Programme... -
Page 45: 6-Utilisation Quotidienne
6-Utilisation quotidienne 6.1 Alimentation Raccordez le lave-linge à une alimentation (220 V à 240 V~/50 Hz ; Fig. 6-1). Veuillez également vous référer à la section INSTALLATION. 6.2. Raccordement à l'approvisionnement d'eau ▶ Avant le raccordement, assurez-vous de la pro- preté et de la clarté du dispositif d'arrivée d'eau. ▶... - Page 46 6-Utilisation quotidienne Tableau d'entretien Lavage Lavage à 95°C maxi- Lavage à 60°C maxi- Lavable à 60°C processus léger programme normal programme normal Lavage à 40°C maxi- Lavable à 40°C Lavable à 40°C processus léger processus très léger programme normal Lavage à 30°C maxi- Lavable à...
- Page 47 6-Utilisation quotidienne 6.5 Sélection du détergent ▶ L'efficacité et la performance du lavage dépendent de la qualité du détergent utilisé. ▶ Utilisez exclusivement un détergent homologué pour le lavage en machine. ▶ Le cas échéant, utilisez des détergents spéciaux (par exemple, pour les synthé- tiques et les lainages.) ▶...
- Page 48 6-Utilisation quotidienne 6.6 Ajout de détergent 1. Faites glisser le tiroir à lessive hors de son empla- cement. 2. Ajoutez la quantité de détergent nécessaire dans les compartiments respectifs (Fig. 6-4). 3. Repoussez doucement le tiroir. Remarque : ▶ Retirez les résidus de détergent du tiroir à lessive avant le prochain cycle de lavage. ▶...
- Page 49 6-Utilisation quotidienne 6.10 Démarrage du programme de lavage Appuyez sur le bouton « Départ/Pause » (Fig. 6-8) Start/Pause pour lancer le programme. Le voyant LED du bouton "Marche/Arrêt s'allume continuellement L'appareil fonctionne selon les réglages actuels. Pour effectuer des modifications, vous devez annuler le programme.
-
Page 50: 7-Lavage Écologique
7-Lavage écologique Utilisation respectueuse de l’environnement ▶ Pour une meilleure utilisation de l’énergie, de l’eau, du détergent et du temps, tenez- vous en à la charge maximale recommandée. ▶ Ne surchargez pas l’appareil (à l’aide de la main, faites un dégagement en largeur au- dessus du linge). -
Page 51: 8-Entretien Et Nettoyage
8-Entretien et nettoyage 8.1 Nettoyage du tiroir à lessive Veillez toujours à ce qu’il ne reste pas de résidus de détergent. Nettoyez régulièrement le tiroir à lessive (Fig. 8-1) : 1. Tirez le tiroir jusqu’à la butée. 2. Appuyez sur le bouton d’ouverture pour le retirer. 3. - Page 52 8-Entretien et nettoyage 8.5 Périodes de non-utilisation prolongées Si l’appareil n’est pas utilisé pendant une longue pé- riode : 1. Débranchez la fiche électrique (fig. 8.-6). 2. Fermez l’arrivée d’eau (fig. 8-7). 3. Ouvrez la porte pour éviter toute formation d’hu- midité et l’apparition d’odeurs. Laissez les portes ouvertes lorsque vous n’utilisez pas la machine.
- Page 53 8-Entretien et nettoyage 9. Nettoyez soigneusement le filtre de la pompe à 8-14 8-15 l’eau courante, (Fig. 8-14). 10. Remontez-le soigneusement (Fig. 8-15). 11. Fermez le volet d’entretien. ATTENTION ! ▶ Le bouchon du filtre de la pompe doit être nettoyé et en bon état. Si le bouchon n’est pas bien serré, l’eau peut s'échapper.
-
Page 54: 9-Dépannage
9-Dépannage Vous pouvez résoudre la plupart des problèmes qui pourraient survenir sans expertise précise. En cas de problème, veuillez vérifier toutes les solutions possibles en suivant les instructions ci-dessous avant de contacter un service après-vente. Voir SERVICE CLIENT. AVERTISSEMENT ! ▶ Avant de procéder à l’entretien, mettez l’appareil hors tension et débranchez la fiche secteur de la prise de courant. - Page 55 9-Dépannage Problème Cause Solution • Capteur de température - erreur. • Contactez le service après-vente. • Erreur de chauffage • Contactez le service après-vente. • Moteur - erreur. • Contactez le service après-vente. fCOou fC1 • Erreur de communication anor- •...
- Page 56 9-Dépannage Problème Cause Solution L’opération s’arrête • Coupure d'eau ou panne de courant. • Vérifiez le branchement élec- avant la fin du cycle trique et l’alimentation en eau. de lavage. L’opération s’arrête • Un code d’erreur s’affiche à l’écran. • Vérifiez les codes affichés. pendant un certain •...
-
Page 57: 10-Installation
10-Installation 10.1 Préparation ▶ Retirez l’appareil de l’emballage. ▶ Retirez tous les matériaux d’emballage, y compris la base en polystyrène et tenez-les hors de la portée des enfants. Lors de l’ouverture de l’emballage, vous pourriez voir des gouttes d’eau sur le sac en plastique et le hublot. Ce phénomène normal résulte des essais à... - Page 58 10-Installation 10.5 Alignement de l’appareil 10-7 Réglez tous les pieds (Fig. 10-7) pour obtenir un nivellement complet. Cela réduira les vibrations et le bruit pendant l’utilisation. de même que l’usure. Nous recommandons d’utiliser un niveau à bulle pour le ré- glage. Le sol doit être aussi stable et plat que possible. 1.
- Page 59 10-Installation 10.5.3 Raccordement du tuyau de vidange à l’évier 10-8 ▶ Le raccordement doit se situer au-dessus du si- phon ▶ Un raccord à embout est habituellement fermé par un bloc (A). Vous devez le retirer pour éviter tout dysfonctionnement (fig. 10.-8). ▶...
- Page 60 10-Installation 10.7. Raccordement électrique 10-11 Avant chaque branchement, vérifiez si : ▶ l’alimentation, la prise et le fusible sont conformes à la plaque signalétique. ▶ la prise d’alimentation est mise à la terre et aucune fiche multiple ou rallonge n’est utilisée ; ▶...
-
Page 61: 11-Informations Techniques
11.1 Fiche du produit conforme à la réglementation UE N 1061/2010) Nom du fournisseur ou de la marque du produit Haier Référence du modèle établi par le fournisseur HW80-BP16636 Capacité nominale (kg) Classe d'efficacité énergétique A+++ Consommation d’énergie annuelle (AE en kWh/an) Consommation d’énergie d’un programme coton 60 °C standard,... - Page 62 11-Informations techniques 11.2 Autres données techniques HW80-BP16636 Dimension (H x L x P en mm) 850x595x600 Tension en V 220-240 V~/50 Hz Courant en A Puissance maximale en W 1950 Pression d’eau en MPa 0,03≤P ≤1 Poids net en kg tous les droits de garantie et de responsabilité.
-
Page 63: 12-Service Clientèle
Si vous ne trouvez pas de solution, veuillez contacter ▶ votre vendeur local ou ▶ rendez-vous sur le site www.haier.com, dans la zone Service et support, vous trou- verez des numéros de téléphone et une FAQ. Vous pourrez également contacter le service de réclamation. - Page 65 Gebruikershandleiding Wasmachine HW80-BP16636...
- Page 66 Dank u voor uw aankoop van dit Haier product. Lees deze handleiding grondig voor u het apparaat in gebruik neemt. De handleiding bevat belangrijke informatie die u zal helpen uw apparaat optimaal te gebruiken en het veilig en correct te installeren, gebruiken en onderhouden.
- Page 67 1-Veiligheidsinformatie ........................4 2-Productbeschrijving ........................7 3-Bedieningspaneel .......................... 8 4-Programma‘s ..........................11 5-Verbruik ............................12 6-Dagelijks gebruik ..........................13 7-Milieuvriendelijk wassen ....................... 18 8-Zorg en reiniging ..........................19 9-Probleemoplossen ........................22 10-Installatie ............................25 11-Technische gegevens ......................... 29 12-Klantendienst ..........................31...
-
Page 68: 1-Veiligheidsinformatie
1-Veiligheidsinformatie Voor u het apparaat de eerste maal inschakelt, moet u het veilig- heidsadvies lezen!: WAARSCHUWING Voor de eerste ingebruikname ▶ Zorg ervoor dat er geen schade is opgetreden tijdens het trans- port. ▶ Zorg ervoor dat alle transportbouten verwijderd zijn. ▶... - Page 69 1-Veiligheidsinformatie WAARSCHUWING Dagelijks gebruik ▶ U mag de stekker niet verwijderen of invoeren in de aanwezig- heid van ontvlambaar gas ▶ U mag schuimrubber of sponsachtig materiaal wassen in heet water. ▶ U mag geen wasgoed wassen dat vuil is met bloem. ▶...
- Page 70 1-Veiligheidsinformatie WAARSCHUWING! Installatie ▶ Installeer of gebruik het apparaat enkel als de temperatuur ho- ger is dan 5 °C. ▶ Plaats het apparaat niet rechtstreeks op een tapijt of dichtbij een muur of meubelstuk. ▶ U mag het apparaat niet installeren in direct zonlicht of in de buurt van warmtebronnen (bijv.
-
Page 71: 2-Productbeschrijving
2-Productbeschrijving Opmerking: Omwille van technische wijzigingen en uiteenlopende modellen kunnen de illustraties in de volgende hoofdstukken verschillen van uw model. 2.1 Afbeelding van het apparaat Voorzijde (afb. 2-1): Achterzijde (afb. 2-2): HW80-BP14636 Baumwolle Schnell HW90-BP14636 Fast Cotton BLDC motor Synthetik Express 15 min Synthetic Express 15 min... -
Page 72: 3-Bedieningspaneel
3-Bedieningspaneel Snel Katoen+ Katoen Express 15 min Bonte was Quotidien Baby Care Delicaat Hygiënisch Handwas Sport Tr/min Stoom Extra spoelen Startuitsel Jeans Dekbed Katoen Zwieren Energy Capacity Tr/min Speed up 1 “Knop Aan/Uit" 3 Scherm 5 Functieknoppen 2 Programma selectiescha- 4 Wasmiddel/wasverzachter 6 "Startuitstel"... - Page 73 LED-lampjes of - in het geval van slechts één optie - het LED-lampje uitschakelt. Opmerking: Fabrieksinstellingen Voor een optimaal resultaat in elk programma heeft Haier goed gedefinieerde specifie- ke standaardinstellingen. Als er geen speciale vereiste is, worden standaardinstellingen aanbevolen.
- Page 74 3-Bedieningspaneel Als de “Temp.” knop wordt ingedrukt, wordt de “Stoom” functie uitgeschakeld. U kunt de “Stoom” functie enkel inschakelen voor de start van een Stoom programma. U kunt de stoomfunctie niet inschakelen terwijl het apparaat een programma reeds uitvoert. 3.5.4-Functieknop "Extra spoelen“ 3-10 Druk op deze knop (Afb.
-
Page 75: 4-Programma's
4-Programma's Oplosmiddel compartiment voor: Enkel waterinlaat, geen wasmiddel Wasmiddel Wasverzachter of verzor- • Optioneel, º gingsproduct Max. lading Temperatuur Functie Voorin- gestelde zwieren TR/min in kg in °C in tpm selec- teerbaar Programma HW80 bereik 1 Vezeltype • º • • • Katoen * tot 90 / Katoen... -
Page 76: 5-Verbruik
5-Verbruik De aangeduide verbruikswaarden kan variëren naargelang lokale voorwaarden. Tempera- Max. lading Energie Water Wasduur Zwieren tuur in kg in kWu in L in u:min prestatie in °C in % HW80 HW80 HW80 Programma HW80 40°C 0,46 04:37 Katoen+ * 60°C 0,56 04:40... -
Page 77: 6-Dagelijks Gebruik
6-Dagelijks gebruik 6.1 Voeding Sluit de wasmachine aan op het lichtet (220V tot 240V~/50Hz; afb. 6-1). Raadpleeg ook de sectie INSTALLATIE. 6.2 Waterverbinding ▶ Controleer of de watertoevoer schoon en in goe- de staat is, voor u de wateraanvoerslang aansluit. ▶... - Page 78 6-Dagelijks gebruik Onderhoudstabel Wassen Wasbaar tot 95°C Wasbaar tot 60°C Wasbaar tot 60°C normaal programma normaal programma delicaat programma Wasbaar tot 40°C Wasbaar tot 40°C Wasbaar tot 40°C normaal programma delicaat programma heel delicaat pro- gramma Wasbaar tot 30°C Wasbaar tot 30°C Wasbaar tot 30°C normaal programma delicaat programma...
- Page 79 6-Dagelijks gebruik 6.5 Het wasmiddel selecteren ▶ De efficiëntie en de prestatie van het wasprogramma wordt bepaald door de kwali- teit van het wasmiddel. ▶ Gebruik enkel wasmiddel dat is goedgekeurd voor wasmachines. ▶ Indien noodzakelijk moet u specifieke wasmiddelen gebruiken, bijv. voor syntheti- sche stoffen of wol.
- Page 80 6-Dagelijks gebruik 6.6 Wasmiddel toevoegen 1. Open de wasmiddellade. 2. Plaats de vereiste chemicaliën in de overeen- stemmende compartimenten (Afb. 6-4) 3. Sluit de lade zachtjes. Opmerking: ▶ Verwijder wasmiddelresten vóór het volgende gebruik uit de wasmiddellade. ▶ Gebruik niet te veel wasmiddel of wasverzachter. ▶...
- Page 81 6-Dagelijks gebruik 6.10 Het wasprogramma starten Druk op de “Start/Pause“ knop (Afb. 6-8) om het Start/Pause programma te starten. Het LED-lampje van de "Start/ Pause" knop knipperen en brandt voortdurend Het apparaat werkt in overeenstemming met de aanwezige instellingen. Wijzigingen zijn enkel mogelijk door het programma te annuleren.
-
Page 82: 7-Milieuvriendelijk Wassen
7-Milieuvriendelijk wassen Milieuverantwoordelijk gebruik ▶ Voor een optimaal gebruik van energie, water, wasmiddel en de tijdsduur moet u de aanbevolen maximum lading grootte gebruiken. ▶ Niet overladen (handbreedte tussenruimte boven wasgoed). ▶ Voor licht vervuild wasgoed selecteert u het Quick Wash programma. ▶... -
Page 83: 8-Zorg En Reiniging
8-Zorg en reiniging 8.1 De wasmiddellade reinigen U moet altijd goed opletten of er geen wasmiddelres- ten zijn. Reinig de lade regelmatig (afb. 8-1): 1. Trek de lade uit tot ze stopt. 2. Druk op de vrijgave knop en verwijder de lade. 3. - Page 84 8-Zorg en reiniging 8.5 Lange perioden van inactiviteit Als het apparaat niet wordt gebruikt gedurende een lange periode: 1. Haal de stekker uit het stopcontact (afb. 8-6). 2. Draai de kraan dicht (afb. 8-7). 3. Open de deur om de opbouw van vocht en geur- tjes te voorkomen.
- Page 85 8-Zorg en reiniging 9. Reinig het pompfilter zorgvuldig, bijv. onder stro- 8-14 8-15 mend water (afb. 8-14). 10. Breng het opnieuw stevig aan (afb. 8-15). 11. Sluit de service klep. OPGELET! ▶ De afdichting van het pompfilter moet schoon en onbeschadigd zijn. Als het deksel niet volledig aangedraaid is, kan water ontsnappen.
-
Page 86: 9-Probleemoplossen
9-Probleemoplossen Veel van de voorkomende problemen kunt u zelf oplossen zonder specifieke expertise. In het geval van een probleem moet u alle weergegeven mogelijkheden controleren en de onderstaande instructies volgen voor u contact opneemt met de dienst na verkoop. Zie KLANTENDIENST. WAARSCHUWING! ▶... - Page 87 9-Probleemoplossen Probleem Oorzaak Oplossing • Temperatuursensor - fout. • Neem contact op met de klantendienst. • Verwarmingsfout • Neem contact op met de klantendienst. • Motor - fout. • Neem contact op met de klantendienst. • Abnormale communicatiefout • Neem contact op met de dienst na verkoop. fCOof fC1 Controleer en breng de lading in evenwicht in of FC2...
- Page 88 9-Probleemoplossen Probleem Oorzaak Oplossing De machine stopt • Het apparaat geeft een foutcode • Overweeg de weergavecodes. gedurende een be- weer. paalde periode. • Probleem omwille van het ladingpa- • Verminder de lading of pas ze troon. aan. • Programma voert de spoelcyclus uit. •...
-
Page 89: 10-Installatie
10-Installatie 10.1. Voorbereiding ▶ Verwijder het apparaat uit de verpakking. ▶ Verwijder al het verpakkingsmateriaal, inclusief de polystyreen basis, houd ze bui- ten het bereik van kinderen. Wanneer u de verpakking opent, kunnen waterdruppels zichtbaar zijn op de plastic zak en het kijkvenster. Dit normale fenomeen is het resul- taat van watertests in de fabriek. - Page 90 10-Installatie 10.5 Het apparaat uitlijnen 10-7 Pas alle voetjes aan (Afb. 10-7) om een volledige ho- rizontale positie te bereiken. Dit herleidt de trillingen en dus het lawaai tot een minimum tijdens het gebruik. Dit vermindert ook de slijtage. We raden aan een wa- terpas te gebruiken voor de bijstelling.
- Page 91 10-Installatie 10.5.3 Afvoerslang naar wastafel aansluiting 10-8 ▶ De verbinding moet boven de sifon ▶ Een tapkraanverbinding wordt gewoonlijk afge- sloten met een dop (A). Deze moet worden ver- wijderd om slecht functioneren te voorkomen (afb. 10-8). ▶ Beveilig de afvoerslang met een klem. OPGELET! ▶...
- Page 92 10-Installatie 10.7 Elektrische verbinding 10-11 Voor elke aansluiting moet u controleren of: ▶ het elektrisch net, stopcontact en de zekerin- gen overeenstemmen met de informatie op het naamplaatje. ▶ het stopcontact geaard is en er geen multi-stek- ker of verlengsnoer wordt gebruikt. ▶...
-
Page 93: 11-Technische Gegevens
11-Technische gegevens 11.1 Productfiche conform regel EU Nr. 1061/2010 Naam of handelsmerk leveranciers Haier Model-identificatie van de leverancier HW80-BP16636 Nominaal vermogen (kg) Energie efficiëntieklasse A+++ Energieverbruik per jaar (AE in kWh/jaar) Energieverbruik van standaard katoenprogramma 60°C, volledige 0,54 lading (kWu/cyclus) Energieverbruik van standaard katoenprogramma 60°C, gedeel-... - Page 94 11-Technische gegevens 11.2 Bijkomende technische gegevens HW80-BP16636 Afmetingen (HxBxD in mm) 850x595x600 Voltage in V 220-240 V~/50Hz Stroom in A Max vermogen in W 1950 Waterdruk in MPa 0,03≤P ≤1 Nettogewicht in kg 11.3 Normen en richtlijnen Dit product stemt overeen met de vereisten van alle toepasselijke EU-richtlijnen met de...
-
Page 95: 12-Klantendienst
12-Klantendienst We raden onze Haier klantendienst aan en het gebruik van originele reserveonderdelen. Als u een probleem ondervindt met uw apparaat moet u eerst de sectie PROBLEEMOPLOSSEN controleren. Als u daar geen oplossing vindt, kunt u contact opnemen met ▶ uw lokale verkoper of ▶...