Table of Contents
Advertisement
Quick Links
Advertisement
Table of Contents

Related Manuals for Sony Bravia AZ3TK Chassis KDL-32BX359


Summary of Contents for Sony Bravia AZ3TK Chassis KDL-32BX359
- Page 1 Self Diagnosis Supported model HISTORY INFORMATION FOR THE FOLLOWING MANUAL: SERVICE / TRAINING MANUAL AZ3TK Chassis Segment: P-2F ORIGINAL MANUAL ISSUE DATE: 9/2012 Version Date Subject 9/13/2012 Original Manual Release Date. LCD Digital Color TV 9-883-891-01...
- Page 2 Self Diagnosis Supported model SERVICE / TRAINING MANUAL AZ3TK Chassis Segment: P-2F LCD Digital Color TV KDL-32BX359 9-883-891-01...
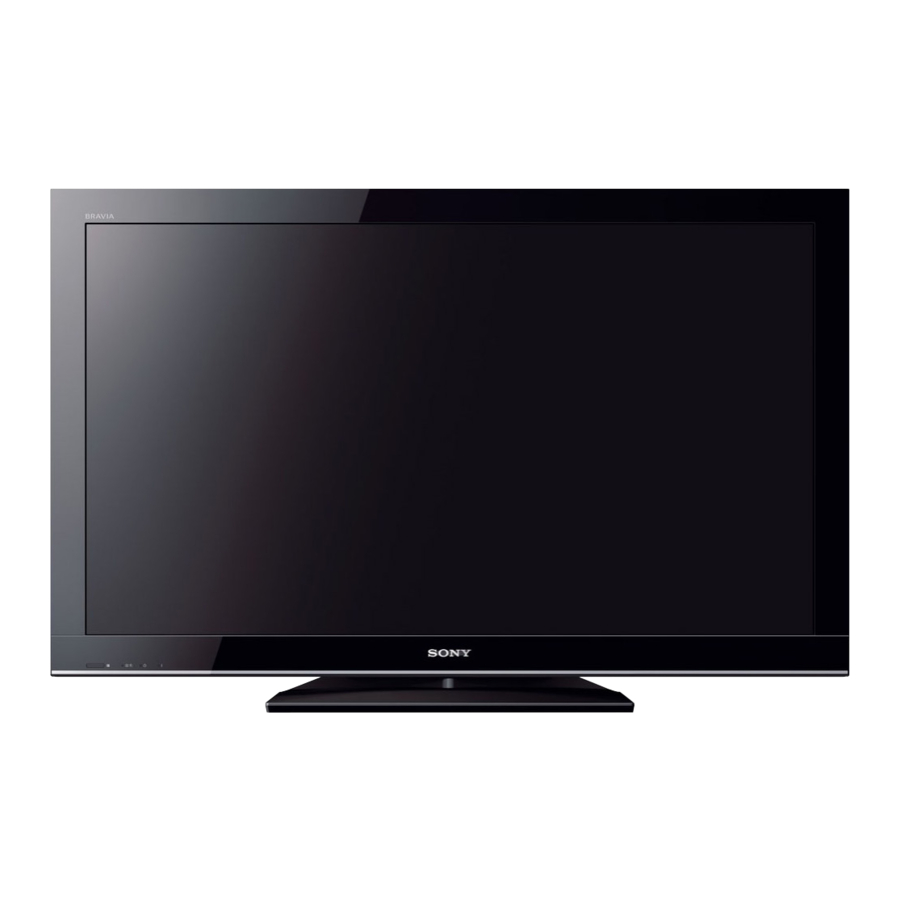
- Page 3 MODEL LIST MODEL COMMANDER DESTINATION MODEL COMMANDER DESTINATION KDL-32BX359 RM-YD081 ECUADOR 9-883-891-01...
-
Page 4: Table Of Contents
TABLE OF CONTENTS Cautions and Warnings ...................ii Connectors ....................18 Screws ......................18 Section 1 - Features and Overview ..............1 Accessories and Packaging ................19 Features ......................1 Optional Accesories ..................19 Specifications ....................1 Remote Commander ...................19 Chassis Overview ..................3 Wire Dressing ....................20 Overall Circuit Description ................4 Main Board ....................4 Section 5 - Updates and Adjustments ............21 Overview .....................21... -
Page 5: Cautions And Warnings
CAUTIONS AND WARNINGS CAUTION!! These servicing instructions are for use by qualified service personnel only. To reduce the risk of electric shock, do not perform any servicing other than that contained in the operating instructions unless you are qualified to do so. WARNING!! An isolation transformer should be used during any service to avoid possible shock hazard, in case of live chassis. - Page 6 CAUTIONS AND WARNINGS SETTING UP AND CARRYING THE TV ● Disconnect all cables when carrying the TV. ● Carry the TV with the adequate number of people; larger size TVs require two or more people. ● Correct hand placement while carrying the TV is very important for safety and to avoid damage. USE CAUTION WHEN HANDLING THE LCD PANEL When repairing the LCD panel, be sure you are grounded by using a wrist band.
- Page 7 CAUTIONS AND WARNINGS CLEANING THE LCD PANEL CAUTION: When cleaning the TV, be sure to unplug the power cord to avoid any chance of electric shock. Clean the cabinet of the TV with a dry soft cloth. Wipe the LCD screen gently with a soft cloth. ;...
- Page 8 CAUTIONS AND WARNINGS Measuring the voltage drop across a resistor by means of a VOM SAFETY CHECK-OUT or battery-operated AC voltmeter. The “limit” indication is 0.75 V, so analog meters must have an accurate low voltage scale. Nearly all After correcting the original service problem, perform the following safety battery-operated digital multimeters that have a 2 VAC range are checks before releasing the set to the customer: suitable.
-
Page 9: Section 1 - Features And Overview
Consulte la referencia de la señal de entrada de la PC para PC y HDMI IN to access photo, music and video files from Sony USB equipment Minitoma estéreo, 500 mVrm, (Típico) / Impedancia: 47 kiloohmios PC/HDMI IN 1 AUDIO IN ó... - Page 10 SECTION 1 - FEATURES AND OVERVIEW Nombre de modelo KDL-32BX359 Corriente y otras especi caciones Requisitos de alimentación 110-240 V ca 50/60 Hz Consumo energético en uso en espera Menos de 1,0 W Tamaño de pantalla (cm/pulgadas) (medido diagonalmente) Resolución del monitor 1366 puntos (horizontales) ×...
-
Page 11: Chassis Overview
SECTION 1 - FEATURES AND OVERVIEW CHASSIS OVERVIEW The primary circuits in the AZ3TK chassis consist of a Main Board (A Board), Power Supply Board (GT32 Board), the IR Board (H Board), the Switch Unit and the LCD Panel Assembly which includes the TCON Board and the Inverter MT Board. NOTE: For connector part number information, refer to “Connectors”... -
Page 12: Overall Circuit Description
SECTION 1 - FEATURES AND OVERVIEW OVERALL CIRCUIT DESCRIPTION CPU: The CPU internal to the MT5366 processor controls all aspects of the television functions. Input from the user along with monitoring of critical circuits is also performed by this CPU. “Block Diagram”... -
Page 13: Lcd Panel Assembly
SECTION 1 - FEATURES AND OVERVIEW LCD PANEL ASSEMBLY The LCD Panel Assembly includes the LCD Panel, TCON Board and Backlight system. The LCD Panel contains the actual liquid crystals, color filters and polarizers. The liquid crystals are manipulated by the applied voltage to pass a specific amount of light - from the backlight - depending on the level of voltage applied. -
Page 14: Section 2 - Troubleshooting
SECTION 2 - TROUBLESHOOTING Self Diagnosis Supported model OVERVIEW SELF DIAGNOSIS FUNCTION This chapter provides information regarding the Self Diagnosis feature in Critical voltages and circuit operations are monitored by the CPU on the our TVs. Main Board. If an error is detected the Self Diagnosis function in the TV will force the TV to shut down by the CPU. -
Page 15: Viewing The Self Check Diagnosis History
SECTION 2 - TROUBLESHOOTING VIEWING THE SELF CHECK DIAGNOSIS HISTORY SELF CHECK When an error is detected, the Self Check screen records the error that occurred. This is helpful in confirming past occurrences of an error and for Back << determining if an error is intermittent when the customer is not sure what MAIN_ POWER Indicates... -
Page 16: Triage Chart
SECTION 2 - TROUBLESHOOTING 6X Blink - Backlight Inverter System Failure 7X Blink - Temperature Failure If the Inverter circuits fails to generate high voltage or one or more of the A digital thermometer IC located on the Main Board provides a temperature backlight lamps fails to light, the television will shut down and display this reading of the chassis and LCD Panel. -
Page 17: Section 3 - Flow Charts And Diagrams
SECTION 3 - FLOW CHARTS AND DIAGRAMS BLOCK DIAGRAM IF 1 Tuner PANEL . CXD2828 IF 2 DEMOD COMPOSITE Side I/O DDR3 x 2 NAND Flash MT5366 HDMI1 KEYPAD SIL9185ACTU HDMI2 IR/ LED SPDIF OUT Side I/O UART MAX9728 Head PHONE COMPONENT+COMPOSITE + AUDIO / AUDIO OUT VGA/HDMI... -
Page 18: No Power
SECTION 3 - FLOW CHARTS AND DIAGRAMS NO POWER POWER SUPPLY CN9302 DIMMER ON/OFF LCD PANEL & INVERTER CCFL BACKLIGHTS CN901 AC IN (N) 10~14 AC IN (L) UNREG24V MAIN BOARD CN9301 CN701 11,12 AC_OFF_DET REG12V 2, 3 8, 9,10 STBY5.2V 3, 4 POWER_ON... - Page 19 SECTION 3 - FLOW CHARTS AND DIAGRAMS No Power Press power Does red standby button while High (3.3V) Power Supply LED on front panel monitoring pin 4 of on pin 4? Board* light? CN9301 on power supply board Is standby LED High (3.3V) Protection Shutdown Main Board*...
-
Page 20: Standby Led Blinking
Board* Main Board* Check room After a While temperature and ventilation around unit Immediately Main Board* “SONY” logo Power Supply appears before LCD Panel* Board* shutdown? LCD Panel* PROTECTION SHUTDOWN FLOWCHART *For Part Number information, refer to “Section 4 - Disassembly/Part Number Information” on page... -
Page 21: No Video
SECTION 3 - FLOW CHARTS AND DIAGRAMS NO VIDEO No Video Backlights Inverter Board turned on? or LCD Panel* Any OSD graphics Main Board* present? Unplug LVDS connector at TCON while unit Any flashes is running. This seen on LCD Panel* may need to be screen? done more than... - Page 22 SECTION 3 - FLOW CHARTS AND DIAGRAMS Video Distortion Is distortion Lines move Improper of Vertical lines across entire when wide-mode Main Board* missing colors? or bars? changed? screen? Main Board* LCD Panel* Any horizontal LCD Panel* lines? Any single or LCD Panel* isolated vertical lines?
-
Page 23: Section 4 - Disassembly/Part Number Information
D Hold Power Supply Cord while lifting up X-2584-208-1 STAND ASSEMBLY (32APOT) For product protection and safety reasons, Sony strongly recommends that Rear Cover, then pass Power Supply you use the screws provided with the TV. Cord through Rear Cover opening. -
Page 24: Chassis Assembly Removal
SECTION 4 - DISASSEMBLY/PART NUMBER INFORMATION NOTE: The components identified by a red outline and a mark contain NOTE: The components identified by shading CHASSIS ASSEMBLY REMOVAL confidential information. Specific instructions must be adhered to whenever mark are critical for safety. Replace only these components are repaired and/or replaced. -
Page 25: Lcd Panel Assembly Removal
SECTION 4 - DISASSEMBLY/PART NUMBER INFORMATION NOTE: The components identified by a red outline and a mark contain NOTE: The components identified by shading LCD PANEL ASSEMBLY REMOVAL confidential information. Specific instructions must be adhered to whenever mark are critical for safety. Replace only these components are repaired and/or replaced. -
Page 26: Connectors
SECTION 4 - DISASSEMBLY/PART NUMBER INFORMATION NOTE: The components identified by a red outline and a mark contain NOTE: The components identified by shading confidential information. Specific instructions must be adhered to whenever mark are critical for safety. Replace only these components are repaired and/or replaced. -
Page 27: Accessories And Packaging
AND STAND BASE TO NECK) (SCREWS TO ATTACH TABLE-TOP STAND TO LCD TV) For product protection and safety reasons, Sony strongly recommends that you use the screws provided with the TV. CAUTION: These screws cannot be used to secure the TV to the Wall Mount Brackets. -
Page 28: Wire Dressing
SECTION 4 - DISASSEMBLY/PART NUMBER INFORMATION WIRE DRESSING WIRE DRESSING LAYOUT KDL-32BX359... -
Page 29: Section 5 - Updates And Adjustments
USB device containing the necessary software. to updating the software in their products. If a customer contacts the Sony Customer Support Center and it is deemed to be correctable with a software This new method of supplying Main Boards significantly reduces the update, the issue is handled at the customer level. -
Page 30: Software Update Responsibility
Certain features not working correctly (photo or video file viewing) Póngase en contacto con Sony Póngase en contacto directamente con Sony si tiene algún problema con el TV: Sitio Web de soporte técnico Latinoamérica: http://esupport.sony.com/ES/LA/ Sitio Web de soporte técnico Ecuador: www.sony.com.ec... -
Page 31: Accessing Service Adjustment Mode
SECTION 5 - UPDATES AND ADJUSTMENTS OVERVIEW ACCESSING SERVICE ADJUSTMENT MODE As mentioned on page 21, the models in this manual utilize a “generic” TV must be in Standby mode. type Main Board, therefore certain service adjustments settings must Press the following buttons on the Remote Commander be changed or confirmed when either the Main Board or LCD Panel are within a second of each other: replaced. -
Page 32: Completing Service Requirements When Replacing The Main Board
SECTION 5 - UPDATES AND ADJUSTMENTS COMPLETING SERVICE REQUIREMENTS WHEN The Service Mode initial screen, will be displayed. REPLACING THE MAIN BOARD Service Mode Sound Adjustment >> The following must be performed after replacing the Main Board to ensure Wide Band Tuning >>... -
Page 33: Selecting The Panel Id Code
SECTION 5 - UPDATES AND ADJUSTMENTS SELECTING THE PANEL ID CODE Then press to view the Status Information screen. CAUTION: You MUST SELECT THE CORRECT PANEL ID CODE for the The latest version is displayed as shown: picture to display propertly. Verify before proceeding to the next step: Main Micro SW Version... -
Page 34: Adding The Serial Number
SECTION 5 - UPDATES AND ADJUSTMENTS ADDING THE SERIAL NUMBER 16. Press to be able to select the first digit. Verify before proceeding to the next step: CAUTION: The Serial Number can only be selected once. Be sure to verify the information is correct before saving the ;... -
Page 35: Adding The Model Name
SECTION 5 - UPDATES AND ADJUSTMENTS ADDING THE MODEL NAME 18. Continue to use to enter the remaining digits of the Serial Number. Verify before proceeding to the next step: Service Mode ; Verified Status Information Sound Adjustment >> ; Selected the Panel ID Code Wide Band Tuning >>... - Page 36 SECTION 5 - UPDATES AND ADJUSTMENTS Service Mode 26. Continue to use to enter the remaining characters of the Model Name. Sound Adjustment >> Wide Band Tuning >> Service Mode Range Scan… >> Sound Adjustment >> Self diagnosis history >> Wide Band Tuning >>...
-
Page 37: Completing Service Requirements When Replacing The Lcd Panel
SECTION 5 - UPDATES AND ADJUSTMENTS COMPLETING SERVICE REQUIREMENTS WHEN VIEWING THE STATUS INFORMATION REPLACING THE LCD PANEL After replacing the LCD Panel you MUST UPDATE the SOFTWARE to the latest version. Verify the latest software is installed before proceeding to the service adjustments. -
Page 38: Resetting Panel Operation Time
SECTION 5 - UPDATES AND ADJUSTMENTS Using the table below, verify the correct Panel Code for the Panel ID. 11. Verify Panel Operation Time has been changed to 00000. SELF CHECK Model Name Panel Code Panel Type Panel ID KDL-32BX359 T315XW04_V3 SLCD LTY[Z]320AN04... -
Page 39: Accessing Factory Adjustment Mode
SECTION 5 - UPDATES AND ADJUSTMENTS ACCESSING FACTORY ADJUSTMENT MODE ADJUSTING THE COLOR TEMPERATURE The default White Balance data values are set for optimal viewing. The TV must be ON. following instructions are for technicians who have been requested to Press the following buttons on the Remote Commander customize calibrations for their customers. - Page 40 SECTION 5 - UPDATES AND ADJUSTMENTS Press to access Color Temp adjustments. to select Data Backup, then To save the changes, press press Factory Mode Color Temperature Factory Mode Color Temperature Back << Color Temp <[ Neutral ]> Back << R Gain <[ ]>...
- Page 41 Sony Electronics Reproduction in whole or part without written permission is prohibited. All rights reserved Sony Corporation Sony LCSC English Technical Services 2012IJ74WEB-1 9-883-891-01 Service Publication Department © 2012.9 KDL-32BX359...
-
Page 42: Appendix A: Encryption Key Components
APPENDIX A: ENCRYPTION KEY COMPONENTS Encryption key components developed by Sony Corporation contain confidential information and shall be handled under the non-disclosure obligations provided in the applicable agreement with Sony Corporation (and/or its subsidiary). As part of this agreement specific instructions must be adhered to whenever a Circuit Board containing encryption key components is repaired and/or replaced pursuant to the following: In the service manual the Circuit Board(s) containing encryption key components shall be identified with a red outline and a .