Table of Contents
Advertisement
Quick Links
Advertisement
Table of Contents

Related Manuals for Husqvarna 524R


Summary of Contents for Husqvarna 524R
- Page 1 524R Operator's manual 2-31...
-
Page 2: Table Of Contents
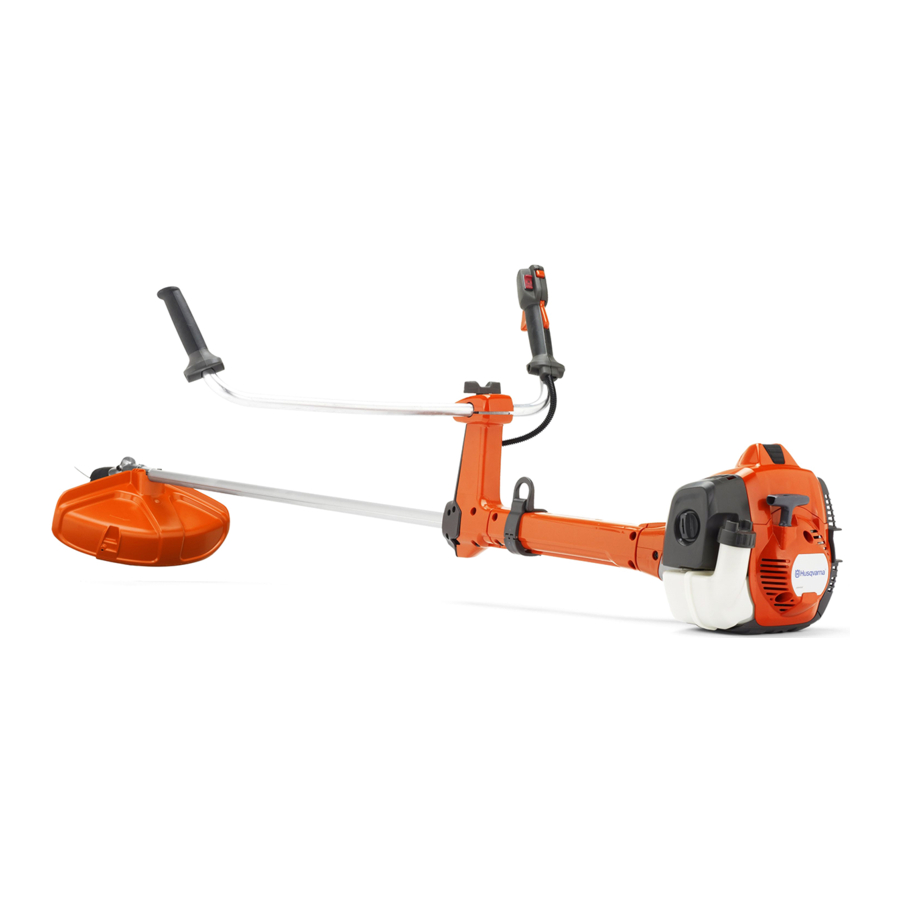
Contents Introduction..............2 Troubleshooting............27 Safety................5 Transportation and storage...........27 Assembly..............11 Technical data.............. 28 Operation..............14 Accessories..............29 Maintenance..............21 EC Declaration of Conformity........31 Introduction Product description use the product for other tasks than grass trimming, grass clearing and forestry clearing. Use a saw blade to This product is a brushcutter with a combustion engine. - Page 3 4. Switch for heated handles (XXXX) 20. Air filter cover 5. Handle adjustment (XXXX) 21. Choke control 6. Handle adjustment (524R, XXXX, XXXX) 22. Decompression valve 7. Throttle trigger (524R, XXXX) 23. Air purge bulb 8. Stop switch (524R, XXXX) 24.
- Page 4 45. Drive disc (XXXX) use metal cutting elements. Apply this for 46. Cutting attachment guard (XXXX) grass guard accessory. 47. Transport guard (524R, XXXX, XXXX) 48. Operator's manual 49. Socket wrench The arrows shows the limit for the handle 50. Locking pin position.
-
Page 5: Safety
Product liability • the product is not repaired at an approved service center or by an approved authority. As referred to in the product liability laws, we are not Euro V Emissions liable for damages that our product causes if: •... - Page 6 • Listen for warning signals and loud voices when you attachment guard. Stones and other small objects use hearing protection. Always remove your hearing can eject into your eyes and cause blindness or protection when the engine stops. other injuries. •...
- Page 7 Use approved eye protection. If you use a visor, you devices regularly. If the safety devices are defective, must also use approved protective goggles. speak to your Husqvarna service agent. Approved protective goggles must comply with the ANSI Z87.1 standard in the USA or EN 166 in EU •...
- Page 8 2. Push down the throttle trigger lockout and make sure 2. Move the stop switch to the stop position and make that it goes back to its initial position when you sure that the engine stops. release it. To do a check of the cutting attachment guard 3.
- Page 9 2. Do a visual check for deformation and damage for To do a check of the muffler example, cracks. 3. Make sure you attach the elements of the vibration damping system are correctly. The muffler keeps noise levels to a minimum and sends exhaust fumes away from the operator.
- Page 10 • Make sure that the locknut is attached and tightened • Use the trimmer head to cut grass. To attach and remove the locknut correctly. Refer to on page 25 . Cutting attachment WARNING: Read the warning instructions that follow before you use the product.
-
Page 11: Assembly
• Let an approved Husqvarna service agent do skin. servicing on the product regularly. • Mix and pour fuel outdoors, where there are no •... - Page 12 To assemble the handlebar To set the handlebar in transport position 1. Remove the screw behind the throttle handle. 1. Loosen the knob. 2. Turn the handlebar clockwise until the throttle handle touches the battery. 3. Turn the handlebar around the shaft. 2.
- Page 13 3. Turn the output shaft until one of the holes in the Note: The saw blade nut has a left hand thread. drive disc aligns with the related hole in the gear housing. 6. Turn the socket wrench counterclockwise to tighten 4.
-
Page 14: Operation
3. Attach with the bolt (L). 4. Adjust the side straps to make the product weigh equally on your shoulders. 5. Adjust the harness until the cutting attachment is 4. Install the drive disc (B) on the output shaft. parallel to the ground. 5. - Page 15 Speak to an approved service agent to select the correct engine oil. • If Husqvarna 4-stroke oil is not available, use a 4- stroke oil of good quality with minimum API SG rating. The recommended viscosity class is SAE 10W-40.
- Page 16 2. Clean the area around the fuel tank cap. 4. Push the decompression valve (C). Note: The decompression valve moves to the initial position when the product starts. 5. Hold the body of the product on the ground with your left hand.
- Page 17 2. Push the air purge bulb (A) approximately 6 times 7. Continue to pull the starter rope handle until the until fuel starts to fill the bulb. It is not necessary to engine starts. fill the air purge bulb fully. CAUTION: Do not pull the starter rope to full extension and do not let go of...
- Page 18 or operator in all directions. There is a risk of injury to • Move in a direction where the wind makes the cut the operator and bystanders. vegetation fall in the cleared area. The risk increases in areas where it is not easy to see the material that is cut.
- Page 19 3. Tilt the saw blade and push it with force diagonally 4. Cut through the tree from the other side. up and to the right. At the same time, push the tree with the blade guard. CAUTION: To fell a tree forward If the saw blade becomes blocked, do not pull the product with a To fell forward, push the bottom of the tree rearward.
- Page 20 Grass clearing with a grass blade 2. Decrease the length of the trimmer line by 10-12 cm / 4-4.75 in. CAUTION: 3. Decrease the engine speed to decrease the risk of Do not use grass blades damage to plants. and grass knives on wood. Use grass blades and grass knives for long or heavy 4.
-
Page 21: Maintenance
To sweep the grass 3. Move the product from side to side when you cut grass. Use full speed. The airflow from the rotating trimmer line can be used to remove cut grass from an area. 1. Hold the trimmer head and the trimmer line parallel to the ground and above the ground. - Page 22 To lubricate the Make sure that the bevel gear is filled correctly with grease, see bevel gear on page 24 . If not, use Husqvarna bevel gear grease. Examine the fuel filter for contamination and the fuel hose for cracks and other defects.
- Page 23 b) Clean the spark arrester screen if it is blocked. WARNING: If the cutting Clean weekly if your product has a catalytic attachment does not stop when you converter. Clean monthly if your product does not adjust the idle speed, speak to your have a catalytic converter.
- Page 24 Make sure that the air filter is clean. • If the spark plug is dirty, clean it and make sure that CAUTION: Always use Husqvarna Technical data the electrode gap is correct, refer to special air filter oil. Do not use other types of on page 28 .
- Page 25 5. If the grease level is too low fill the bevel gear with wrench. Husqvarna bevel gear grease. Fill slowly and turn the drive shaft as you apply the bevel gear grease, stop at the correct level (B).
- Page 26 To sharpen the grass knife and grass • Use a 5.5 mm round file with a file holder. blade WARNING: Stop the engine. Use protective gloves. • To sharpen the grass knife or grass blade correctly, refer to the instructions that come with the cutting attachment.
-
Page 27: Troubleshooting
Troubleshooting The engine does not start Check Possible cause Procedure Stop switch. The stop switch is in the stop posi- Let an approved servicing dealer re- tion. place the stop switch. Starter pawls. The starter pawls cannot move free- Remove the starter cover and clean around the starter pawls. -
Page 28: Technical Data
Discard the fuel at an applicable • Clean and do servicing on the product before long- disposal location. term storage. Technical data Technical data 524R Engine Cylinder displacement, cm Idle speed, rpm 3100 Maximum engine power acc. to ISO 8893, kW/hp @ rpm 0.8/7000... -
Page 29: Accessories
524R Equivalent vibration levels (a ) at handles, measured according to EN ISO 11806 and ISO 22867, m/s hv,eq Equipped with trimmer head (original), left/right 2.9/3.1 Equipped with grass blade (original), left/right 2.7/2.2 Accessories The accessories used in combination with the specified These combinations have been evaluated by power heads have been evaluated to ANSI B175.3-2013... - Page 30 Approved attachments Use with Hedge trimmer attachment HA850 524LK Edger attachment EA850 524LK Saw attachment PA1100 524LK Trimmer attachment TA850 524LK Extension attachment EX850 524LK Cultivator attachment CA230 524LK Blower attachment BA101 524LK Bristle brush attachment BR600 524LK Dethatcher attachment DT600 524LK Brushcutter attachment BCA850-24 524LK...
-
Page 31: Ec Declaration Of Conformity
EC Declaration of Conformity Husqvarna AB, SE-561 82 Huskvarna, Sweden, tel: +46-36-146500, declares that the brush cutters Husqvarna 524R with serial numbers dating from 2016 onwards (the year is clearly stated on the rating plate, followed by the serial number), comply with the requirements of the COUNCIL’S DIRECTIVE:... - Page 32 Original instructions 1158422-26 2021-04-13...