Table of Contents
Advertisement
Available languages
Available languages
Quick Links
Advertisement
Chapters
Table of Contents

Related Manuals for LG S5200


Summary of Contents for LG S5200
- Page 1 NEDERLANDS F R A N Ç A I S E N G L I S H S 5 2 0 0 GEBRUIKERSHANDLEIDING S 5 2 0 0 GEBRUIKERSHANDLEIDING De inhoud van deze handleiding kan op bepaalde punten afwijken van uw telefoon, afhankelijk van de software op de telefoon of uw service provider.
- Page 2 NEDERLANDS S 520 0 GEBRUIKERSHANDLEIDING De inhoud van deze handleiding kan op bepaalde punten afwijken van uw telefoon, afhankelijk van de software op de telefoon of uw service provider. Uw oude toestel wegdoen 1. Als het symbool met de doorgekruiste verrijdbare afvalbak op een product staat, betekent dit dat het product valt onder de Europese Richtlijn 2002/96/EC.
-
Page 3: Table Of Contents
HOOFDFUNCTIES OPROEP-INFO Bellen en gebeld worden Gemiste oproepen RICHTLIJNEN VOOR JUIST Contacten Ontvangen oproepen EN VEILIG GEBRUIK Menu in gesprek Uitgaande oproepen S5200 FUNCTIES Conferentiegesprekken Laatste oproepen Onderdelen van de telefoon verwijderen MENU-OVERZICHT Scherminformatie Oproeptarieven SELECTEREN VAN TOESTEL KLAARMAKEN Oproepduur... - Page 4 EXTRA PLANNER BERICHTEN Nieuw bericht Alarmklok Contacten SMS schrijven Bluetooth Zoeken MMS schrijven Gekoppelde apparaten Nieuw toevoegen Inbox Handsfree-apparaten Bellersgroepen Outbox Instellingen Snelkiezen Concepten Calculator Instellingen Voicemail beluisteren Conversieprogr. Alles Kopiëren Info-bericht Wereldtijd Alles verwijderen Lezen Modem Informatie Onderwerpen Kalender Sjablonen Nieuwe toevoegen Tekstsjablonen...
- Page 5 INHOUDSOPGAVE MULTIMEDIA INSTELLINGEN Beveiligingsinstellingen PIN-code vragen Foto maken Datum & tijd Telefoonblokkering Videocamera Datum instellen Time-out autom. Mijn foto's Tijd instellen toetsenvergrendeling Mijn video's Telefooninstellingen Oproepblokkering Instellingen weergeven Vast oproepnummer MP3-speler Thema instellingen Codes wijzigen Afspeellijst Taal Netwerkinstellingen Oproepinstellingen Instellingen Netwerkkeuze Spraakrecorder Oproep doorschakelen...
- Page 6 SERVICE DOWNLOADS Internet Games en toepassingen Startpagina Games en toepassingen Favorieten Profielen Afbeeldingen Ga naar URL Geluiden Instellingen SIM-service Bestandsopslag ACCESSOIRES TECHNISCHE GEGEVENS...
- Page 7 INTRODUCTIE Gefeliciteerd met de aanschaf van de geavanceerde en compacte mobiele telefoon S5200, met de laatste digitale mobiele communicatietechnologie. Deze gebruikershandleiding bevat belangrijke informatie over het gebruik en de bediening van uw telefoon. Lees alle informatie aandachtig door om het toestel optimaal te benutten en schade aan of misbruik van de telefoon te voorkomen.
- Page 8 SAR (Specific Absorption Rate) De hoogst gemeten SAR-waarde voor dit type telefoon tijdens tests tegen het oor is 0.1 17 W/kg Deze mobiele telefoon, model S5200, is ontworpen (per 10 gram). in overeenstemming met de limiet voor blootstelling aan radiogolven. Deze limiet is gebaseerd op...
- Page 9 RICHTLIJNEN VOOR JUIST EN VEILIG GEBRUIK Houd het toestel uit de buurt van warmtebronnen ELEKTRONISCHE APPARATEN zoals radiators en fornuizen. Alle mobiele telefoons kunnen onderhevig zijn aan Laat het toestel niet vallen. storingen die de prestaties nadelig beïnvloeden. Stel het toestel niet bloot aan mechanische Gebruik uw telefoon niet in de buurt van medische trillingen of schokken.
- Page 10 Als dit gezien de rijomstandigheden verstandiger is, Vervoer of bewaar geen brandbaar gas, vloeistof of verlaat dan de weg en parkeer uw auto alvorens ander materiaal op dezelfde plaats in uw voertuig een telefoongesprek te gaan voeren. als uw mobiele telefoon en accessoires. RF-energie kan sommige elektronische systemen in VLIEGTUIG uw gemotoriseerde voertuig, zoals autoradio en...
- Page 11 In tegenstelling tot andere batterijsystemen heeft dit systeem geen geheugeneffect dat de capaciteit van de batterij beïnvloedt. Gebruik uitsluitend LG-batterijen en -laders. LG- laders zorgen voor een maximale levensduur van de batterij. Haal de batterij niet uit elkaar en voorkom kortsluiting in de batterij.
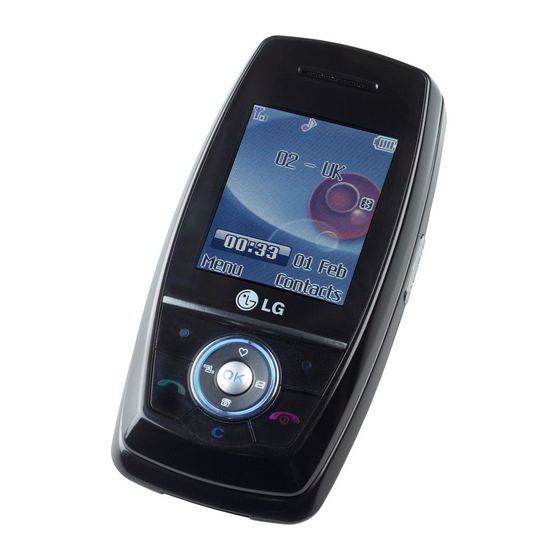
- Page 12 S5200 FUNCTIES ONDERDELEN VAN DE 1. Hoofdtelefoon aansluiting TELEFOON Hoofdtelefoon hier aansluiten 2. Zijtoetsen omhoog/omlaag Voorkant Hiermee regelt u het volume van de toetsentonen in de standby-modus bij geopende klep. Hiermee regelt u het volume van de oormicrofoon tijdens een telefoongesprek.
- Page 13 S5200 FUNCTIES Rechterkant Achterkant Cameralens Vuil op de cameralens kan de beeldkwaliteit beïnvloeden. Flitser Microfoon (Video) Ontgrendelingsknop Druk op deze knop om de batterijklep te verwijderen. Camera/MP3 Batterij Houd deze toets ingedrukt als u Opening voor een draagkoord de cameramodus, MP3 of videcamera wilt activeren.
- Page 14 Klep open Oortelefoon Hoofdscherm Menu Contacten & Navigatietoetsen Rechter softkey Linker softkey Bevestigingstoets Verzendtoets Einde-/Aan-uit-toets Annuleertoets Alfanumerieke toetsen Speciale functietoetsen Microfoon Opmerking Als het geluid niet goed overkomt, schuift u de klep open tijdens het gebruik van de telefoon.
- Page 15 S5200 FUNCTIES 1. Oortelefoon 10. Einde-/Aan-uit-toets: U kunt een oproep beëindigen of weigeren met deze toets, en tevens 2, 8. Linker softkey/ Rechter softkey: Elk van deze teruggaan naar de standby-modus. U houdt de toetsen verricht de functie die erboven in het toets ingedrukt om de telefoon aan of uit te scherm wordt weergegeven.
- Page 16 SCHERMINFORMATIE Schermpictogram Beschrijving Op het scherm worden verschillende pictogrammen Duidt het ontvangstbewijs van weergegeven. Hieronder vindt u een beschrijving van een bericht aan. elk pictogram of icoontje dat op het scherm kan Geeft aan dat u een spraakbericht verschijnen. hebt ontvangen. Schermpictogrammen Geeft aan dat de trilfunctie is ingesteld.
- Page 17 S5200 FUNCTIES Schermpictogram Beschrijving Geeft aan dat u GPRS gebruikt. U kunt uw planning bekijken. U kunt een oproep doorschakelen. U hebt het Bluetooth-menu geactiveerd. Opmerking Gebruik de camera- of de multimediafuncties niet als de batterijstatus aangeeft dat de batterij bijna leeg is.
- Page 18 TOESTEL KLAARMAKEN VOOR GEBRUIK DE SIM-KAART EN DE BATTERIJ 2. De SIM-kaart installeren INSTALLEREN Plaats de SIM-kaart in de kaarthouder. Schuif de SIM-kaart volledig in de houder. Plaats de kaart Zorg ervoor dat de telefoon is uitgeschakeld voor u met het metalen stukje naar beneden. Om de SIM- de batterij verwijdert.
- Page 19 TOESTEL KLAARMAKEN VOOR GEBRUIK 3. De batterij installeren 1. Zorg ervoor dat de batterij volledig is opgeladen voor u de telefoon voor het eerst gebruikt. 2. Sluit het andere uiteinde van de reisadapter aan op een stopcontact. Gebruik alleen de meegeleverde batterijoplader.
- Page 20 Waarschuwing! Koppel bij onweer het stroomsnoer en de oplader los, om elektrische schokken of brand te voorkomen. Zorg dat er geen scherpe voorwerpen zoals tanden en nagels van huisdieren in contact komen met de batterij. Hierdoor zou brand kunnen ontstaan. Gebruik de telefoon niet tijdens het opladen.
- Page 21 TOESTEL KLAARMAKEN VOOR GEBRUIK TELEFOON AAN-EN UITZETTEN TOEGANGSCODES Met de in dit hoofdstuk beschreven toegangscodes Telefoon aanzetten voorkomt u dat er ongeoorloofd gebruik wordt gemaakt van uw telefoon. De toegangscodes (met 1. Sluit de telefoon aan op bijvoorbeeld de uitzondering van de PUK- en PUK2-codes) kunnen reisadapter, de aanstekeradapter of de handsfree worden gewijzigd via de functie Codes wijzigen carkit.
- Page 22 PIN2-code (4 tot 8 cijfers) Beveiligingscode (4 tot 8 cijfers) De PIN2-code, die bij sommige SIM-kaarten wordt De beveiligingscode voorkomt dat onbevoegden geleverd, hebt u nodig om toegang te krijgen tot gebruik kunnen maken van uw telefoon. De code is bepaalde functies zoals Overzicht telefoonrekening of standaard op ‘0000’...
-
Page 23: Hoofdfuncties
HOOFDFUNCTIES BELLEN EN GEBELD WORDEN Internationaal bellen 1. Houd de toets ngedrukt om de Een oproep verrichten internationale toegangscode in te voeren. Het teken ‘+’ kunt u vervangen door de internationale 1. Controleer of uw telefoon is ingeschakeld. toegangscode. 2. Toets het volledige telefoonnummer in, dus 2. - Page 24 Volume aanpassen Opmerking Als Willekeurige toets is ingesteld als U kunt tijdens een gesprek het volume aanpassen antwoordmodus kunt u een inkomende oproep met behulp van de zijtoetsen ( ) . Druk op de beantwoorden door op een willekeurige toets te bovenste zijtoets om het geluid harder te zetten en drukken, behalve of de rechter softkey.
- Page 25 HOOFDFUNCTIES Sterkte netwerksignaal U kunt snel en eenvoudig woorden invoeren, met een minimaal aantal toetsaanslagen. U hoeft de antenne niet uit te trekken, deze zit vast. ABC-invoermodus Als u zich in een gebouw bevindt kan het zijn dat u een betere ontvangst hebt als u bij een raam staat. U In deze modus kunt u letters ingeven door de toets kunt de sterkte van uw netwerksignaal aflezen aan de waar de gewenste letter onder zit een, twee, drie of...
- Page 26 2. U kunt de modus voor tekstinvoer veranderen Als daarna niet het juiste woord op het scherm door op . te drukken. Rechtsonder in het staat, drukt u een of meerdere keren op de scherm ziet u de huidige invoermodus. onderste navigatietoets om door de andere mogelijke woorden te bladeren.
- Page 27 HOOFDFUNCTIES 3. Voer aan het einde van elk woord een spatie in Opmerking door op toets te drukken. Druk op In de onderstaande tabel vindt u een letters te wissen. Houd de toets enige tijd beschrijving van de beschikbare tekens onder de ingedrukt om volledige woorden te wissen.
-
Page 28: Menu In Gesprek
Gebruik 123(nummer)-modus Tijdens een oproep In de 123-modus kunt u nummers invoeren in een Het menu dat tijdens een oproep op het scherm tekstbericht (bijvoorbeeld een telefoonnummer). wordt weergegeven, verschilt van het standaard hoofdmenu in de standby-modus. Hieronder vindt u Druk op de gewenste nummertoetsen voor u een beschrijving van de opties. - Page 29 HOOFDFUNCTIES Een inkomende oproep beantwoorden Wanneer u in gesprek bent, kunt u een inkomende oproep weigeren door op de linker softkey [Menu] te Om bij een belsignaal een inkomende oproep aan te drukken en vervolgens Conferentie/Weigeren te nemen, drukt u op de toets .
-
Page 30: Conferentiegesprekken
CONFERENTIEGESPREKKEN Een tweede oproep verrichten U kunt een tweede oproep verrichten terwijl u reeds De ‘multiparty’- of conferentieservice biedt u de in gesprek bent. Geef het nummer in en druk op de mogelijkheid om tegelijkertijd met meer dan één toets . - Page 31 HOOFDFUNCTIES Een conferentiegesprek in de wacht Een privé-gesprek in een terugnemen conferentiegesprek Druk op de linker softkey en selecteer vervolgens Voor een privé-gesprek met een van de deelnemers Conferentie/Allen deelnemen. aan een conferentiegesprek laat u het nummer van de persoon waarmee u apart wilt spreken op het scherm verschijnen, waarna u op de linker softkey drukt.
-
Page 32: Menu-Overzicht
MENU-OVERZICHT 1. Profielen 3. Extra 4. Planner 1.1 Alleen trillen 3.1 Alarmklok 4.1 Contacten 4.1.1 Zoeken 1.2 Stil 3.2 Bluetooth 4.1.2 Nieuw toevoegen 1.3 Normaal 3.2.1 Gekoppelde apparaten 4.1.3 Bellersgroepen 1.4 Luid 3.2.2 Handsfree-apparaten 4.1.4 Snelkiezen 1.5 Hoofdtelefoon 3.2.3 Instellingen 4.1.5 Instellingen 2. - Page 33 MENU-OVERZICHT 5. Berichten 6. Multimedia 7 . Instellingen 5.1 Nieuw bericht 6.1 Foto maken 7.1 Datum & tijd 5.1.1 SMS schrijven 7.1.1 Datum instellen 6.2 Videocamera 5.1.2 MMS schrijven 7.1.2 Tijd instellen 6.3 Mijn foto's 5.2 Inbox 7.2 Telefooninstellingen 6.4 Mijn video's 5.3 Outbox 7.2.1 Instellingen 6.5 MP3...
- Page 34 8. Service 9. Downloads 7.4 Beveiligingsinstellingen 8.1 Internet 9.1 Games en toepassingen 7.4.1 PIN-code vragen 8.1.1 Startpagina 9.1.1 Games en 7 .4.2 Telefoonblokkering toepassingen 8.1.2 Favorieten 7.4.3 Time-out bij autom. 9.1.2 Profielen 8.1.3 Ga naar URL Toetsenvergrendeling 9.2 Afbeeldingen 7.4.4 Oproepblokkering 8.1.4 Instellingen 9.3 Geluiden 7.4.5 Vast...
-
Page 35: Selecteren Van Functies En Opties
SELECTEREN VAN FUNCTIES EN OPTIES Uw telefoon biedt tal van functies waarmee u het toestel kunt afstemmen op uw wensen. Deze functies zijn ondergebracht in menu’s en submenu’s die toegankelijk zijn via de twee softkeys [ ] en Menu Contacten ]. - Page 36 PROFIELEN In Profielen kunt u beltonen instellen voor Type oproepsignaal: type oproepsignaal voor verschillende gebeurtenissen, omgevingen en inkomende gesprekken instellen. bellergroepen. Er zijn zes standaardprofielen: Alleen Beltoon: selecteer de gewenste beltoon uit de lijst. trillen, Stil, Normaal, Luid en Hoofdrelefoon. Elk Belvolume: volume van de beltoon instellen.
- Page 37 PROFIELEN Aan/Uit-volume: Instelling van het volume van de 1. Voor het wijzigen van een profielnaam scrollt u toon als het toestel aan- of uitgezet wordt. naar het profiel in de lijst met profielen, drukt u op de linker softkey of de toets OK en Automatisch beantwoorden: Deze functie kan selecteert u vervolgens Naam wijzigen.
-
Page 38: Oproep-Info
OPROEP-INFO Als uw netwerkexploitant Caller Line Identification Het nummer weergeven en bellen (indien (CLI) ondersteunt, kunt u een overzicht opvragen van beschikbaar) of dit opslaan in het adresboek. gemiste, ontvangen en uitgaande oproepen. Een nieuwe naam voor het nummer invoeren en Het nummer en de naam (indien beschikbaar) beide opslaan in het adresboek. -
Page 39: Laatste Oproepen Verwijderen
OPROEP-INFO LAATSTE OPROEPEN Uitgaande oproepen: duur van de uitgaande oproepen. VERWIJDEREN MENU 2.4 Alles resetten: Hiermee kunt u de lengte van alle Hiermee kunt u lijsten met Gemiste oproepen en oproepen op nul zetten door op de linker softkey Ontvangen oproepen verwijderen. U kunt [Ja] te drukken. -
Page 40: Gprs Info
Limiet instellen: Met deze netwerkdienst kunt u Gegevensvolumes (Menu 2.6.2) de kosten van uw oproepen beperken tot een U kunt het volume van de Verzonden, Ontvangen en bepaald aantal gesprekseenheden. Selecteer Lezen Alle datavolumes controleren en Alles resetten om het aantal resterende eenheden weer te geven. instellen. - Page 41 EXTRA ALARMKLOK Nadat u de overdracht hebt bevestigd, wordt het MENU 3.1 bestand naar uw telefoon gekopieerd. U kunt tot 5 alarmen instellen om op een bepaald Het bestand wordt, afhankelijk van het bestandstype, tijdstip af te gaan. in een van de volgende mappen opgeslagen: 1.
- Page 42 Instellingen (Menu 3.2.3) Opmerking Als u op de -toets drukt, kunt u een Wanneer apparaten compatibel zijn met Bluetooth negatief getal invoeren. En als u op de kunnen ze als nieuw apparaat aangemeld worden op toets drukt, kunt u een decimaal getal invoeren. het toestel.
- Page 43 EXTRA 1. Selecteer de stad (tijdzone) door op de toetsen te drukken. 2. U kunt de huidige tijd ook instellen op de door u gekozen stadstijd door op [Instellen] te drukken. MODEM MENU 3.6 U kunt via de modem de netwerkservices gebruiken. Als u PCsync, Contents banks of Internet Cube wilt gebruiken, moet u het menu openen, de modem activeren en vervolgens de USB-kabel aansluiten.
- Page 44 PLANNER CONTACTEN SMS / MMS: als u het gezochte nummer hebt MENU 4.1 gevonden, kunt u een bericht/multimediabericht aan het geselecteerde nummer verzenden. Opmerking Druk in de standby-modus op de rechter Verzenden via Bluetooth: Gegevens uit het softkey [Contacten] voor directe toegang. telefoonboek kunnen via Bluetooth verzonden worden naar een ander apparaat.
- Page 45 PLANNER Nieuw toevoegen e. U kunt een symbool en een afbeelding bij het (Menu 4.1.2) item selecteren met de toetsen Met deze functie kunt u een item aan het telefoonboek toevoegen. In het telefoongeheugen kunnen maximaal 1000 items worden opgeslagen. De Bellersgroepen (Menu 4.1.3) capaciteit van de SIM-kaart is afhankelijk van de...
- Page 46 Snelkiezen - Als u Variabel selecteert, wordt u gevraagd (Menu 4.1.4) waar het item moet worden opgeslagen. Aan een in de naamlijst ingevoerd item kunt u een - Als u SIM of Telefoon selecteert, bewaart het willekeurige toets van toekennen. toestel het item in het door u geselecteerde U kunt het nummer dan direct bellen door op deze geheugen.
- Page 47 PLANNER 2. Blader naar Alles kopiëren en druk vervolgens 3. Geef de beveiligingscode in en druk op [OK] om dit menu te openen. [OK] of [Terug]. SIM naar telefoon: u kunt het item van het Informatie SIMgeheugen naar het Telefoongeheugen (Menu 4.1.8) kopiëren.
- Page 48 1. Open eerst het telefoonboek door in de Toetsen Beschrijving standbymodus op [Contacten] te Jaarlijks drukken. Kies Informatie door op [OK] te drukken. Maandelijks 2. Blader naar Controleer geheugen en druk op Wekelijks [OK]. Dagelijks Eigen nummerlijst (afhankelijk van SIM-kaart) U kunt uw eigen nummer in de SIM-kaart opslaan Druk in de kalender op de linker softkey en controleren.
- Page 49 PLANNER Alles verwijderen (Menu 4.2.4) Opmerking ls u de tekstinvoermodus wilt wijzigen, drukt u Hiermee kunt u alle items verwijderen. op de toets totdat u de gewenste modus hebt. Ga naar datum (Menu 4.2.5) U kunt rechtstreeks naar de gekozen datum springen. Waarschuwingsgeluid instellen (Menu 4.2.6) U kunt het alarmsignaal voor elke gekozen datum...
- Page 50 BERICHTEN Druk op de Menu-toets ( ) en selecteer 1. Geef de tekst in. Kijk voor meer informatie over Berichten met de navigatietoetsen. tekst invoeren op pagina 24-27 (Tekst invoeren). 2. Als u de volledige tekst hebt ingegeven, drukt u op NIEUW BERICHT de linker softkey [Opties].
- Page 51 BERICHTEN Uitlijning: stel de positie van het bericht in - Tekstsjabloon: gebruik een tekstsjabloon die al in Rechts, Centreren of Links. de telefoon opgeslagen is. Toevoegen aan T9-woordenboek: u kunt Contacten: voeg een telefoonnummer toe aan het woorden toevoegen. Dit menu wordt alleen bericht.
- Page 52 3. U kunt een dia toevoegen door te bladeren naar Pagina instellingen ] n vervolgens op de OK-toets of de linker - Timer instellen: u kunt de timer voor dia's, tekst, navigatietoets [OK] te drukken. U kunt tevens een foto's en geluid instellen. dia toevoegen met behulp van de rechter softkey - Tekst en foto verwisselen: u kunt de positie van [Menu].
- Page 53 BERICHTEN INBOX Als er op de telefoon ‘Geen ruimte voor SIM-bericht’ MENU 5.2 verschijnt, hoeft u alleen de SIM-berichten uit de U wordt gewaarschuwd als u nieuwe berichten hebt Inbox te verwijderen. Als er op de telefoon 'Geen ontvangen. Deze worden opgeslagen in de Inbox. ruimte voor SIM-bericht' verschijnt, kunt u ook andere zaken verwijderen, zoals berichten, media en In de Inbox worden de berichten door pictogrammen...
- Page 54 Terugbellen: u kunt de afzender terugbellen. Specifieke opties voor downloadberichten Informatie: u kunt informatie over ontvangen Informatie: hiermee kunt u de inhoud van berichten weergeven, zoals het adres van de downloadberichten weergeven. afzender, het onderwerp (alleen voor Laden: hiermee kunt u een WAP-verbinding met de multimediaberichten), de datum en tijd, het URL in het downloadbericht tot stand brengen.
- Page 55 BERICHTEN Als u het bericht al hebt verzonden: Alles verzenden: alle berichten die nog niet zijn verzonden, verzenden. Bekijken: u kunt de verzonden berichten Alles verwijderen: alle berichten die nog niet zijn weergeven. verzonden, verwijderen. Doorsturen: u kunt het huidige bericht naar andere ontvangers doorsturen.
- Page 56 VOICEMAIL BELUISTEREN ontvangen, of het bericht verschijnt direct op het MENU 5.5 scherm. In de standby-modus verschijnen de Via dit menu hebt u snel toegang tot uw voicemailbox onderstaande opties in het scherm. (indien ondersteund door uw netwerkexploitant). Voor u van deze dienst gebruik kunt maken, moet u Lezen (Menu 5.6.1) het servernummer invoeren.
- Page 57 BERICHTEN Tekstsjablonen MMS-sjablonen (Menu 5.7.1) (Menu 5.7.2) Preview: Bekijk de door u geschreven MMS- • Bel me terug aub berichten. • Ik ben wat later. Ik ben er om Opslaan: Sla het MMS-bericht op als concept of • Waar ben je nu? sjabloon.
- Page 58 T9 talen: hiermee selecteert u de T9- Ontvangstrapport: Stel de functie in op Ja als u invoermodus. wilt controleren of uw bericht is verzonden. Afsluiten: hiermee verlaat u het menu. Kosten voor opnieuw afspelen: Wanneer u een bericht hebt verzonden, kan de ontvanger Mijn visitekaartje antwoorden op uw kosten.
- Page 59 BERICHTEN Netwerkinstellingen: als u de multimediaserver Info-bericht (Menu 5.8.4) selecteert, kunt u de URL van de server instellen. Ontvangen Toegestane berichttypen Ja: Als u deze functie selecteert, kunt u Persoonlijk: persoonlijk bericht. informatieberichten ontvangen. Advertentie: commercieel bericht. Nee: Als u deze functie selecteert, kunt u geen informatieberichten ontvangen.
-
Page 60: Multimedia
MULTIMEDIA FOTO MAKEN Afsluiten: De camera afsluiten. MENU 6.1 Modus: hiermee kunt u het maken van meerdere Met deze toepassing kunt u foto's maken. U kunt opnamen in- of uitschakelen. foto's maken in een door u gewenst formaat en ze gebruiken als foto van een contactpersoon, voor het Effect: hiermee kunt u speciale effecten aan een basisscherm en voor algemenere doeleinden. -
Page 61: Mijn Foto's
MULTIMEDIA Grootte: hiermee kunt u de grootte van een Opties afbeelding opgeven. Multi-weergave: u kunt alle foto’s (maximaal Timer: hiermee kunt u de vertragingstimer negen) op een scherm bekijken. opgeven. Verzenden via Bluetooth: u kunt de foto's via Kwaliteit: hiermee kunt u de kwaliteit van een Bluetooth verzenden. - Page 62 AAC. luidspreker naar MP3-muziekbestanden in het geheugen van de telefoon luisteren. Met LG Contents Bank op de cd-rom in de Opmerking verpakking kunt u MP3-bestanden overzetten van een Doordat de luidspreker zo klein is, kan de audio compatibele computer naar het geheugen van de in bepaalde gevallen worden vervormd.
-
Page 63: Mp3-Speler
MULTIMEDIA Afspeellijsten weergeven: U kunt de afspeellijst Opmerking weergeven terwijl u naar de muziek luistert. De computer moet over Windows 98 SE, Sectie herhalen: Als u dit inschakelt, wordt de Windows ME, Windows 2000 of Windows XP selectie van de huidige muziek herhaald. beschikken. -
Page 64: Afspeellijst
Afspeellijst SPRAAKRECORDER (Menu 6.5.2) MENU 6.6 Met dit menu kunt u de volledige afspeellijst Met de spraakmemofunctie kunt u maximaal 10 weergeven. U kunt een track verplaatsen door de spraakberichten opnemen. Elk bericht duurt maximaal navigatietoets in te drukken. 20 seconden. Daarnaast kunt u, als u het optiemenu selecteert, het Opnemen bestand verwijderen of de informatie ervan bekijken. -
Page 65: Instellingen
MULTIMEDIA INSTELLINGEN MENU 6.7 Camera (Menu 6.7.1) Automatisch opslaan: als u deze optie inschakelt, worden de afbeeldingen automatisch opgeslagen, zonder dat de menubalk voor opslaan wordt weergegeven. Alle foto's verwijderen: met dit menu kunt u alle foto's verwijderen nadat u een bevestiging hebt gegeven. -
Page 66: Datum & Tijd
INSTELLINGEN U kunt de volgende menu’s instellen volgens uw TELEFOONINSTELLINGEN MENU 7.2 voorkeuren en behoeften. U kunt functies voor de telefoon instellen. 1. Druk in de standby-modus op [Menu]. Instellingen weergeven 2. Druk op om rechtstreeks naar het menu (Menu 7.2.1) Instellingen te gaan. -
Page 67: Oproepinstellingen
INSTELLINGEN Thema instellingen Indien bezet (Menu 7.2.2) Oproepen doorschakelen als u in gesprek bent. Hiermee kunt u één van de vooraf ingestelde thema's selecteren. Bij geen gehoor Oproepen doorschakelen als u niet opneemt. Taal (Menu 7.2.3) Indien buiten bereik In dit menu kunt u de taal voor het scherm wijzigen. Oproepen doorschakelen als het toestel uitstaat of Deze wijziging is ook van invloed op de Taal als u buiten bereik van het netwerk bent. -
Page 68: Mijn Nummer Meezenden
• Activeren Antwoordmodus (Menu 7.3.2) De bijbehorende dienst activeren. Bij openen Naar voice mail centrale Als u deze functie selecteert, kunt u een inkomende oproep beantwoorden door de klep te openen. Het bericht doorsturen naar de berichtencentrale. Deze functie is niet beschikbaar in de menu’s Alle Willekeurige toets dataoproepen en Alle faxoproepen. -
Page 69: Automatische Nummerherhaling
INSTELLINGEN Minuutmelder (Menu 7.3.5) U kunt uw telefoonnummer verzenden naar een Als u Aan selecteert, kunt u de gespreksduur ander nummer. Uw telefoonnummer zal dan worden controleren aan de hand van een pieptoon die tijdens weergegeven op het toestel van de persoon die uw een oproep elke minuut klinkt. -
Page 70: Telefoonblokkering
1. Selecteer Verzoek PIN-code in het menu Time-out bij autom. Beveiligingsinstellingen en druk op [OK]. Toetsenvergrendling (Menu 7 .4.3) 2. Stel in op Activeren/uitschakelen. Met dit menu kunt u de tijd van de automatische toetsenvergrendeling instellen. 3. Als u de instelling wilt wijzigen, voert u uw PIN- code in als u het toestel aanzet. -
Page 71: Vast Oproepnummer
INSTELLINGEN Inkomend bij roam FDN-lijst Deze dienst blokkeert alle inkomende oproepen als U kunt de lijst met nummers bekijken die als vaste u geen verbinding via uw thuisnetwerk hebt. nummers zijn opgeslagen. Alles annuleren Codes wijzigen (Menu 7.4.6) U kunt alle blokkeerdiensten annuleren. PIN is een afkorting van Personal Identification Wachtwoord wijzigen Number en voorkomt dat er ongeoorloofd gebruik... -
Page 72: Netwerkkeuze
Netwerkkeuze Bandkeuze (Menu 7.5.1) (Menu 7.5.2) U kunt selecteren tussen GSM 900/1800 of Automatisch GSM1900. Het telefoontoestel selecteert automatisch het netwerk dat in uw regio beschikbaar is. Als de telefoon staat GPRS-INSTELLINGEN ingesteld op Automatisch verandert deze instelling niet, MENU 7.6 ook niet als het toestel aan of uit wordt gezet. -
Page 73: Service
SERVICE U hebt toegang tot verschillende WAP-diensten Toets Beschrijving (Wireless Application Protocol), zoals bankdiensten, Blader naar de vorige of volgende nieuws, weerberichten en vluchtgegevens. Deze regel op de pagina diensten zijn speciaal voor mobiele telefoons en worden onderhouden door aanbieders van WAP- Terug naar de vorige pagina diensten. -
Page 74: Internet
INTERNET ✽ Tip: Gebruik de toetsen“ ” en MENU 8.1 symbolen in te voeren. Om “.” in te voeren, druk op“ ”. Startpagina (Menu 8.1.1) Nadat de gewenste favoriet geselecteerd is, zijn de Hiermee gaat u naar de geconfigureerde startpagina volgende opties beschikbaar, die in het actieve profiel is opgegeven. -
Page 75: Instellingen
SERVICE Instellingen 2 GPRS (Menu 8.1.4) - Gegevensinstellingen: verschijnt alleen als u Profielen Gegevensinstellingen hebt geselecteerd als Een profiel omvat de netwerkinformatie die wordt dragerdienst. gebruikt om verbinding te maken met het internet. Nummer kiezen: Geef het telefoonnummer voor Opmerking de WAP-gateway op. - Page 76 - GPRS-instellingen: de onderstaande Nieuw toevoegen: u kunt een nieuw profiel dienstinstellingen zijn alleen beschikbaar als GPRS toevoegen. is geselecteerd als dragerdienst. Verwijderen: u kunt het profiel wissen. APN: geef de APN van de GPRS in. Cache User ID: de gebruikersidentiteit voor uw Stel in of een verbindingspoging via het APNserver.
-
Page 77: Sim-Service
SERVICE SIM-SERVICE MENU 8.2 (AFHANKELIJK VAN SIM) Via de SIM-kaart kan uw serviceprovider speciale toepassingen leveren, zoals die voor thuisbankieren, handelen in aandelen enz. Als u op een van deze services bent geabonneerd, is de naam ervan aan het einde van het hoofdmenu zichtbaar. Met het SIM Services-menu gaat uw telefoon met de tijd mee en worden toepassingen van uw serviceprovider ondersteund. -
Page 78: Downloads
DOWNLOADS GAMES EN Opmerking TOEPASSINGEN U kunt de voorgeïnstalleerde map of games in MENU 9.1 deze map niet verwijderen of hernoemen. Games en toepassingen (Menu 9.1.1) Java is een door Sun Microsystems ontwikkelde In dit menu kunt u de geïnstalleerde Java-applicaties technologie. -
Page 79: Profielen
DOWNLOADS Hoewel ze op een standaardtaal zij gebaseerd AFBEELDINGEN MENU 9.2 (J2ME), zijn niet alle Java-toepassingen De linker softkey [Opties] geeft de volgende compatibel met alle telefoons die verkrijgbaar opties. zijn, omdat voor een bepaalde telefoon wellicht een specifieke bibliotheek moet worden Als achtergrond instellen: De huidige gebruikt. -
Page 80: Bestandsopslag
Bluetooth verzenden. seconden. USB-connectiviteit 2. In het hoofd-LCD-scherm van de telefoon wordt De S5200 kan met een USB-kabel op een PC worden "USB" weergegeven aangesloten om bestanden en andere inhoud over te 3. Op de PC wordt de telefoon aangeduid als dragen en om de ingebouwde modem te gebruiken. - Page 81 DOWNLOADS - Muziek: in deze map kunt u muziekbestanden bestanden). Deze laatste kunt u dan toch opslaan. De ondersteunde indelingen zijn: MP3, gewoon meenemen en later op een andere PC AAC, AAC+, AAC++, WMA e MP4 (audio). U zetten. Op de telefoon worden de in deze map kunt de bestanden in deze map afspelen met de opgeslagen bestanden weergegeven in (Menu - ingebouwde MP3-speler van de telefoon.
- Page 82 4. Na gebruik van de modem wordt het aanbevolen Waarschuwing! deze te deactiveren in het menu Extra - Modem. Ontkoppel de telefoon nooit als er nog een bestandsoverdracht plaatsvindt. Doet u dit toch, dan kan het geheugen beschadigd raken. Verwijder altijd eerst het randapparaat in Windows alvorens de kabel te ontkoppelen.
-
Page 83: Accessoires
Datakabel Om uw telefoon aan te sluiten op een computer. Headset Opmerking Gebruik altijd originele LG-accessoires. Hiermee kunt u handsfree bellen. Inclusief oortelefoon Als u dit niet doet kan uw garantie vervallen. en microfoon. Accessoires kunnen per regio verschillen; gelieve... -
Page 84: Technische Gegevens
TECHNISCHE GEGEVENS Algemeen Productnaam : S5200 Systeem : GSM 900 / DCS 1800 / PCS 1900 Omgevingstemperaturen Max : +55°C (ontladen) +45°C (laden) Min : -10°C... - Page 88 FRANÇAIS S 520 0 GUIDE DE L’UTILISATEUR Veuillez lire attentivement ce manuel avant d'utiliser votre téléphone portable. Conservez-le afin de pouvoir vous y référer ulterieurement. Élimination de votre ancien appareil 1. Ce symbole, représentant une poubelle sur roulettes barrée d'une croix, signifie que le produit est couvert par la directive européenne 2002/96/EC.
- Page 89 Supprimer les appels efficace Appels multiparties ou Frais d’appel conférences téléphoniques 31 Caractéristiques du Durée appel Arborescence des S5200 Coût de l’appel menus Description du téléphone Réglages Sélection de fonctions et Informations à l’écran Info GPRS d'options Mise en route Durée appel...
- Page 90 Outils Agenda Messages Nouveau message Réveil Contacts Ecrire SMS Bluetooth Liste Ecrire MMS Périphériques associés36 Ajouter Boîte de réception Kit piéton Groupes d’appel Réglages N° abrégés Boîte d'envoi Calculatrice Réglages Brouillons Copier tout Convertisseur Messagerie vocale Tout supprimer Fuseaux horaires Message d’information Informations Modem...
- Page 91 Table des matières Multimédia Réglages Sécurité Demander code PIN Photo Date et heure Verrouillage téléphone Caméra vidéo Date Verrouillage clavier Heure Mes photos Interdiction d’appels Téléphone Mes vidéos Appels restreints Affichage Modifier les codes Thèmes Lecteur MP3 Réseau Langue Liste d'écoute Sélection du réseau Appels Réglages...
- Page 92 Navigateur Téléchargements Jeux et applis Internet Jeux et applis Page d’accueil Profils Favoris Images Aller à l'URL Sons Réglages Clé USB Services SIM Accessoires Données techniques...
-
Page 93: Precautions D'usage De L'appareil
PRECAUTIONS D'USAGE DE L'APPAREIL MESURES DE SECURITE MESURES DE PRECAUTIONS* OBLIGATOIRES A/ Un indicateur de ‘niveau de réception’ vous permet de savoir si votre appareil est en mesure de Remarque d'ordre générale recevoir et d'émettre un signal dans de bonnes Pour préserver votre sécurité... - Page 94 Ces mesures vous permettrons de réduire considérablement l'absorption, par les parties sensibles de votre corps, de la puissance rayonnée par votre téléphone. * Aucun constat de dangerosité d'utilisation des téléphones mobiles n'ayant été constaté, seul le principe de ‘précaution’ nous pousse à vous demander de respecter ces quelques mesures.
-
Page 95: Présentation
Présentation Félicitations ! Vous venez de faire l’acquisition du S5200, un téléphone portable sophistiqué et compact, conçu pour tirer parti des toutes dernières technologies de communication mobile numérique. Ce guide de l’utilisateur contient des informations importantes relatives à l’utilisation et au fonctionnement de ce téléphone. - Page 96 (10) grammes de tissus. Specific Absorption Rate) La valeur de DAS la plus élevée pour ce modèle a Le S5200 est conforme aux exigences de sécurité été mesurée par DASY4 (pour une utilisation à relatives à l’exposition aux ondes radio. Ces exigences l’oreille) à...
-
Page 97: Recommandations Pour Une Utilisation Sûre Et Efficace
Recommandations pour une utilisation sûre et efficace Tenez votre téléphone éloigné d’appareils Ne mettez pas votre téléphone en contact avec des électriques, tels qu’un téléviseur, une radio ou un liquides ou des éléments humides. ordinateur. Utilisez les accessoires tels que l’oreillette avec la Ne placez pas votre téléphone à... - Page 98 Sécurité au volant Zone de dynamitage Vérifiez les lois et règlements en vigueur en matière N’utilisez pas votre téléphone lorsque des opérations d’utilisation des téléphones portables dans les zones de dynamitage sont en cours. Respectez les où vous conduisez. restrictions, les règlements et les lois. Ne tenez pas le téléphone dans votre main alors Sites potentiellement dangereux que vous conduisez.
- Page 99 Recommandations pour une utilisation sûre et efficace Avec les enfants Utilisez uniquement les batteries et chargeurs LG. Les chargeurs LG sont conçus pour optimiser la Conservez votre téléphone dans un endroit sûr, hors durée de vie de votre batterie. de la portée des enfants. En effet, votre téléphone Ne démontez pas et ne court-circuitez pas la...
-
Page 100: Caractéristiques Du S5200
Caractéristiques du S5200 Description du téléphone 1. Prise kit piéton Connectez un kit piéton ici. Vue avant 2. Touches latérales haut/bas Permet de contrôler le volume des bips touches en mode veille, lorsque le slide est ouvert. Permet de contrôler le volume de l'écouteur en cours de communication. - Page 101 Caractéristiques du S5200 Vue latérale Vue arrière Objectif de l’appareil photo Si l'objectif de l'appareil photo est encrassé, la qualité d'image peut être réduite. Flash Microphone (Vidéo) Bouton d'ouverture/fermeture de la batterie Appuyez sur ce bouton pour Touche de Caméra/MP3 retirer le couvercle de la batterie.
- Page 102 Vue slide ouvert Écouteur Ecran Menu Contacts & Touches de navigation Touche de Touche de fonction droite fonction gauche Touche de confirmation Touche de fin/marche- Touche d’envoi arrêt Touche d’effacement Touches alphanumériques Touche de fonctions Microphone Remarque Pour améliorer la qualité d'écoute lorsque vous êtes en communication, ouvrez le clapet du téléphone en le faisant glisser vers le haut.
- Page 103 Caractéristiques du S5200 1. Écouteur 10. Touche de fin/marche-arrêt : permet de mettre fin à un appel, de rejeter un appel et de passer 2 et 8. Touche de fonction gauche/ droite : en mode veille. Pour allumer/éteindre votre chacune de ces touches exécute la fonction téléphone, maintenez cette touche enfoncée.
-
Page 104: Informations À L'écran
Informations à l’écran Icones Description Le tableau ci-dessous présente les différentes icones Indique la réception d’un et indicateurs qui s’affichent sur l’écran de votre message. téléphone. Indique la reception d’un message vocal. Icones affichées à l’écran Indique que le mode Vibreur est Icones Description activé. - Page 105 Caractéristiques du S5200 Icones Description Indique que vous utilisez la technologie GPRS. Vous pouvez afficher votre agenda. Vous pouvez renvoyer un appel. Indique que le menu Bluetooth est activé. Remarque Si la batterie est déchargée, vous risquez de ne pas pouvoir utiliser les fonctions Photos et Multimédia.
-
Page 106: Mise En Route
Mise en route Installation de la carte SIM et de 2. Installation de la carte SIM la batterie Insérez la carte SIM dans son logement. Faites glisser la carte SIM dans le logement approprié. Assurez-vous que le mobile est éteint avant de retirer Assurez-vous qu'elle est insérée correctement et la batterie. -
Page 107: Chargement De La Batterie
Mise en route 3. Installation de la batterie. 1. La flèche vous faisant face, comme indiqué dans l'illustration, branchez la fiche de l'adaptateur de batterie sur la prise, en bas du téléphone, jusqu'à ce qu'elle soit insérée dans son logement. Vous devez sentir un déclic. -
Page 108: Débranchement Du Chargeur
Avertissement! Par temps d'orage, débranchez le cordon d'alimentation et le chargeur afin d'éviter les risques d'électrocution ou d'incendie. Mettez la batterie à l'abri d'objets pointus tels que les crocs ou les griffes d'un animal. Ceci peut provoquer un incendie. Lorsque le téléphone est en charge, ne l'utilisez pas pour appeler ou pour répondre aux appels. -
Page 109: Mise En Marche/Arrêt Du Téléphone
Mise en route Mise en marche/Arrêt du Codes d’accès téléphone Vous pouvez utiliser les codes d’accès décrits dans cette section pour éviter l’utilisation frauduleuse de Mise en marche du téléphone votre téléphone. Les codes d’accès (sauf les codes PUK et PUK2) peuvent être modifiés à l’aide de la 1. -
Page 110: Code Réseau
Code PIN2 (4 à 8 chiffres) Code de sécurité (4 à 8 chiffres) Le code PIN2, fourni avec certaines cartes SIM, est Le code de sécurité empêche toute utilisation non nécessaire pour accéder à certaines fonctions telles autorisée de votre téléphone. Ce code est nécessaire que Conseil sur les frais d’appel, Numéro fixe à... -
Page 111: Fonctions Générales
Fonctions générales Émission et réception d’un appel 2. Sélectionnez le numéro souhaité à l’aide des touches de navigation haut/bas. Émission d’un appel 3. Appuyez sur 1. Assurez-vous que votre téléphone est allumé. Émission d’un appel international 2. Entrez un numéro de téléphone avec l’indicatif de 1. - Page 112 Pour composer un numéro, il vous suffit de 1. Pour décrocher un appel, ouvrez le slide du rechercher le nom souhaité dans le répertoire. Pour téléphone (quand l'ouverture slide est définie comme plus d’informations sur la fonction Contacts. Mode de réponse. [Menu 7-3-2].) Remarque Réglage du volume Si l’option Toutes touches touche a été...
- Page 113 Fonctions générales Signal réseau Ce mode de saisie nécessite donc beaucoup moins de frappes que le mode ABC classique. Il est L’indicateur de signal ( ) qui s’affiche sur l’écran également connu sous le nom de saisie textuelle à cristaux liquides de votre téléphone vous permet de intuitive.
- Page 114 2. Vous pouvez modifier le mode de saisie en Une fois le mot saisi, si le mot affiché n’est pas correct, appuyez une ou plusieurs fois sur la appuyant sur la touche . Le mode de saisie en touche de navigation bas pour consulter les cours s’affiche dans le coin supérieur droit de autres mots proposés.
- Page 115 Fonctions générales Caractères dans l’ordre d’affichage Remarque Touche Majuscules Minuscules Pour quitter le mode de saisie de texte sans enregistrer le texte entré, appuyez sur la touche . , / ? ! - : ' '' 1 . , / ? ! - : ' '' 1 .
-
Page 116: Menu Appel En Cours
Contacts Volume Pour augmenter ou diminuer le volume de l'écouteur. Vous pouvez stocker des numéros de téléphone et les noms des personnes auxquels ils correspondent dans Émission d’un second appel la mémoire de votre carte SIM. Vous pouvez rechercher un numéro dans le répertoire En outre, vous pouvez stocker jusqu’à... - Page 117 Fonctions générales Terminer tout attente. Cette fonction, appelée Mise en attente, n’est disponible que si votre réseau le prend en Pour mettre fin à tous les appels. charge. Pour plus d’informations sur l’activation et la désactivation de cette fonction, reportez-vous à la Conférence rubrique Mise en attente.
-
Page 118: Appels Multiparties Ou Conférences Téléphoniques
sélectionnant Silence. Le microphone du poste GSM Émission d’un second appel peut être activé en sélectionnant Retour. Quand le Vous pouvez émettre un second appel alors que vous microphone est désactivé, vous pouvez toujours êtes déjà en communication. Entrez le second entendre la personne qui vous appelle sans qu'elle numéro et appuyez sur la touche . - Page 119 Fonctions générales Activation d’une conférence Conversation privée au cours d’une téléphonique en attente conférence téléphonique Appuyez sur la touche de fonction gauche, puis Pour avoir une conversation privée avec l’un des sélectionnez Conférence téléphonique/Tout appelants de la conférence, affichez à l’écran le joindre.
-
Page 120: 2.6.1 Durée Appel
Arborescence des menus 1. Profils audio 3. Outils 4. Agenda 1.1 Vibreur seul 3.1 Réveil 4.1 Contacts 1.2 Silence 4.1.1 Liste 3.2 Bluetooth 1.3 Général 4.1.2 Ajouter 3.2.1 Périphériques 1.4 Extérieur associés 4.1.3 Groupes d’appel 1.5 Kit piéton 3.2.2 Kit piéton 4.1.4 N°... - Page 121 Arborescence des menus 5. Messages 6. Multimédia 7 . Réglages 5.1 Nouveau message 6.1 Photo 7.1 Date et heure 5.1.1 Ecrire SMS 7.2.1 Date 6.2 Caméra Vidéo 5.1.2 Ecrire MMS 7.2.2 Heure 6.3 Mes photos 5.2 Boîte de réception 7.2 Téléphone 6.4 Mes vidéos 5.3 Boîte d'envoi 7.2.1 Affichage...
- Page 122 8. Navigateur 9. Téléchargements 7.4 Sécurité 8.1 Internet 9.1 Jeux et applis 7.4.1 Demander code 8.1.1 Page d’accueil 9.1.1 Jeux et applis 8.1.2 Favoris 9.1.2 Profils 7.4.2 Verrouillage téléphone 8.1.3 Aller à l’URL 9.2 Images 7.4.3 Verrouillage clavier 8.1.4 Réglages 9.3 Sons 7.4.4 Interdiction 8.2 Services SIM...
- Page 123 Sélection de fonctions et d'options Votre téléphone comprend un ensemble de fonctions qui vous permettent de le personnaliser. Ces fonctions sont classées dans des menus et sous- menus, accessibles via les deux touches de fonction Menu Contacts ] et [ ].
- Page 124 Profils audio Dans Profils audio, vous pouvez régler et Définissez l’option souhaitée. personnaliser les sonneries du téléphone selon Alerte appels : permet de définir le type de signal différents événements, environnements ou groupes souhaité pour les appels entrants. d’appelants. Il existe six profils prédéfinis : Vibreur Mélodie appels : permet de sélectionner dans une seul, Silence, Général, Extérieur et Kit piéton.
- Page 125 Profils audio Volume effets sonores : permet de régler le 1. Pour modifier le nom d’un profil, accédez au profil volume des effets sonores. de votre choix dans la liste des profils, puis appuyez sur la touche OK ou sur la touche de Volume marche/arrêt : permet de régler le volume fonction gauche et sélectionnez Renommer.
-
Page 126: Journal Appels
Journal appels Vous pouvez consulter la liste des appels manqués, Appels reçus Menu 2.2 des appels reçus et des numéros composés Cette option permet de consulter les 10 derniers uniquement si le réseau prend en charge le service appels entrants. Vous pouvez également : CLI (Calling Line Identification, identification de la ligne appelante) dans la zone de couverture. -
Page 127: Supprimer Les Appels
Journal appels Supprimer les appels Coût de l’appel (Menu 2.5.2) Menu 2.4 Cette fonction vous permet de vérifier le coût de Cette fonction vous permet de supprimer les listes votre dernier appel, de tous les appels, de conserver des Appels en absence et des Appels reçus. Vous et de réinitialiser les coûts. -
Page 128: Volume Données
Info GPRS Menu 2.6 Vous pouvez vérifier la quantité de données transférées via le réseau au moyen de l'option Info GPRS. De plus, vous pouvez afficher le temps passé en ligne. Durée appel (Menu 2.6.1) Vous pouvez vérifier la durée du Dernier appel et de Tous les appels. - Page 129 Outils Réveil Une fois le transfert confirmé, le fichier est copié sur Menu 3.1 votre téléphone Selon son type, le fichier est stocké Vous pouvez définir jusqu'à 5 réveils pour être dans l'un des dossiers suivants : réveillé à une heure spécifique. Fichier MP3 : dossier MP3 (Menu 6.5.2) 1.
- Page 130 Outils Associer. Une fenêtre s’affiche et vous demande de Pour échanger des données avec votre périphérique, taper un mot de passe. Choisissez un mot de passe choisissez un fichier et sélectionnez Envoyer par de 4 chiffres et tapez le même mot de passe sur Bluetooth dans le menu Options.
- Page 131 Outils Ajouter : permet d’associer un nouveau Afficher mon téléphone : choisissez le paramètre périphérique Bluetooth Afficher pour que les autres périphériques Bluetooth puissent détecter votre téléphone Renommer : vous permet de rennomer le lorsque le bluetooth est activé. Si vous choisissez périphérique avec lequel vous êtes connecté.
- Page 132 Fuseaux horaires 5. Appuyez sur la touche [Réinit] ou entrez de Menu 3.5 nouveaux nombres Vous pouvez consulter l’heure correspondant aux pour répéter la procédure ci-dessus. principales villes du monde. 6. Pour quitter la Calculatrice, appuyez sur 1. Sélectionnez la ville située dans le fuseau horaire [Retour].
- Page 133 Agenda Contacts Ecrire SMS/MMS : Après avoir trouvé le numéro Menu 4.1 de votre choix, vous pouvez lui envoyer un SMS/MMS. Remarque En mode veille, appuyez sur la touche de Envoyer par Bluetooth : permet d'envoyer le fonction droite [Contacts] pour accéder contact par Bluetooth.
- Page 134 Ajouter e. Vous pouvez définir un caractère pour l’entrée (Menu 4.1.2) en appuyant sur Cette fonction vous permet d’ajouter une entrée à l’annuaire. La capacité de la mémoire du téléphone Groupes d’appel (Menu 4.1.3) est de 1000 entrées. La capacité de la mémoire de la Vous pouvez intégrer 20 membres maximum par carte SIM dépend de votre fournisseur de services groupe.
- Page 135 Agenda N° abrégés Réglages (Menu 4.1.4) (Menu 4.1.5) Vous pouvez assigner n’importe quelle touche (de 1. Appuyez sur la touche [Contacts] en mode à à une entrée de la liste de noms. Vous veille. pouvez appeler directement une personne en 2.
- Page 136 - Avec images : affiche les noms du répertoire Tout supprimer (Menu 4.1.7) avec les textes et les images. Vous pouvez supprimer toutes les entrées de la carte - Nom & numéro : permet d’afficher le nom et SIM et du téléphone. le numéro de téléphone dans le répertoire.
- Page 137 Agenda 3. Les noms des services disponibles apparaissent. d’un curseur en forme de carré. Si une barre apparaît sous le calendrier, cela signifie qu’un agenda ou un 4. Utilisez pour sélectionner un mémo est prévu ce jour. Cette fonction vous aide à service.
- Page 138 Ajouter Definir sonnerie d'alarme (Menu 4.2.1) (Menu 4.2.6) Cette fonction vous permet d'ajouter un nouvel Si vous avez configuré l'alarme, l'alarme définie sonnera. agenda pour un jour choisi. Saisissez le sujet puis appuyez sur la touche de fonction gauche Mémos Menu 4.3 [OK].
- Page 139 Messages Appuyez sur la touche Menu ( ) et sélectionnez 1. Tapez votre message. Pour plus d’informations sur Messages à l’aide des touches de navigation. la saisie de texte, reportez-vous aux pages 28 à 31 (Saisie de texte). Nouveau message 2.
- Page 140 Ajout dictionnaire : permet d'enregistrer de Contacts : permet d’ajouter des numéros de nouveaux mots dans le dictionnaire T9. téléphone dans vos messages. Langue T9 : permet de sélectionner la langue du Symbole : permet de joindre des caracteres mode de saisie T9. Vous pouvez également speciaux.
- Page 141 Messages 3. Vous pouvez ajouter une diapositive en déplaçant Format diapo le curseur sur , puis en appuyant sur la touche - Définir la minuterie : permet de définir le OK ou sur la touche de fonction gauche [Sélect]. minuteur pour la diapositive, le texte, l’image et le Vous pouvez également ajouter une diapositive à...
- Page 142 Boîte de réception Si le téléphone affiche «Pas d’espace pour message Menu 5.2 SIM», vous devez supprimer tous les messages SIM de Vous êtes averti lorsque vous recevez des messages. votre boîte d’envoi ou boîte de réception. Si le Ils sont stockés dans la Boîte de réception. Les téléphone affiche «Pas d’espace pour message», vous messages de la boîte de réception sont identifiés par pouvez libérer de l’espace dans chaque dossier en...
- Page 143 Messages Appeler : Vous pouvez rappeler l’expéditeur. Options spécifiques des messages téléchargés Informations : Vous pouvez afficher les Informations : permet d'afficher le contenu des informations sur les messages reçus : l’adresse de messages téléchargés. l’expéditeur, l’objet (uniquement pour les MMS), la Charger : Lance la connexion WAP vers l'URL date et heure du message, le type, la taille du contenue dans le message téléchargé.
- Page 144 Lorsque vous utilisez le message qui a déjà été Informations : Vous pouvez afficher les informations sur les messages de la boîte d’envoi. envoyé. Envoyer tout : Vous pouvez envoyer tous les Afficher : Vous pouver afficher les message messages qui ne l’ont pas encore été. envoyés Tout supprimer : Permet de supprimer tous les Transférer : Vous pouvez transférer le message...
- Page 145 Messages Tout supprimer : Supprimez tous les messages Message dans le repertoire. d’information Menu 5.6 (DEPEND DU RESEAU ET DE L'ABONNEMENT) Messagerie vocale Menu 5.5 Les messages d’information sont des messages textes envoyés par le réseau aux utilisateurs de téléphones Ce menu présente un moyen rapide d’accéder à...
- Page 146 Thèmes Les options disponibles sont les suivantes : (Menu 5.6.2) Afficher : affiche le message sélectionné. Pour créer de nouvelles catégories, appuyez sur la touche de fonction gauche [Options], puis Supprimer : efface le modèle. sélectionnez Ajouter. Si vous avez déjà des Ajouter : permet de créer un nouveau modèle.
- Page 147 Messages Ajouter diapo : permet d'ajouter une diapositive Réglages Menu 5.8 avant ou après la diapositive actuelle. Aller à diapo : permet d'accéder aux diapositives (Menu 5.8.1) précédentes ou suivantes. Types de message Supprimer diapo : permet de supprimer la Texte, Voix, Fax, Téléappel, X.400, E-mail, diapositive sélectionnée.
- Page 148 Centre SMS : Si vous souhaitez envoyer le Profils : Si vous sélectionnez serveur de messages message texte, vous pouvez recevoir l’adresse du multimédias, vous pouvez définir l’URL au serveur centre SMS via ce menu. de messages multimédias. Message autorisés (Menu 5.8.2) Personnels : Message personnel.
- Page 149 Messages Message d’information (Menu 5.8.4) Charger Oui : Si vous sélectionnez ce menu, votre téléphone recevra les messages de service d’information. Non : Si vous sélectionnez ce menu, votre téléphone ne recevra plus les messages de service d’information. Alerte Oui : Votre téléphone émettra un bip à la réception des numéros de message du service d’information.
-
Page 150: Multimédia
Multimédia Photo Flash : détermine le fonctionnement du flash. Menu 6.1 Zoom : détermine la puissance du zoom. Cette application vous permet de prendre des photos. Vous pouvez prendre une photo au format de Remarque votre choix et l'utiliser dans votre répertoire, pour Les images fixes sont disponibles avec une votre écran d'accueil ou à... -
Page 151: Mes Photos
Multimédia Balance des blancs : détermine la balance des Ecrire MMS : vous pouvez envoyer votre photo par blancs de la vidéo. MMS. Temps d’enregistrement : détermine le temps Mettre en fond d'écran : permet définir une d'enregistrement de la vidéo. photo comme papier peint. -
Page 152: Mp3
: 24 KHz, débit binaire : de 32 Kbps à 160 Kbps, stéréo Menu 6.5 AAC: formats ADIF, ADTS (fréquence Le S5200 est équipé d'un lecteur MP3 intégré. Vous d'échantillonnage jusqu'à 48 KHz) pouvez écouter de la musique enregistrée au format MP3 dans la mémoire de votre téléphone, en utilisant Remarque un kit piéton compatible ou le haut-parleur interne. -
Page 153: Lecteur Mp3
Multimédia Liste d’ecoute : Vous permet de sélectionnér le Remarque autre ficher MP3 lors de lecture la ficher. Le PC utilisé doit fonctionner sous Windows 98 Répétition de la zone: cette fonction permet de Second Edition, Windows 2000, Windows ME répéter la zone musicale souhaitée en appuyant sur la ou Windows XP. -
Page 154: Liste D'écoute
Liste d'écoute Réglages (Menu 6.5.2) (Menu 6.5.3) Ce menu vous permet d'afficher la liste d'écoute dans ce menu permet de définir les éléments suivants : son intégralité. Vous pouvez basculer d'une piste à Equalizer, Mode de lecture, Lecture aléatoire et Effets l'autre en appuyant sur la touche de navigation. -
Page 155: Voir Liste
Multimédia Voir liste (Menu 6.6.2) Le téléphone affiche la liste des mémos vocaux. Vous pouvez écouter et supprimer le mémo vocal enregistré. Réglages Menu 6.7 Photo (Menu 6.7.1) Enregistrement auto : si vous sélectionnez Activé, les images seront automatiquement enregistrées sans que la barre de menus ne s'affiche. -
Page 156: Date Et Heure
Réglages Vous pouvez définir les menus suivants à votre gré. Téléphone Menu 7.2 1. Appuyez sur la touche [Menu] en mode Vous pouvez définir des fonctions relatives au veille. téléphone. 2. Appuyez sur la touche pour accéder Affichage directement aux Réglages. (Menu 7.2.1) Fond d’écran : Vous pouvez sélectionner des Date et heure... -
Page 157: Thèmes
Réglages Nom du réseau : Si vous sélectionnez Activer, le Renvoi d’appel (Menu 7.3.1) nom du réseau (le nom du fournisseur de services) Le service de transfert d’appel vous permet de apparaît dans l'écran interne. transférer des appels vocaux entrants, des appels de fax et des appels de données vers un autre numéro. -
Page 158: Mode De Réponse
Sous-menus Mode de réponse (Menu 7.3.2) Les menus de Renvoi d’appel disposent des sous- Slide ouvert menus suivants. Si vous sélectionnez ce menu, vous pouvez recevoir • Activer un appel entrant en ouvrant le slide. Active le service correspondant. Toute touche Boîte vocale Si vous sélectionnez ce menu, vous pouvez recevoir un appel en appuyant sur n’importe quelle touche,... -
Page 159: Double Appel
Réglages Activé Bip minute (Menu 7.3.5) Vous pouvez choisir d’envoyer votre numéro de Si vous sélectionnez Activé, vous pouvez contrôler la téléphone à votre correspondant. Votre numéro durée de l’appel via l’émission d’un bip toutes les apparaît alors sur le téléphone du correspondant. minutes lors d’un appel. -
Page 160: Verrouillage Téléphone
1. Sélectionnez Demander code PIN dans le menu Verrouillage clavier (Menu 7.4.3) Réglages, puis appuyez sur la touche [OK]. Ce menu permet de régler l'heure du verrouillage 2. Sélectionnez Activer/Désactiver. clavier automatique. 3. Pour modifier ce paramètre, vous devez entrer Interdiction d’appels (Menu 7.4.4) votre code PIN lorsque vous allumez le téléphone. -
Page 161: Appels Restreints
Réglages Entrant quand à l’étranger Liste de numéros Le service d’interdiction s’applique à tous les Vous pouvez visualiser la liste des numéros appels entrants lorsque l’utilisateur est itinérant. enregistrés en tant que numéros fixes. Tout annuler Modifier les codes (Menu 7.4.6) Ce sous-menu permet d’annuler tous les services PIN est l’abréviation de Personal Identification d’interdiction. -
Page 162: Sélection Du Réseau
Sélection du réseau Sélection de bande (Menu 7.5.1) (Menu 7.5.2) Automatique Permet de choisir entre deux réseaux : GSM 900/1800 ou GSM1900. Si vous sélectionnez le mode automatique, le téléphone recherche et sélectionne automatiquement Activ. GPRS un réseau à votre place. Une fois le mode Menu 7.6 automatique sélectionné, le téléphone est défini sur Vous pouvez définir différents modes d'utilisation du... -
Page 163: Navigateur
Navigateur Vous avez accès à différents services WAP (Wireless Utilisation des touches du téléphone Application Protocol : protocole d’application sans Lorsque vous surfez sur Internet, les touches du fil), tels que les services bancaires en ligne, les téléphone ont d’autres propriétés qu’en mode actualités, la météo et le trafic aérien. -
Page 164: Internet
Internet ✽ Astuce : les touches “ ” et permettent Menu 8.1 d’entrer des symboles. Pour saisir « . », appuyez sur “ ”. Page d’accueil (Menu 8.1.1) Une fois un favori sélectionné, vous avez accès aux Ce menu permet d’accéder à la page d’accueil. La options suivantes. -
Page 165: Réglages
Navigateur Réglages - Type service : permet de définir le service de (Menu 8.1.4) données de support. Profils 1 Données Un profil est constitué des informations réseau 2 GPRS requises pour se connecter au WAP. - Paramètres de donnèes : accessible uniquement Remarque si vous sélectionnez Paramètres de données Si la carte SIM prend en charge les services SAT... - Page 166 Vitesse d’appel : vitesse de votre connexion de Renommer : permet de modifier le nom du profil. données, 9600 ou 14400. Ajouter : permet d’ajouter un nouveau profil. - Activation GPRS : les paramètres de ce service Supprimer : permet de supprimer de la liste le ne sont disponibles que si vous avez sélectionné...
-
Page 167: Services Sim
Navigateur Personnel : permet de consulter la liste des certificats personnels stockés dans votre téléphone. Services SIM Menu 8.2 (dépendant de la carte SIM) Votre opérateur peut proposer des applications spéciales via votre carte SIM, notamment l’accès à des services bancaires ou à la bourse. Si vous avez souscrit à... -
Page 168: Téléchargements
Téléchargements Jeux et applis - Toujours : la connexion est créée immédiatement Menu 9.1 sans notification. Jeux et applis - Invite : vous devez confirmer l’action avant que (Menu 9.1.1) l’application ne se connecte. Dans ce menu, vous pouvez gérer les applications - Jamais : aucune connexion n’est autorisée. -
Page 169: Profils
Téléchargements Images Remarque Menu 9.2 Les fichiers JAR sont des programmes Java au La touche de fonction gauche [Options] vous format compressé et les fichiers JAD sont des permet d'accéder accéder aux fonctions suivantes : fichiers de description contenant toutes les Mettre en fond d'écran : l'image sélectionnée informations nécessaires. -
Page 170: Clé Usb
Connectivité USB 2. Le téléphone affiche alors "USB" sur l'écran En connectant le S5200 à un ordinateur à l'aide d'un principal câble USB, vous pouvez utiliser le modem intégré et transférer des fichiers et leur contenu. La section 3. - Page 171 Téléchargements - Musique : vous pouvez copier des fichiers de les transporter et de les télécharger vers un musicaux dans ce dossier. Les formats suivants autre ordinateur. Sur le téléphone, les fichiers sont pris en charge : MP3, AAC, AAC+, AAC++, enregistrés dans ce dossier sont répertoriés dans WMA, MP4 (audio) et WAV.
- Page 172 5. Une fois le transfert des fichiers terminé, Remarque déconnectez le périphérique USB de Windows, Pour connecter un périphérique USB, attendez puis débranchez le câble du téléphone. quelques minutes après la mise sous tension du téléphone et que l'écran soit en veille. Avertissement! Ne jamais déconnecter le téléphone lorsqu'un transfert de fichiers est en cours.
-
Page 173: Accessoires
PC pour échanger les données. Kit piéton stéréo Remarque Permet d’utiliser le téléphone Utilisez toujours d’authentiques accessoires LG. en mode mains libres. Il comprend un écouteur Le non-respect de cette recommandation risque et un microphone. d’entraîner l’annulation de votre garantie. -
Page 174: Données Techniques
Données techniques Généralités Code de produit : S5200 Système : GSM 900 / DCS 1800 / PCS 1900 Températures de fonctionnement Max : +55°C (déchargement...) +45°C (chargement…) Min : -10°C... - Page 178 ENGLISH S 520 0 U S E R G U I D E Some of contents in this manual may differ from your phone depending on the software of the phone or your service provider. Disposal of your old appliance 1.
- Page 179 Making and answering calls Missed calls GUIDELINES FOR SAFE Contacts Received calls AND EFFICIENT USE In-call menu Dialled calls S5200 FEATURES Multiparty or Delete recent calls Parts of the phone conference calls Call charges Display information MENU TREE Call duration...
- Page 180 TOOLS ORGANISER MESSAGES New message Alarm clock Contacts Write text message Bluetooth Search Write multimedia Paired devices Add new message Handsfree devices Caller groups Inbox Settings Speed dial Outbox Calculator Settings Drafts Unit converter Copy all Listen to voice mail World time Delete all Info message...
- Page 181 TABLE OF CONTENTS MULTIMEDIA SETTINGS Security settings PIN code request Camera Date & Time Handset lock Video camera Date Auto key lock timeout My photos Time Call barring My video Phone settings Fixed dial number Display settings Change codes MP3 player Theme Settings Network settings Playlist...
- Page 182 SERVICE DOWNLOADS Internet Games & Apps Home Games & Apps Bookmarks Profiles Images Go to URL Sounds Settings SIM service File storage ACCESSORIES TECHNICAL DATA...
-
Page 183: Introduction
INTRODUCTION Congratulations on your purchase of the advanced and compact S5200 mobile phone, designed to operate with the latest digital mobile communication technology. This user’s guide contains important information on the use and operation of this phone. Please read all... -
Page 184: Guidelines For Safe And Efficient Use
Radio wave exposure and Specific Absorption PRODUCT CARE AND Rate (SAR) information MAINTENANCE This mobile phone model S5200 has been designed to comply with applicable safety requirement for WARNING! Use only batteries, chargers and exposure to radio waves. This requirement is based... - Page 185 GUIDELINES FOR SAFE AND EFFICIENT USE The coating of the phone may be damaged if ELECTRONICS DEVICES covered with wrap or vinyl wrapper. All mobile phones may get interference, which could Use dry cloth to clean the exterior of the unit. affect performance.
- Page 186 RF energy may affect some electronic systems in IN AIRCRAFT your motor vehicle such as car stereo or safety Wireless devices can cause interference in aircraft. equipment. Turn off your mobile phone before boarding any When your vehicle is equipped with an air bag, do aircraft.
- Page 187 Unlike other battery systems, there is no memory effect that could compromise the battery’s performance. Use only LG batteries and chargers. LG chargers are designed to maximize the battery life. Do not disassemble or short-circuit the battery pack.
-
Page 188: S5200 Features
S5200 FEATURES PARTS OF THE PHONE 1. Headset jack Connect a headset here. Front view 2. Up/down side keys Controls the volume of keypad tone in standby mode with the phone open. Controls the earpiece volume during a phone call. - Page 189 S5200 FEATURES Right side view Rear view Camera lens Dirt on the camera lens could affect the image quality. Flash Microphone (Video) Battery latch Press this button to remove the battery cover. Camera/MP3 key Battery pack Holes for a Slide the phone open to reveal carrying strap the camera lens.
- Page 190 Open view Earpiece Main screen Menu Contacts & Navigation keys Right soft key Left soft key Confirm key Send key End/Power key Clear key Alphanumeric keys Special function keys Microphone Note To prevent the difficulty in hearing of the other side, slide open while using phone.
- Page 191 S5200 FEATURES 1. Earpiece 10. End/Power key: Used to end a call or reject a call and also to go back to standby mode. Hold 2, 8. Left soft key/ Right soft key: Performs the this key down to turn the phone on/off.
-
Page 192: Display Information
DISPLAY INFORMATION Icon Description The table below describes various display indicators Indicates the receipt of a voice or icons that appear on the phone’s display screen. message. Indicates that the vibration ringer On-Screen Icons has been set. Icon Description Indicates the Loud profile is activated. - Page 193 S5200 FEATURES Icon Description Indicates that you are using GPRS. Agenda event set Call divert service active Bluetooth enabled Note When the status of the battery indicates low, you may not use Camera or Multimedia function. While using Multimedia function, the status of...
-
Page 194: Getting Started
GETTING STARTED INSTALLING THE SIM CARD 2. Install the SIM card. AND BATTERY Insert the SIM card into the holder. Slide the SIM card into the SIM card holder. Make sure that the Make sure the power is off before you remove the SIM card is inserted properly and that the gold battery. -
Page 195: Charging The Battery
GETTING STARTED 3. Install the battery. 1. With the arrow facing you as shown in the diagram push the plug on the battery adapter into the socket on the bottom of the phone until it clicks into place. 2. Connect the other end of the mains adapter to the mains socket. -
Page 196: Disconnecting The Adapter
Warning! Unplug the power cord and charger during lightning storms to avoid electric shock or fire. Make sure that no sharp-edged items such as animal teeth or nails come into contact with the battery. There is a risk of this causing a fire. Do not place or answer calls while charging the phone as it may short-circuit the phone and/or cause electric shock or fire. -
Page 197: Turning Your Phone On And Off
GETTING STARTED TURNING YOUR PHONE ON ACCESS CODES AND OFF You can use the access codes described in this section to avoid unauthorised use of your phone. Turning your phone ON The access codes (except PUK and PUK2 codes) can be changed by using the Change codes feature 1. -
Page 198: Barring Password
PUK code (4 to 8 digits) BARRING PASSWORD The PUK (PIN Unblocking Key) code is required to The barring password is required when you use the unlock a PIN blocked phone. The PUK code may be Call barring function. You can obtain the password supplied with the SIM card. -
Page 199: General Functions
GENERAL FUNCTIONS MAKING AND ANSWERING Making an international call CALLS 1. Press and hold the key for the international prefix. The ‘+’ character automatically selects the Making a call international access code. 2. Enter the country code, area code, and the phone 1. - Page 200 Adjusting the volume To reject an incoming call, press and hold one of the side keys on the left side of the phone If you want to adjust the earpiece volume during a without opening the phone. call, use the side keys ( ) . Press the up side key to You can answer a call while using the address increase and down side key to decrease the volume.
- Page 201 GENERAL FUNCTIONS Entering text 123 mode (Number mode) Type numbers using one keystroke per number. To You can enter alphanumeric characters by using the change to 123 mode in a text entry field, press the phone’s keypad. For example, storing names in the key until 123 mode is displayed.
- Page 202 You can also add new words in the dictionary. As new You can select the language of the T9 mode. words are added, the word changes to reflect the Press the left soft key [Option], then select T9 most likely candidate from the dictionary. You can languages.
- Page 203 GENERAL FUNCTIONS 2. To insert a space, press the key once. To Using the 123 (Number) mode delete letters, press the key. Press and hold The 123 mode enables you to enter numbers in a text down the key to clear the whole display. message (a telephone number, for example).
- Page 204 During a call This feature, known as Call waiting, is only available if your network supports it. For details of how to The menu displayed on the handset screen during a activate and deactivate it see Call waiting call is different to the default main menu displayed [Menu 7-3-4].
- Page 205 GENERAL FUNCTIONS Switching DTMF tones on during a call Making a second call To turn DTMF tones on during a call, press the left You can make a second call while currently on a call. soft key, and then select DTMF on. DTMF tones can Enter the second number and press the key.
-
Page 206: Conference Calls
Adding calls to the conference call After pressing the left soft key, selecting Conference/End all will end all the active and on- To add a call to an existing conference call, press the hold calls. left soft key, then select the Conference/Join all. Displaying callers in a conference call To scroll through the numbers of the callers who make up a conference call on the handset screen, use... - Page 207 MENU TREE 1. Profiles 3. Tools 4. Organiser 1.1 Vibrate only 3.1 Alarm clock 4.1 Contacts 4.1.1 Search 1.2 Silent 3.2 Bluetooth 4.1.2 Add new 3.2.1 Paired devices 1.3 General 4.1.3 Caller groups 3.2.2 Handsfree devices 1.4 Loud 4.1.4 Speed dial 3.2.3 Settings 1.5 Headset 4.1.5 Settings...
- Page 208 5. Messages 6. Multimedia 7 . Settings 5.1 New message 6.1 Camera 7.1 Date & Time 5.1.1 Write text message 7.1.1 Date 6.2 Video camera 5.1.2 Write multimedia 7.1.2 Time 6.3 My photos message 7.2 Phone settings 5.2 Inbox 6.4 My videos 7.2.1 Display settings 5.3 Outbox 6.5 MP3...
-
Page 209: Service
MENU TREE 8. Service 9. Downloads 7.4 Security settings 8.1 Internet 9.1 Games & Apps 7.4.1 PIN code request 8.1.1 Home 9.1.1 Games & Apps 7.4.2 Handset lock 8.1.2 Bookmarks 9.1.2 Profiles 7.4.3 Auto key lock 8.1.3 Go to URL 9.2 Images timeout 8.1.4 Settings... -
Page 210: Selecting Functions And Options
SELECTING FUNCTIONS AND OPTIONS Your phone offers a set of functions that allow you to customise the phone. These functions are arranged in the menus and sub-menus, accessed via the two soft keys marked [ ] and [ ]. Each menu and Menu Contacts sub-menu lets you view and alter the settings of a... -
Page 211: Sounds
PROFILES In Profiles, you can adjust and customise the phone Call alert type: Set the alert type for incoming tones for different events, environments, or caller calls. groups. There are five preset profiles: Vibrate only, Ring tone: Select the desired ring tone from the Silent, General, Loud and Headset. - Page 212 Auto answer: This function will be activated only when your phone is connected to the headset. Off: The phone will not answer automatically. • After 5 secs: After 5 seconds, the phone will • answer automatically. After 10 secs: After 10 seconds, the phone will •...
-
Page 213: Call Register
CALL REGISTER You can check the record of missed, received, and View the number if available and call it, or save it in dialled calls only if the network supports the Calling the phonebook Line Identification (CLI) within the service area. Enter a new name for the number and save both in The number and name (if available) are displayed the phonebook... -
Page 214: Delete Recent Calls
DELETE RECENT CALLS Call costs (Menu 2.5.2) MENU 2.4 Allows you to check the cost of your last call, all calls, Allows you to delete Missed calls and Received calls remaining and reset the cost. To reset the cost, you lists. -
Page 215: Gprs Information
CALL REGISTER GPRS INFORMATION MENU 2.6 You can check the amount of data transferred over the network through the GPRS information option. In addition, you can also view how much time you are online. Call duration (Menu 2.6.1) You can check the duration of Last call and All calls. You can also reset the call timers. - Page 216 TOOLS ALARM CLOCK Depending on the file type, it will be stored in the MENU 3.1 following folders: You can set up to 5 alarm clocks to go off at a MP3: MP3 folder (Menu 6.5.2) specified time. Video (.3GP): video folder (Menu 6.4) 1.
- Page 217 TOOLS Settings (Menu 3.2.3) Note key to erase any numbers or signs. If You can register a new device which is compatible you press key, you can input a minus with Bluetooth. If you already have added the device, number. In addition, press key, you can you can connect to it after entering a password input a decimal number.
- Page 218 MODEM MENU 3.6 You can access the network services through Modem. If you want to use PCsync, Contents banks, Internet Cube, you should access the menu and activate the modem and then plug in the USB cable.
- Page 219 ORGANISER CONTACTS Write text/multimedia message: After you have MENU 4.1 found the number you want, you can send a text/ multimedia message to the selected number. Note In standby mode, press right soft key Send via Bluetooth: You can send the data of [Contacts] to access directly.
- Page 220 1. Select Add new by pressing the left soft key Group icon: Allows you to select the icon [Select] or [OK]. dependent on Group. 2. Select the memory you want to save to: SIM or Add member: You can add group members. Each Phone.
- Page 221 ORGANISER Settings - Name & number: Set the phonebook list by (Menu 4.1.5) displaying the name and number. 1. Press the right soft [Contacts] in standby mode. Copy all (Menu 4.1.6) 2. Scroll to Settings, then press the left soft key You can copy/move entries from SIM card memory to [Select].
- Page 222 Delete all 3. The names of the available services will be (Menu 4.1.7) shown. You can delete all entries in the SIM and Phone. This 4. Use to select a service. Press function requires the Security code. [Send]. 1. Press the right soft key [Contacts] in Memory status standby mode and select Delete all, press...
- Page 223 ORGANISER CALENDAR Add new (Menu 4.2.1) MENU 4.2 Allows you to add a new schedule for the chosen day. When you enter this menu a Calendar will be Input the subject and then press the left soft key displayed. The month and year are shown at the top [OK].
- Page 224 MEMO MENU 4.3 1. Select the Memo by pressing the left soft key [Select]. 2. If the entry is empty, add new by pressing the left soft key [Add]. 3. Input the memo and then press the left soft key [Ok].
- Page 225 MESSAGES Press the Menu key ( ) and select Messages 1. Key in your message. For details on how to enter using navigation keys. text, refer to page 25 through 28 (Entering Text). 2. After you complete the message, to select the NEW MESSAGE required option, press the left soft key [Options].
- Page 226 Add T9 dictionary: You can add your own words. Contacts: You can add phone numbers in the This menu will only be shown when the edit mode message. has been set to T9ABC/T9Abc/T9abc. Symbol: You can attach special characters. T9 languages: Select the desired language for T9 My business card: You can attach your name card.
- Page 227 MESSAGES 4. Press the left soft key [Options]. The following Add T9 dictionary: You can add your own word. options are available. This menu will only be shown when the edit mode has been set to T9ABC/T9Abc/T9abc. Send: Supports multiple numbers and email addresses.
- Page 228 INBOX then need to delete messages, media or applications MENU 5.2 to free up space. You will be alerted when you have received messages. They will be stored in the Inbox. SIM message In the Inbox, you can identify each message by icons. SIM message means that the message is For detail, see the icon directive.
- Page 229 MESSAGES Information: You can view information about Load: Launches the WAP connection to the URL received messages; Sender’s address, Subject (only contained in the download message. The phone for Multimedia message), Message date & time, must be configured for WAP services to download Message type, Message size.
- Page 230 Forward: You can forward the current message to DRAFTS MENU 5.4 other recipients. Using this menu, you can preset up to five Delete: You can delete the current message. multimedia messages that you use most frequently. This menu shows the preset multimedia message list. Information: You can view information about outbox messages;...
- Page 231 MESSAGES Topics When new voice message is received, the (Menu 5.6.2) symbol will be displayed on the screen. Please check To create new topics, press the left soft key [Option] with your network provider for details of their service then select Add new. If you already have topics, you in order to configure the handset correctly.
- Page 232 The following options are available. Add T9 dictionary: You can add our own word. This menu can be shown only when the edit mode View: Views the selected message. is Predictive. Delete: Deletes the template. T9 languages: Selects T9 input mode. Add new: Uses this to create new template.
- Page 233 MESSAGES Validity period: This network service allows you to Auto retrieve: If you select on, you receive set how long your text messages will be stored at multimedia messages automatically. If you select the message centre. Off, you receive only notification message in the inbox and then you can check this notification.
- Page 234 Home: You can listen to voice mails by selecting Push messages (Menu 5.8.5) Home. You can set the option whether you will receive the Roaming: Even when you are in abroad, you can message or not. listen to voice mails if a roaming service is supported.
-
Page 235: Multimedia
MULTIMEDIA CAMERA Zoom: Determines the zoom rate. MENU 6.1 This application enables you to take a still picture. Note You can take a picture in your desired size, and use it Frame shots are only available with the 128x160 for the contacts photo, home screen and other more pixel resolution. -
Page 236: My Photos
Exit: To exit the Video camera. Edit title: You can edit the title of picture. Effect: Determines the special effect to the video Information: You can view the information about clip. Title, Size, Date and Time you’ve taken. Flash: Determines the flash operation. MY VIDEO MENU 6.4 Zoom: Determines the zoom rate. -
Page 237: Mp3
MENU 6.5 Note S5200 doesn't support the variable rate of The S5200 has an integrated MP3 player built-in. MP3 and AAC file. Therefore, you can't change You can enjoy listening to MP3 music files on your the file from VBR MP3 format to AAC. -
Page 238: Mp3 Player
Setting Note - Equalizer To download MP3 file in Windows 2000, you This menu helps you to adjust a varity of should set folder option in PC as follow: View environment on listening to the music. This WEB>Use Windows default folder (I). phone supports four preset menus. -
Page 239: Playlist
MULTIMEDIA Set as ring tone: This menu allows to set the MP3 Settings (Menu 6.5.3) file as a ring tone. You can also set it as a ring tone This menu allows to set the following items; Equalizer, in Profile. Playmode, Set shuffle and Visual effect. -
Page 240: Video Camera
SETTINGS MENU 6.7 Camera (Menu 6.7.1) Auto save: If you set On, the images will be saved automatically without displaying menu bar to save. Delete all photos: This menu allows to delete all photos after asking your confirmation. Video camera (Menu 6.7.2) Delete all videos: This menu allows you to delete all the videos. -
Page 241: Settings
SETTINGS You can set the following menus for your PHONE SETTINGS MENU 7.2 convenience and preferences. You can set functions relating to the phone. 1. Press [Menu] in standby mode. Display settings 2. Press for direct access to enter Settings. (Menu 7.2.1) Wallpaper: You can select the background pictures DATE &... -
Page 242: Theme Settings
Theme settings If no reply (Menu 7.2.2) Diverts voice calls which you do not answer. Allows you to choose from one of the preset themes. If out of reach Language (Menu 7.2.3) Diverts voice calls when the phone is switched off You can change the language for the display texts in or out of coverage. -
Page 243: Answer Mode
SETTINGS shown at All data calls and All fax calls menus. Send my number (Menu 7.3.3) To other number (network and subscription dependent) Set by network Inputs the number for diverting. To favourite number If you select this, you can send your phone number depending on two line service such as line 1 or line 2. -
Page 244: Minute Minder
View status requested to enter the PIN code. Shows the status of Call waiting. 1. Select PIN code request in the security settings menu, and then press [Select]. Minute minder (Menu 7.3.5) 2. Set On/Off. If you select On, you can check the call duration by 3. -
Page 245: Auto Key Lock Timeout
SETTINGS Auto key lock timeout Incoming when roaming (Menu 7 .4.3) The barring service for all incoming calls when This menu allows to set the time of Auto key lock. roaming. Call barring Cancel all (Menu 7.4.4) The Call barring service prevents your phone from You can cancel all barring services. -
Page 246: Fixed Dial Number
Fixed dial number 1. If you want to change the Security (Menu 7.4.5) code/PIN/PIN2 code input your original code, (SIM dependent) and then press [OK]. You can restrict your outgoing calls to selected 2. Input new Security code/PIN/PIN2 code and phone numbers. -
Page 247: Band Selection
SETTINGS agreement with your home network operator. The MEMORY STATUS MENU 7.8 phone will let you select another network if the phone fails to access the selected network. Internal memory (Menu 7.8.1) Preferred This function shows the status of the user memory You can set a list of preferred networks that the of the handset. - Page 248 SERVICE You can access various WAP (Wireless Application Description Protocol) services such as banking, news, weather Scrolls each line of the content reports and flight information. These services are area specially designed for mobile phones and they are maintained by WAP service providers. Returns to the previous page Check the availability of WAP services, pricing and Selects options and confirms...
- Page 249 SERVICE defined it in the activated profile. Delete all: Deletes all the bookmarks. Bookmarks Go to URL (Menu 8.1.2) (Menu 8.1.3) This menu allows you to store the URL of favourite You can connect directly to the site you want. After web pages for easy access at a later time.
- Page 250 - Homepage: This setting allows you to enter the transferred. address (URL) of a site you want to use as Call speed: The speed of your data connection ; homepage. You do not need to type http:// at the 9600 or 14400 front of each URL as the WAP Browser will - GPRS settings: The service settings are only automatically add it.
- Page 251 SERVICE Rename: You can change the profile name. SIM SERVICE MENU 8.2 (SIM DEPENDENT) Delete: Deletes the selected profile from the list. Your service provider can offer special applications Add new: You can add a new profile. through the SIM card, such as home banking, stock Cache market, etc.
- Page 252 DOWNLOADS GAMES & APPS - Always: The connection is created immediately MENU 9.1 without a notification. - Prompt: You will be asked before the application Games & Apps (Menu 9.1.1) makes the connection. - Never: No connection is allowed. In this menu, you can manage the Java applications installed in your phone.
- Page 253 DOWNLOADS Profiles Note (Menu 9.1.2) The JAR file is a compressed format of the Java This menu contains the same settings of the Internet program and the JAD file is a description file menu. In fact, in order to download new applications, that includes all detailed information.
-
Page 254: File Storage
3. On the PC, the phone will be identified as “Removable disk” in My Computer folder. Also, a S5200 can be connected to a PC through a USB system disk letter will be assigned, such as “E:\”. cable in order to transfer files, contents and to use After that, you can upload or download files from the built-in modem. - Page 255 DOWNLOADS in this folder can be played using the MP3 player - Videos: In this folder you can download on PC of the phone. the videos taken with the phones’ digital camera and upload new videos on the phone. This folder - Photos: This folder is reserved for the pictures supports the 3GP file format.
- Page 256 5. Once the file transfer is finished, disconnect the 3. Connect the phone to the PC using the USB cable USB peripheral from Windows and disconnect the and start the desired program. cable from the phone. Note To connect USB, several minutes after power on Warning! phone and in the idle window.
-
Page 257: Accessories
PC to exchange the data between them. Headset Note Allows hands-free operation. Always use genuine LG accessories. Includes earpiece and microphone. Failure to do this may invalidate your warranty. Accessories may be different in different regions; please check with our regional service company or agent for further enquires. -
Page 258: Technical Data
TECHNICAL DATA General Product name : S5200 System : GSM 900 / DCS 1800 / PCS 1900 Ambient Temperatures Max : +55°C (discharging) +45°C (charging) Min : -10°C...